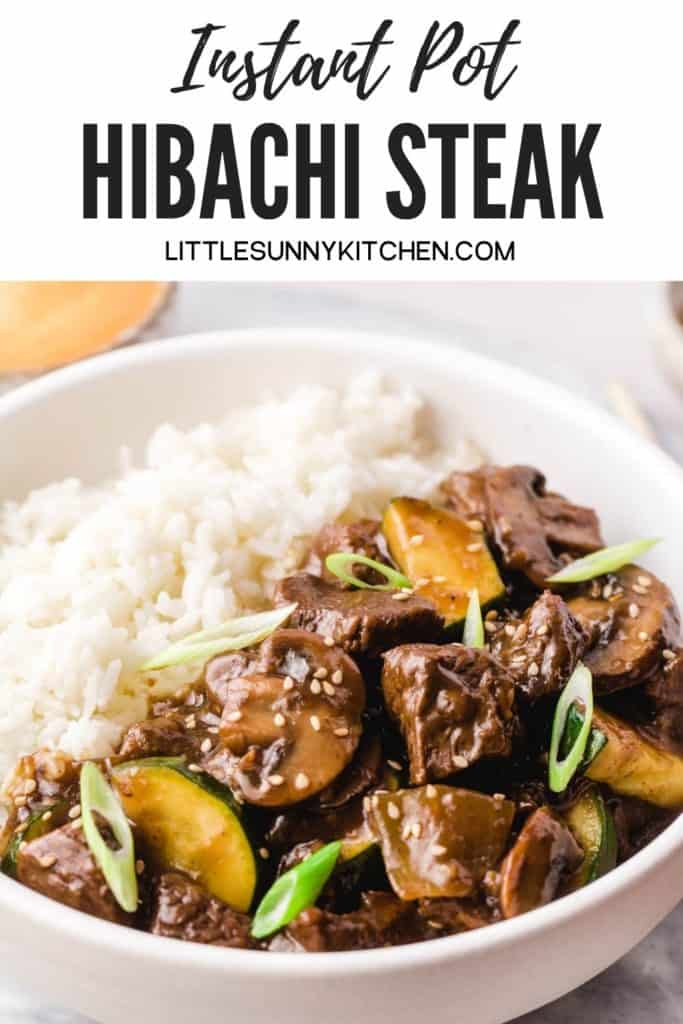
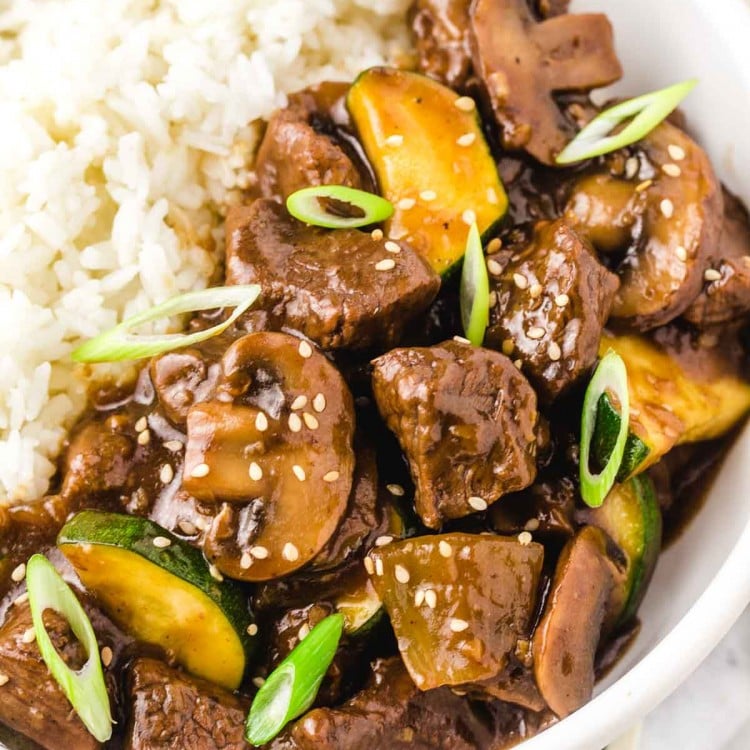
Easy Instant Pot hibachi steak with mushrooms and zucchini cooked in a delicious soy sauce, and served over rice. This easy Instant Pot dinner is ready in under 30 minutes from start to finish!
If you’re a fan of hibachi restaurants and food, then you’re going to love this! We love eating out at Japanese hibachi restaurants but recently learned how to make an easy Instant Pot version and we’re hooked! I mean, it’s much cheaper to make this at home.
This is the closest version of hibachi-style cooking that you can get at home using the Instant Pot. We have tested this recipe so many times, and below we are sharing it with you. Please remember that this is a pressure cooker version that we find so easy and convenient, and if you don’t think that pressure cooking something like this is a good idea then please stick to cooking this in a wok, or even better, go to the restaurant and enjoy the show too!
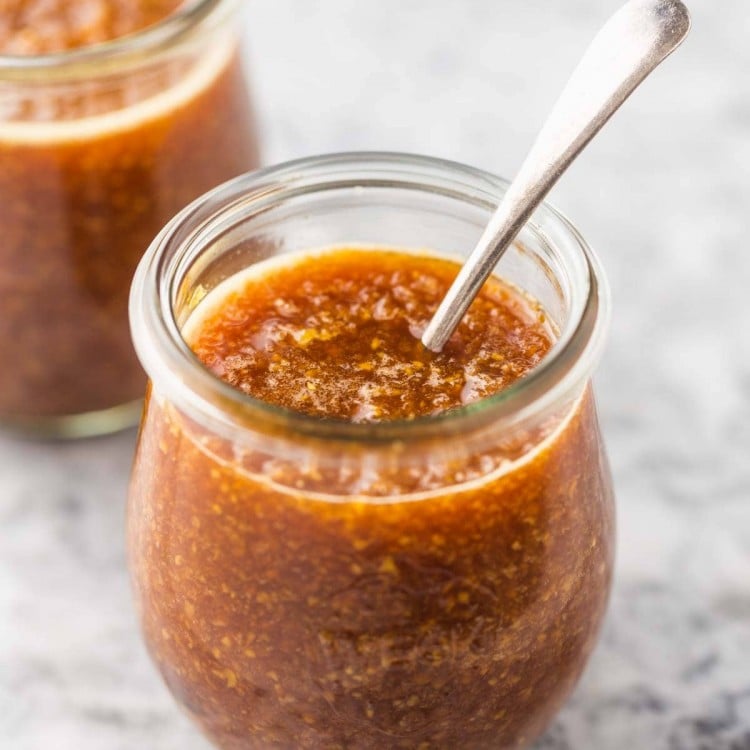
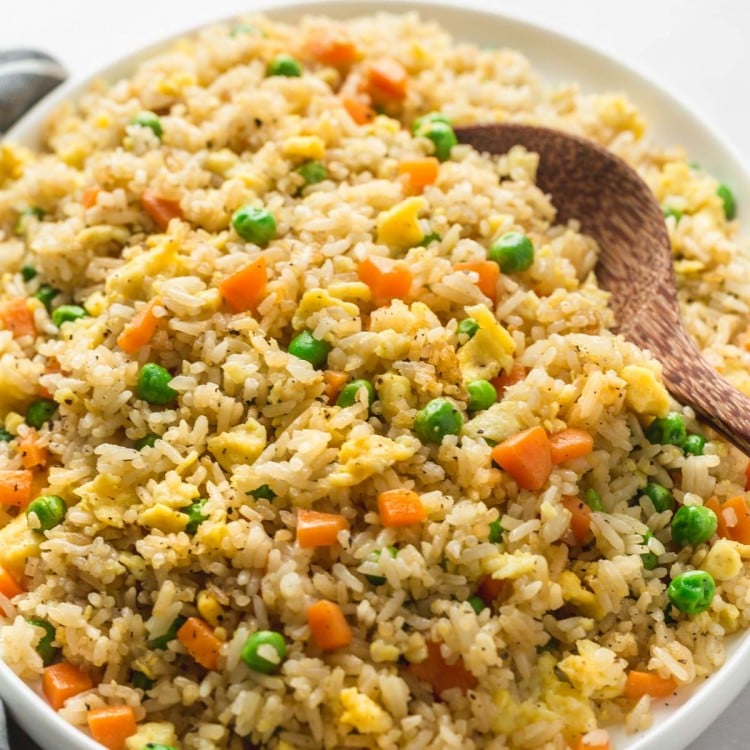
This hibachi steak is AMAZING when it’s served with Instant Pot fried rice, and of course, my favorite Japanese steakhouse sauces that I make at home – the super creamy yum yum sauce and my homemade ginger sauce! And if you love sweet and sour sauce, which you won’t typically find at a hibachi restaurant, but I love it. Here’s my homemade sweet and sour sauce recipe. Enjoy!
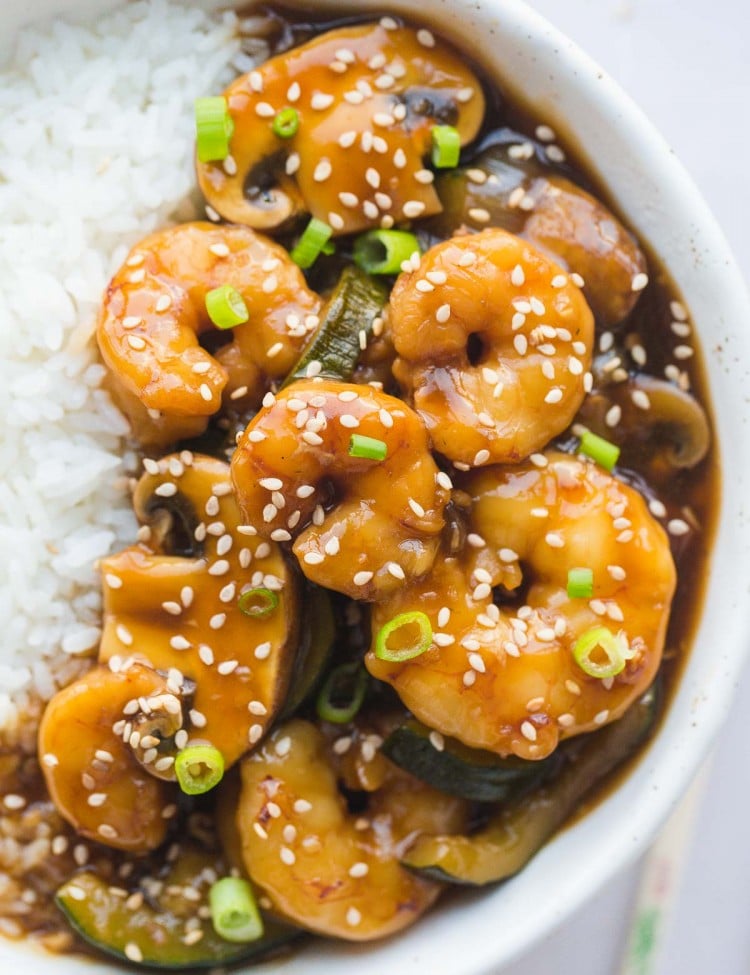
You can also make chicken and shrimp versions, find my Instant Pot chicken hibachi recipe here, and my Instant Pot hibachi shrimp recipe here.
What Is Hibachi Steak?
The word hibachi is Japanese and translates to “Firepit”, it refers to both the grill that is used and to the dish
Instant Pot Hibachi Steak Recipe
This dish is probably one of the easiest IP dishes ever! It takes under 30 minutes to make from start to finish.
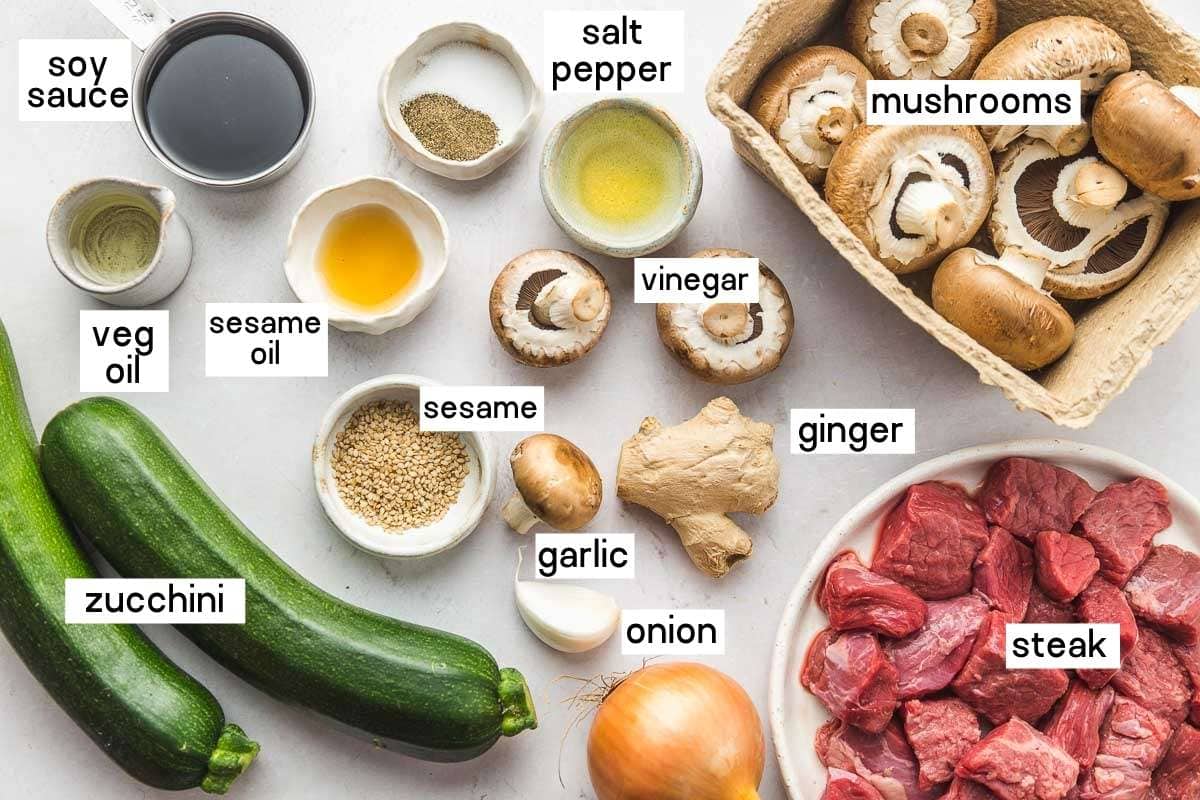
Tools and Ingredients Needed
- An Instant Pot. I have this Instant Pot, it’s my favorite!
- I love these stainless steel measuring cups and use them every time I cook, as well as those measuring spoons.
- A sharp knife to trim the fat, and cut the steak into bite-sized pieces, this is the one that I use and LOVE SO MUCH!
- Soy sauce, use low sodium soy sauce as otherwise, your sauce might end up being too salty. For gluten-free, use tamari sauce instead.
- White vinegar or apple cider vinegar.
- Cornstarch.
- Sesame seeds.
- Meat – choose an inexpensive cut of meat, but definitely not stew meat. We usually use flank steak.
Complete list of ingredients and amounts can be found in the recipe card below.
How to Make Instant Pot Hibachi Steak
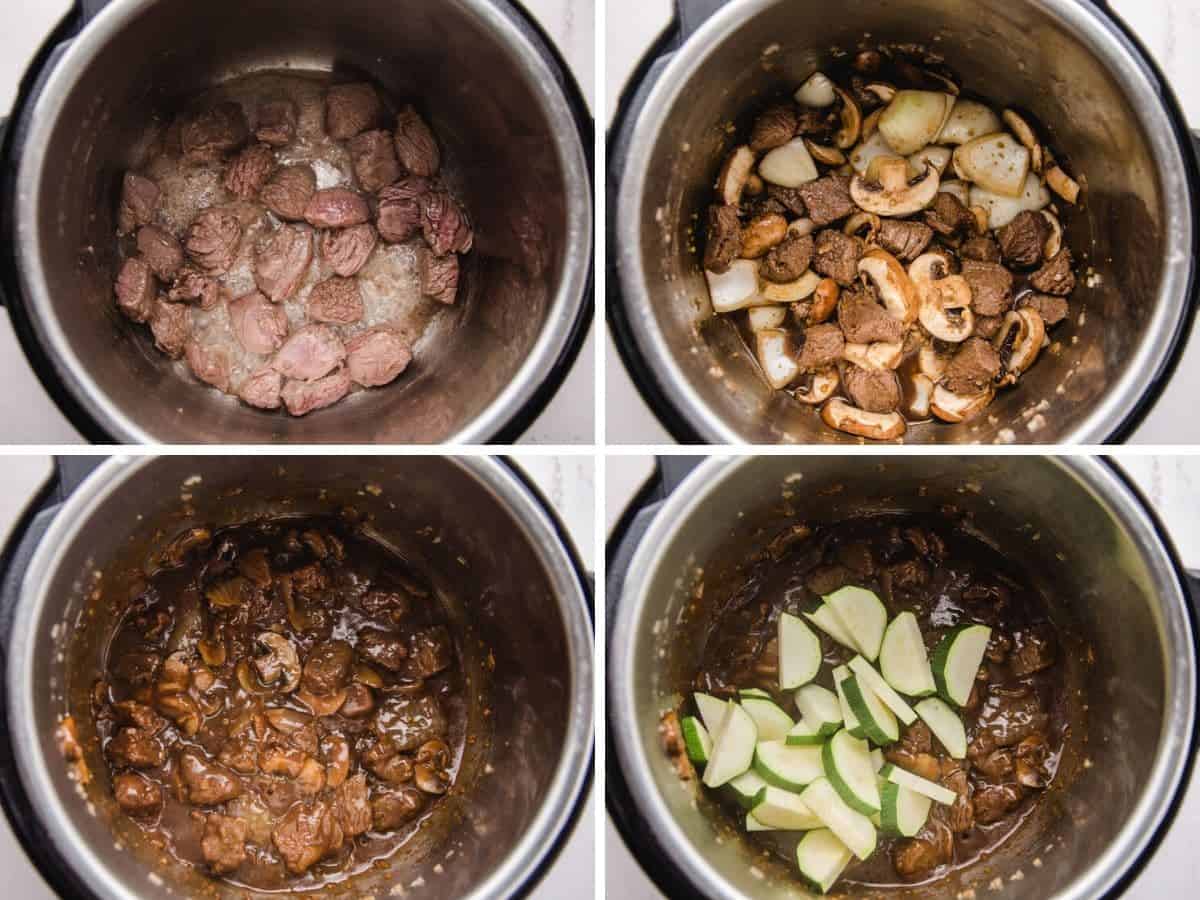
- Press on SAUTE on your Instant Pot, when a HOT message appears, add the vegetable oil, along with sesame oil. Sear the meat in the Instant Pot until it’s brown (but not necessarily cooked through as it will be pressure cooked later), and season it with salt and pepper.
- Please don’t skip this step, as browning the meat gives it a better flavor, and color, and the meat will give liquids that will be evaporated as it browns (so you don’t end up with too much liquid after pressure cooking). Also, adding the sesame oil at this stage is important as it infuses the meat, and will give you that restaurant-style flavor that you’re after.
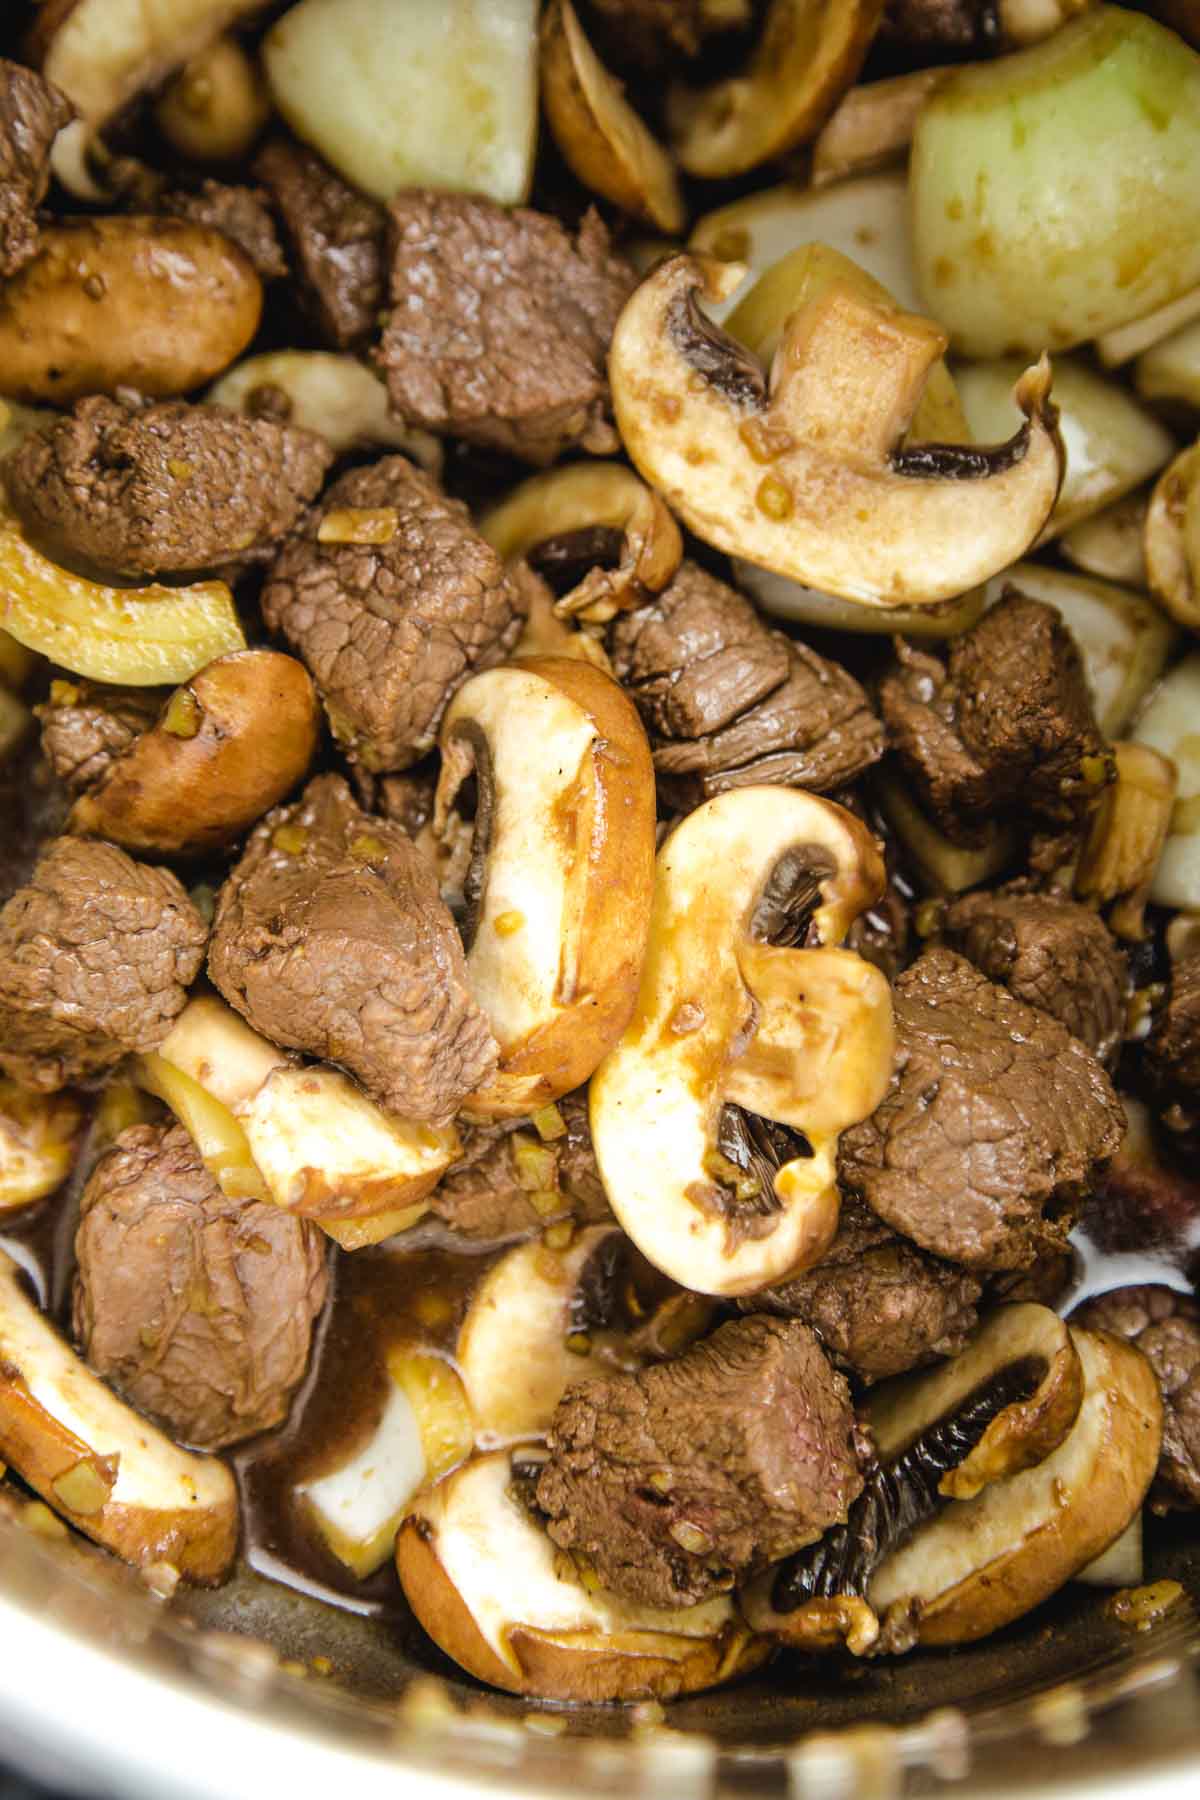
- Add minced ginger and garlic to the pot, stir and cook for a couple of minutes. Press on CANCEL then add the onions and mushrooms, soy sauce, water, and vinegar, and give everything a quick mix.
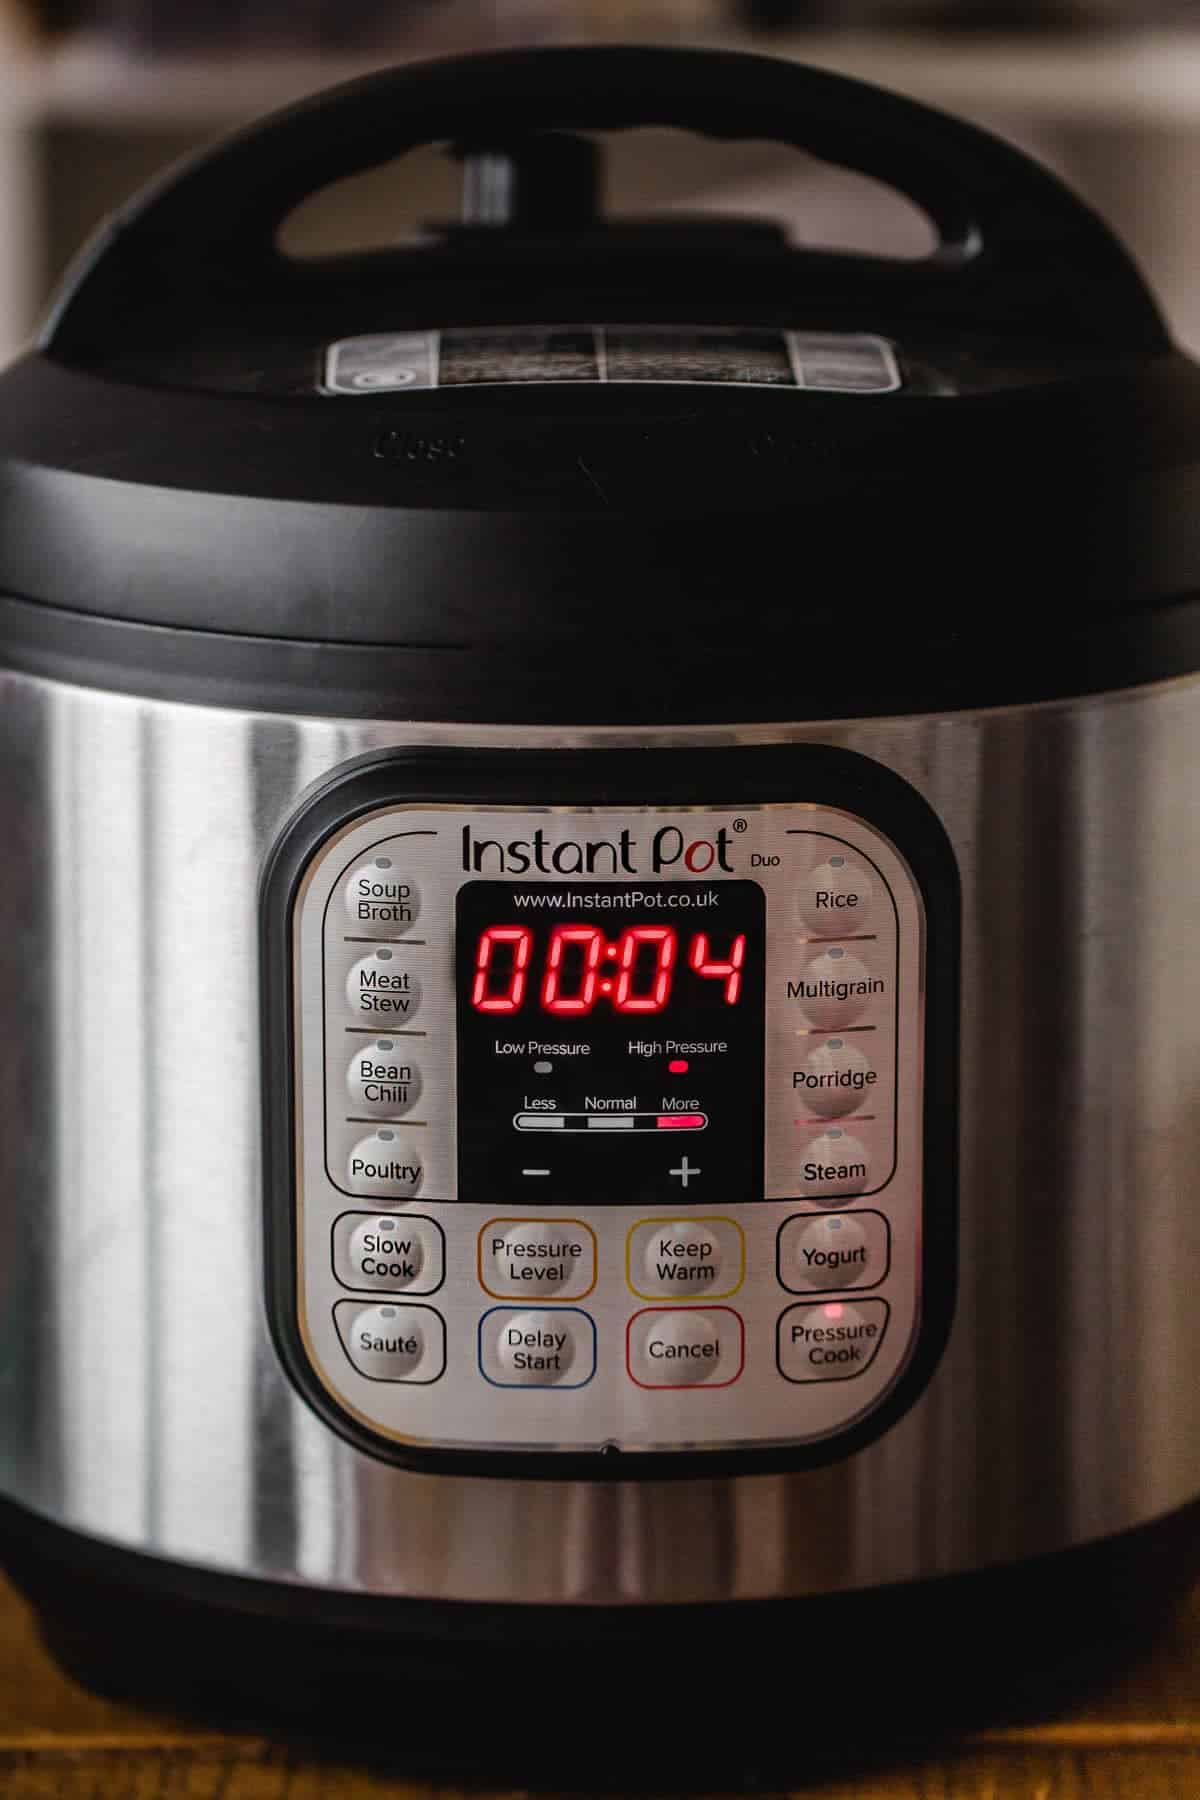
- Secure the lid and set the vent to SEALING. Select the PRESSURE COOK/MANUAL setting and set the cooking time for 4 minutes at high pressure.
- 4 minutes should be enough as the meat was half-cooked when it was seared. However, if you’re using a tougher meat cut (we used a flank), then you can increase the cooking time to 6 minutes or longer. But please note that the onion might disappear in that case as it will be overcooked.
- The Instant Pot will take around 10 minutes to come to pressure and start cooking. When the cooking program ends, quickly release the steam and carefully open the pot.
- I’m aware that many think that a natural release is a must when cooking meat, but I find that completely unnecessary when cooking recipes like this one. I have tested and retested this recipe so many times, and a quick release is what has always worked for me.
- Now you will thicken the sauce by adding 1 tbsp of cornstarch mixed with 1 tbsp of water. Press on SAUTE and add the cornstarch slurry to the sauce once the sauce is boiling. Mix with a wooden spoon until the sauce has thickened.
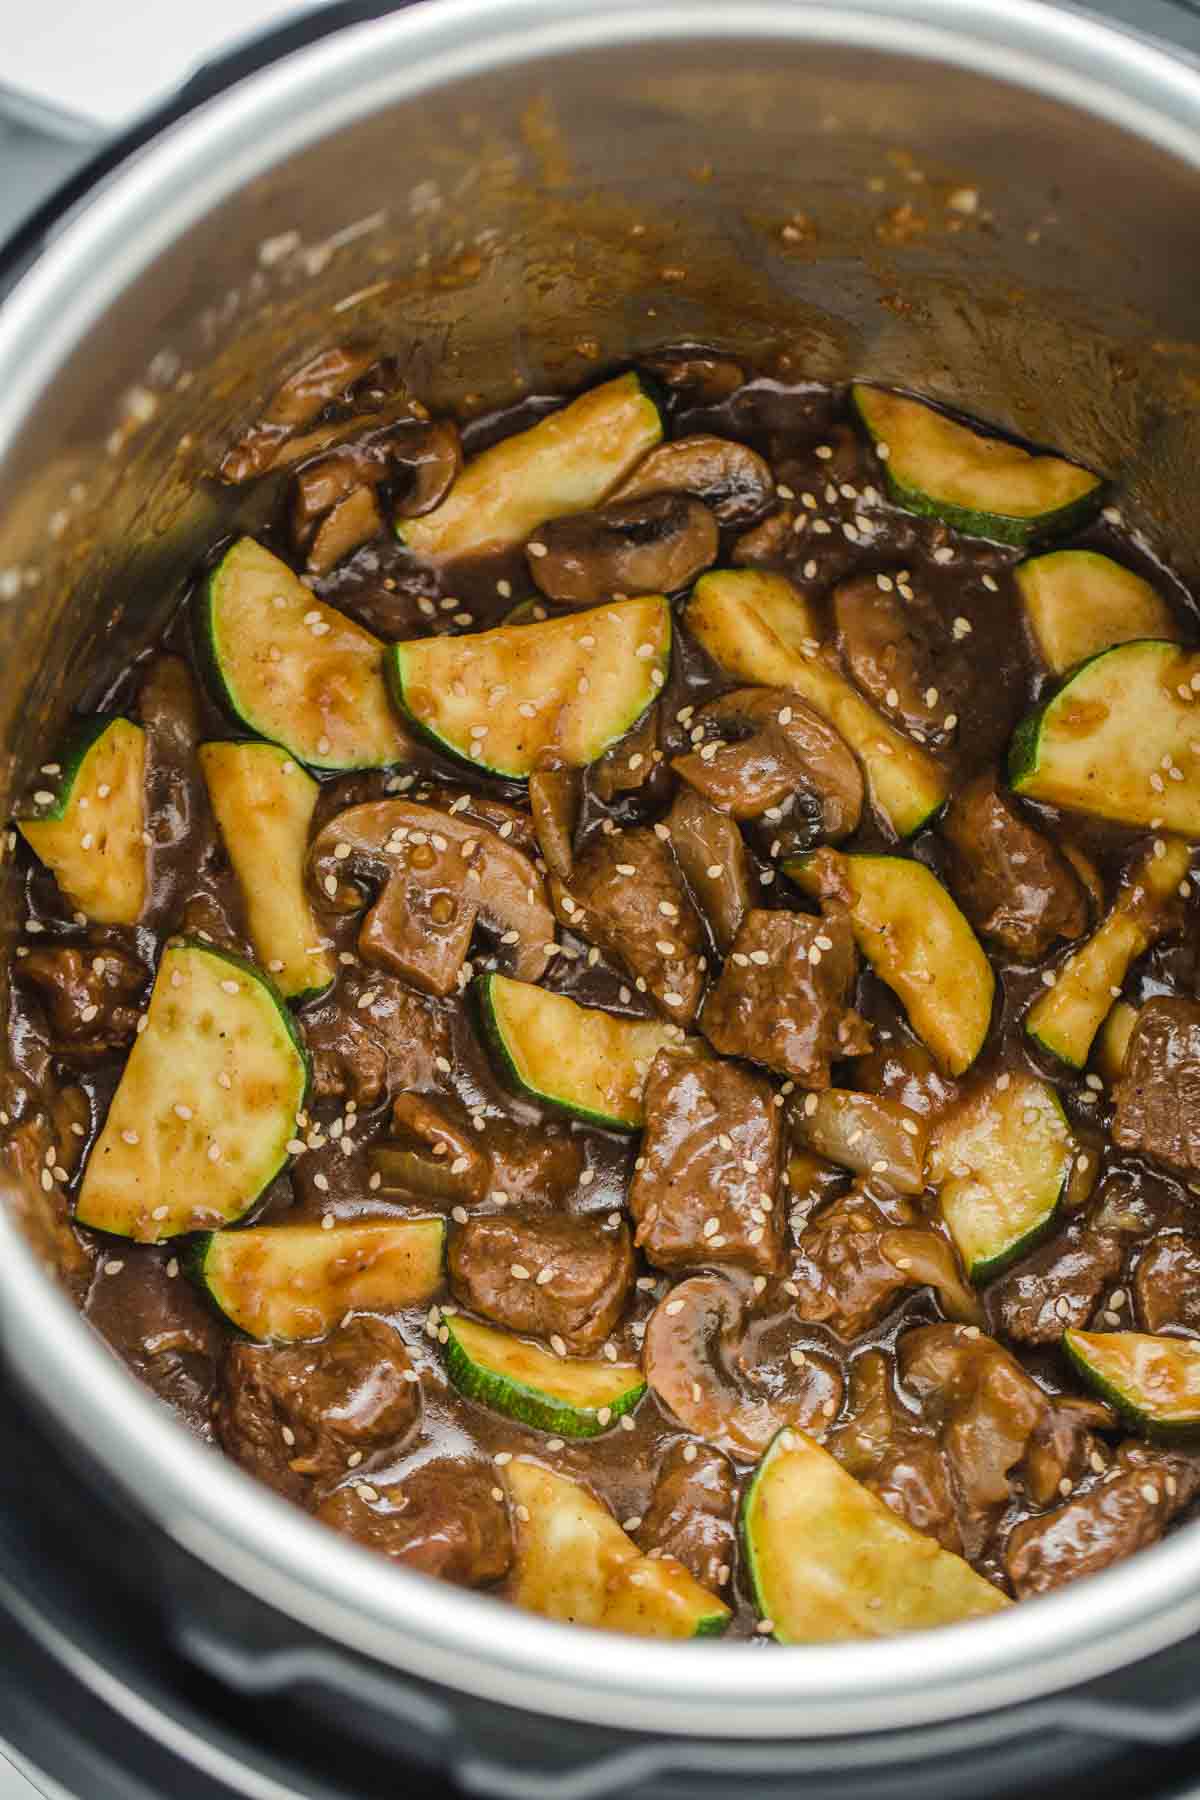
- Press on CANCEL, and add in the sliced zucchini. I have added raw zucchini, but feel free to steam or cook it in a wok beforehand.
- Cover with the lid and let the zucchini “steam” for 5 minutes”. If your zucchini is precooked, then skip this step and just add it straight in.
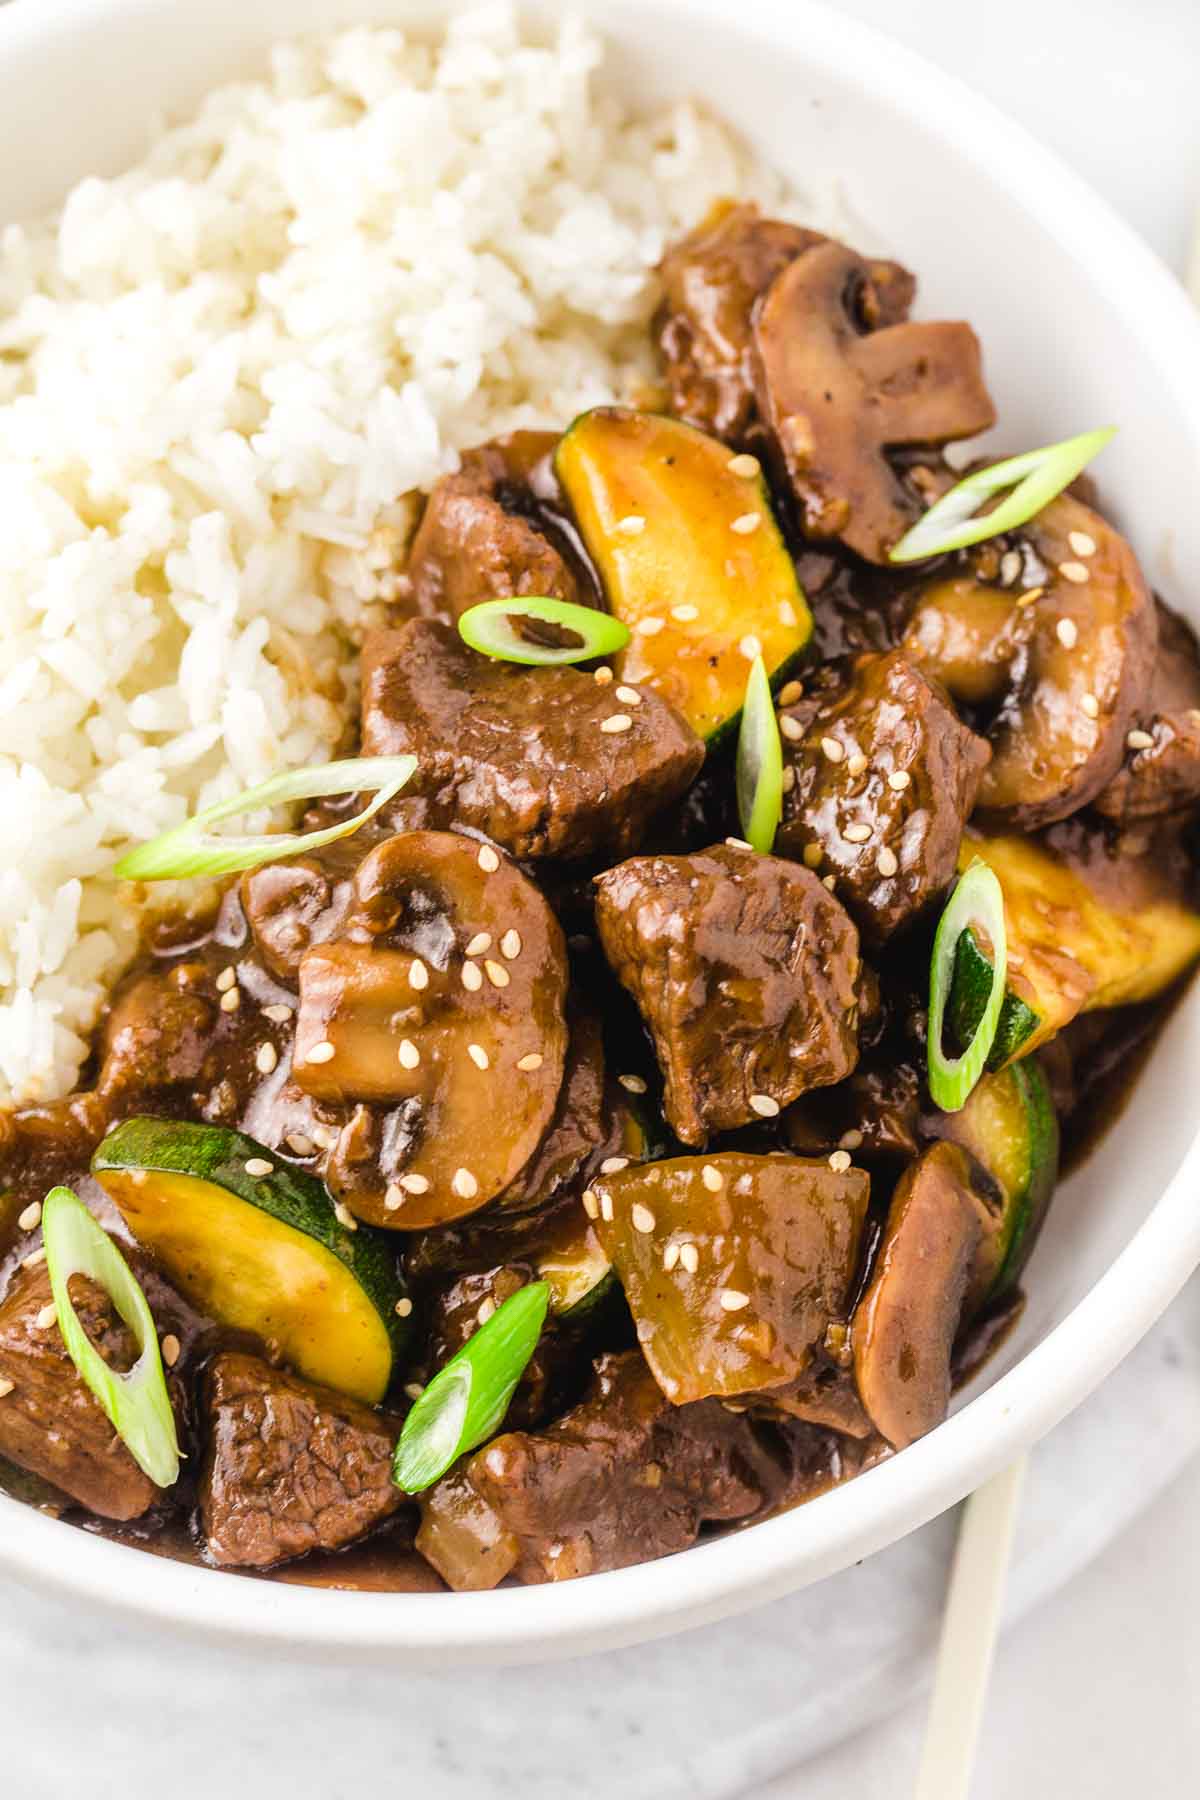
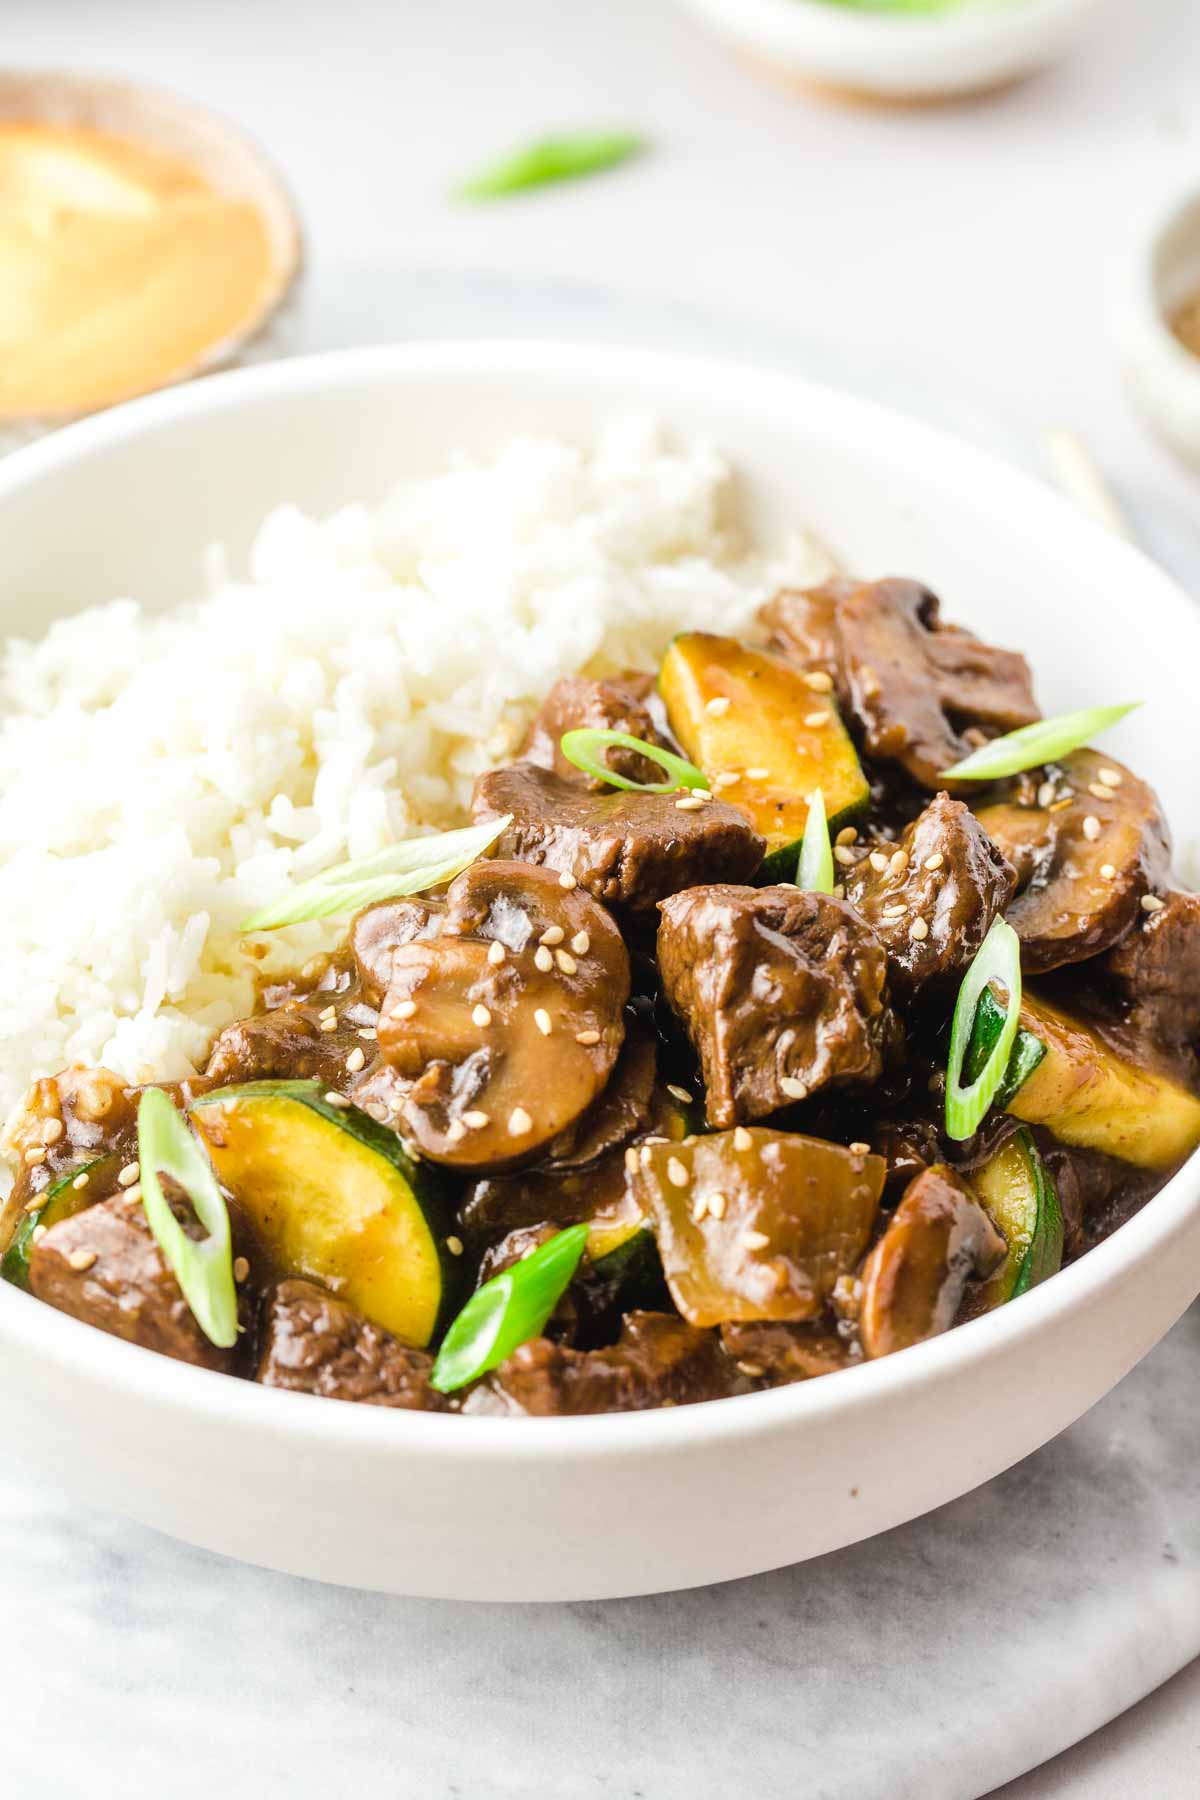
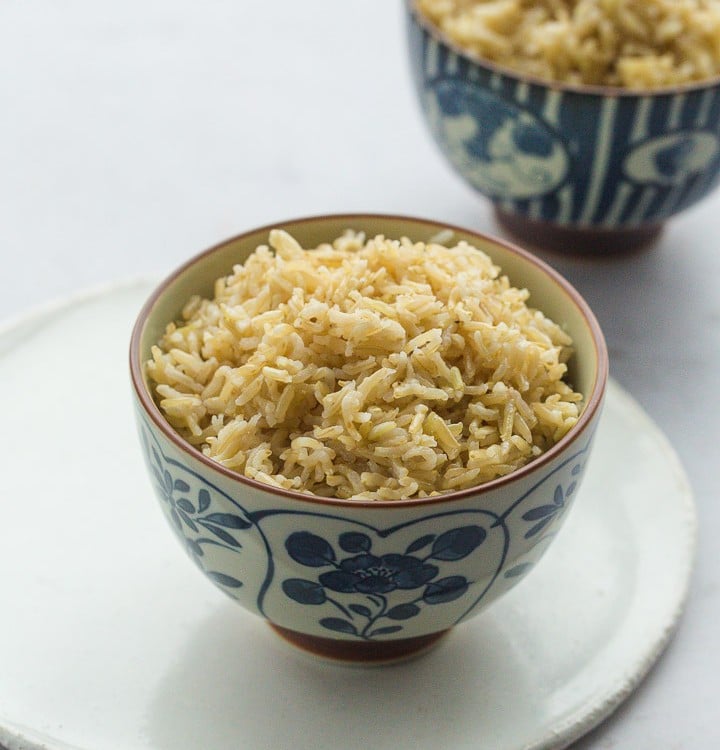
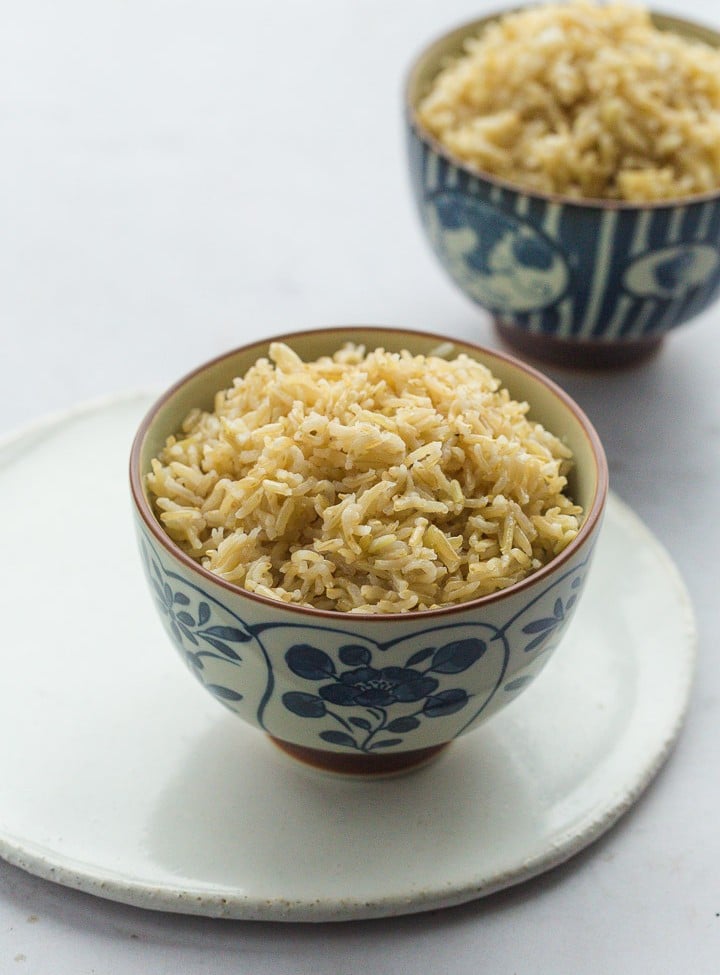
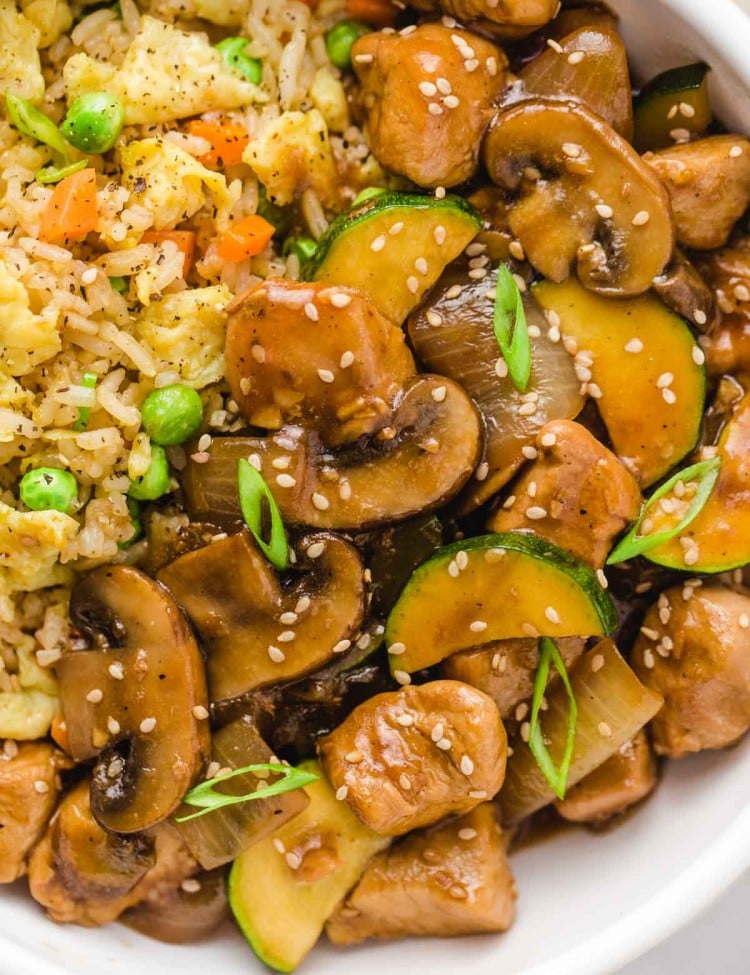
Serve over Instant Pot white rice, or Instant Pot brown rice and garnish with toasted sesame seeds and chopped scallions.
What Kind of Meat to Use for the Instant Pot Hibachi Steak?
I recommend getting an inexpensive piece of meat that does not take long to cook. I personally like to use flank and it worked very well for this recipe.
Buy a couple of pieces, and cut them at home using a sharp knife. You could save time and buy pre-sliced steak, but it’s going to be more expensive.
How to Thicken the Sauce Further? (If Needed)
If after thickening the sauce as instructed above you still feel like your sauce is a bit too thin, just mix 1-2 teaspoons of corn starch with 1-2 teaspoons of water for the slurry. Add it on SAUTE for a minute or 2 to thicken it.
If you have no corn starch available, then just add flour slurry or roux to thicken the sauce.
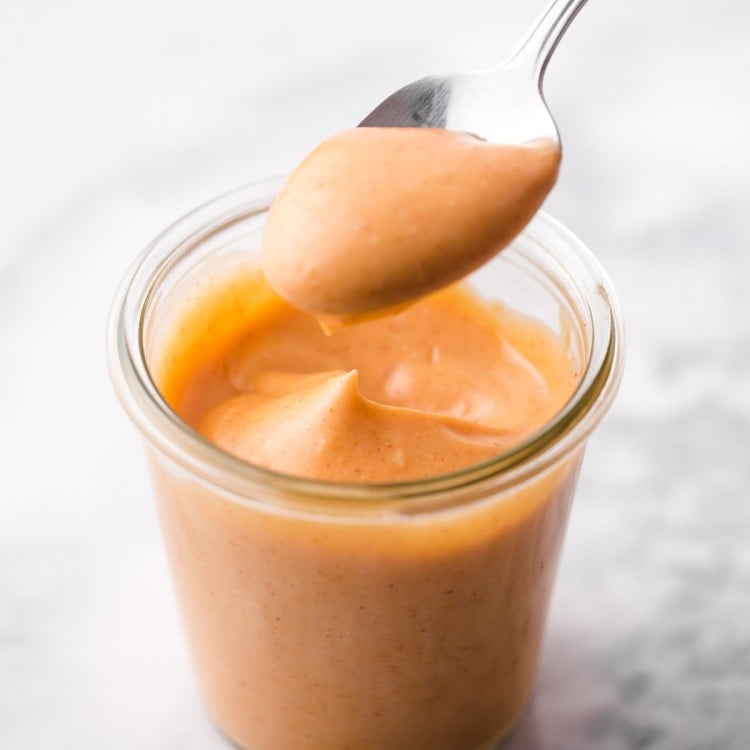
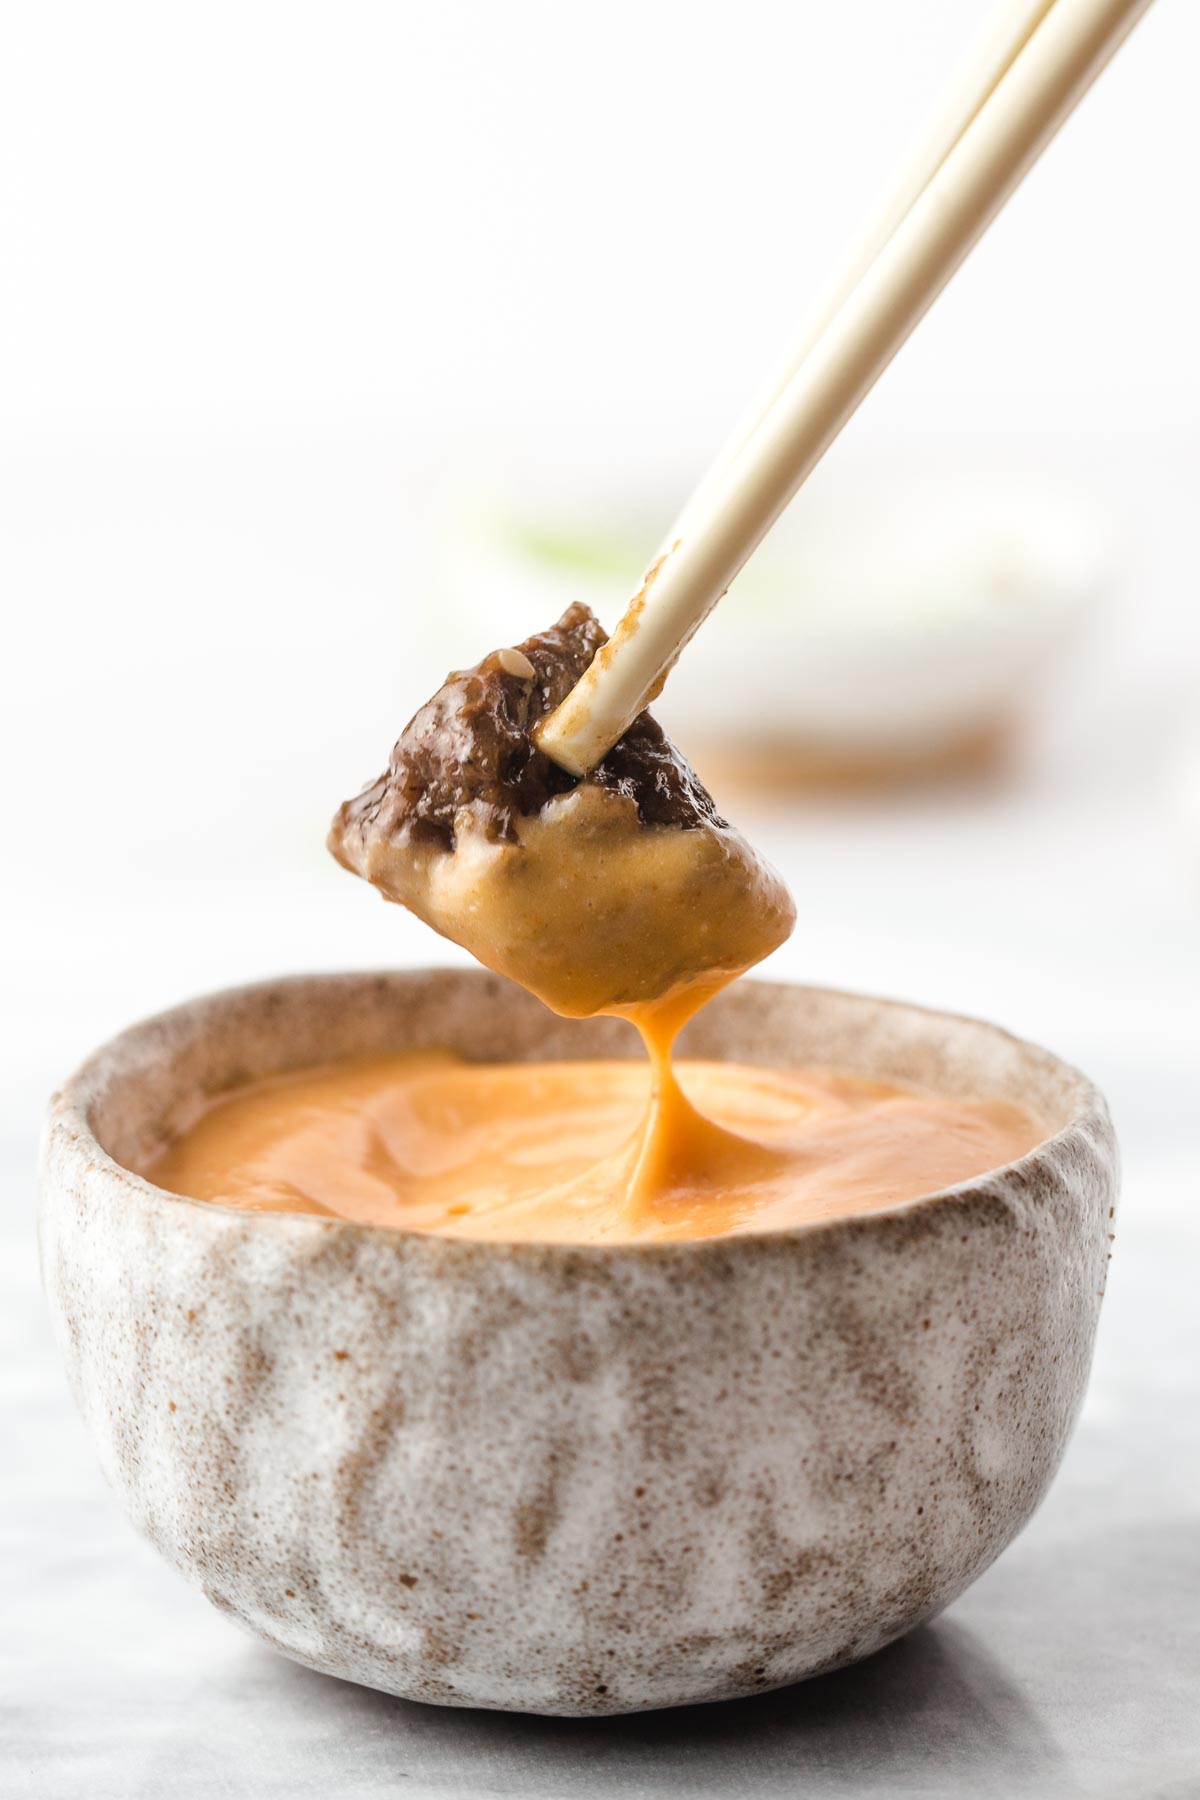
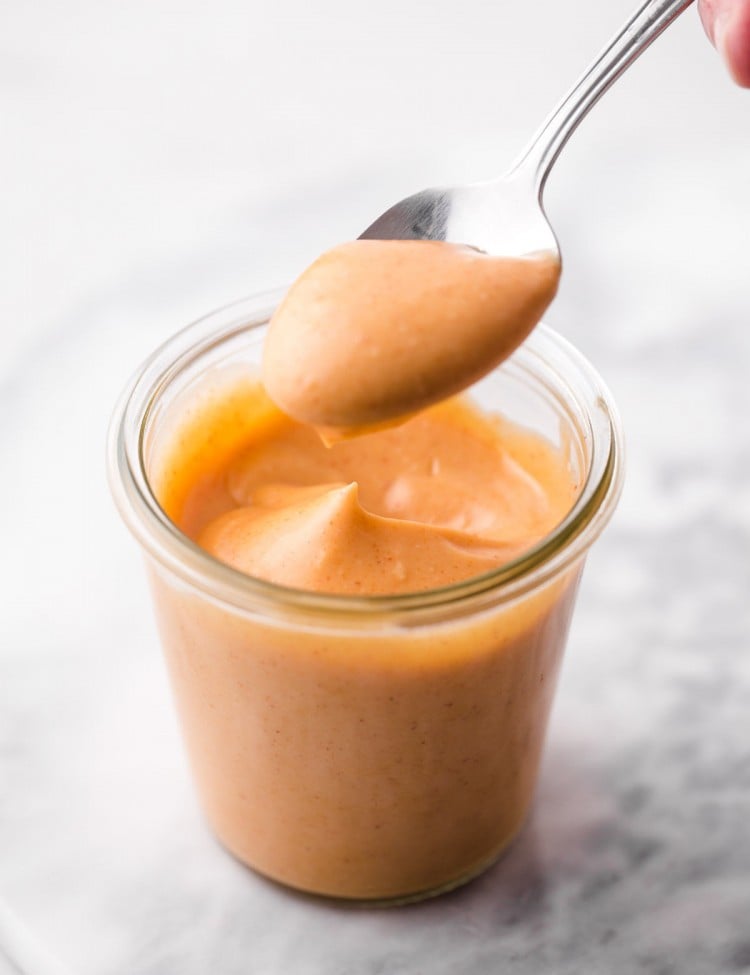
Serve With Homemade Yum Yum Sauce!
Now comes my favorite part, the Yum yum sauce! It’s the pale orange sauce that you see in Hibachi restaurants, and it’s so easy to make at home. Here’s my recipe. Trust me, you don’t want to miss out on this one!
Also, make sure to check out my ginger sauce, it’s the one that you get at hibachi places like Benihana 😁
NOTE: This recipe first appeared on Little Sunny Kitchen in June 2019, as a dump and start recipe. We decided to improve our recipe to make it as close as possible to restaurant-style hibachi cooking, to get better flavors and improve the texture. Here’s what we have changed:
- We decided that the “dump and start” method isn’t the best for this recipe, so we seared the meat first and then pressure cooked it.
- We left out the zucchini as many reported that it turned into mush. And we just added it after pressure cooking.
- We added sesame oil as it adds a lot to the flavor, and decided that the sugar was not necessary.
- Initially, we thought that slicing the onion into half-moons was a good idea, but we tested this with onion quarters and got better results.
More Great Instant Pot Recipes
- Instant Pot sesame chicken
- Instant Pot hibachi chicken
- Instant Pot hibachi shrimp
- Instant Pot shrimp and broccoli
- Instant Pot beef and broccoli
- Instant Pot Tuscan chicken
Or check out my Instant Pot recipe collection!
Did you make this? Be sure to leave a review below and tag me on Facebook, Instagram, or Pinterest!
Instant Pot Hibachi Steak Recipe
Recipe Video
Equipment
Ingredients
- 1 tablespoon vegetable oil
- 1 teaspoon sesame oil
- 1 pound (450 grams) beef steak fat trimmed then cut into bite-sized pieces, against the grain – I used flank
- 1 teaspoon salt and pepper
- 1 tablespoon fresh ginger grated
- 1 clove garlic minced
- 1 medium white or yellow onion quartered
- ½ cup sliced mushrooms
- ¼ cup low-sodium soy sauce
- ¼ cup water
- 2 tablespoons white vinegar or apple cider vinegar
- 1 tablespoon cornstarch mixed with 1 tablespoon of water
- 1 zucchini sliced in rounds then halved
To Garnish:
- green onion sliced
- sesame seeds toasted
Instructions
- Press on SAUTE on your Instant Pot, when a HOT message appears add the vegetable oil, along with sesame oil. Sear the meat in the Instant Pot until it's brown (but not necessarily cooked through as it will be pressure-cooked later), and season it with salt and pepper.
- Add minced ginger and garlic to the pot, and cook for a couple of minutes. Press on CANCEL on the Instant Pot. Then add the onions and mushrooms, soy sauce, water, and vinegar, and give everything a quick mix. If anything is stick to the bottom of the pot, deglaze/scrape it off with a wooden spoon.
- Secure the lid and set the vent to SEALING. Select the PRESSURE COOK/MANUAL setting and set the cooking time for 4 minutes at high pressure.
- The Instant Pot will take around 10 minutes to come to pressure and start cooking. When the cooking program ends, quickly release the steam and carefully open the pot.
- Now you will thicken the sauce by adding 1 tablespoon of cornstarch mixed with 1 tablespoon of water. Press on SAUTE and add the corn starch slurry to the sauce once it's boiling. Mix with a wooden spoon until the sauce has thickened. Press on CANCEL, and add in the sliced zucchini. Cover with the lid and let the zucchini "steam" for 5 minutes".
- Serve over cooked white rice, or brown rice and garnish with toasted sesame seeds and sliced green onion.
Notes:
- If you’re using a tougher cut of meat, you may increase the cooking time by 2 minutes, but keep in mind that the onions might overcook and almost disappear in this case.
- Deglaze the pot with a little bit of water if needed after browning the meat (I didn’t need to do this when I tested this recipe).
- If you feel like your sauce is a bit too thin, just add 1-2 teaspoons of cornstarch with 1-2 teaspoons of water for the slurry and cook on SAUTE for a minute or 2 to thicken it.
- You can steam the zucchini, or cook it in a pan or a wok separately. Or do what I did, just add it to the pot at the end, cover it with the lid and let it sit there to “steam”.
- Feel free to add other vegetables at the end such as steamed broccoli.
- Serve with yum yum sauce, ginger sauce, and white rice or brown rice.
- This recipe was tested in a 6-quart Instant Pot. If you’re using an 8 quart, then it might be a good idea to double the recipe.
- The amounts of the ingredients above make 2 portions, so if you’re cooking for more than 2 people then you might want to double or triple the recipe.
Nutrition Information
This website provides approximate nutrition information for convenience and as a courtesy only. Nutrition data is gathered primarily from the USDA Food Composition Database, whenever available, or otherwise other online calculators.
© Little Sunny Kitchen

Tonya says
When cooking the steak and veggies do you ever add the rice or do you cook the rice separate?
Diana says
Hi Tonya, I cook the rice separately. That’s why I have 3 I|Ps 😁
Lynn says
What size instant pot is this recipe based on?
Diana says
6 quart!
Brittney Thomas says
Do you think I can make this recipe in the crock pot instead?
Diana says
I’m sure that you can, but it’s probably better to leave out the zucchini and cook it at the end.
Alaina says
Love Love Loved it! I didn’t have the correct cut of beef, so I used a nicely marbled Chuck roast and doubled the recipe. The fresh ginger took it over the top. I cut the zucchini into bigger chunks and cooked for 5 minutes. Perfection!!!
Jan says
Could this be frozen after it’s cooked? My mom always told me you couldn’t freeze things with cornstarch.
Thanks
Maridith says
I needed to cut the zucchini thicker because there was nothing that resembled at zucchini at the end but the flavor was AMAZING!!! This recipe is a keeper!!!! Thank you!