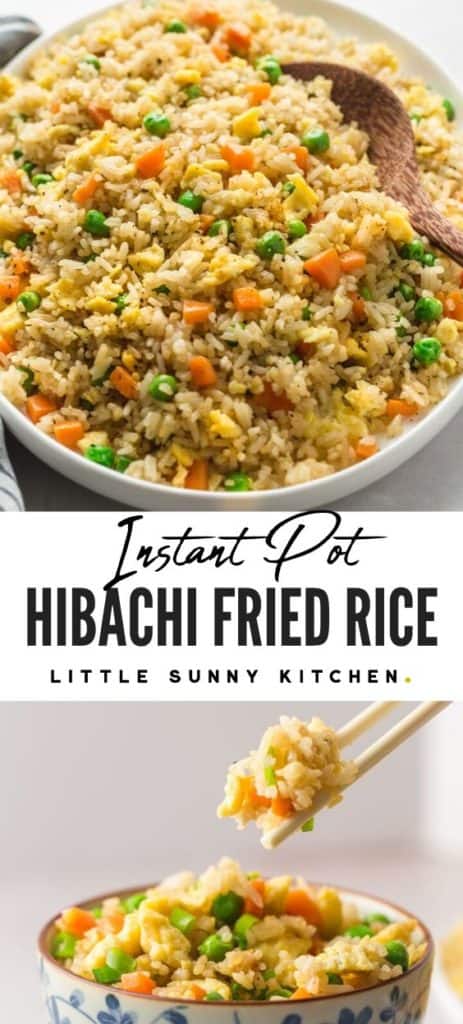

Bring the hibachi restaurant to your house, and make your own homemade Instant Pot fried rice! It’s so easy to make, and the flavors are phenomenal!
We LOVE eating at hibachi restaurants, but it can get quite expensive. I mean, I absolutely love the show and the fun tricks at the restaurant but obviously we can’t go every week!
So instead, we brought the hibachi experience to our house and learned how to make hibachi dishes at home. We make everything in the Instant Pot from hibachi steak to hibachi chicken, shrimp, to yum yum sauce, and the ginger dipping sauce. These are true and tested recipes that received so many 5 star ratings from our readers, and I’m sure that you will love them too.
We also use the Instant Pot to steam our veggies, this is how you properly steam broccoli in your Instant Pot. Now you get it why I have 3 Instant Pots at home!
So here I am sharing the recipe to the best Instant Pot fried rice that you will ever make! This recipe is LOVED by adults and kids in our family, and you don’t need to be an expert to make excellent fried rice in the Instant Pot. Just make sure that you read the recipe carefully before you start.
And now I will take you through the whole process!
Join our Facebook Group
We have a new Facebook Instant Pot Group where we share new recipes, tips and tricks on how to use the Instant Pot. Make sure to join us! Click here to join.
The Ingredients
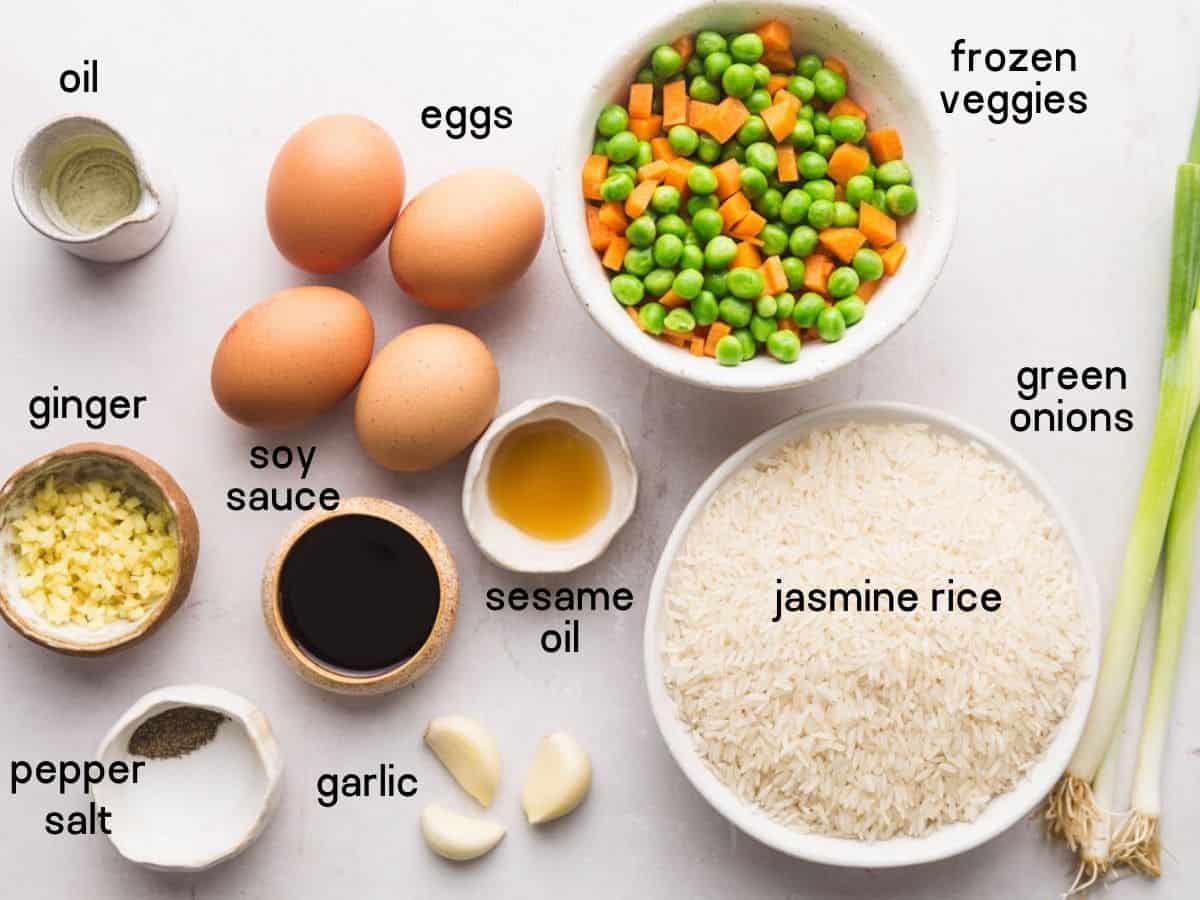
Here’s what you will need to make fried rice in the Instant Pot:
- Jasmine rice – any kind of rice medium-long grain works to make fried rice, but it needs to be chilled before you can fry it and use it (more on this below). I recommend using jasmine rice for the best texture, as it produces fluffy grains that don’t clump or fall apart once fried.
- Eggs – use eggs that are as fresh as possible for the best tasting fried rice!
- Oil (vegetable, corn, sunflower), garlic, ginger, sesame oil, low sodium soy sauce, salt, and pepper.
- Frozen vegetables – You can buy these mixes at the supermarket, usually peas, corn, carrot, and green beans.
- Green onions.
How to Make Fried Rice in the Instant Pot
There are quite a few steps to make this recipe but don’t worry, it’s really easy to follow! Just make sure that you read the recipe until the end before you start.
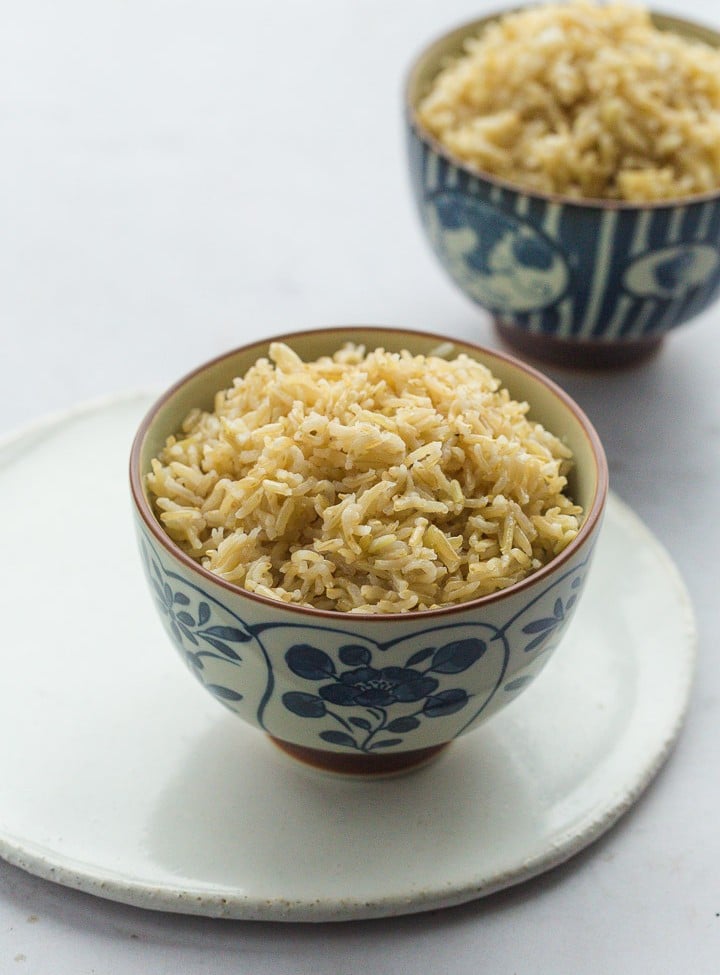
First, you need to cook jasmine rice.
- To cook jasmine rice, add 1.5 cups of rinsed rice to the Instant Pot and 1.5 cups of water. Add a pinch of salt, Secure the lid, and set the vent to SEALING. Select the PRESSURE COOK/MANUAL setting and set the cooking time for 4 minutes at high pressure.
- The Instant Pot will take around 6-7 minutes to come to pressure and start cooking. When the cooking program ends, allow the steam to be naturally released for 10 minutes, then release the rest of the steam manually.
- Carefully open the lid, fluff with a fork, and place it on a large plate or tray. chill in the fridge or freezer if you’re in a hurry.
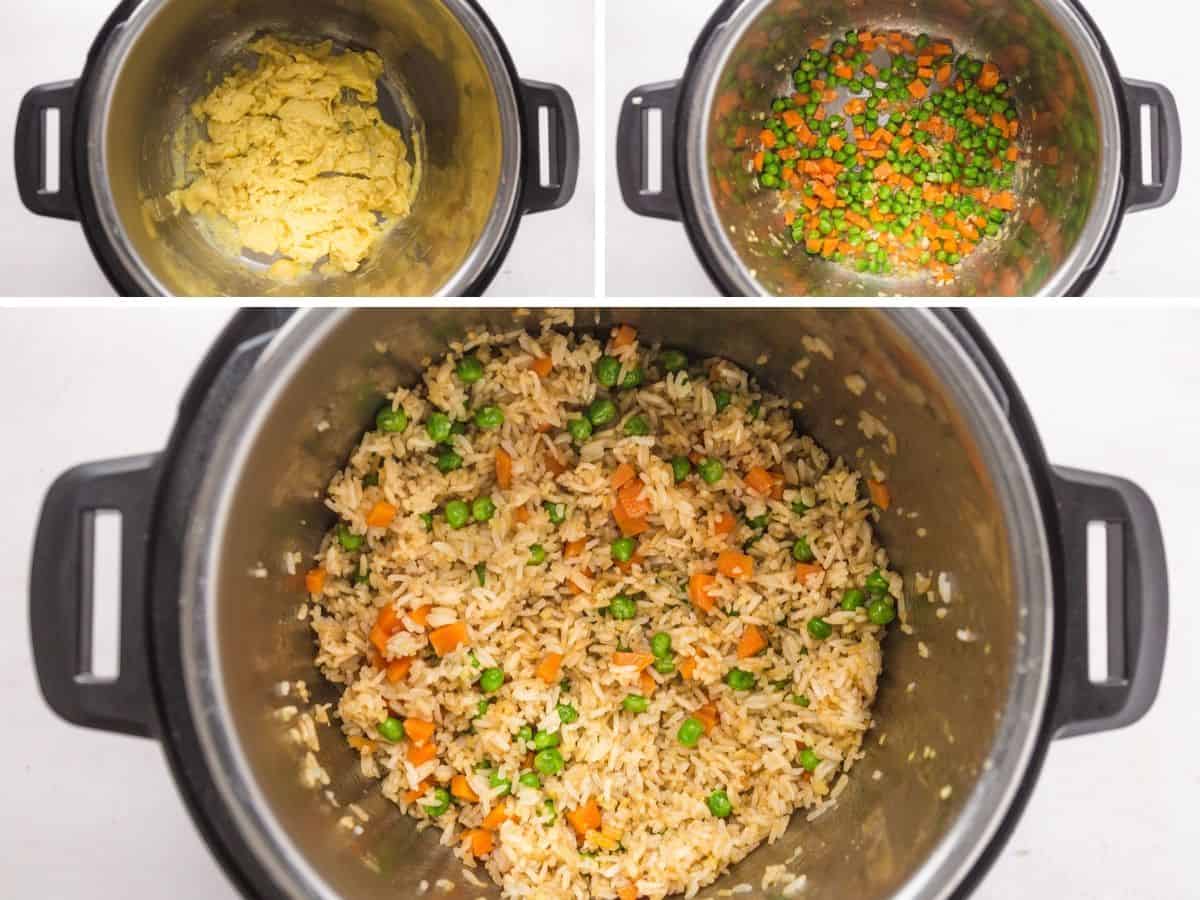
Second, cook the eggs.
On the Instant Pot, choose the SAUTE setting and add vegetable oil. Beat the eggs in a bowl, and season them with salt.
When the oil is hot, add the beaten eggs and cook them using a spatula. You don’t want to dry the eggs so make sure that you don’t step away from the pot as they cook quickly.
Stir and scramble the eggs to break them down to pieces that are not too small as otherwise they will disappear once mixed in with the rice. When they’re no longer wet transfer them to a plate and set aside.
Wipe the pot clean with a paper towel.
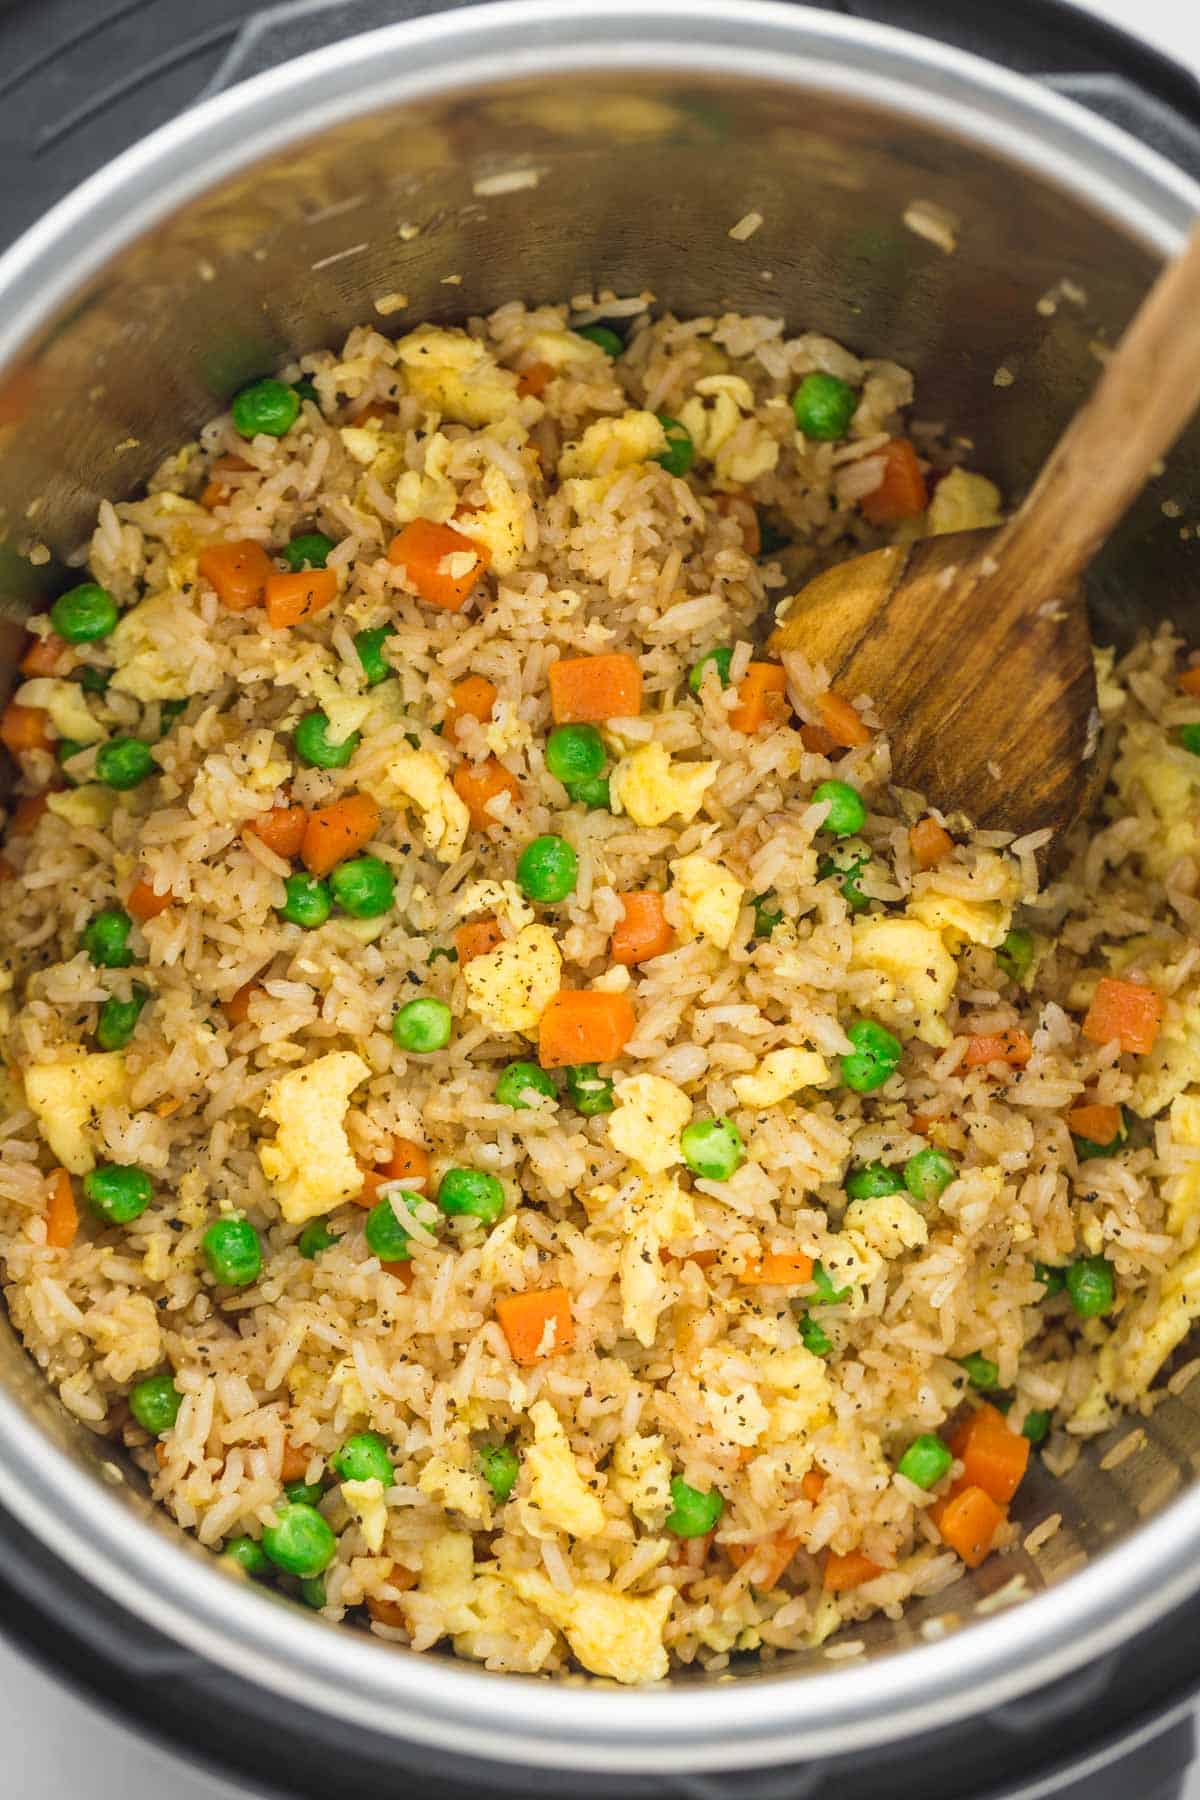
Third, fry the rice and combine everything.
Add oil to the pot, and saute the ginger and garlic for a minute or until they’re fragrant. Then add the frozen vegetables, fry them lightly then move to one side of the pot. Add the rice in 2 batches and fry it for a couple of minutes. To properly fry the rice, let it sizzle without stirring for a minute, but make sure that it does not burn.
then add the sesame oil and soy sauce. Stir everything to combine.
Press on CANCEL on the Instant Pot. And add in the scrambled eggs, and the green onions and stir to combine. Taste the rice, and see if you would like to add more soy sauce or sesame oil to taste. Season with ground black pepper.
Why Chill the Rice Before Frying It?
If you use warm fresh rice, it won’t fry and will get quite sticky once it’s fried with the sauce. So to make sure that it sizzles and to get the right texture, it is better to either plan ahead and cook the rice a few hours ahead. Or use leftover rice that was stored in the fridge. Or if you’re in a hurry, then chill it for at least half an hour in the fridge or freezer.
It’s not just about chilling rice, but to let the surface of the rice dry out. So for better results, chill the rice for 3-4 hours and preferably overnight. Or freeze for 1-2 hours.
Recipe Variations
I would say that my recipe here is a healthier version of fried rice, however, there are quite a few ingredients that you can add/change.
- Use butter when frying the rice. This is the way it’s done at most hibachi places and gives it a richer taste.
- Add more veggies! You can add green beans, sweet corn, broccoli, cauliflower, thinly sliced white onion, you name it!
- Taste the fried rice at the end, and adjust seasonings by adding more soy sauce to sesame oil if desired.
- Saute pieces of chicken, and add them to the rice to make chicken fried rice.
- Chop up kimchi and add it to the fried rice to make kimchi fried rice.
- You can also add pineapple chunks to make Chinese or Thai pineapple fried rice. Just mix them in.
Making Instant Pot fried rice is so easy, and you’re using just one pot which makes it an awesome recipe as I hate doing the dishes! So make a large pot of fried rice, and your family will love it!
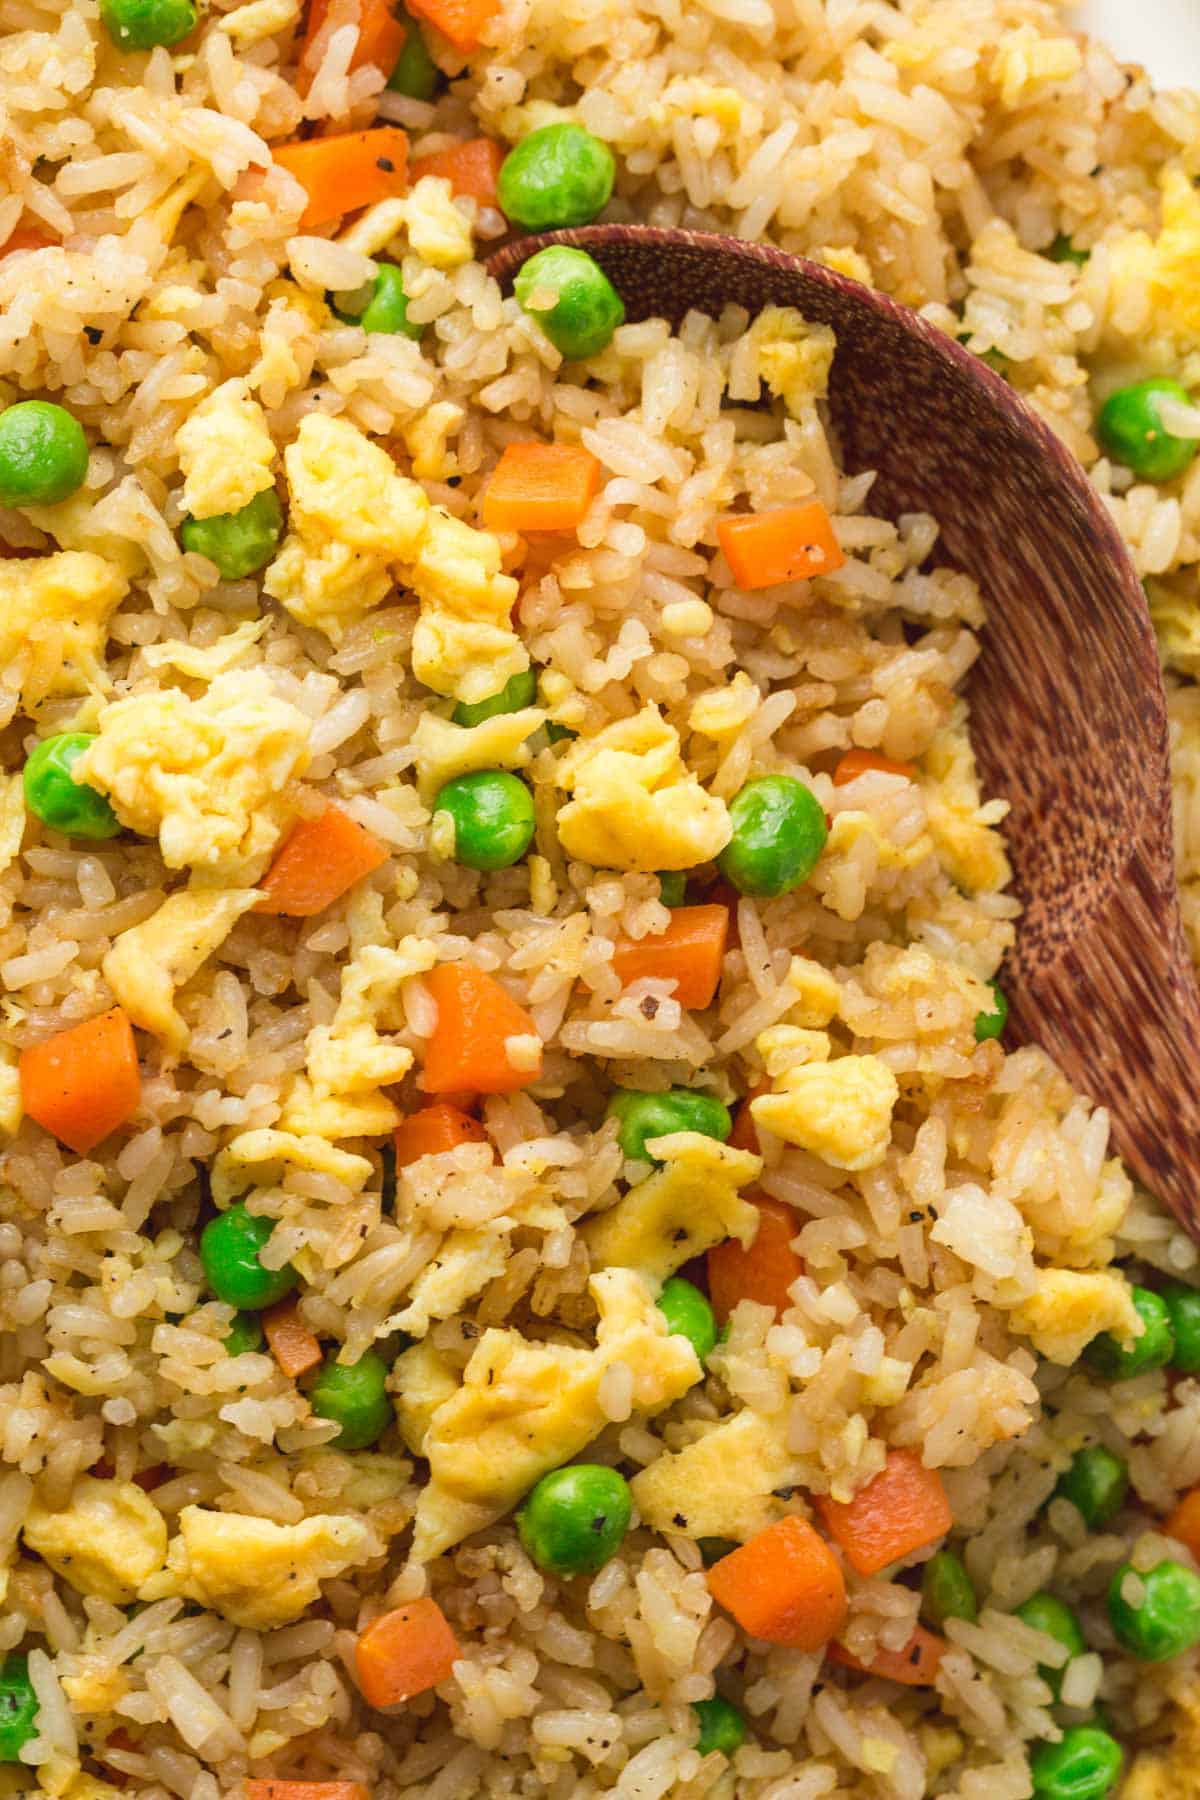
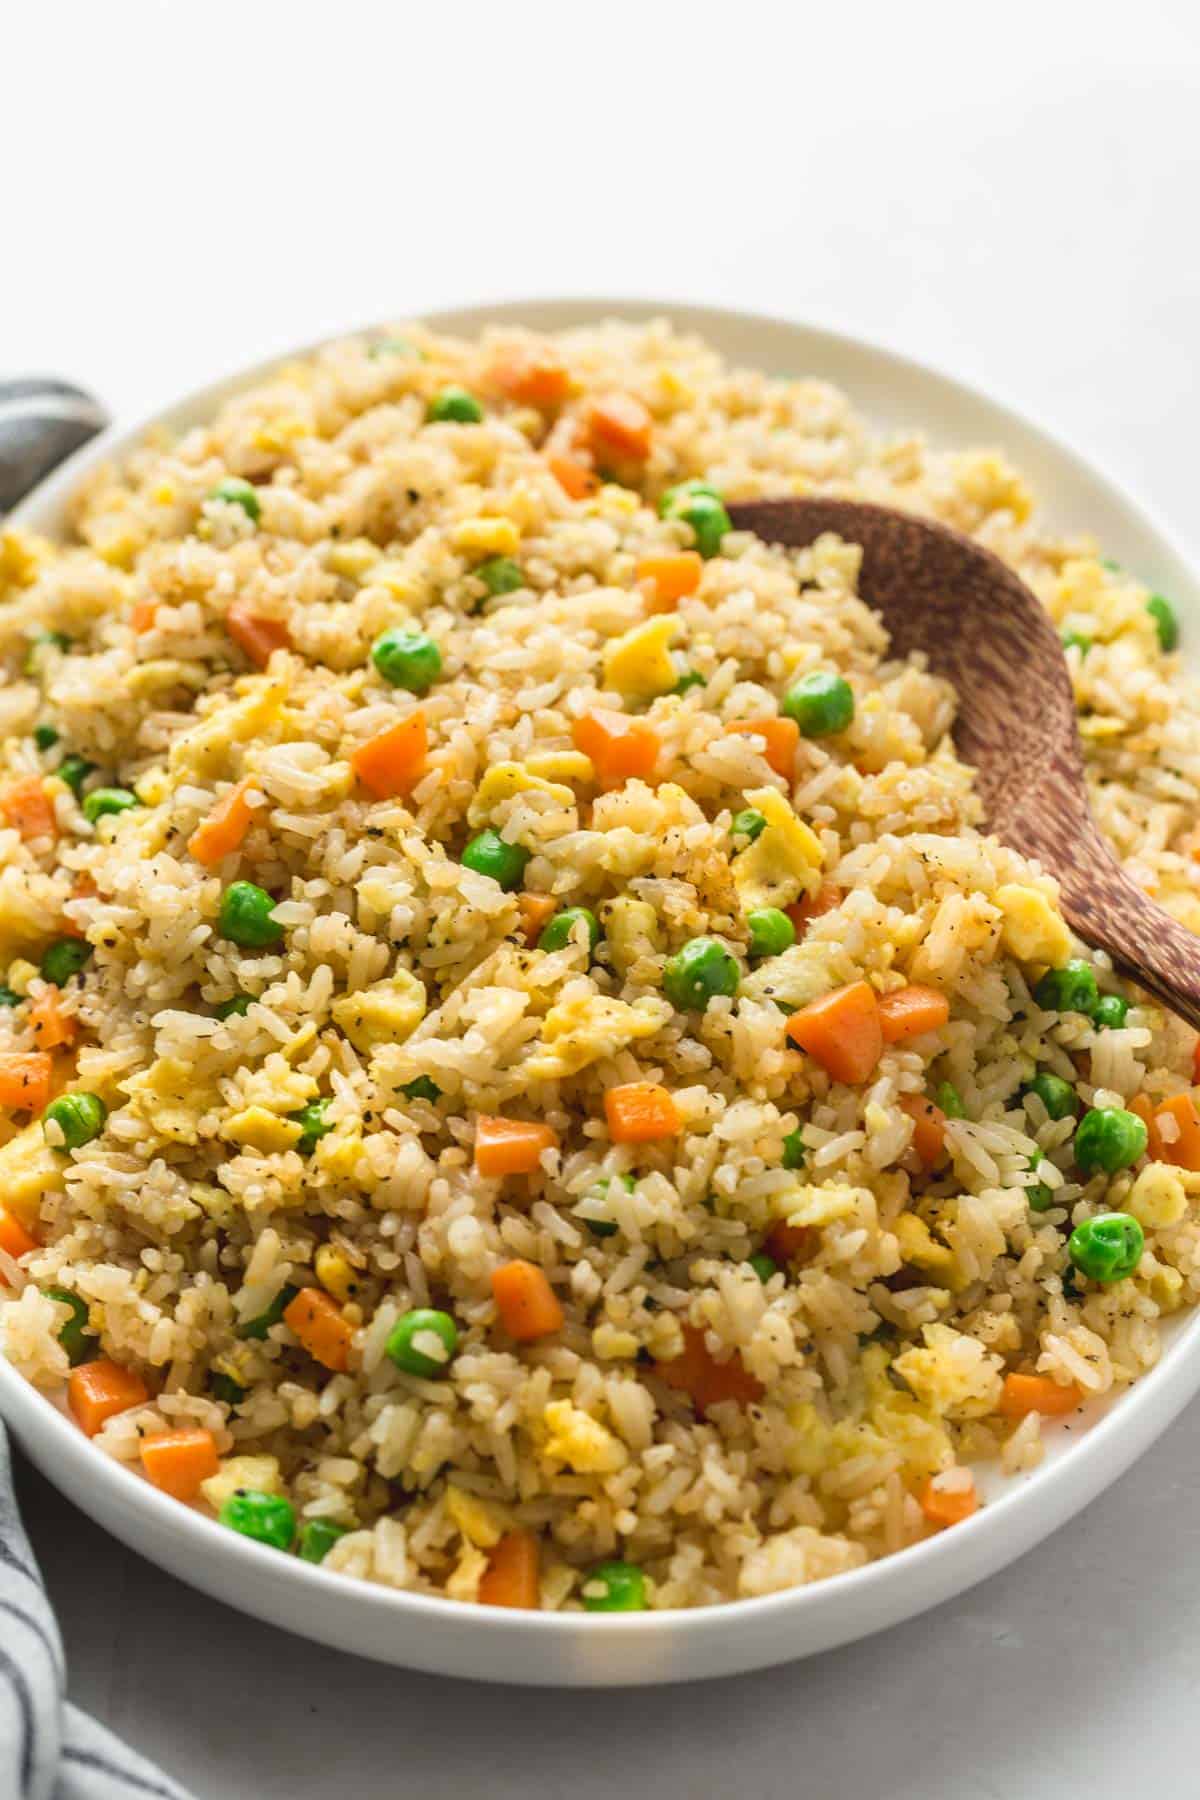
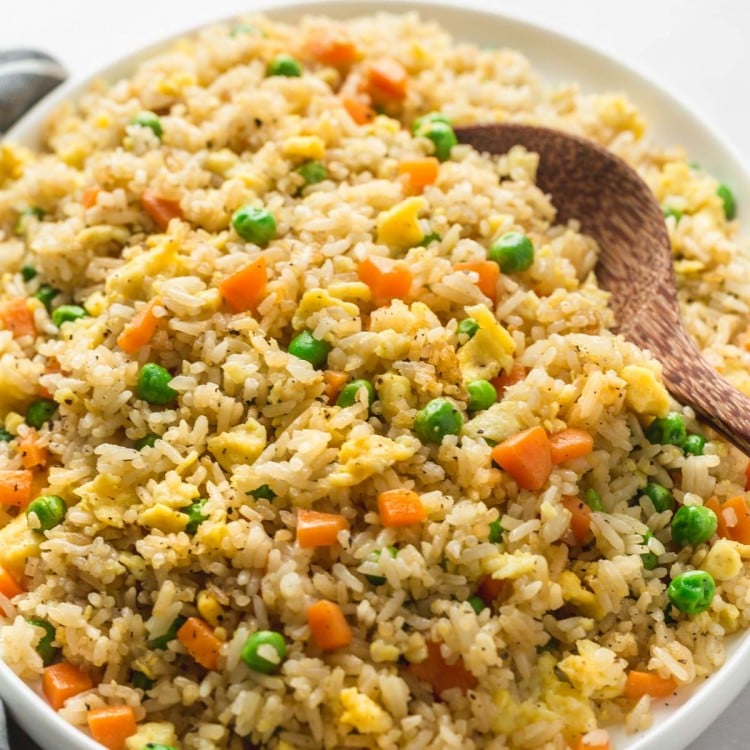
Check out the texture in the image below, this is the texture that you want where the rice is not clumpy or sticky but holds together very well. Perfect for eating with chopsticks!
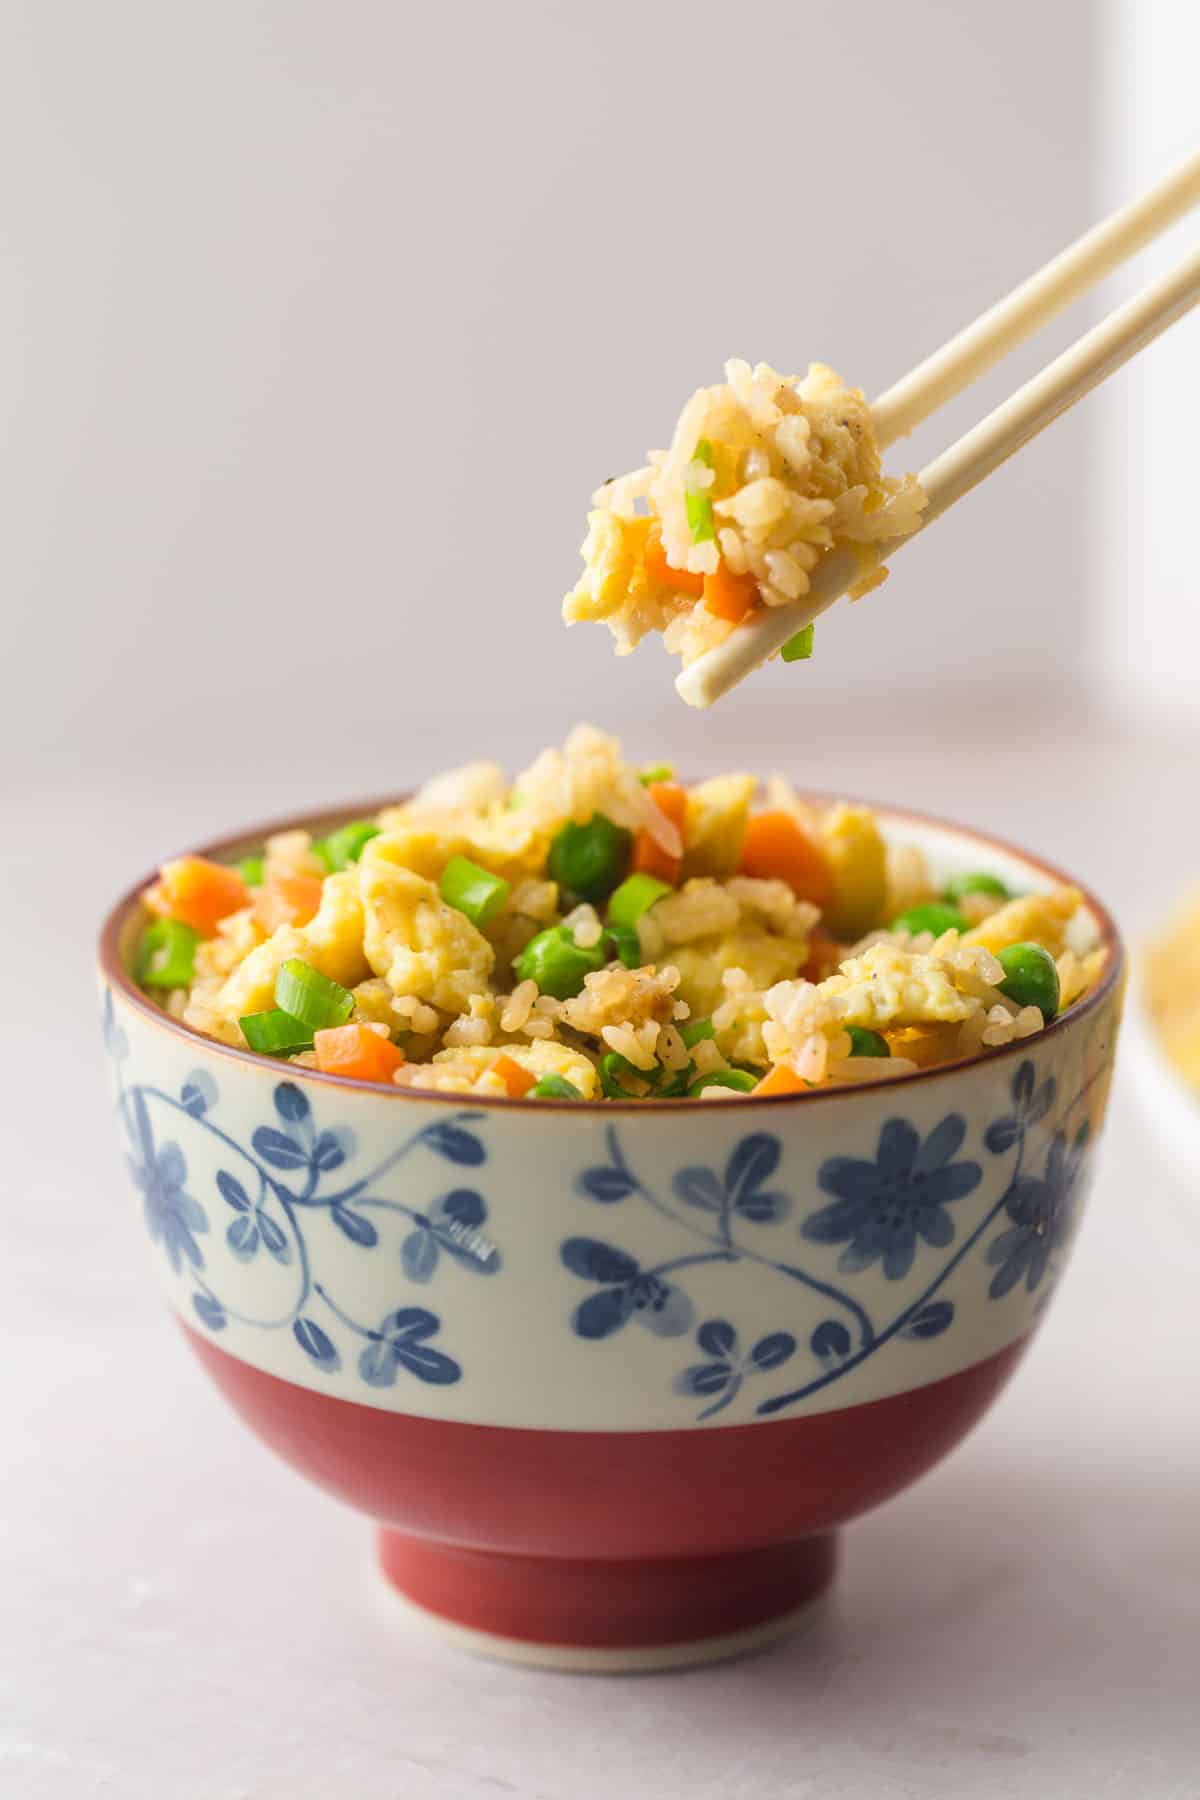
This rice bowl that you can see in the picture above is a traditional Japanese rice bowl. I have 6, and love them so much! You can find them here.
What to Serve Fried Rice With?
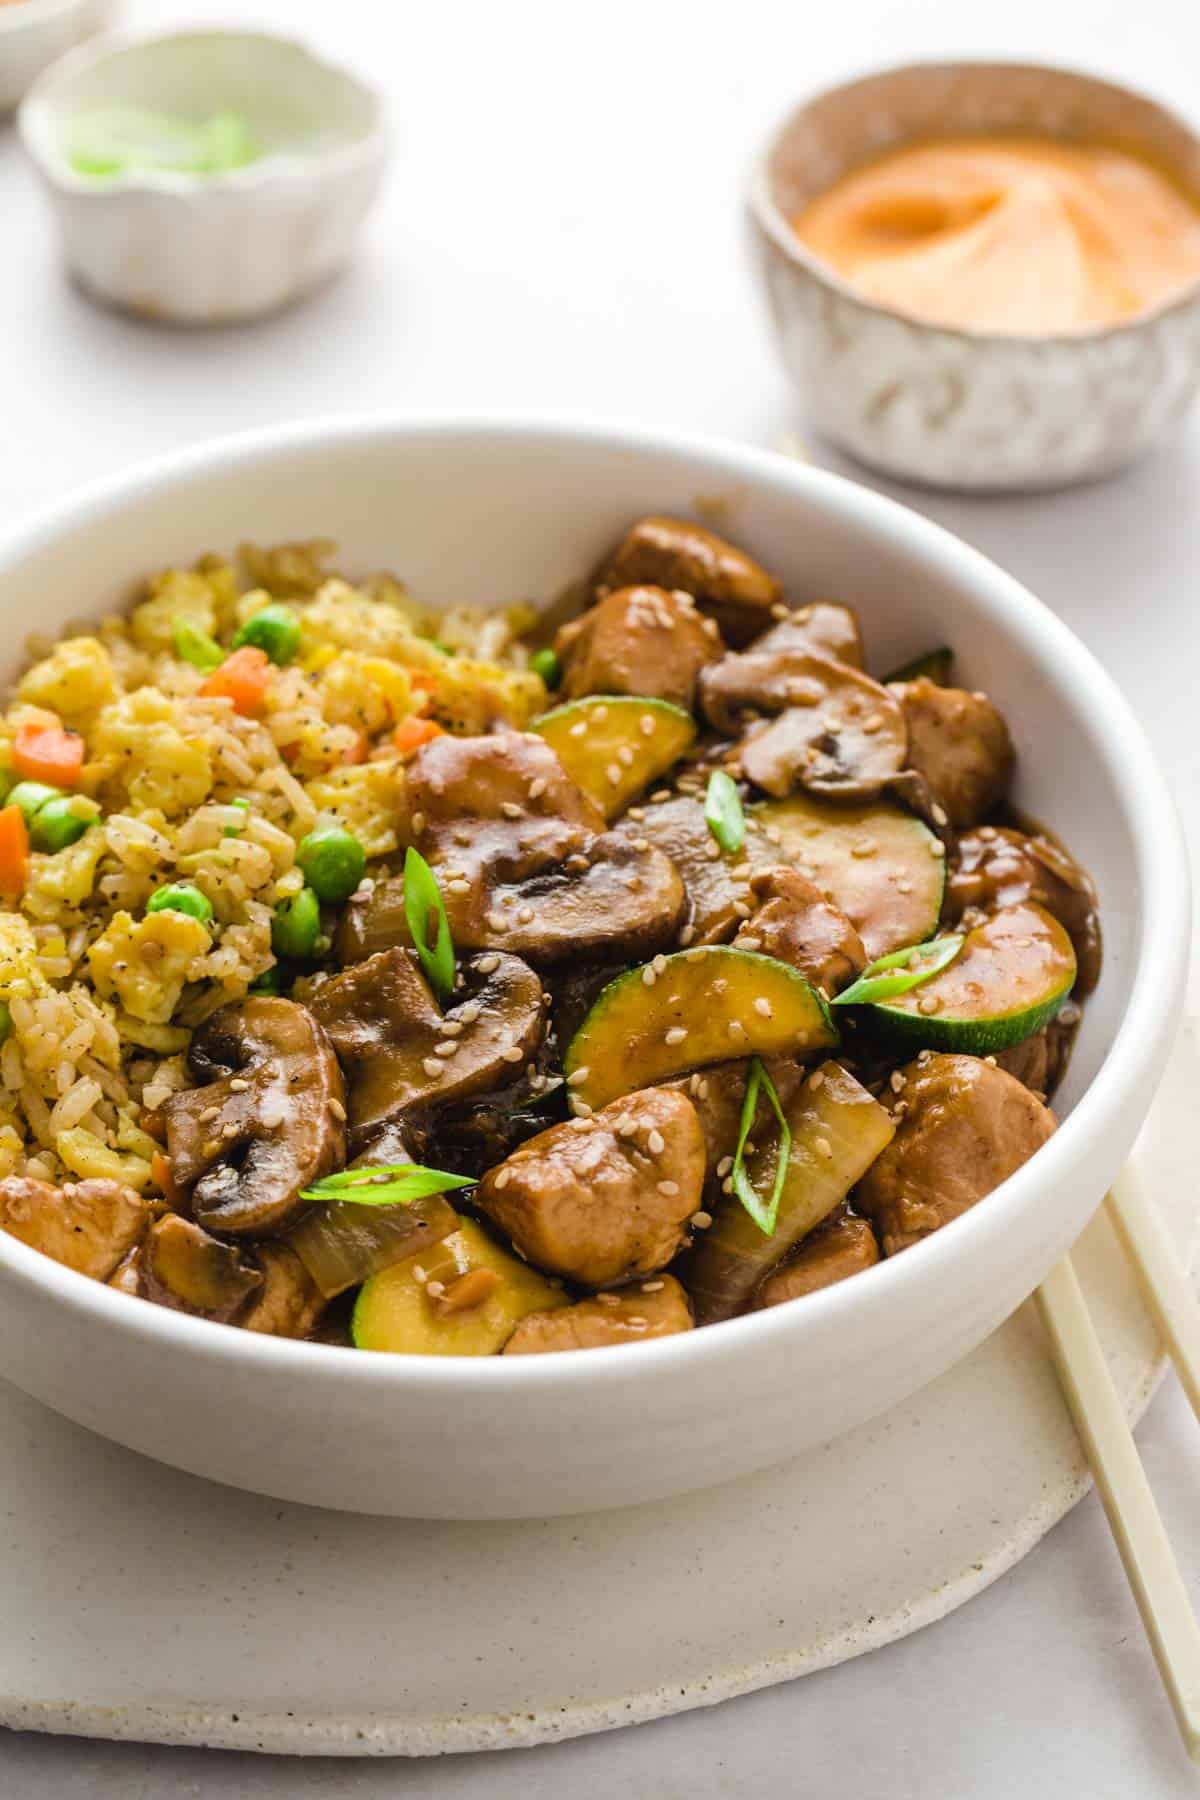
We love fried rice even when it’s served on its own. It makes a great vegetarian lunch or dinner. But most of the time we serve it with hibachi dishes:
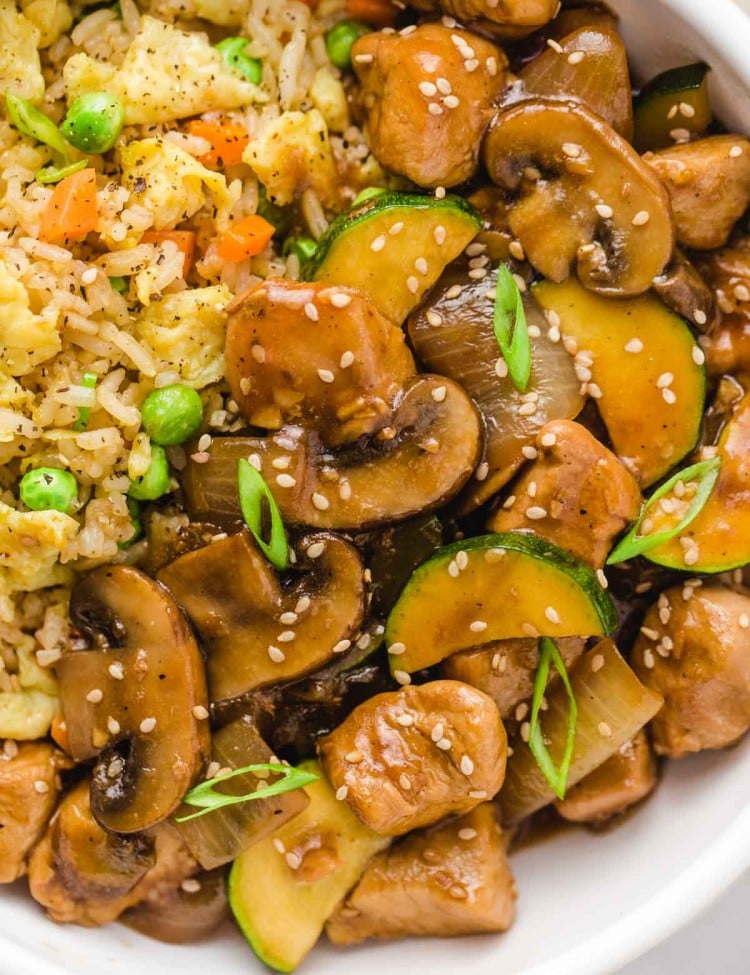
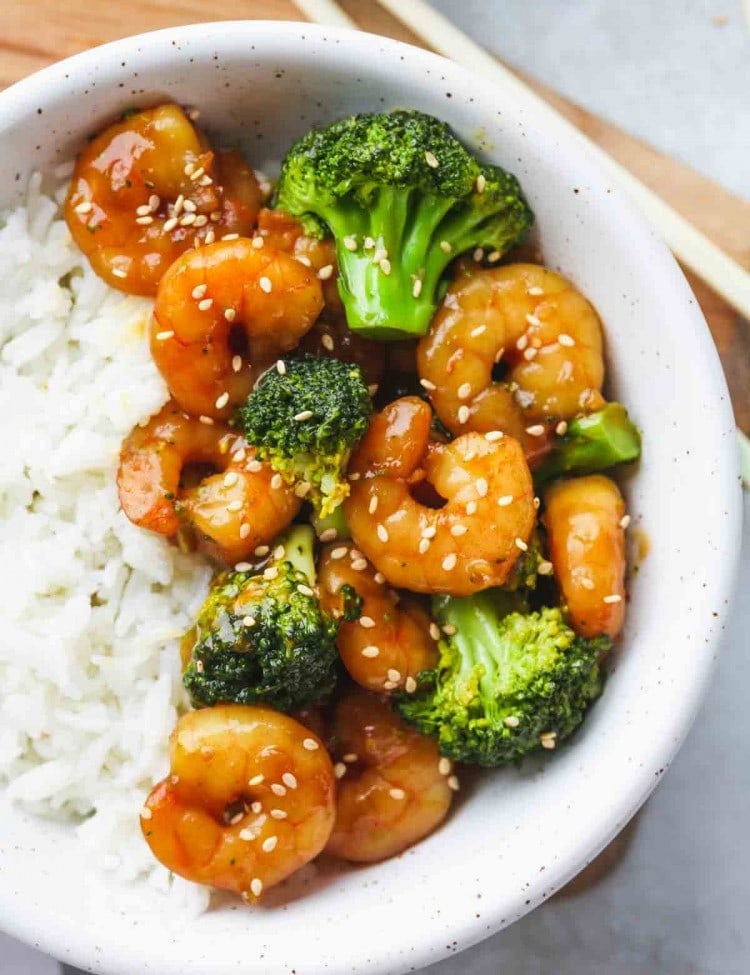
- Hibachi chicken – see image below where we served hibachi chicken with the fried rice, and yum yum sauce.
- Hibachi steak
- Hibachi shrimp
- Yum yum sauce (SO GOOD!)
- Ginger dipping sauce (Benihana copycat!)
- Homemade sweet and sour sauce (so easy and made with a few pantry ingredients!)
Storing Tips
Fridge: Fried rice makes great leftovers! I always intentionally make a large batch of fried rice to have leftovers as they’re so good on the next day! To store in an airtight container for up to 4 days.
Freezer: Freeze in an airtight freezer container or freezer bag for up to 6 months.
Recommended Tools For This Recipe
- Instant Pot. This is the one that I own and love!
- Sheet pan. I used a sheet pan to spread the jasmine rice on and chill it.
- Garlic press. A kitchen essential.
- Sharp knife. This is the knife that I use all the time, a sharp knife is so important and if you want to invest in a new knife then a high-quality chef knife is what I recommend. This one is also currently on sale and well worth the money.
- Heat resistant spatula. This is the one that I use to scramble the eggs and fry the rice.
Did you make this? Be sure to leave a review below and tag me on Facebook, Instagram, or Pinterest!
Instant Pot Fried Rice
Recipe Video
Equipment
Ingredients
- 1½ cups uncooked jasmine rice or 5 cups cooked jasmine rice
- 1½ cups water
- 3 tablespoons oil divided
- 4 eggs
- ½ teaspoon salt
- 2 cloves garlic minced or crushed
- 2 inch ginger grated
- 10 ounces (300 grams) mixed frozen vegetables
- 2 tablespoons low sodium soy sauce
- 1½ teaspoon sesame oil
- ⅓ cup green onions chopped
- ¼ teaspoon pepper
Instructions
Cook the jasmine rice
- Add rinsed rice to the Instant Pot with water. Add a pinch of salt, Secure the lid and set the vent to SEALING. Select the PRESSURE COOK/MANUAL setting and set the cooking time for 4 minutes at high pressure. The Instant Pot will take around 6-7 minutes to come to pressure and start cooking.
- When the cooking program ends, allow the steam to be naturally released for 10 minutes, then release the rest of the steam manually. Carefully open the lid, fluff with a fork, and place it on a large plate or tray. chill in the fridge or freezer if you're in a hurry.
Cook the eggs
- On the Instant Pot, choose the SAUTE setting and add half of the vegetable oil. Beat the eggs in a bowl, and season them with salt.
- When the oil is hot, add the beaten eggs and cook them using a spatula. You don’t want to dry the eggs so make sure that you don’t step away from the pot as they cook quickly.
- Stir and scramble the eggs to break them down, when they’re no longer wet transfer them to a plate and set aside.
- Wipe the pot clean with a paper towel.
Fry the rice and combine everything
- Add remaining oil to the pot, and saute the ginger and garlic for a minute or until they're fragrant.
- Then add the frozen vegetables, fry them lightly then move to one side of the pot.
- Add the rice in 2 batches and fry it for a couple of minutes. To properly fry the rice, let it sizzle without stirring for a minute, but make sure that it does not burn.
- Then add the sesame oil and soy sauce. Stir everything to combine.
- Press on CANCEL on the Instant Pot. And add in the scrambled eggs, and the green onions and stir to combine. Taste the rice, and see if you would like to add more soy sauce or sesame oil to taste. Season with ground black pepper.
Notes:
- 1.5 cups of uncooked jasmine rice, make around 5 cups of cooked rice.
- If you use warm rice, it won’t fry. So to make sure that it sizzles and to get the right texture, it is better to either plan ahead and cook the rice a few hours ahead. Or use leftover rice that was stored in the fridge. Or if you’re in a hurry, then chill it for at least half an hour in the fridge or freezer.
- It’s important to use LOW sodium soy sauce, so you don’t end up with food that is too salty. Don’t take any risks here as it can ruin your food!
- When cooking the eggs, don’t break them down in very small pieces as they will disappear once they’re mixed in with the rice.
- Garnish with chopped green onions, and sesame seeds if desired.
Nutrition Information
This website provides approximate nutrition information for convenience and as a courtesy only. Nutrition data is gathered primarily from the USDA Food Composition Database, whenever available, or otherwise other online calculators.
© Little Sunny Kitchen
Emily says
Easy to make and was awesome that it was a one pot recipe! The rice turns out so well in the IP.
One thing I would say is that the day of, it tastes delicious. Once leftovers are heated up for the next day, it’s incredibly bland. Definitely needs more soy sauce or something to give it some flavor!
Diana says
Thanks for the feedback, Emily! I’m glad you enjoyed it fresh. For leftovers, adding a bit more soy sauce can help maintain the flavor. Appreciate your suggestion!
Dale says
Made a double batch last night for the family and making a double batch now to take to work tomorrow.
Diana Young says
Would it taste off if I don’t use sesame oil, or ginger? I cook on the fly, and I don’t buy these ingredients often.
Diana says
I think it will lack flavor
Donna says
I made it and it was delicious. I did add extra soy sauce once I put it on my plate to taste I will definitely make it again
Beverly says
Sooooo good!! Easy! Good flavor! I didn’t have the fresh ginger root. Used ground. Added after the rice. Mixed in ground pork which had already been browned. Also, used regular white 🍚 rice!! Will easily make again!!
Diana says
Thank you for sharing this with me! Glad to hear you liked it and will be making it again 😄
Julie Peterson says
Thank you for the recipes on your site, they are wonderful!
The sesame oil is listed as regular sesame oil. not toasted sesame oil. Is that intentional because a more neutral flavor is desired? I know that they aren’t interchangeable if frying since toasted sesame oil has a low smoke point, but it doesn’t appear as if the oil is used to fry. So I guess I’m asking if there is a reason that it’s sesame oil instead of toasted sesame oil?
Thank you in advance if you have time to answer! 🙂