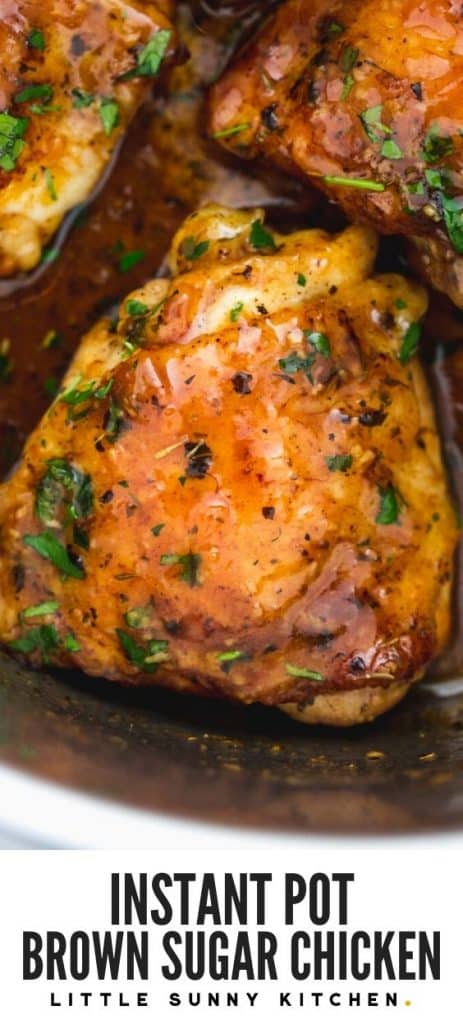

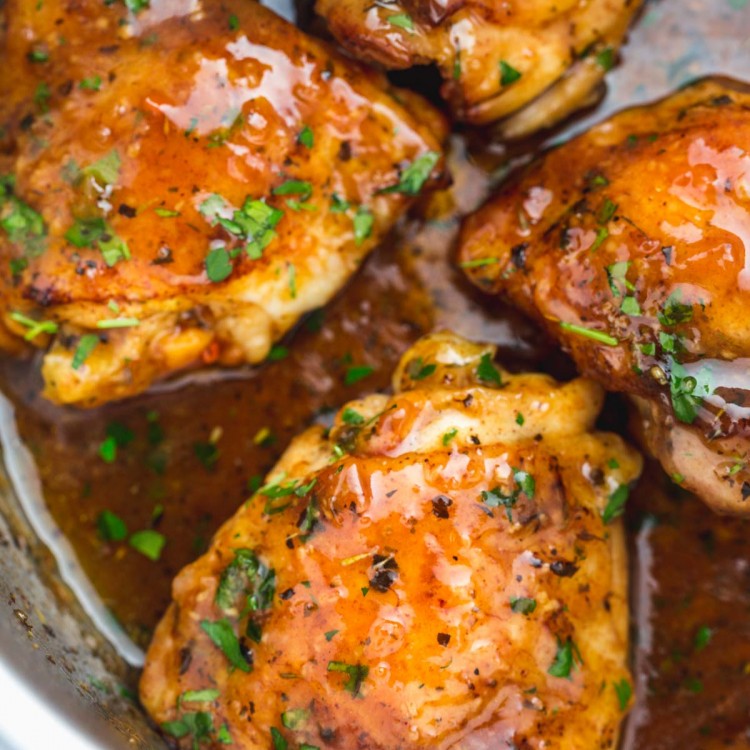
Instant Pot garlic brown sugar chicken is what you make when you need an unplanned, quick, and easy chicken dinner. It’s so simple, but the chicken turns out so juicy and flavorful as it’s cooked in the most amazing sweet and savory sauce. Serve with mashed potatoes, rice, or pasta and drizzle the sauce over everything on your plate!
Everyone loves chicken thighs, they’re always incredibly moist and tender especially when cooked in the Instant Pot. Similar to the Instant Pot Honey Mustard Chicken and the Instant Pot firecracker chicken, the chicken thighs here are cooked in a sweet but savory rich and sticky sauce.
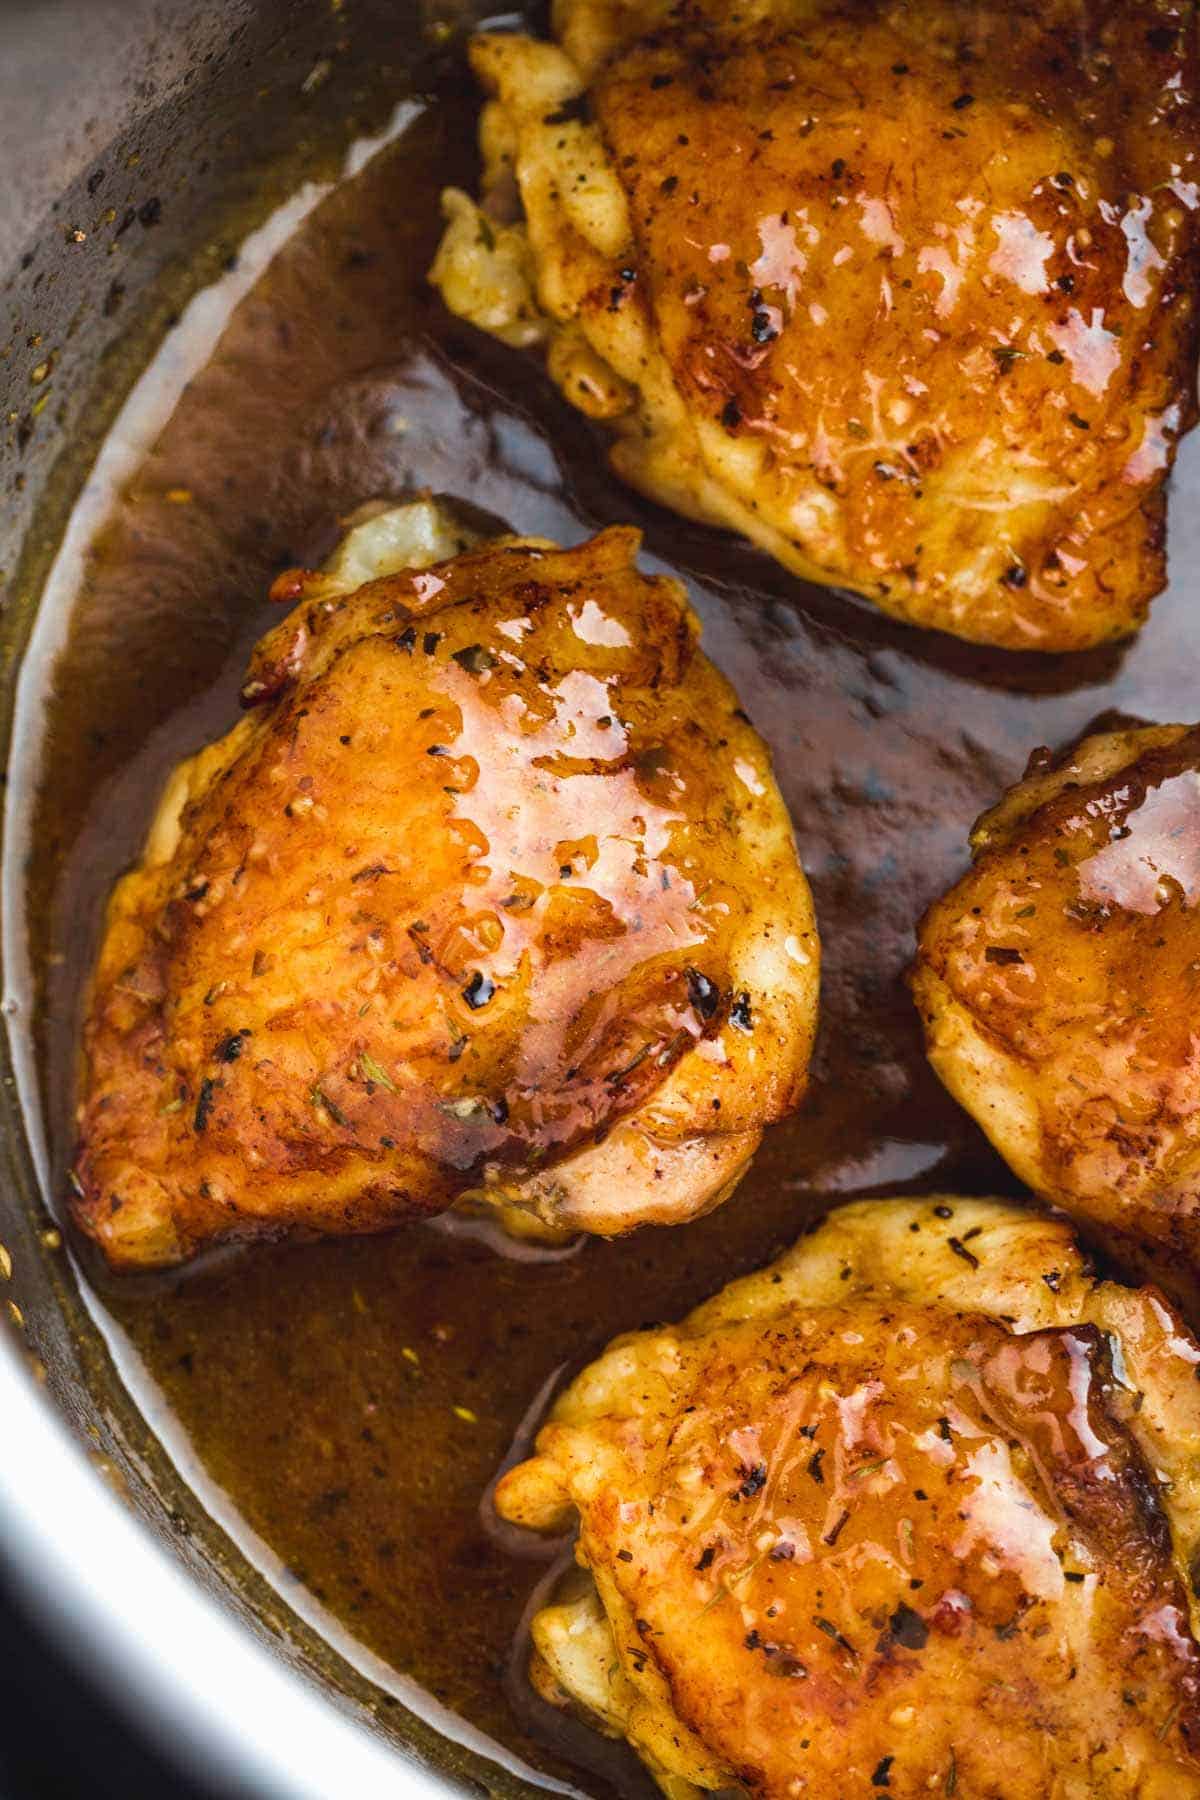
The key to this recipe is to sear the chicken thighs really well, just like you would sear them in a skillet. And that’s what gives this dish that lovely caramelized flavor that you will love!
What You’ll Need
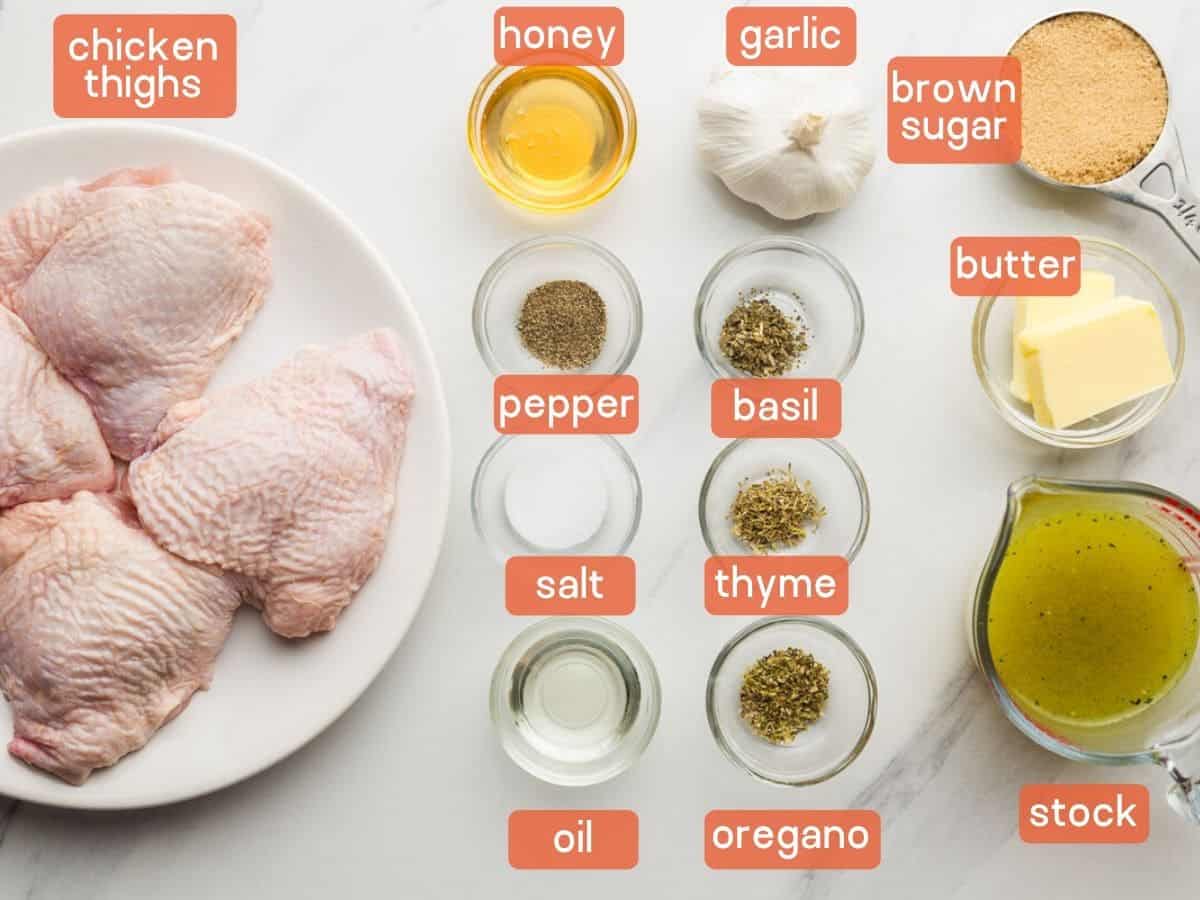
Super simple and straight-forward pantry staples, and chicken thighs! That’s really all you need to make this. Here’s what we’re using:
- Chicken thighs – I used bone-in and skin-on chicken thighs. If using frozen then make sure to thaw completely before cooking. Using skin-on chicken thighs is what gives them that awesome crispy crust and color.
- Honey and brown sugar – to sweeten the sauce up! You can also use maple syrup or agave syrup if you like.
- Garlic – an essential that goes into every chicken recipe at LSK!
- Oil and butter – Oil is used to sear the chicken, and the butter gives richness and flavor to the sauce but it can be skipped if you like.
- Stock – so chicken stock is what’s recommended here, but if you only have vegetable stock available then go for it!
- Seasonings – dried basil, thyme, oregano, salt, and pepper.
The Directions
This is so simple! The detailed directions are in the recipe card below, but in short, this is what you have to do:
- Season the chicken thighs with salt and pepper.
- Brown the chicken very well until a golden-brown crust forms, I do this in oil and butter on the medium SAUTE setting in the Instant Pot on both sides. Of course, you want to focus on browning the skin side better.
- Remove the chicken from the Instant Pot.
- Make the sauce! Saute the garlic, and DEGLAZE the pot to avoid getting a BURN message! Add the honey, brown sugar, and seasonings.
- Put the chicken back in, and pressure cook on HIGH for 8 minutes. If using boneless thighs, then reduce the cooking time by 2 minutes.
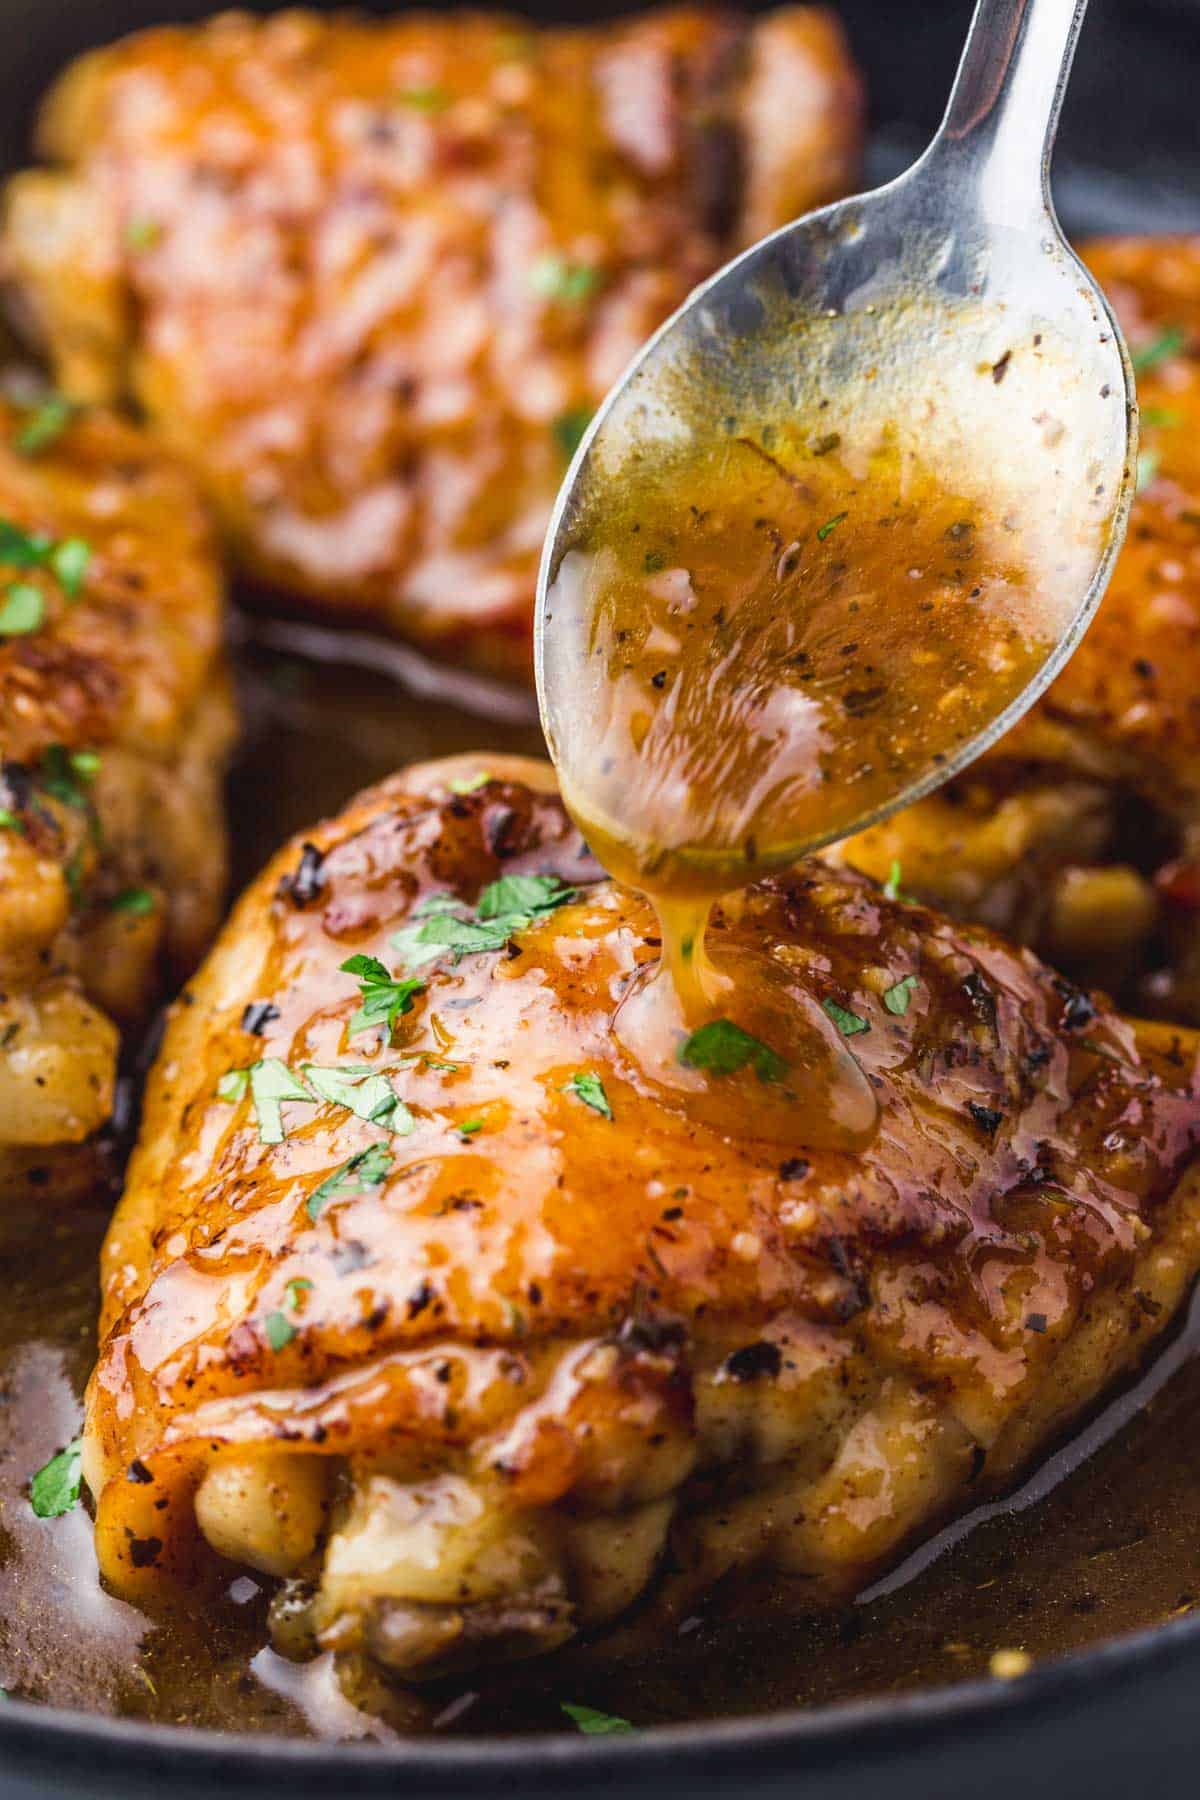
- Thicken the sauce (optional but recommended) using cornstarch slurry and serve!

Can I Use Chicken Breasts Instead of Thighs?
You can, but you won’t get that caramelized flavor as what you’d get from chicken thighs. And remember, chicken breasts are drier.
Storing Tips
- Fridge: Store the chicken in a sealed container in the fridge for up to 2 days. Reheat in the microwave, or in the oven until it’s heated through.
- Freezer: These chicken thighs can last up to three months in the freezer, so be sure to write the date on the bag with a freezer-proof marker.
Serving Ideas
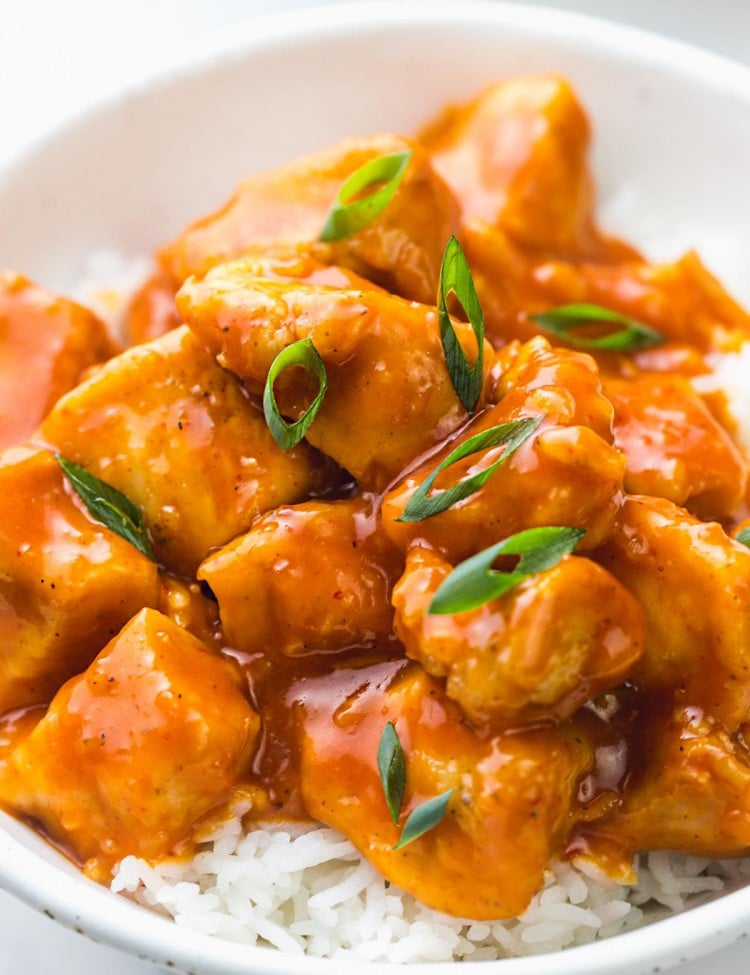
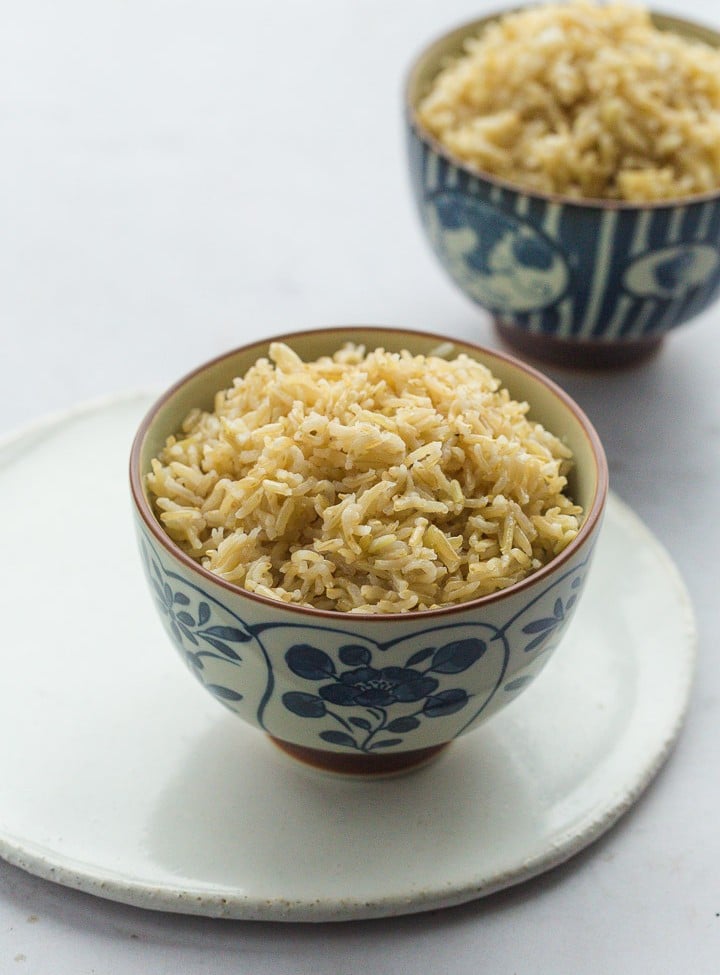
Serve this Instant Pot brown sugar chicken with any starch that you like! I usually serve this over basmati rice or brown rice, but mashed potatoes and pasta are also great options.
And you might also want to serve some veg on the side. I recommend a portion of Instant Pot broccoli, or Instant Pot green beans to bright up your plate! Oh, and don’t forget to drizzle some extra sauce over everything in your plate, because the sauce is everything!

Did you make this? Be sure to leave a review below and tag me on Facebook, Instagram, or Pinterest!
Instant Pot Garlic Brown Chicken
Equipment
Ingredients
- 1 tablespoon vegetable oil
- 2 tablespoons butter divided
- 4-6 chicken thighs bone-in, skin-on
- ¾ teaspoon salt
- ¼ teaspoon ground black pepper
- 3 cloves garlic crushed
- 1 cup chicken stock
- ¼ cup brown sugar
- 1 tablespoon honey
- ¼ teaspoon dried oregano
- ¼ teaspoon dried basil
- ¼ teaspoon dried thyme
- ½ teaspoon chopped fresh parsley for serving
Instructions
- Season the chicken thighs with salt and pepper.
- On the Instant Pot, press on SAUTE, add the oil and melt the butter. Brown the chicken starting skin side down, flip and brown it from the other side. When the chicken is golden brown, remove from the pot and set aside.
- Melt the remaining butter in the Instant Pot, and add the garlic. Cook for a minute until it's fragrant.
- Add the chicken stock, and deglaze scraping off any stuck bits to the bottom of the pot.
- Add the honey, brown sugar, oregano, basil, and thyme. Season with a pinch of salt, and put the chicken back in the pot.
- Secure the lid and set the vent to SEALING. Select the PRESSURE COOK/MANUAL setting and set the cooking time for 8 minutes at high pressure. The Instant Pot will take around 6-7 minutes to come to pressure and start cooking. When the cooking program ends, quickly release the steam.
- Transfer chicken thighs to a serving plate, and to thicken the sauce (optional), set the Instant Pot to SAUTE mode, and add 1 tablespoon of cornstarch mixed with 1 tablespoon of water. Add that to the sauce, and whisk until the sauce thickens. Have a taste and add more salt if needed.
- Pour the sauce over the chicken, and garnish with chopped parsley leaves.
Notes:
- You can use chicken breasts instead of thighs, but you won’t get that caramelized flavor and the chicken breast meat is drier.
- When browning the chicken thighs, if the pot is crowded then work in batches.
- You need to make sure that you brown the chicken really well, starting skin side down. But also keep an eye on it so that it does not stick to the bottom of the pot, I like to use kitchen tongs to move the chicken around a little as they’re being seared.
- Thickening the sauce is optional but HIGHLY recommended to get that awesome glaze and thick sauce.
- Serve this Instant Pot brown sugar chicken with any starch that you like! I usually serve this over basmati rice or brown rice, but mashed potatoes and pasta are also great options.
- And you might also want to serve some veg on the side. I recommend a portion of Instant Pot broccoli, or Instant Pot green beans.
- Storing – Fridge: Store the chicken in a sealed container in the fridge for up to 2 days. Reheat in the microwave, or in the oven until it’s heated through. Freezer: These chicken thighs can last up to three months in the freezer, so be sure to write the date on the bag with a freezer-proof marker.
Nutrition Information
This website provides approximate nutrition information for convenience and as a courtesy only. Nutrition data is gathered primarily from the USDA Food Composition Database, whenever available, or otherwise other online calculators.
© Little Sunny Kitchen
Tara says
HI….is there a need to use a trivet or can the meat go right on bottom of pot? Sorry if that’s a silly Q – I’m new 🙂
samsararose says
I adapted this recipe a bit. But honestly, it doesn’t need any adaptation. I just changed the spice profile so that it was spicy. The mild to hot-sweet profile I created using garlic and bell pepper (I cheated I used the spices from the bottom of a Cajun snack pack. You know – pretzels, Chex Mix, peanuts – it probably had a bit of Worcesteshire in the jumble of nuts and snack bits. I do this a lot…sprinkle the ends of a bag of Doritos on top of Chili – or crush a bag of Funions on top of French Onion Soup. Anything where I can use every bit of the products, I’ve purchased. I’m one of “those” a “granola” head who is always thinking recycling, reclaiming – repurposing, no waste. I also like a bit of junk food. I prefer to cook. I like top quality and knowing what I am eating. Anyway, this recipe is a fine thing. The sugar and honey really caramelize with the seared skin. I did a spicy profile, but you could adapt this recipe for an Asian Flavor using say Tamari and Orange. Think of how nice sesame seeds would look on top of this? I’ve never done a Masala profile with sweetness but why not? A bit of chopped scallion. Served on a bed of rice. I’m being obvious and we’ve also been given adaptations…nevertheless, this recipe is wonderful! I wanted to brown my chicken but most recipes I was finding on the internet with chicken for the Instant Pot were good but didn’t have that nice searing process. It is the difference between night and day. With just a teensy bit more work. Most recipes I found had you spice the chicken to your taste and then steam it in the Pot until it was done. A fabulous way to cook it. Great for stock. But I can’t emphasize how nice the surface of the skin of the chicken is if one sears it first. It is well worth the little bit of effort. It improves the flavor as well. It helps meld the flavors better. And allows the flavors to really stay with the chicken instead of ending up in the broth. Also, there is nothing like have a nice glaze of gravy on top of your chicken. Not that one needs it. The chicken comes out moist and tender, juicy, and delicious but it just really adds to the flavor profile. And there are a lot of alternatives to cornstarch. I’m giving this recipe a 5 star. Very tasty and is easily adaptable to suit your tastes and what’s in your refrigerator. Stores well. Not too expensive to make. Easy to do with ingredients on hand. Stores well in the freezer. Yup, 5 stars!!
Diana says
Wow! Thank you so much for sharing this with me and for the awesome review!
Nancy says
This was pretty easy, savory & sweet. I doubled sauce &. added some hoisen sauce. We opted to have it over basmati rice. I will definitely be making this again. Thank you little sunny kitchen!
Brenda says
Sounds yummy!! It’s in my pot now and smells incredible!
Wendy says
4 thighs wouldn’t feed all my boys so I need to cook more, does it matter how crowded the pot gets? And should the sauce be thickened when adding more meat?
Heather Valencia says
Just brown all the chicken you do have and when you’re done browning in batches of 4, then close the pot with all the pieces you browned. No big deal. You might have to increase the recipe a bit to get enough juicy sauce maybe.