
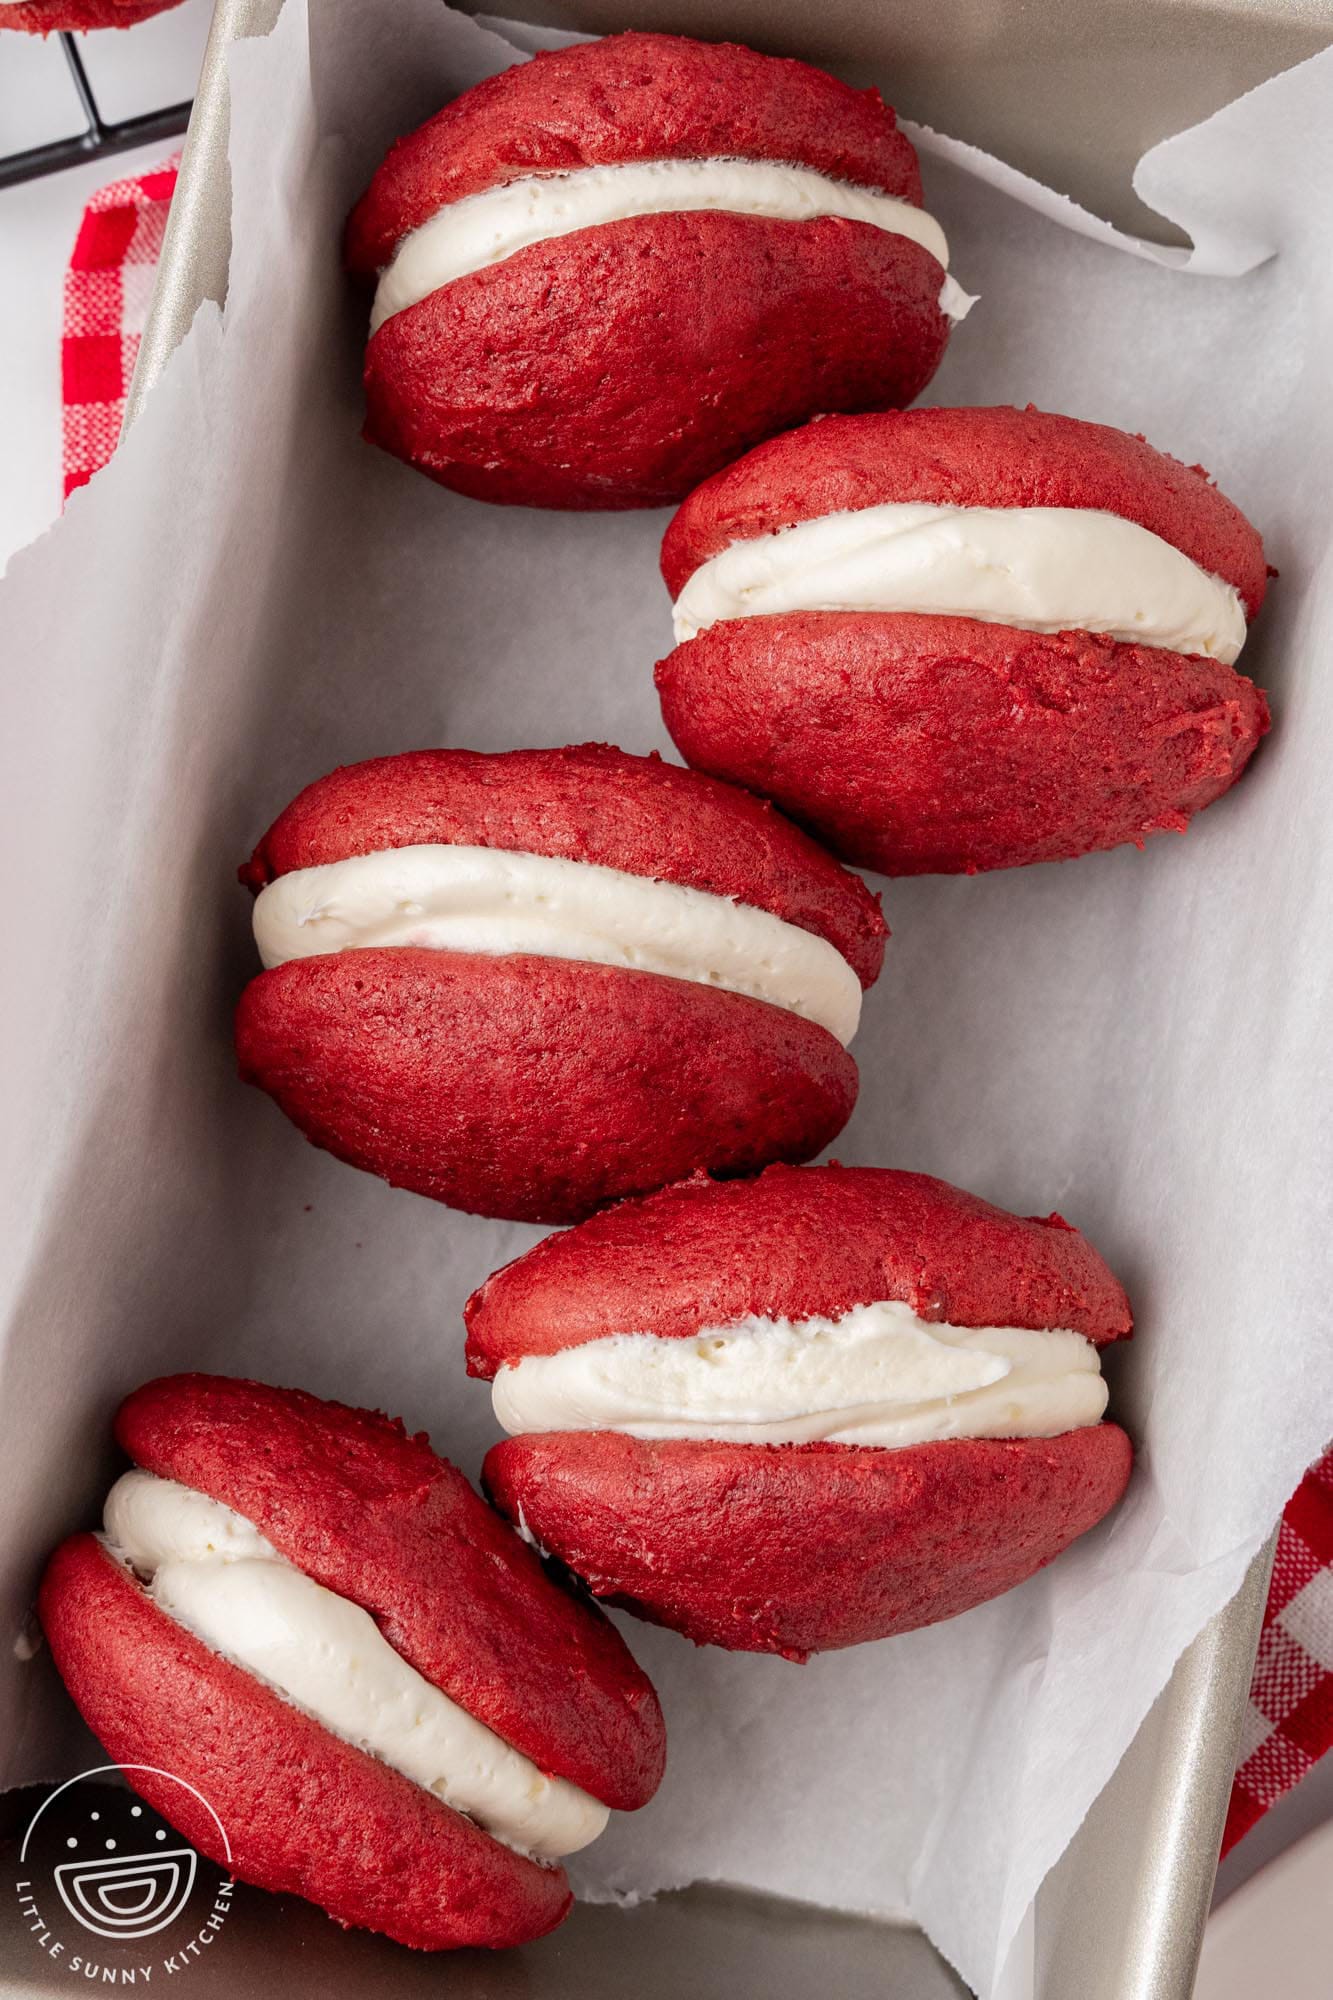
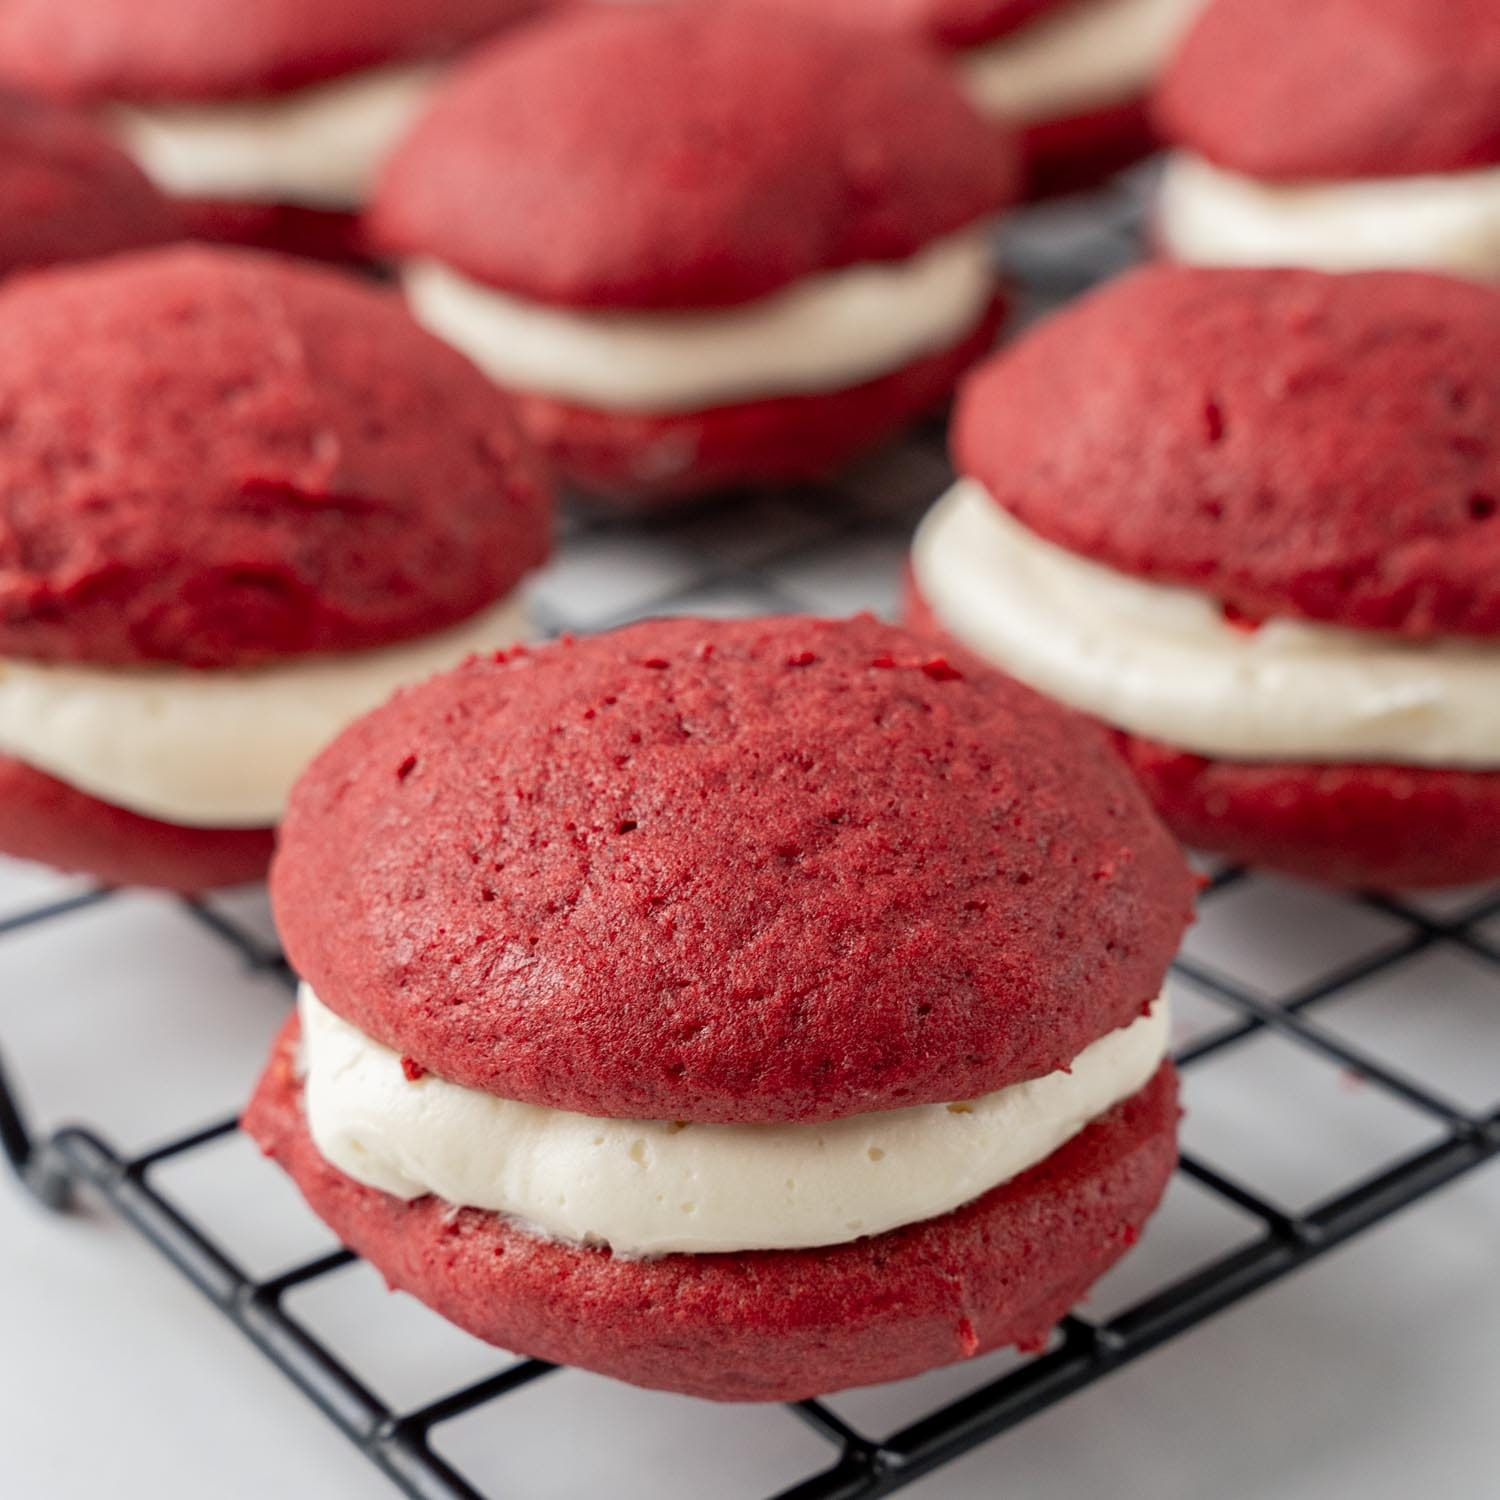
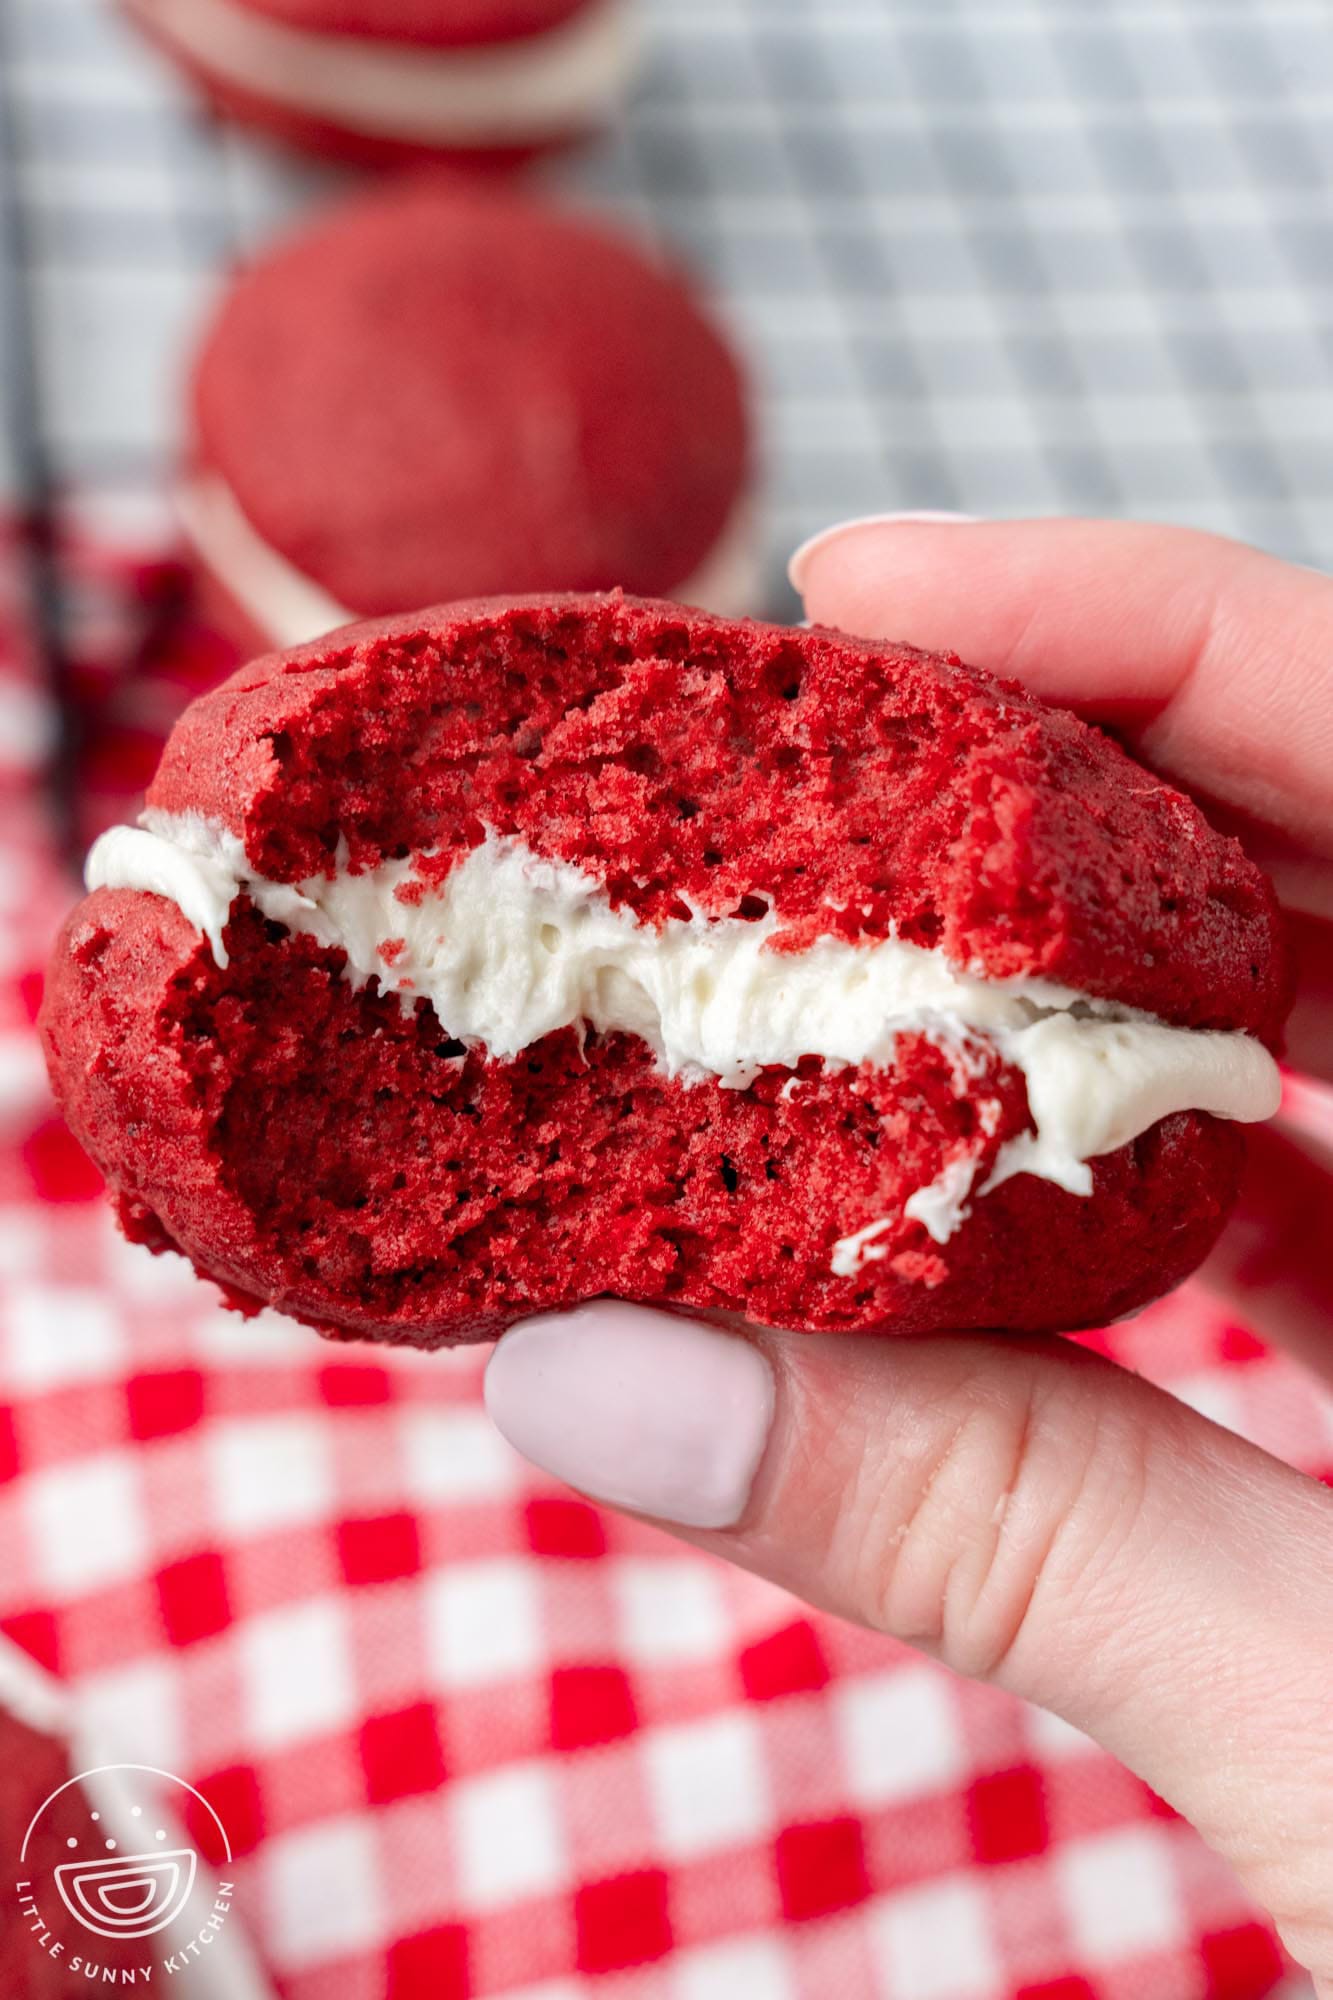
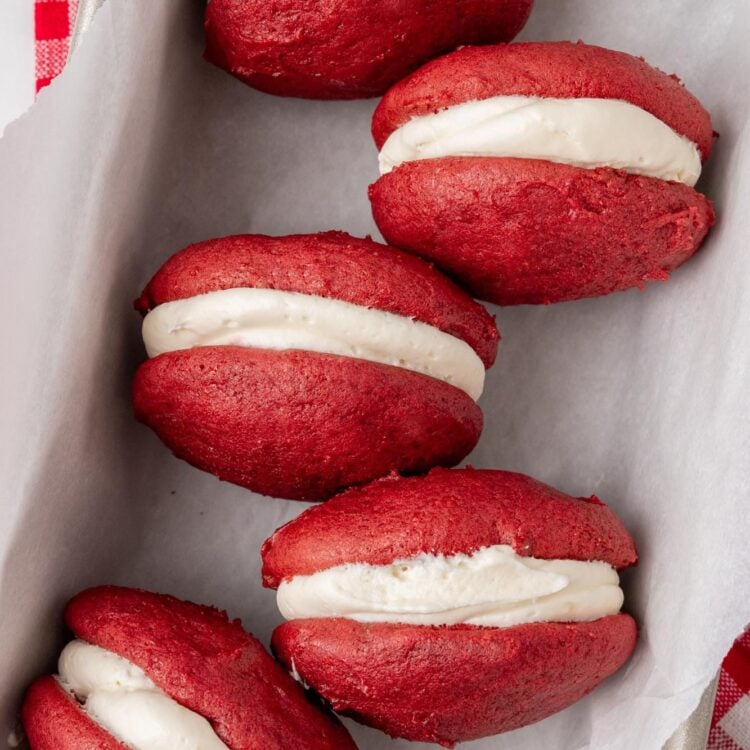
Enjoy red velvet cake in a fun and new way with this recipe for Red Velvet Whoopie Pies! These are the best soft, cake-like sandwich cookies filled with a light, tangy cream cheese frosting.
I’ll take red velvet cake in just about any way you want to serve it to me! Along with this Red Velvet Whoopie Pies recipe, you’ll also find classic Red Velvet Layer Cake, Red Velvet Pound Cake, and Red Velvet Cream Cheese Cookies here.
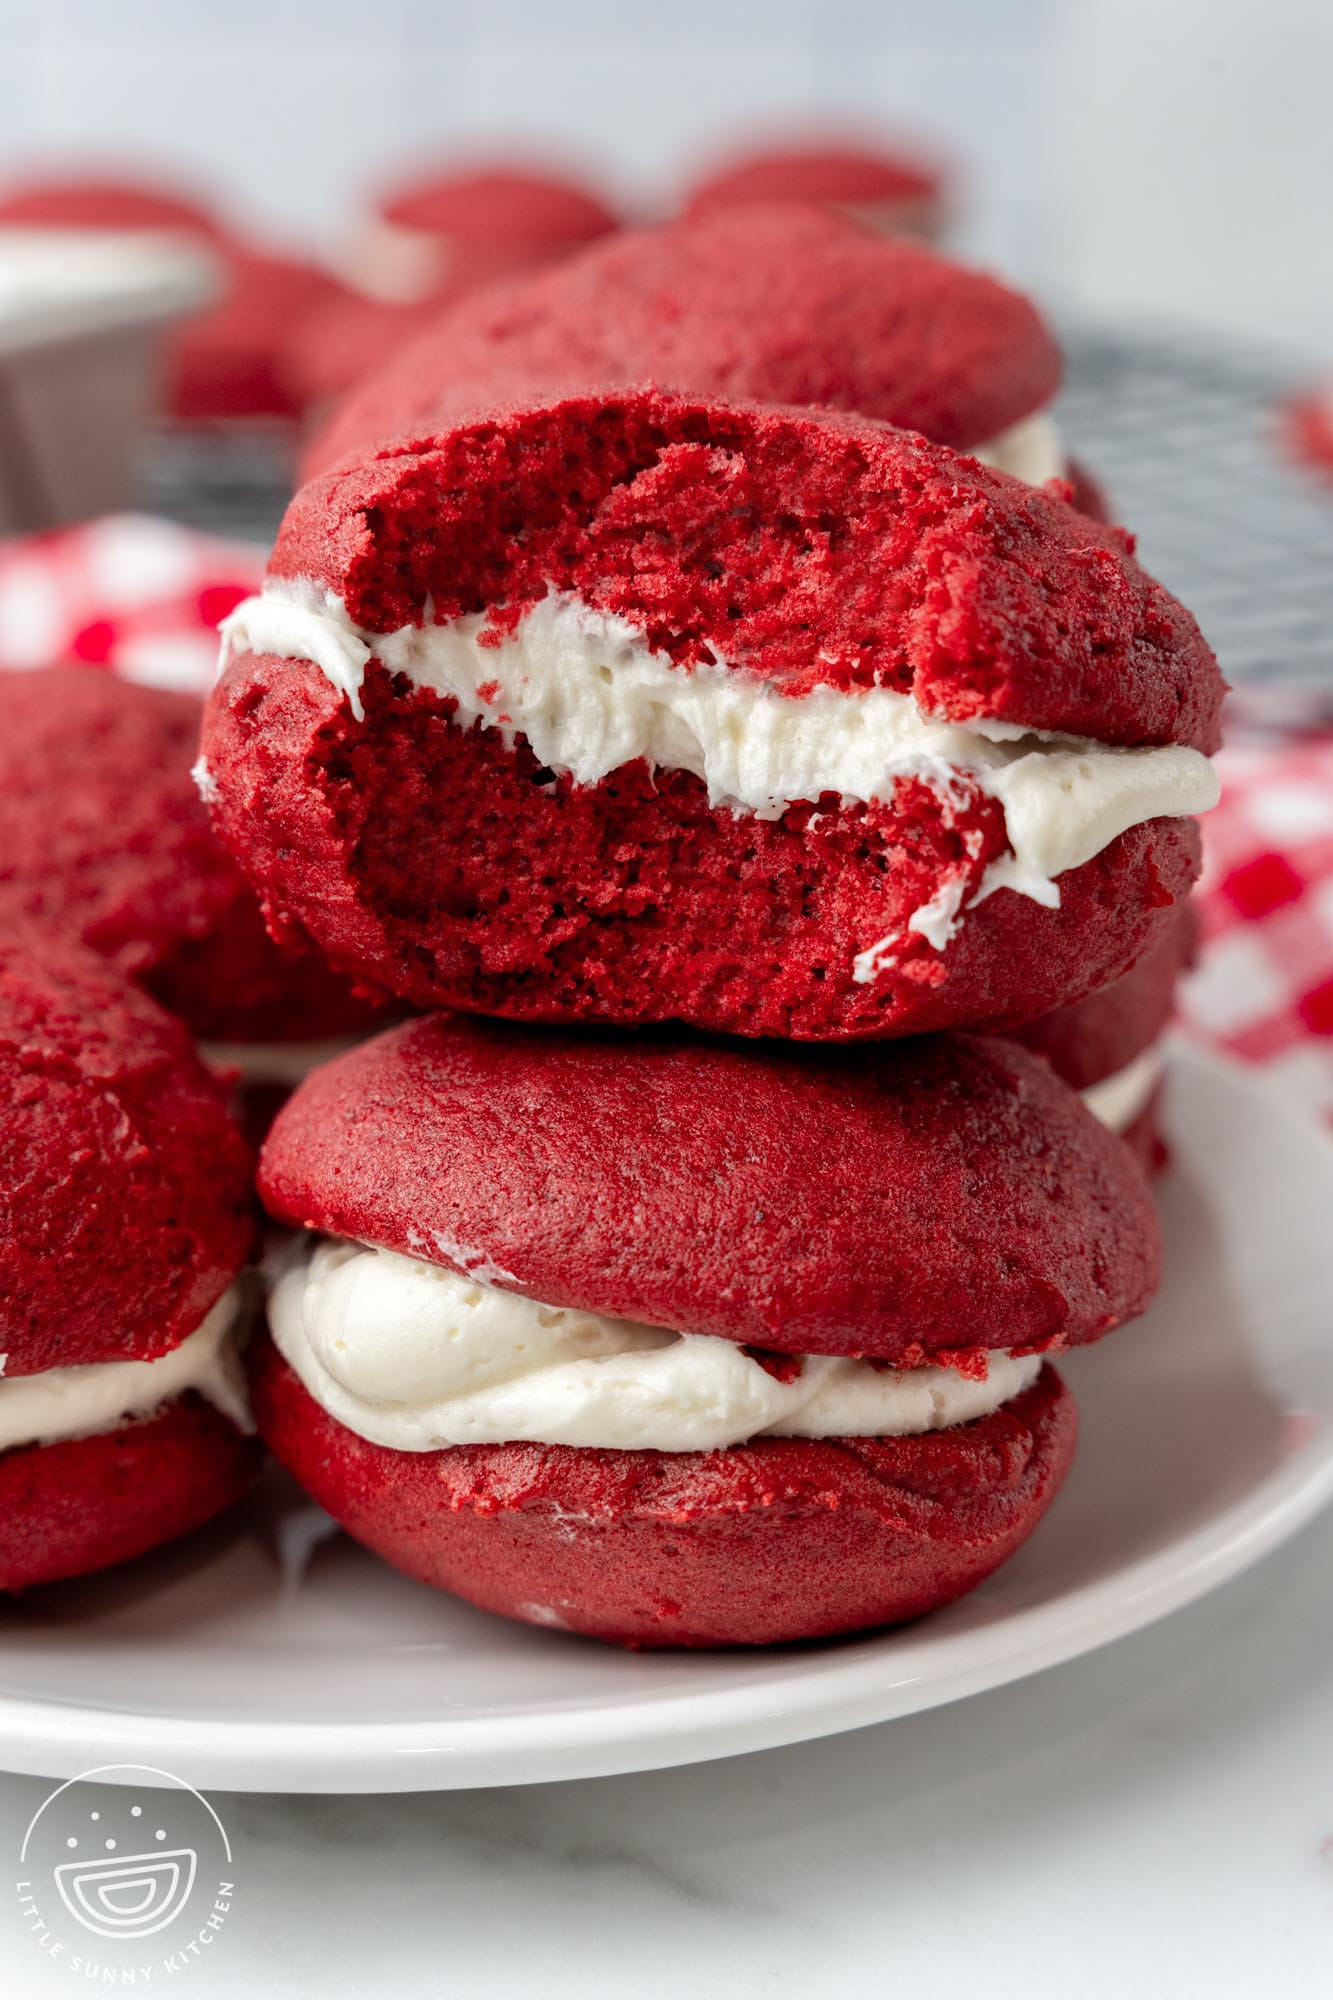
I love the deep, rich, red color of these mini cakes (or are they cookies?) as much as I love their light chocolatey flavor paired with creamy frosting filling.
Making whoopie pie sandwiches is easier than it looks. Follow along and you’ll have a fresh batch of red velvet whoopie pie sandwiches that are perfect for Valentine’s day or any time you’re ready for a luscious treat.
Red Velvet Whoopie Pies Recipe Highlights
- Soft, Fluffy Texture – Whoopie pies are technically cookies, but with the texture of cake! These little round cakes are moist, tender, and delicious.
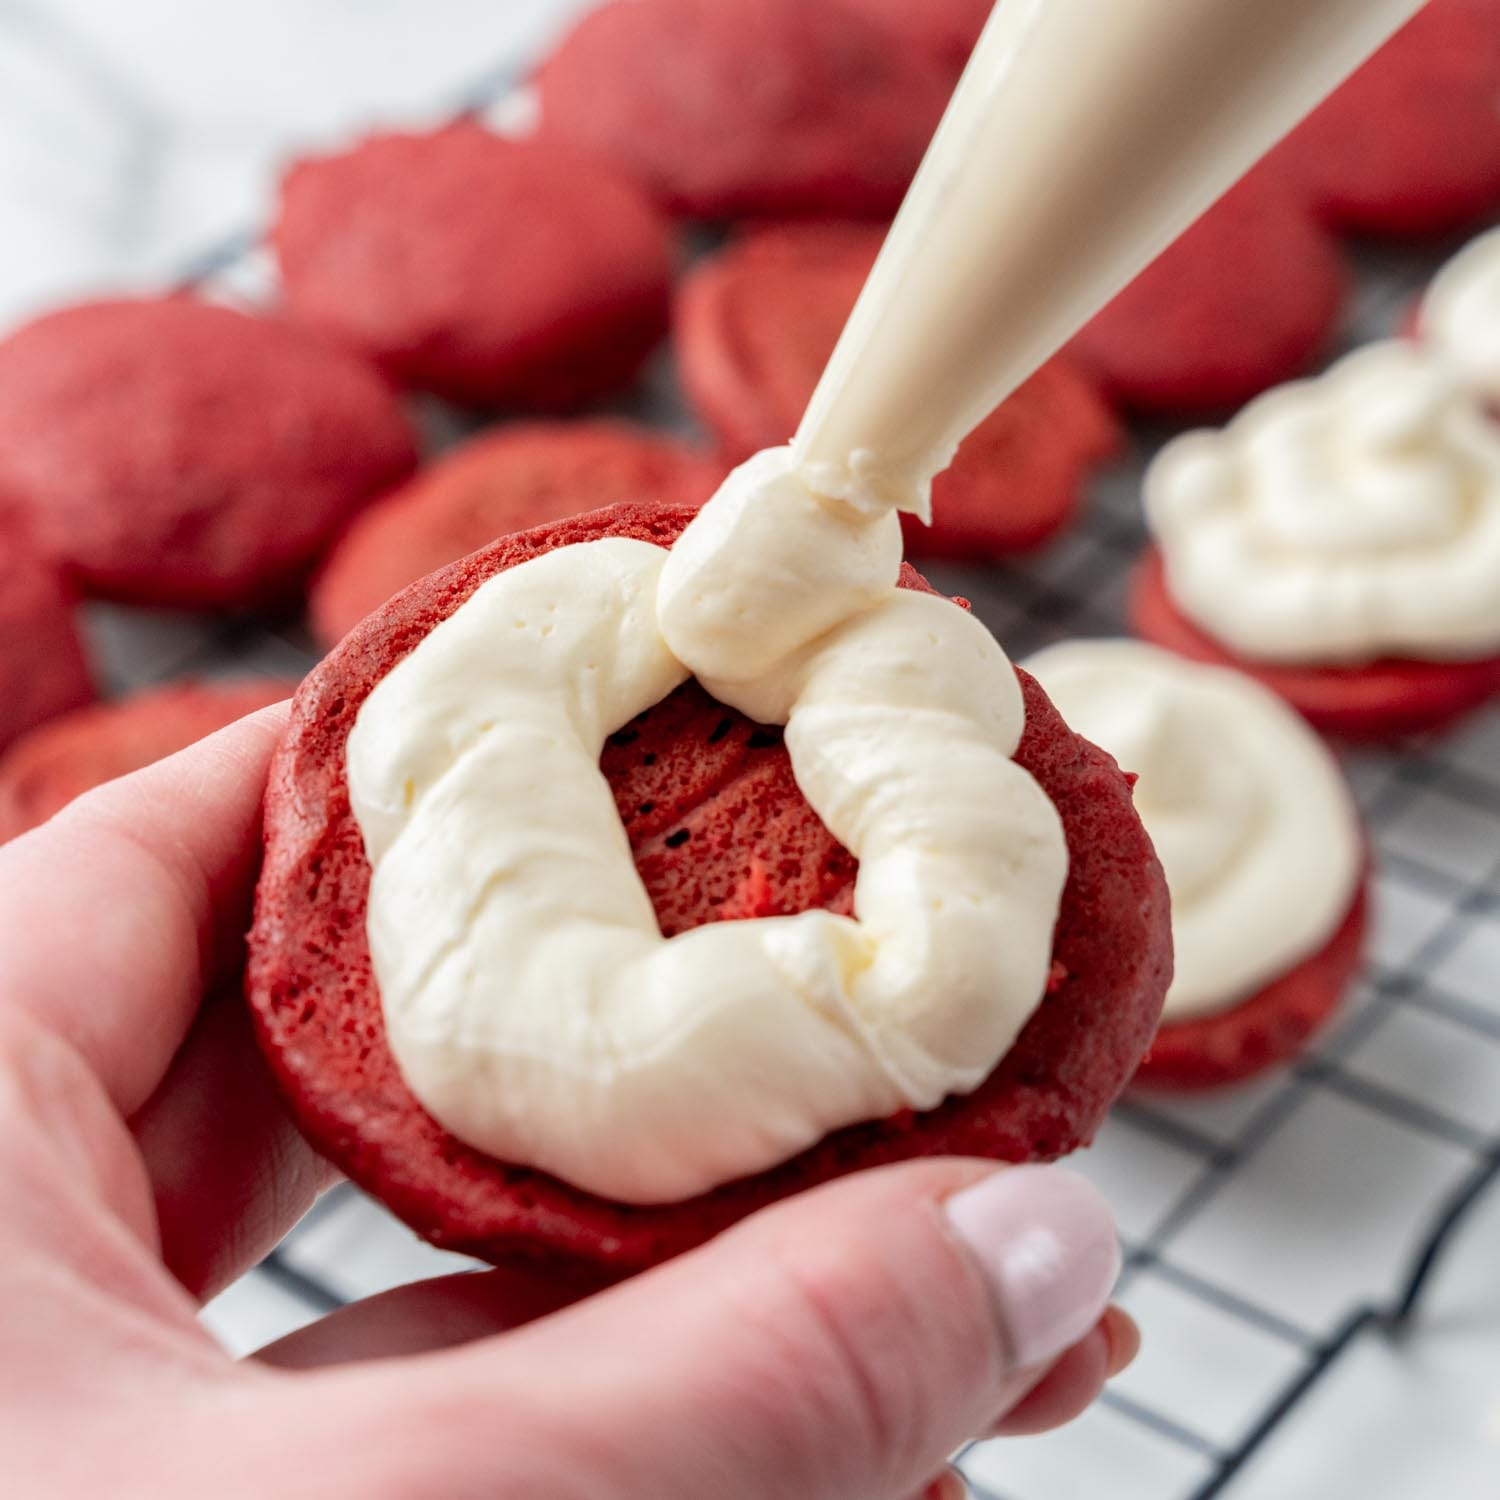
- Cream Cheese Filling – Red velvet cake would not be complete without rich and tangy cream cheese frosting, so this recipe includes plenty of it so that each whoopie pie is perfectly filled.
- Step by Step Instructions – Don’t be intimidated by the idea of baking homemade whoopie pies from scratch. It’s truly very easy, and I’ll show you exactly how to do it.
Key Ingredients
Here’s what you need to make the perfect red velvet whoopie pies:
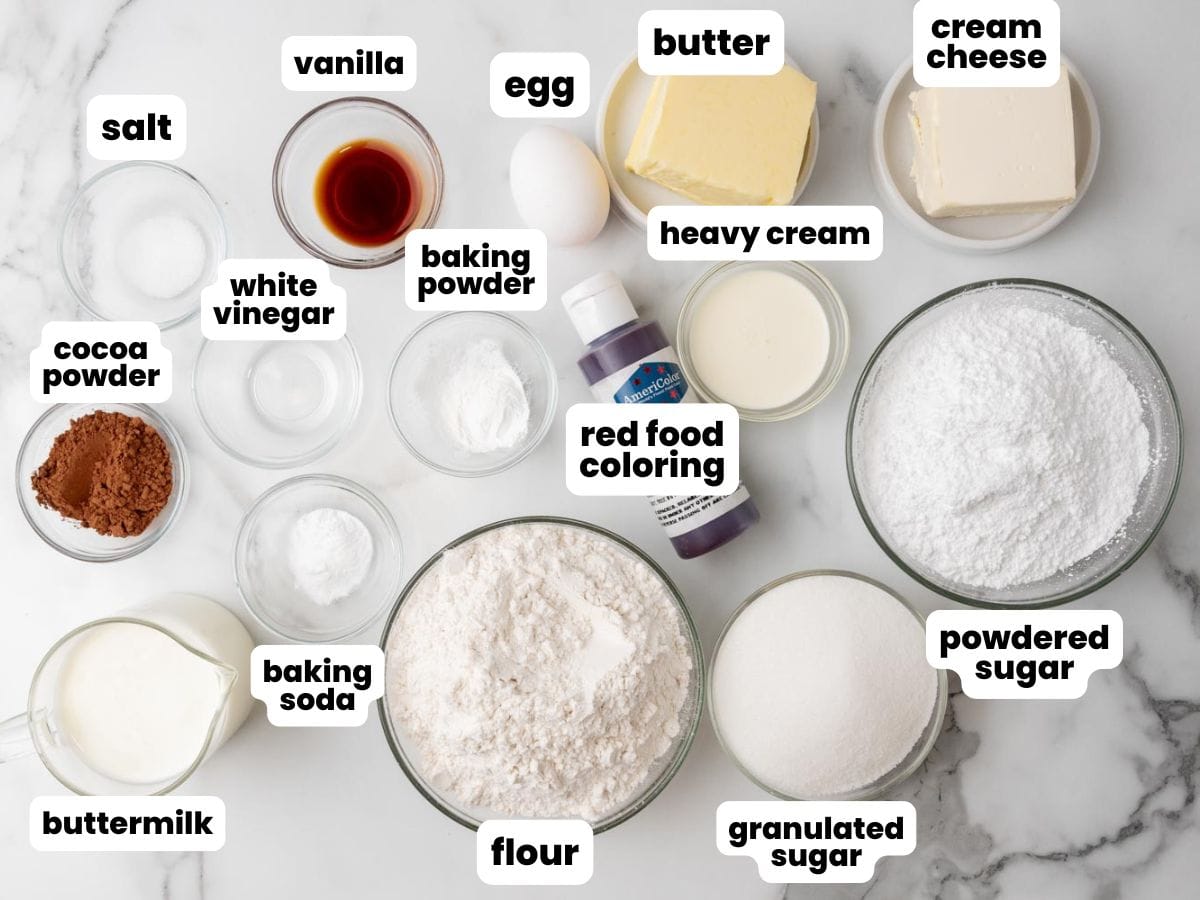
Complete list of ingredients and amounts can be found in the recipe card below.
- Baking Powder and Baking Soda: Baking powder and baking soda give the cookies their cake-like texture.
- Cocoa Powder: The flavor of red velvet is actually chocolate! All-natural cocoa powder adds that flavor as well as a dark color.
- Red Food Coloring: Use gel food coloring to enhance the red color of the cake batter. Liquid food coloring won’t work nearly as well.
- Vinegar and Buttermilk: These two ingredients add acidity to the batter. The chemical reaction that happens is what makes the cake velvety smooth, and it adds a slight tangy flavor too.
- Butter: Use unsalted butter, and be sure to let it soften to room temperature.
- For the Filling: A divine combination of softened cream cheese, butter, powdered sugar, heavy cream, and vanilla extract.
How To Make Red velvet Whoopie Pies
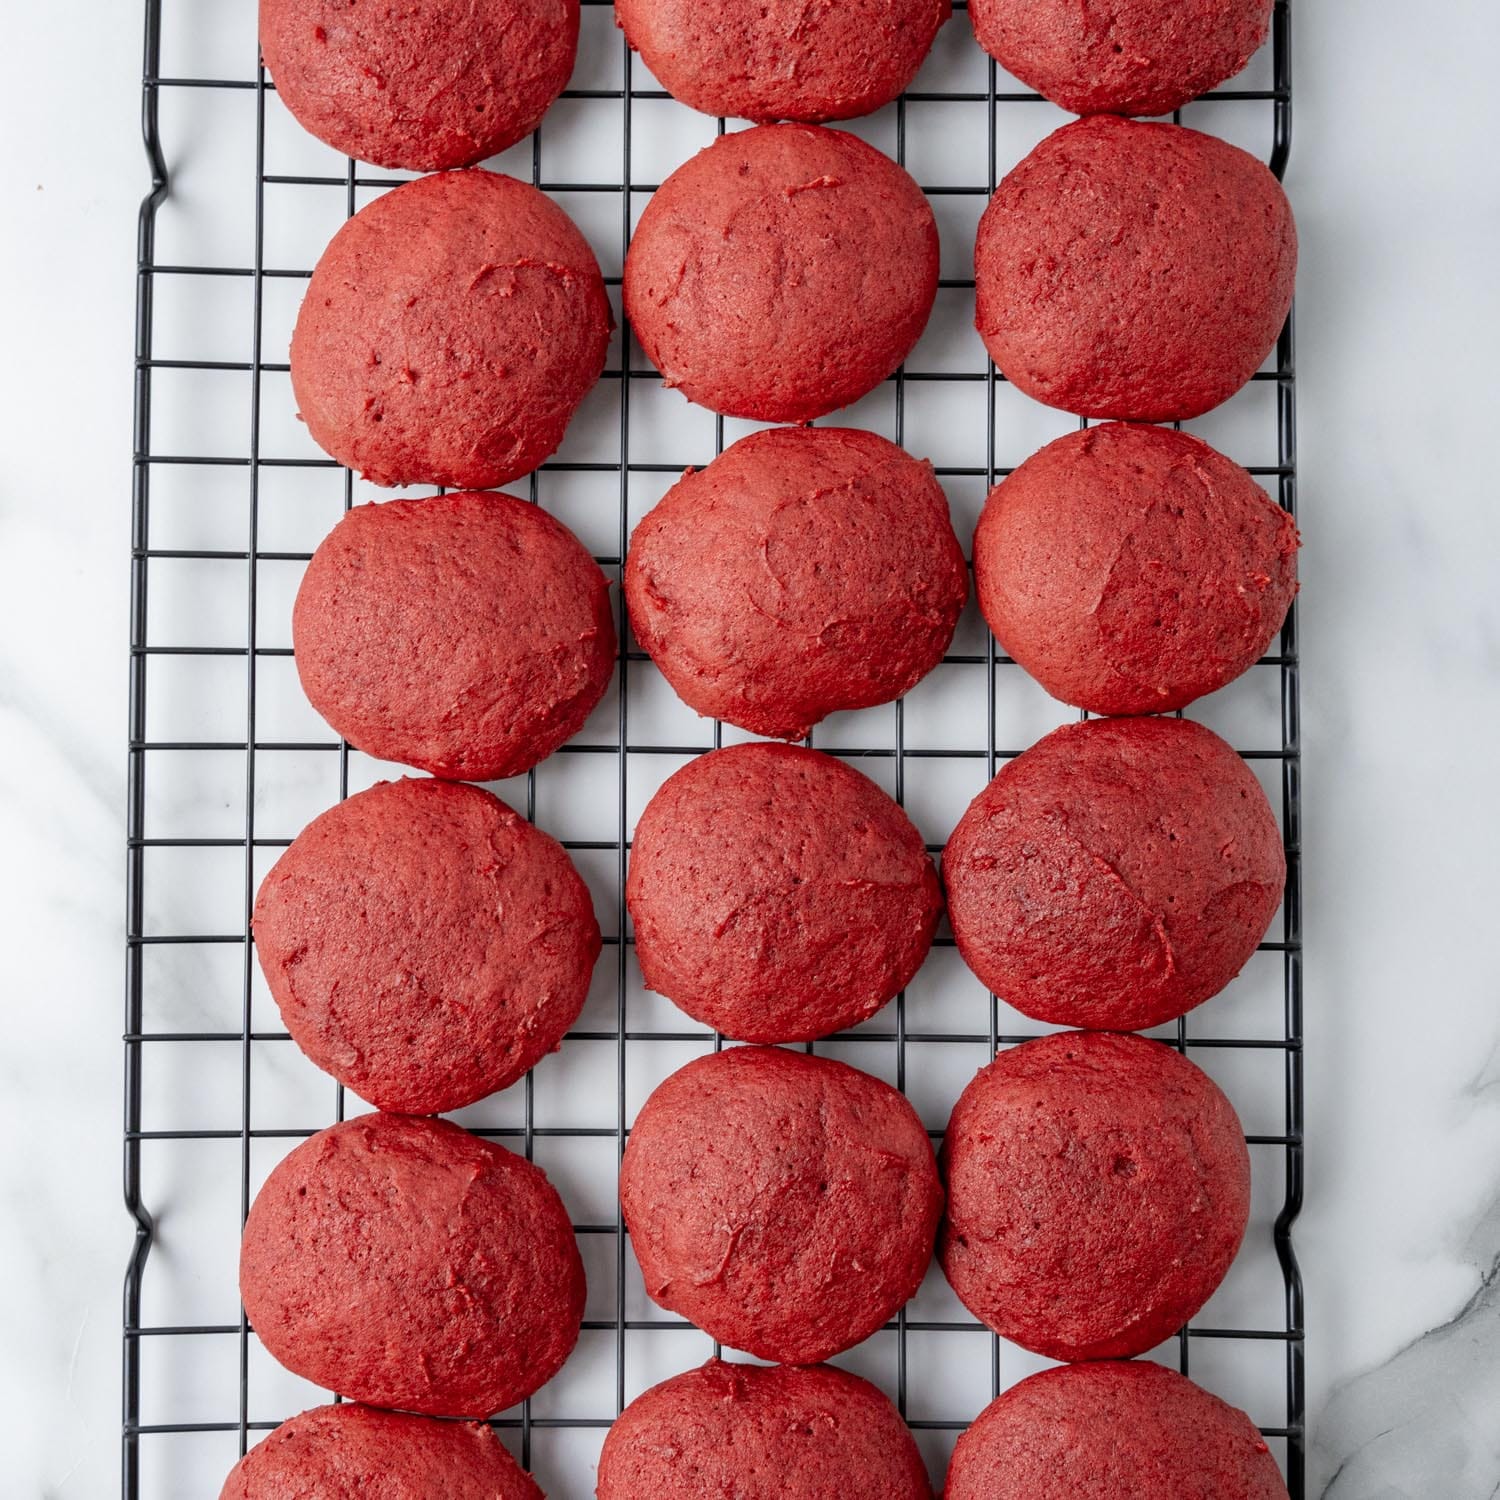
Start by preheating your oven to 350°F (180°C) and lining two cookie sheets with parchment paper or silicone baking mats.
Tip!
The red velvet cake cookies must be completely cooled before you add the frosting. If the cookies are still warm, the cream cheese filling will melt, and nobody wants that!
Recipe Tips
- Use room temperature ingredients. Anything that’s usually cold, including the butter, egg, buttermilk, and cream cheese, need to be at room temperature before you get started with the recipe. Let everything sit out on the counter for 30 minutes to an hour.
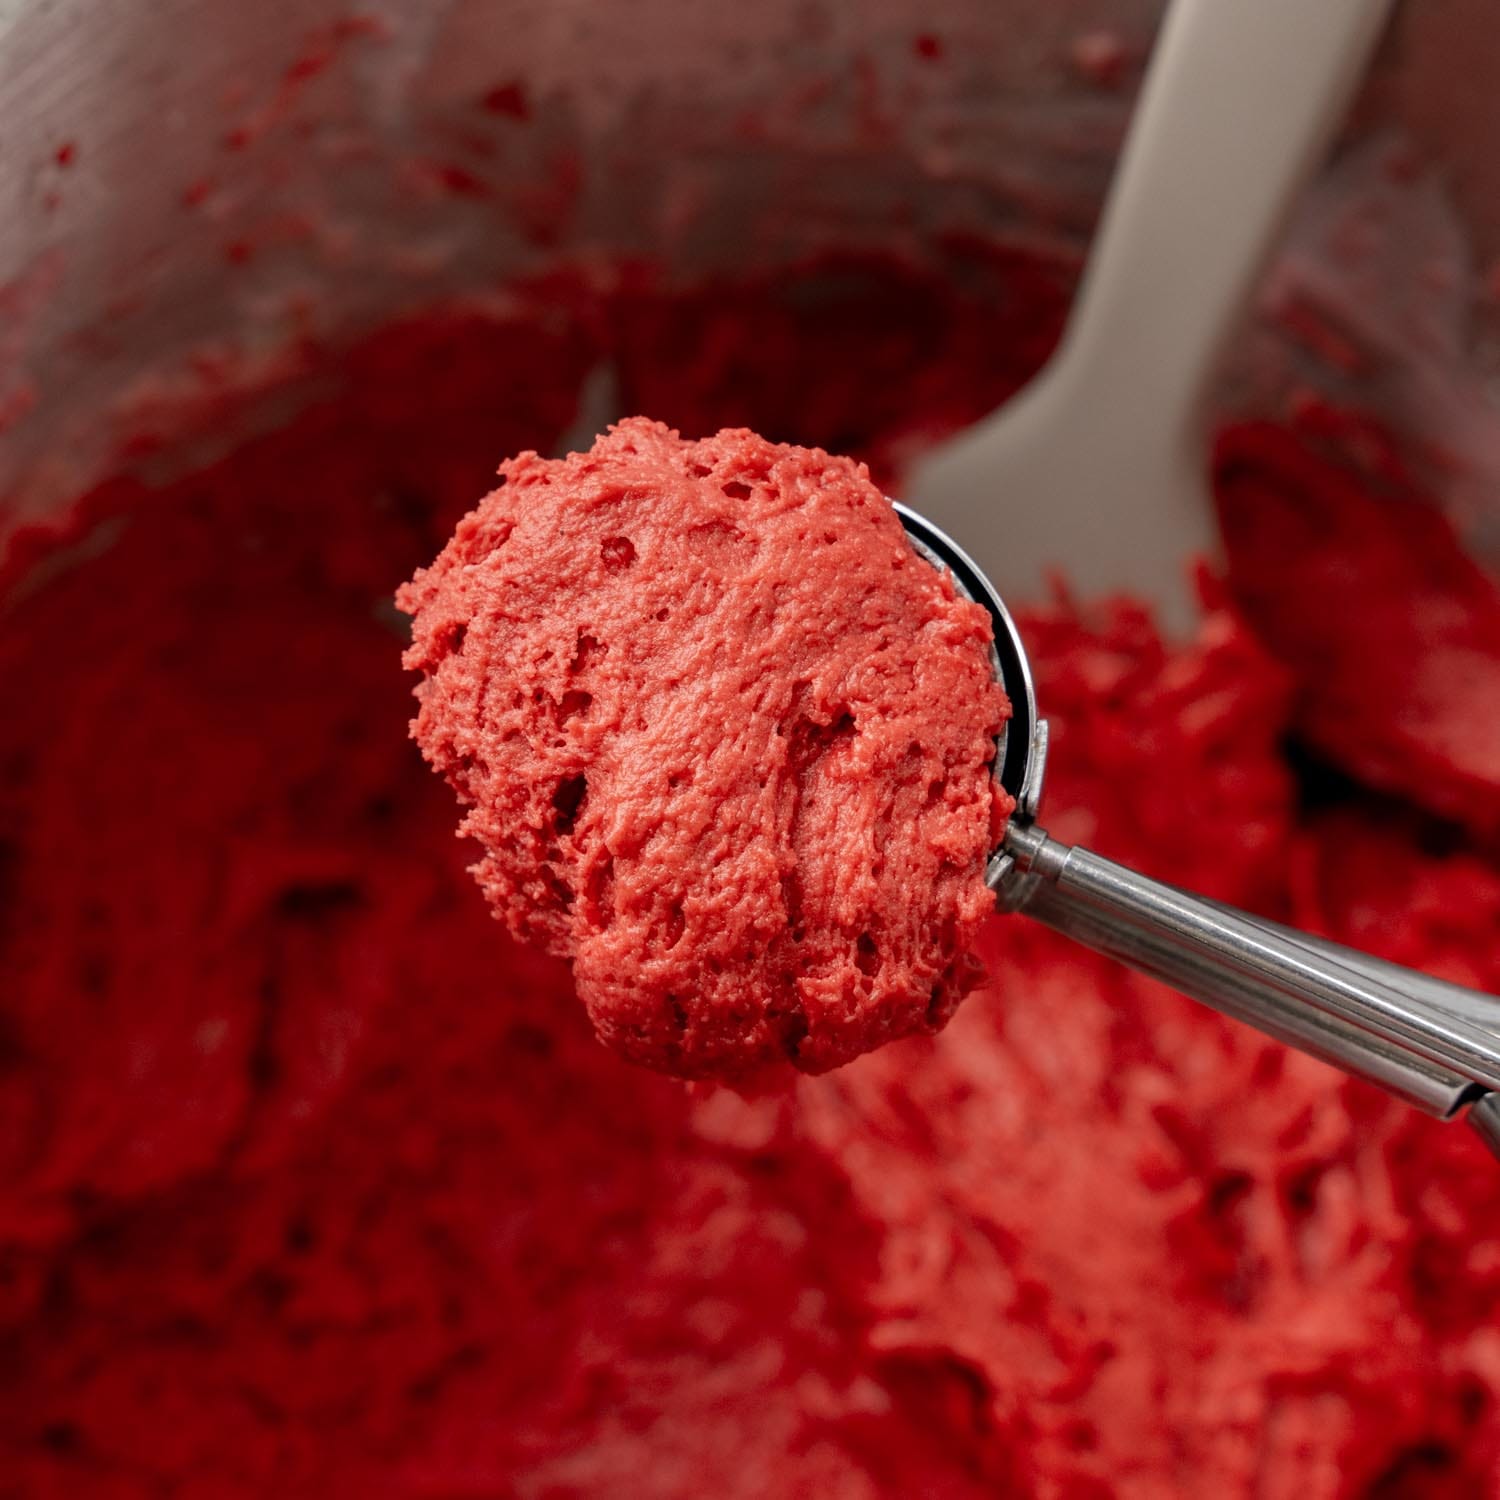
- Make the cookies the same size so that each sandwich will be even. A cookie scoop is the best tool to ensure that the batter is portioned evenly.
- For extra decoration, sprinkle the red velvet whoopie pies with powdered sugar just before serving.

How to Store Whoopie Pies
Because the filling for this red velvet whoopie pie recipe is made with cream cheese, these should be stored in the refrigerator. They’ll stay fresh this way for up to 5 days.
Before enjoying, I like to let them sit out at room temperature for a bit so that the frosting softens up.
Freeze whoopie pies by wrapping each one individually in plastic wrap, then placing in a freezer bag or container. Freeze for up to 6 months. Thaw on the counter before eating.

Other Whoopie Pie Recipes to Bake
Depending on the time of year, I like to make a few different whoopie pie flavors! Try Pumpkin Whoopie Pies in the fall, Gingerbread Whoopie Pies for Christmas, and Vanilla Whoopie Pies for all of the other occasions.
Recipe FAQs
Why are they called Whoopie Pies?
As the story goes, these filled cake treats got their name from the people eating them! Small cake sandwiches were often made and put into the lunchboxes of working men, who would of course exclaim, “whoopie!” when they found such a delicious treat inside.
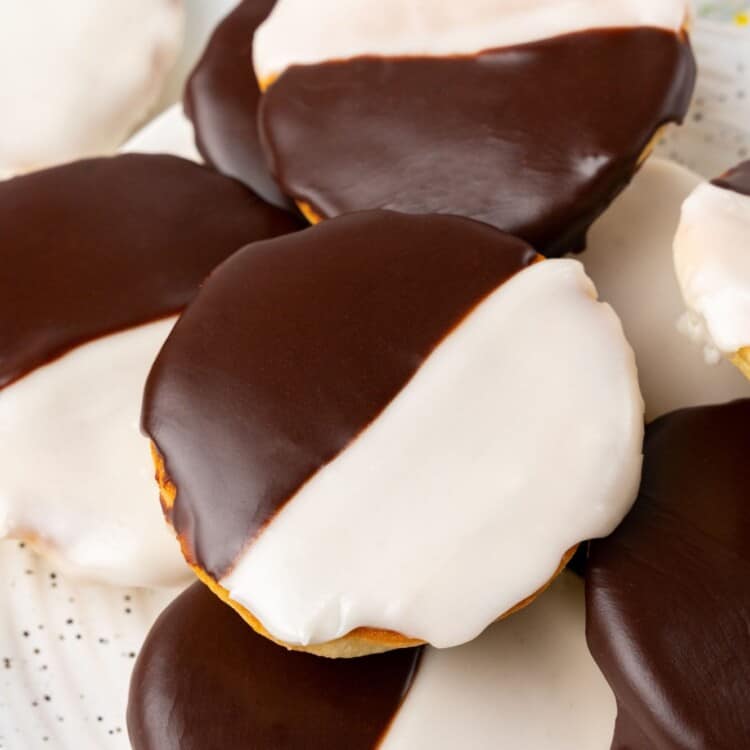
Also worth noting, these are called different things in different places. You might refer to whoopie pies as gobs, black moons, moon pies, or black and whites (particularly referring to a chocolate whoopie pie with vanilla frosting).
Can I make whoopie pies ahead of time?
Yes! These store well in the fridge for up to 4-5 days, or in the freezer for up to 6 months.
Do whoopie pies require a special pan?
Special pans do exist for baking cake batter in uniform circular shapes for this purpose. I’ve developed this recipe to not need one though, so you’ll be fine just using a sheet pan lined in parchment paper here.
Can I make red velvet whoopie pies without red dye?
The red gel food coloring added to this recipe gives the cookies a vibrant color, but the flavor will still be there without it. The color made by mixing natural cocoa powder and acidic buttermilk will be slightly red. You can also experiment with natural colorings such as beet root powder in this recipe.


Enjoy this fun new way to enjoy red velvet cake, in a handheld whoopie pie! Be sure to pin this recipe so you can make them again and again.
Did you make this? Be sure to leave a review below and tag me on Facebook, Instagram, or Pinterest!
Red Velvet Whoopie Pies
Equipment
- Cookie Sheets
- Stand-mixer or hand mixer
- Medium cookie scoop, 1.5 tablespoons
- Piping Bag optional
Ingredients
Cookies:
- 2 ½ cups (300 g) all purpose flour
- 2 tablespoons (10 g) cocoa powder
- 1 teaspoon baking soda
- 1 teaspoons baking powder
- ½ teaspoon salt
- ½ cup (113 g) unsalted butter softened to room temperature
- 1 cup (200 g) granulated sugar
- 1 large egg at room temperature
- 2 teaspoons red food coloring
- 1 teaspoon pure vanilla extract
- ½ teaspoon white vinegar
- 1 cup (240 ml) buttermilk at room temperature
Frosting:
- 4 ounces (113 g) cream cheese softened to room temperature
- ¼ cup (57 g) unsalted butter softened to room temperature
- 1 ½ cups (180 g) powdered sugar
- 1-2 tablespoons heavy cream
- ½ teaspoon pure vanilla extract
Instructions
For the Cookies:
- Preheat your oven to 350°F (180°C) or 160°C if you have a fan oven. Line 3 cookie sheets with parchment paper or silicone baking mats.
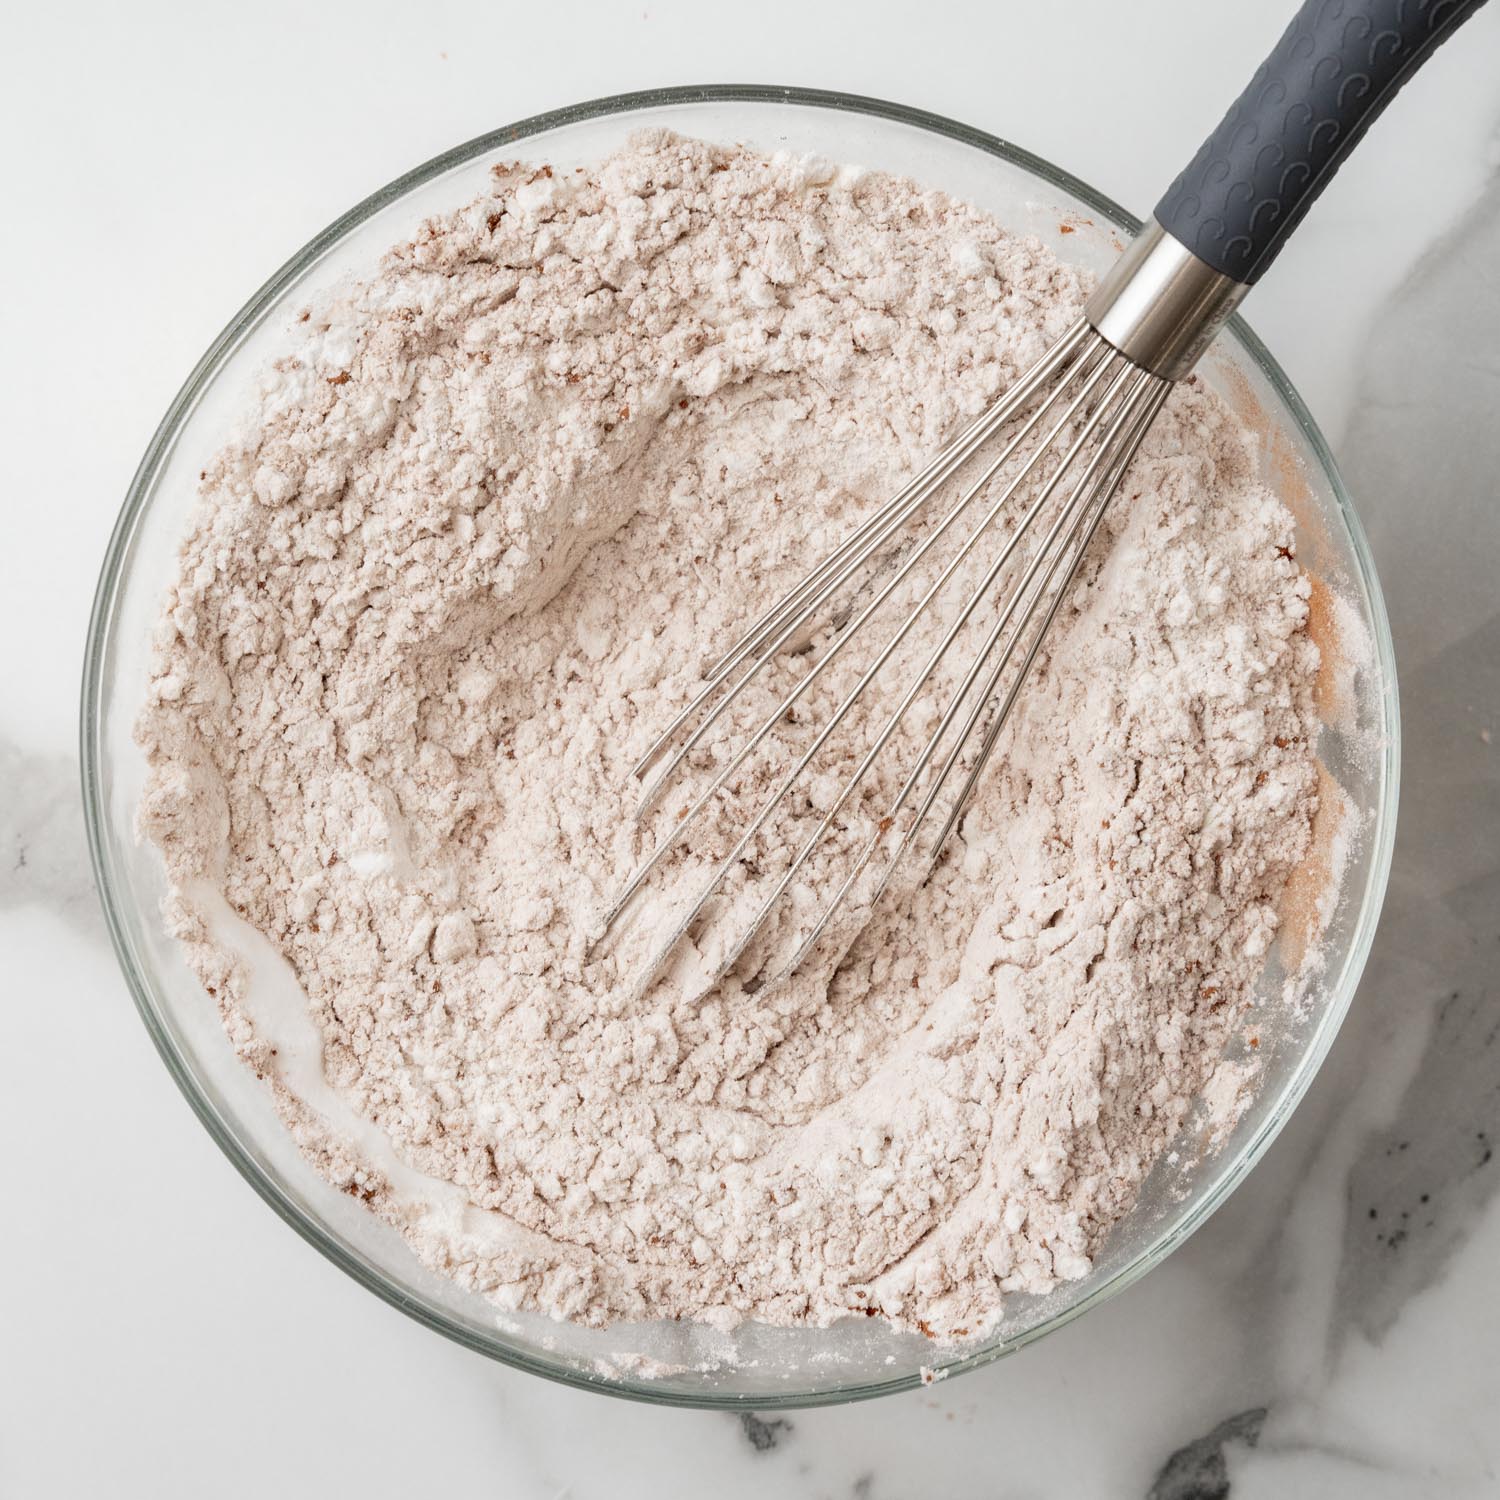
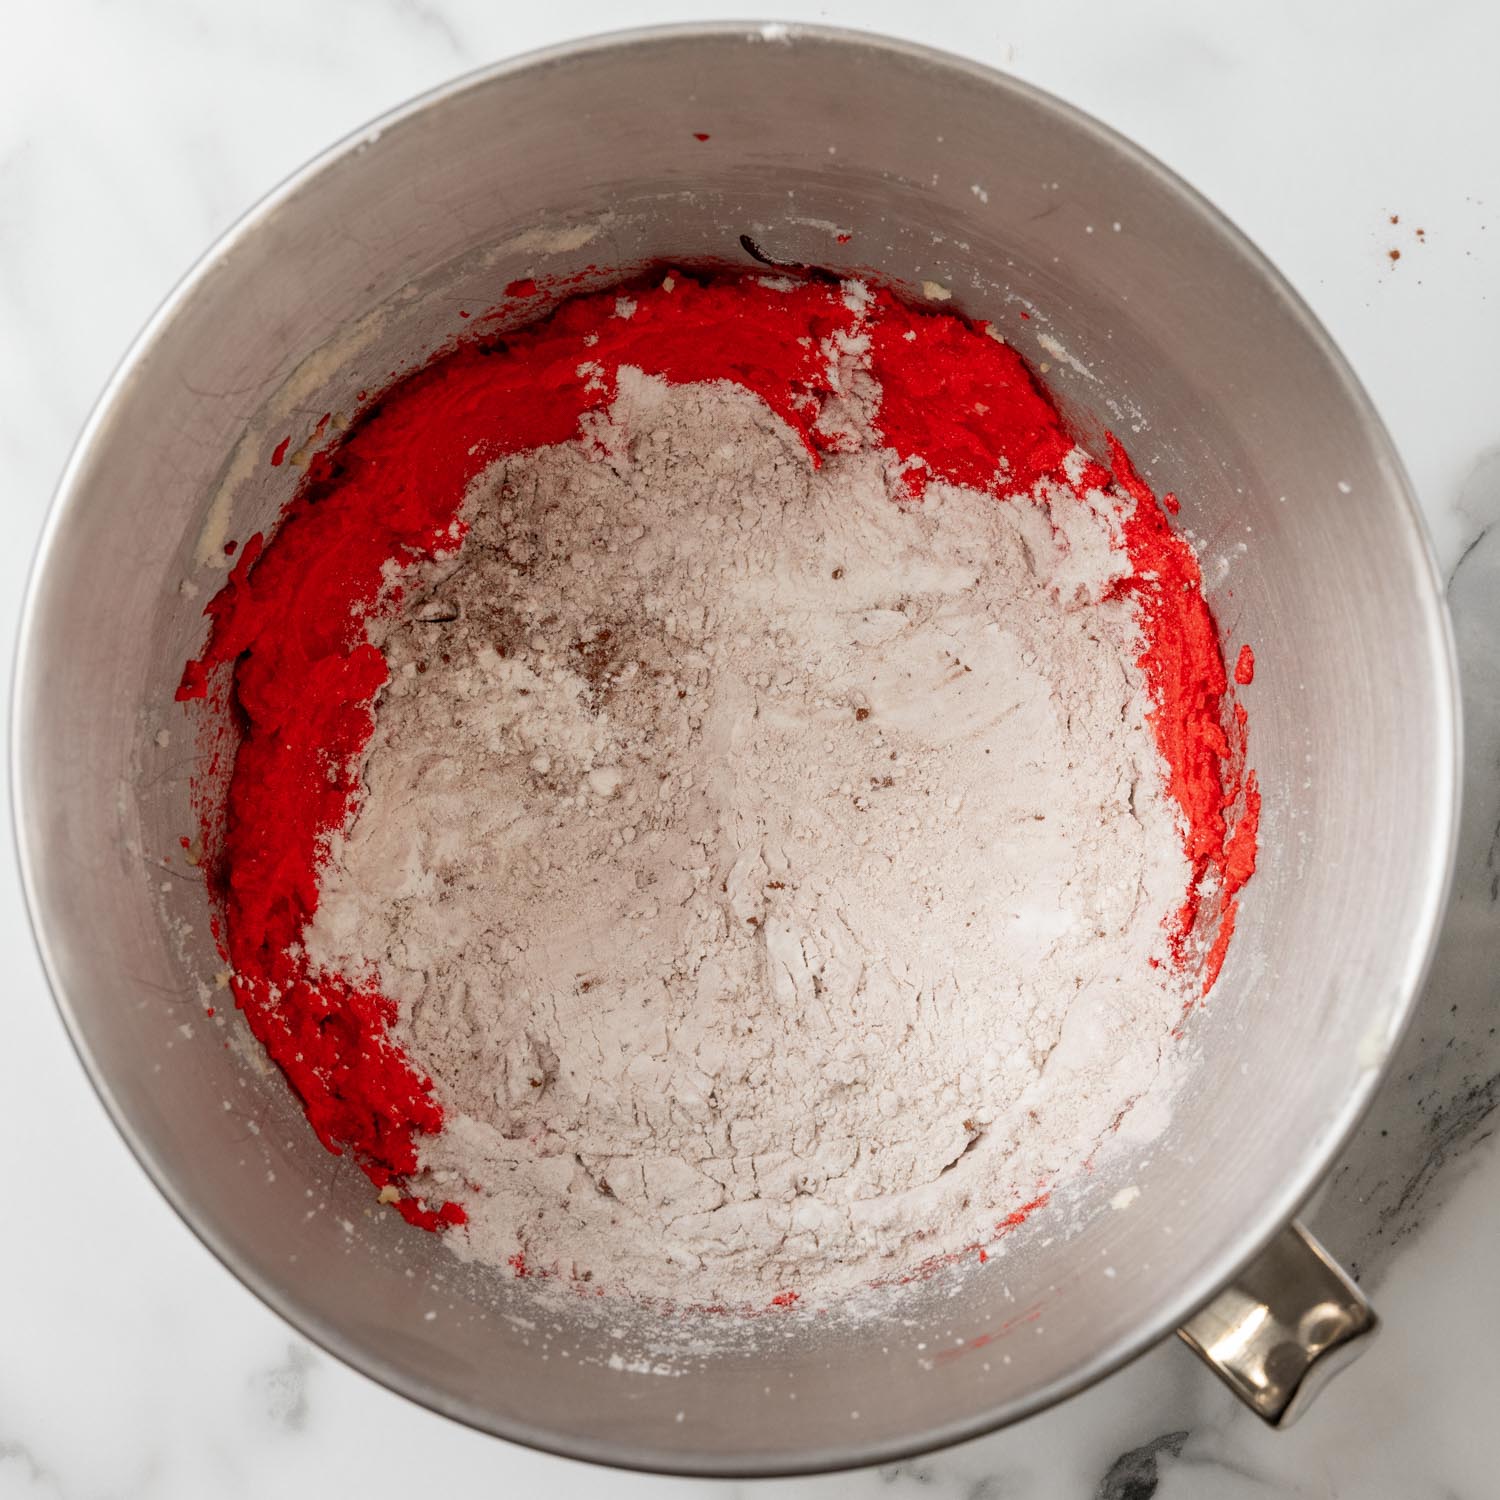
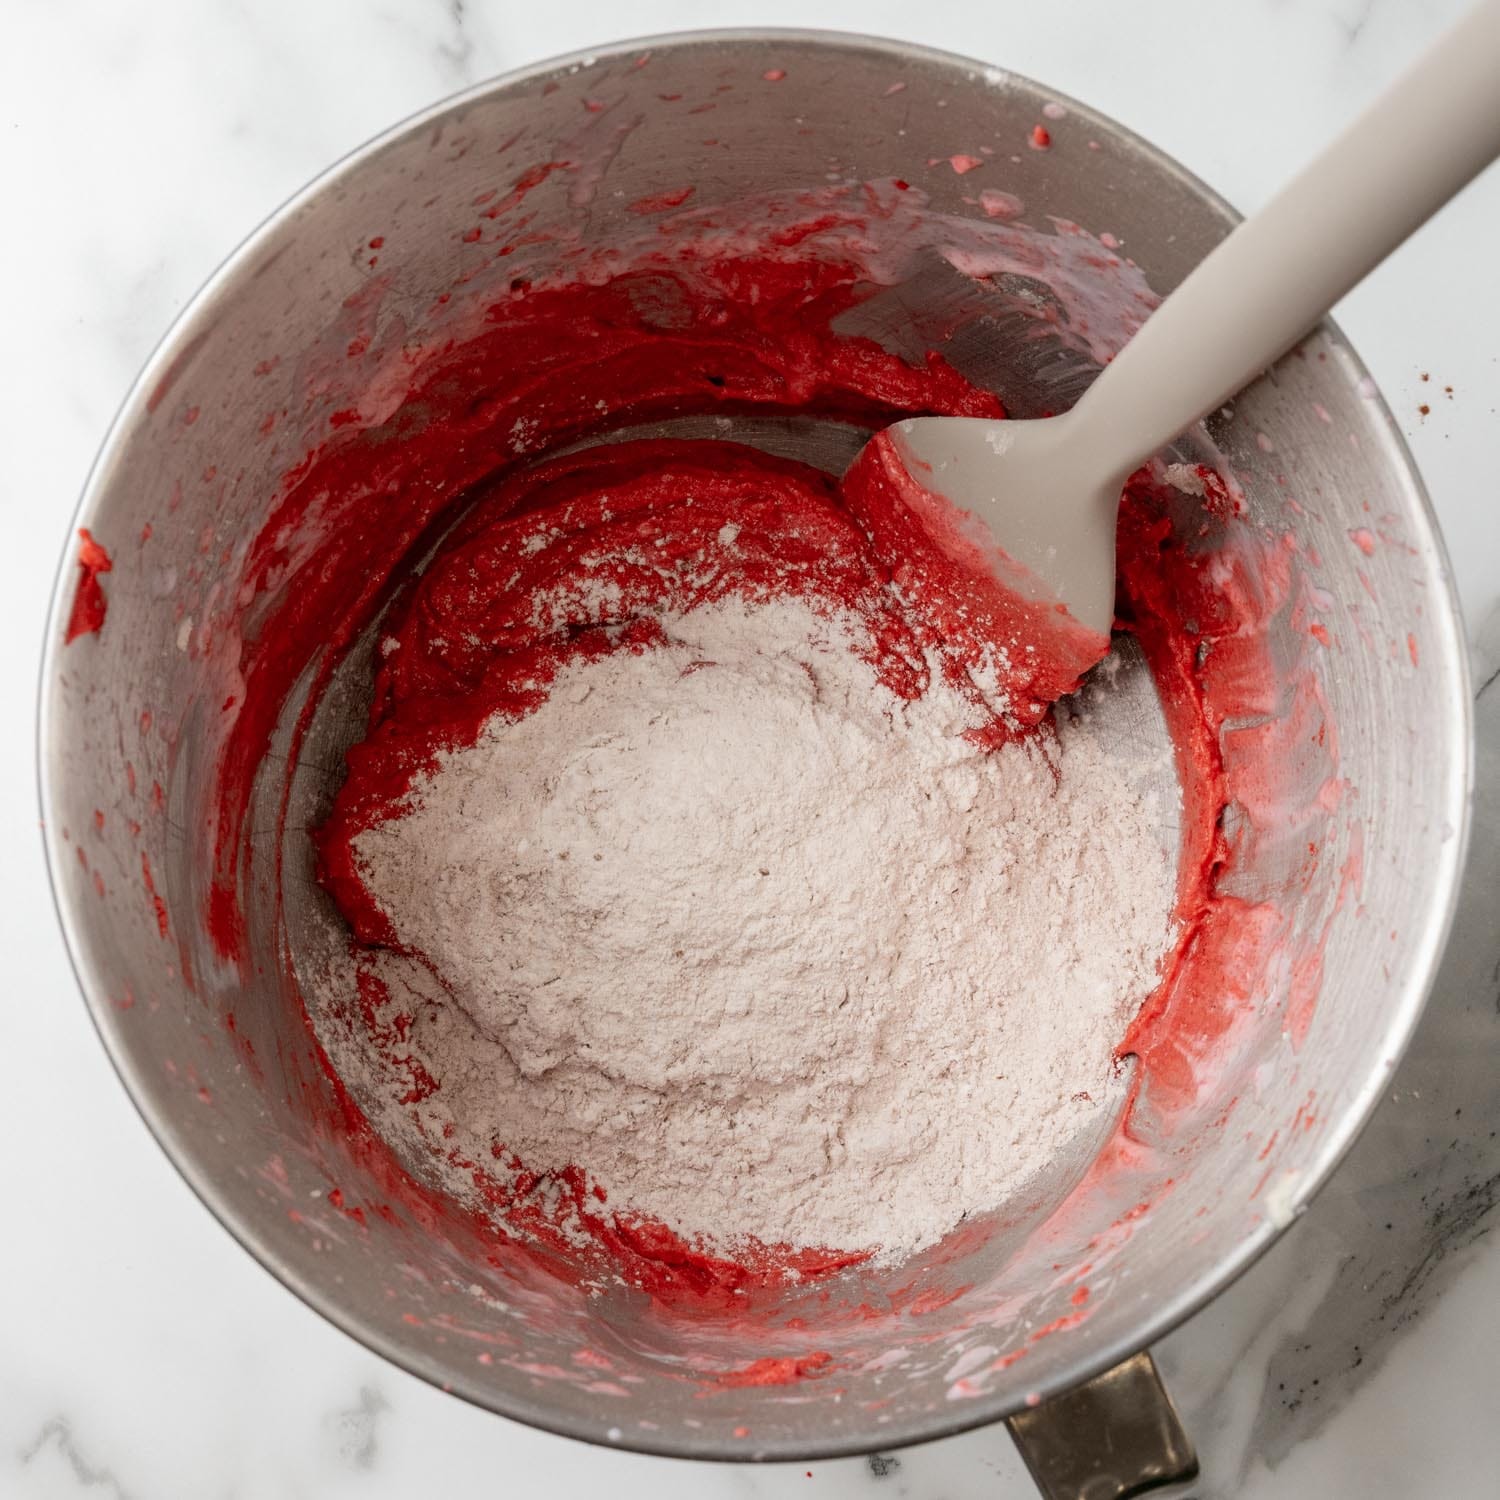
- In a large mixing bowl, whisk together the flour, cocoa powder, baking soda, baking powder, and salt; set aside.
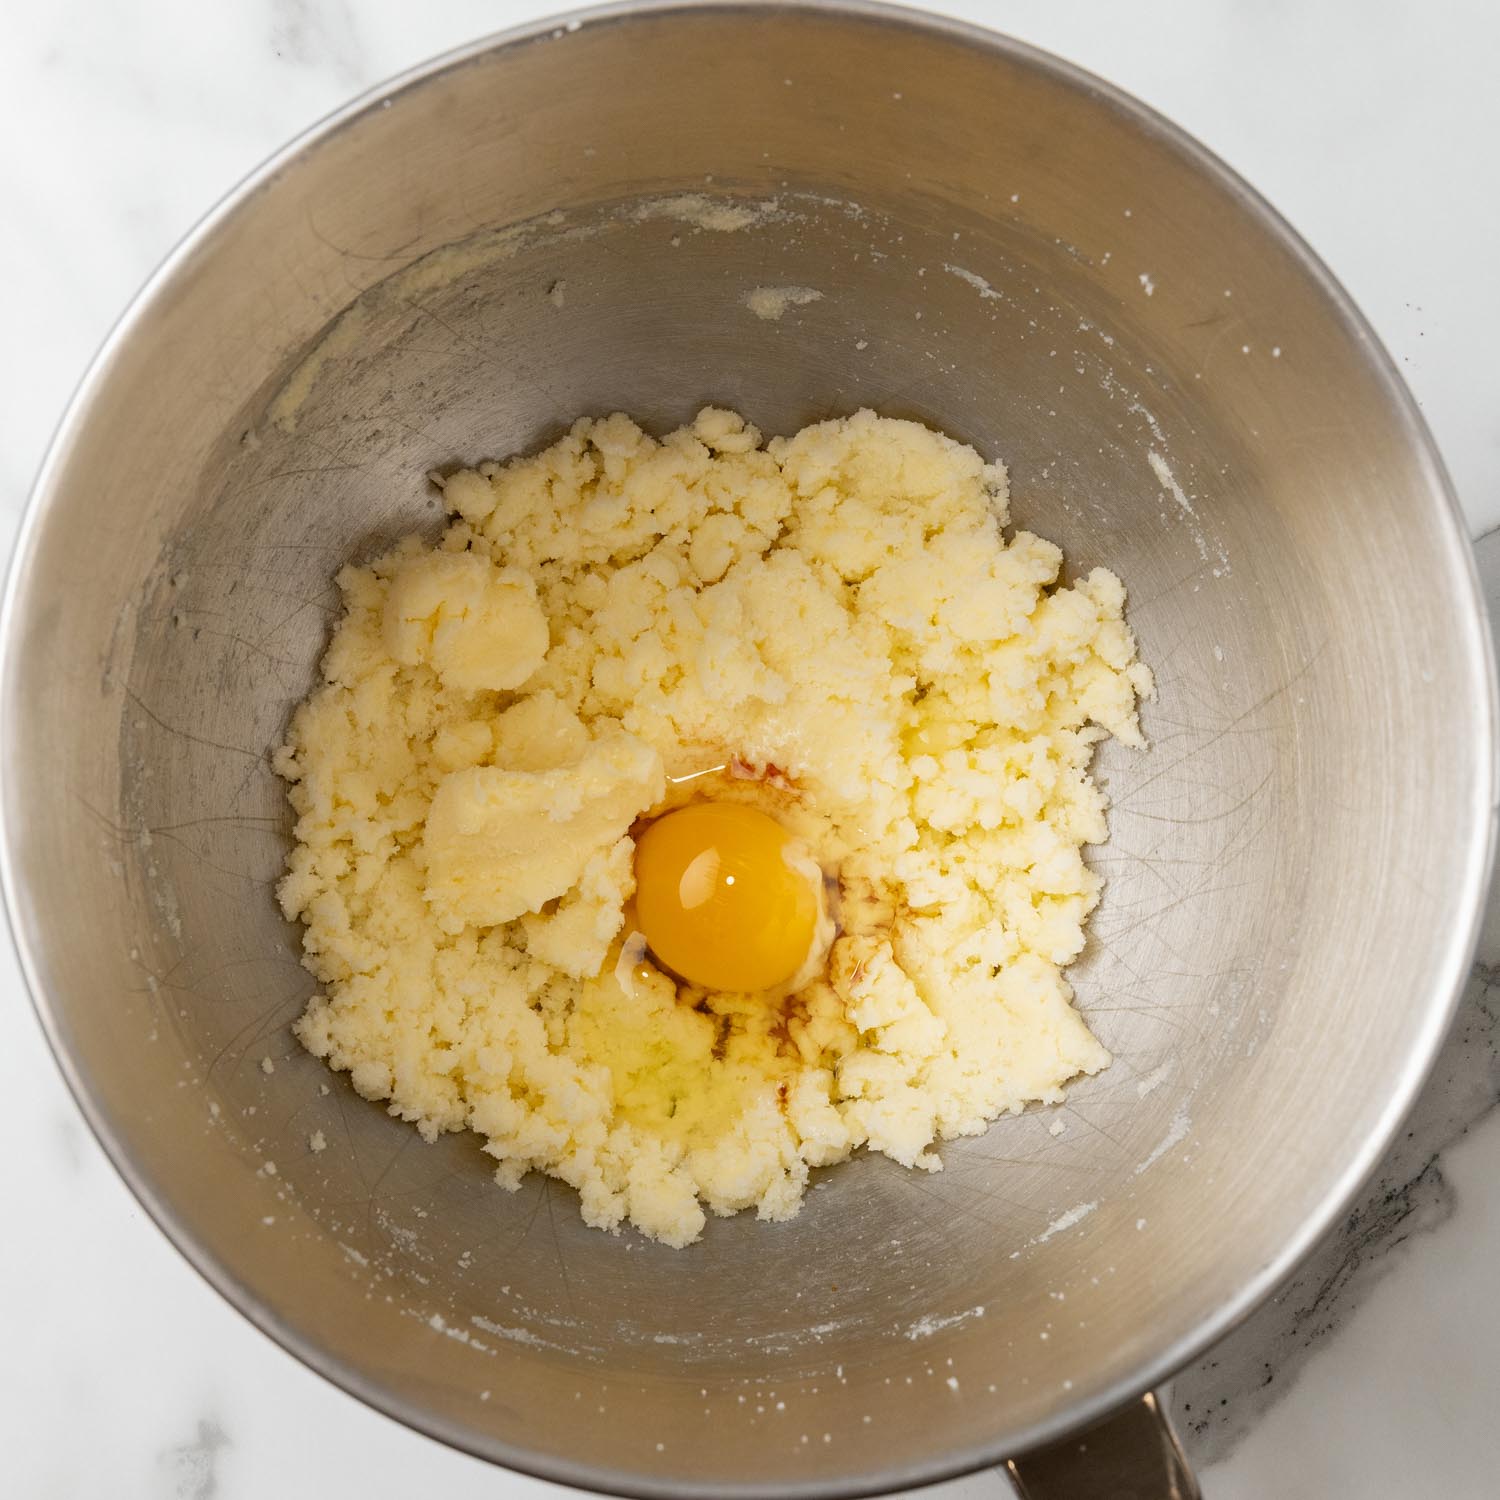
- In a separate bowl, cream together the butter and sugar until light and fluffy, about 2-3 minutes.
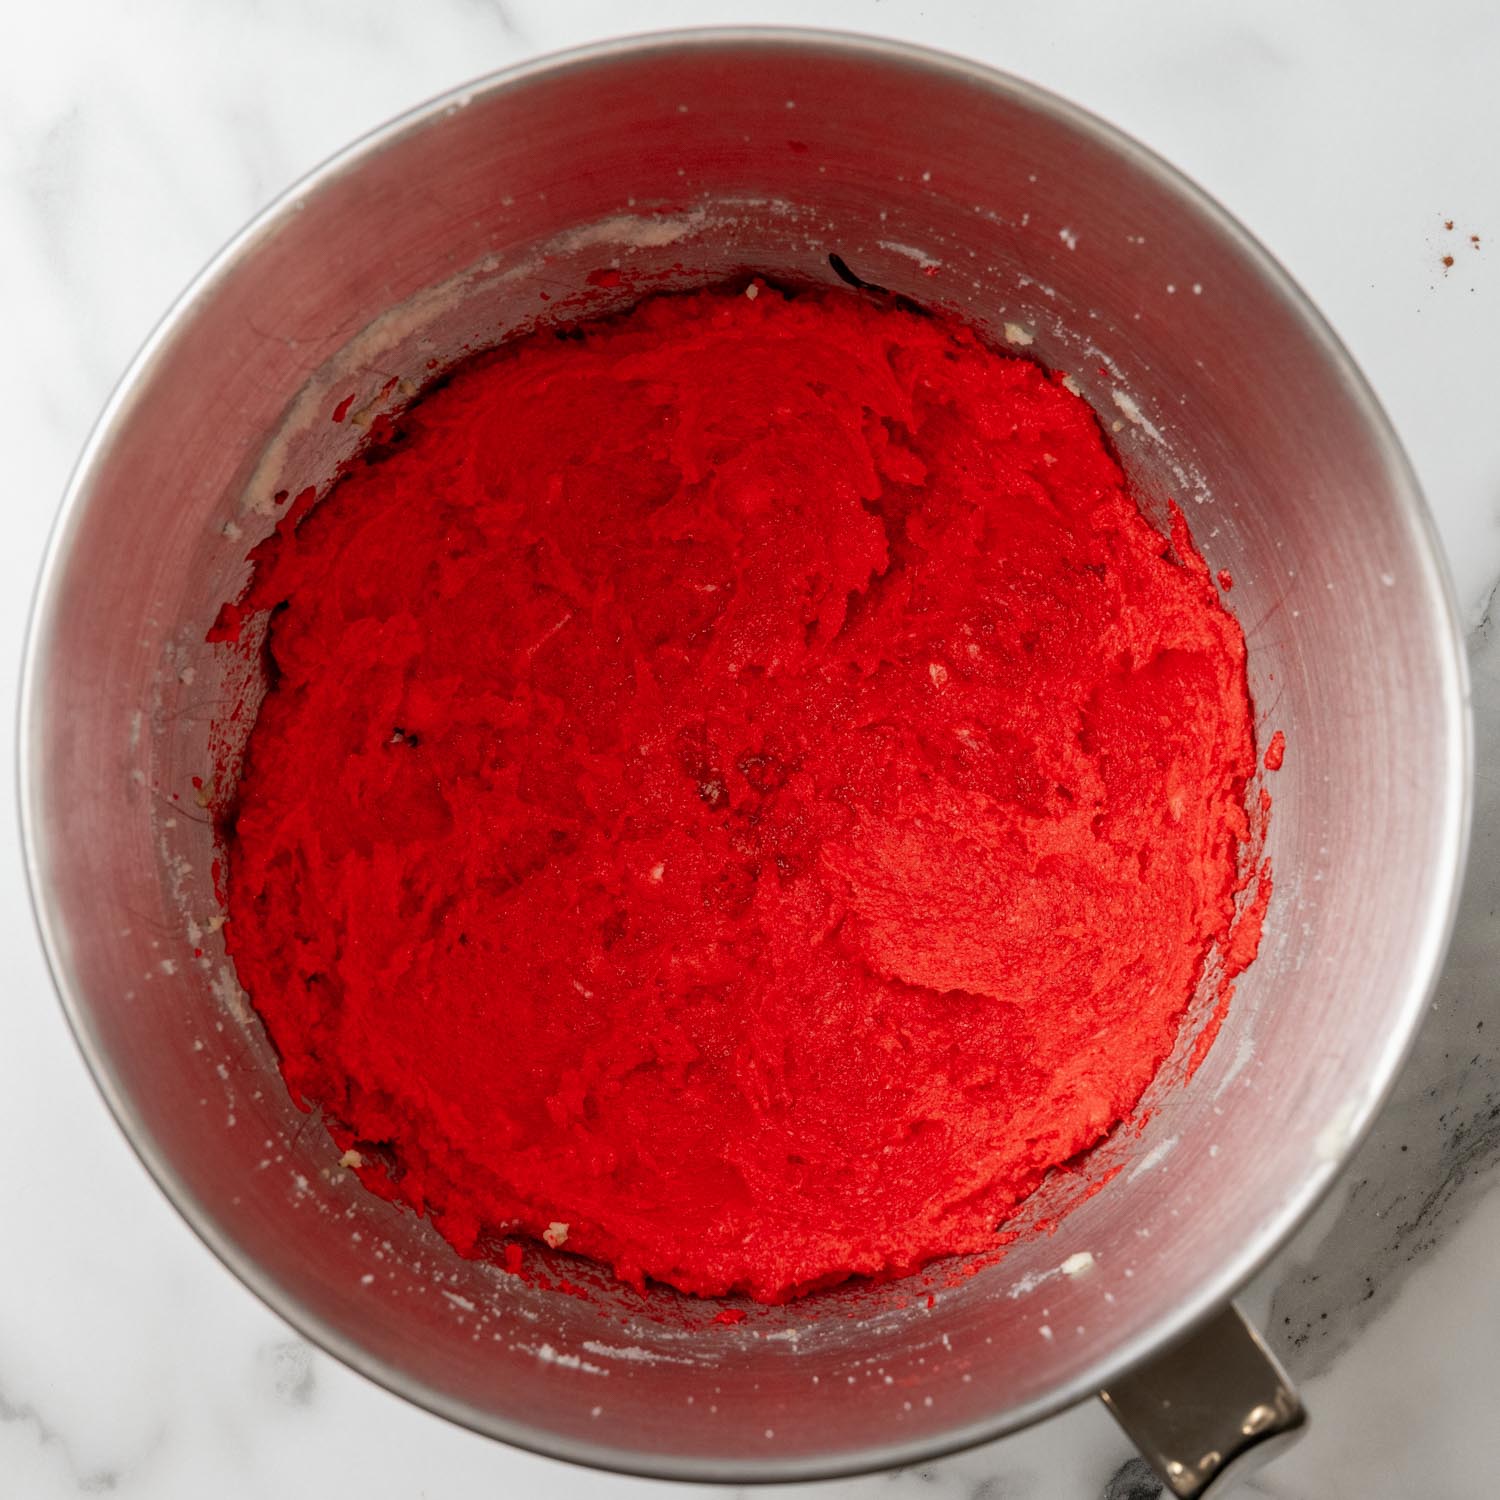
- Mix in the egg, red food coloring, vanilla extract, and white vinegar until fully combined.
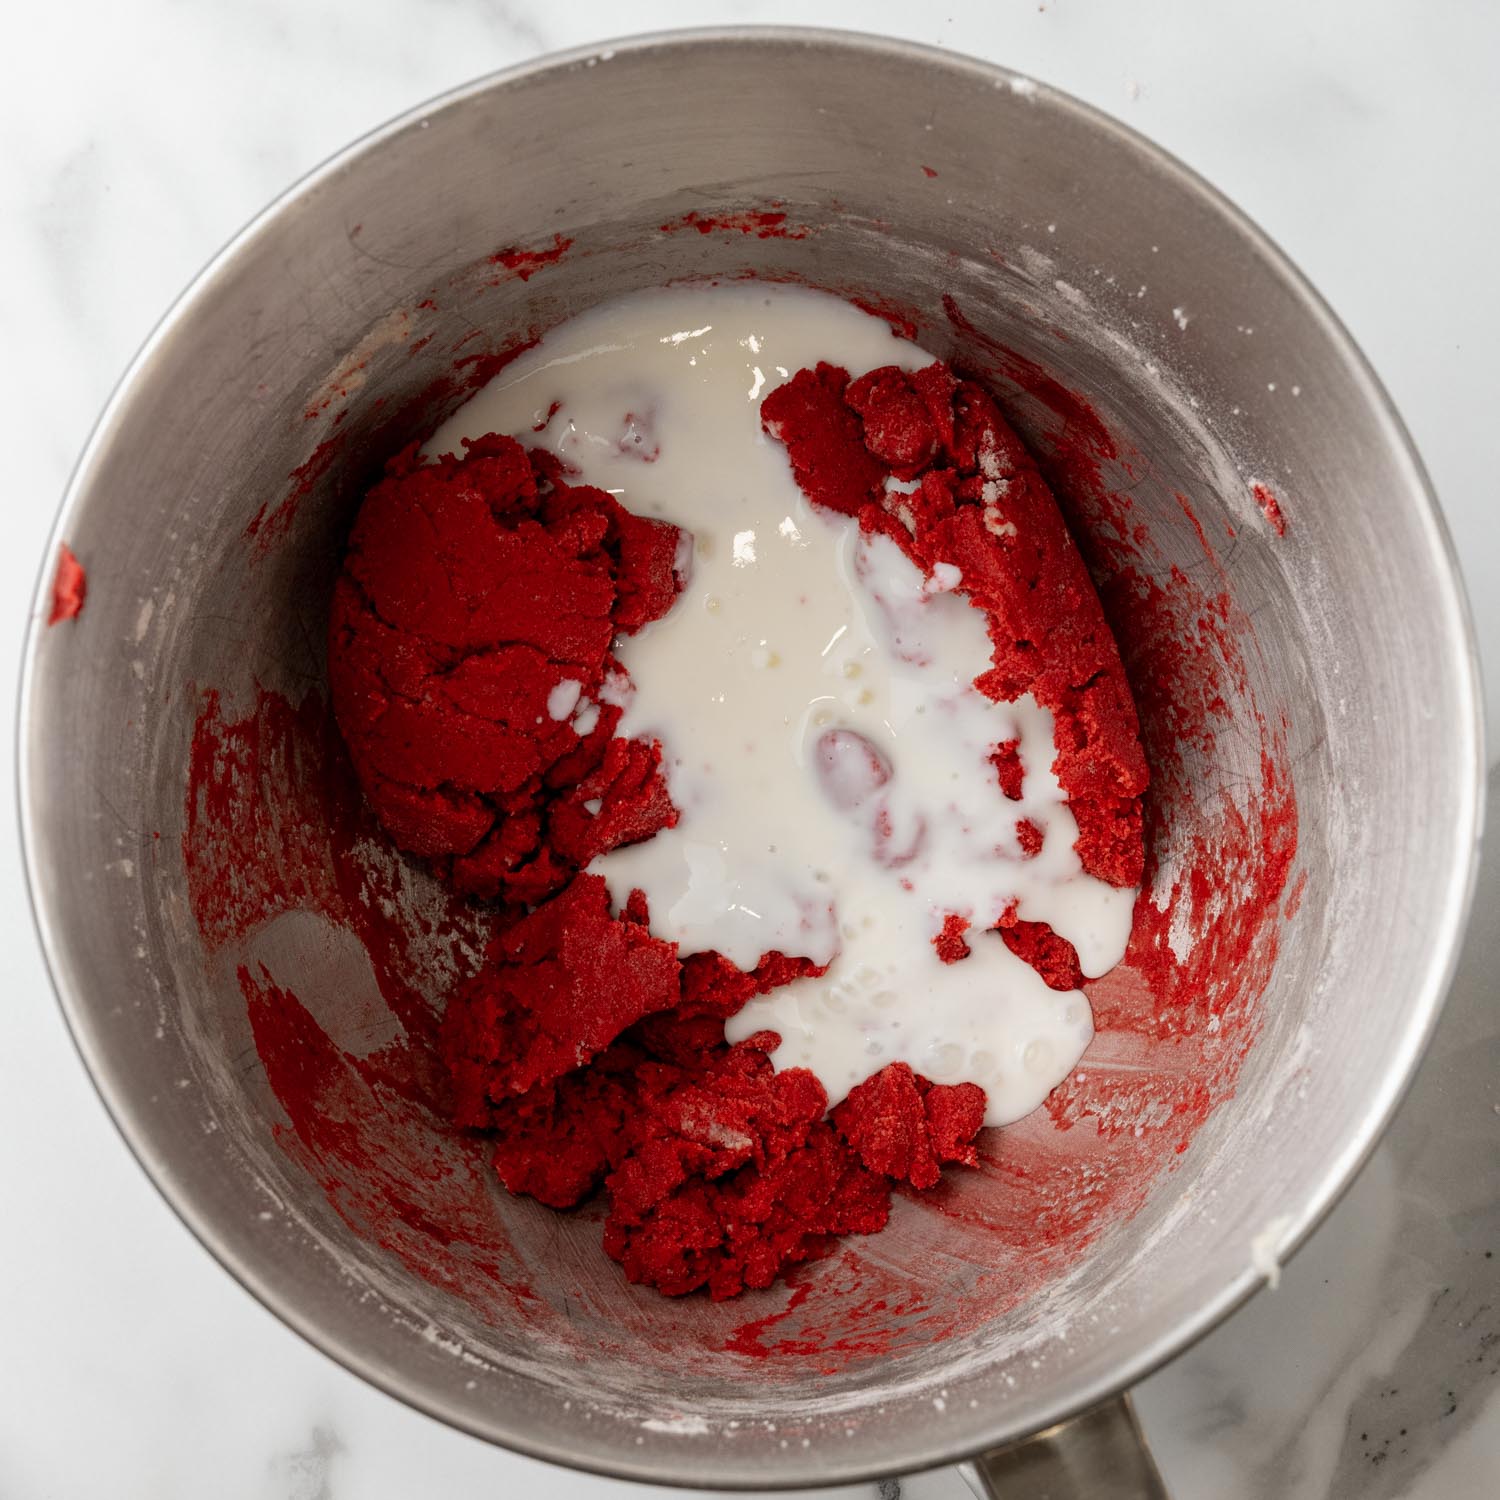
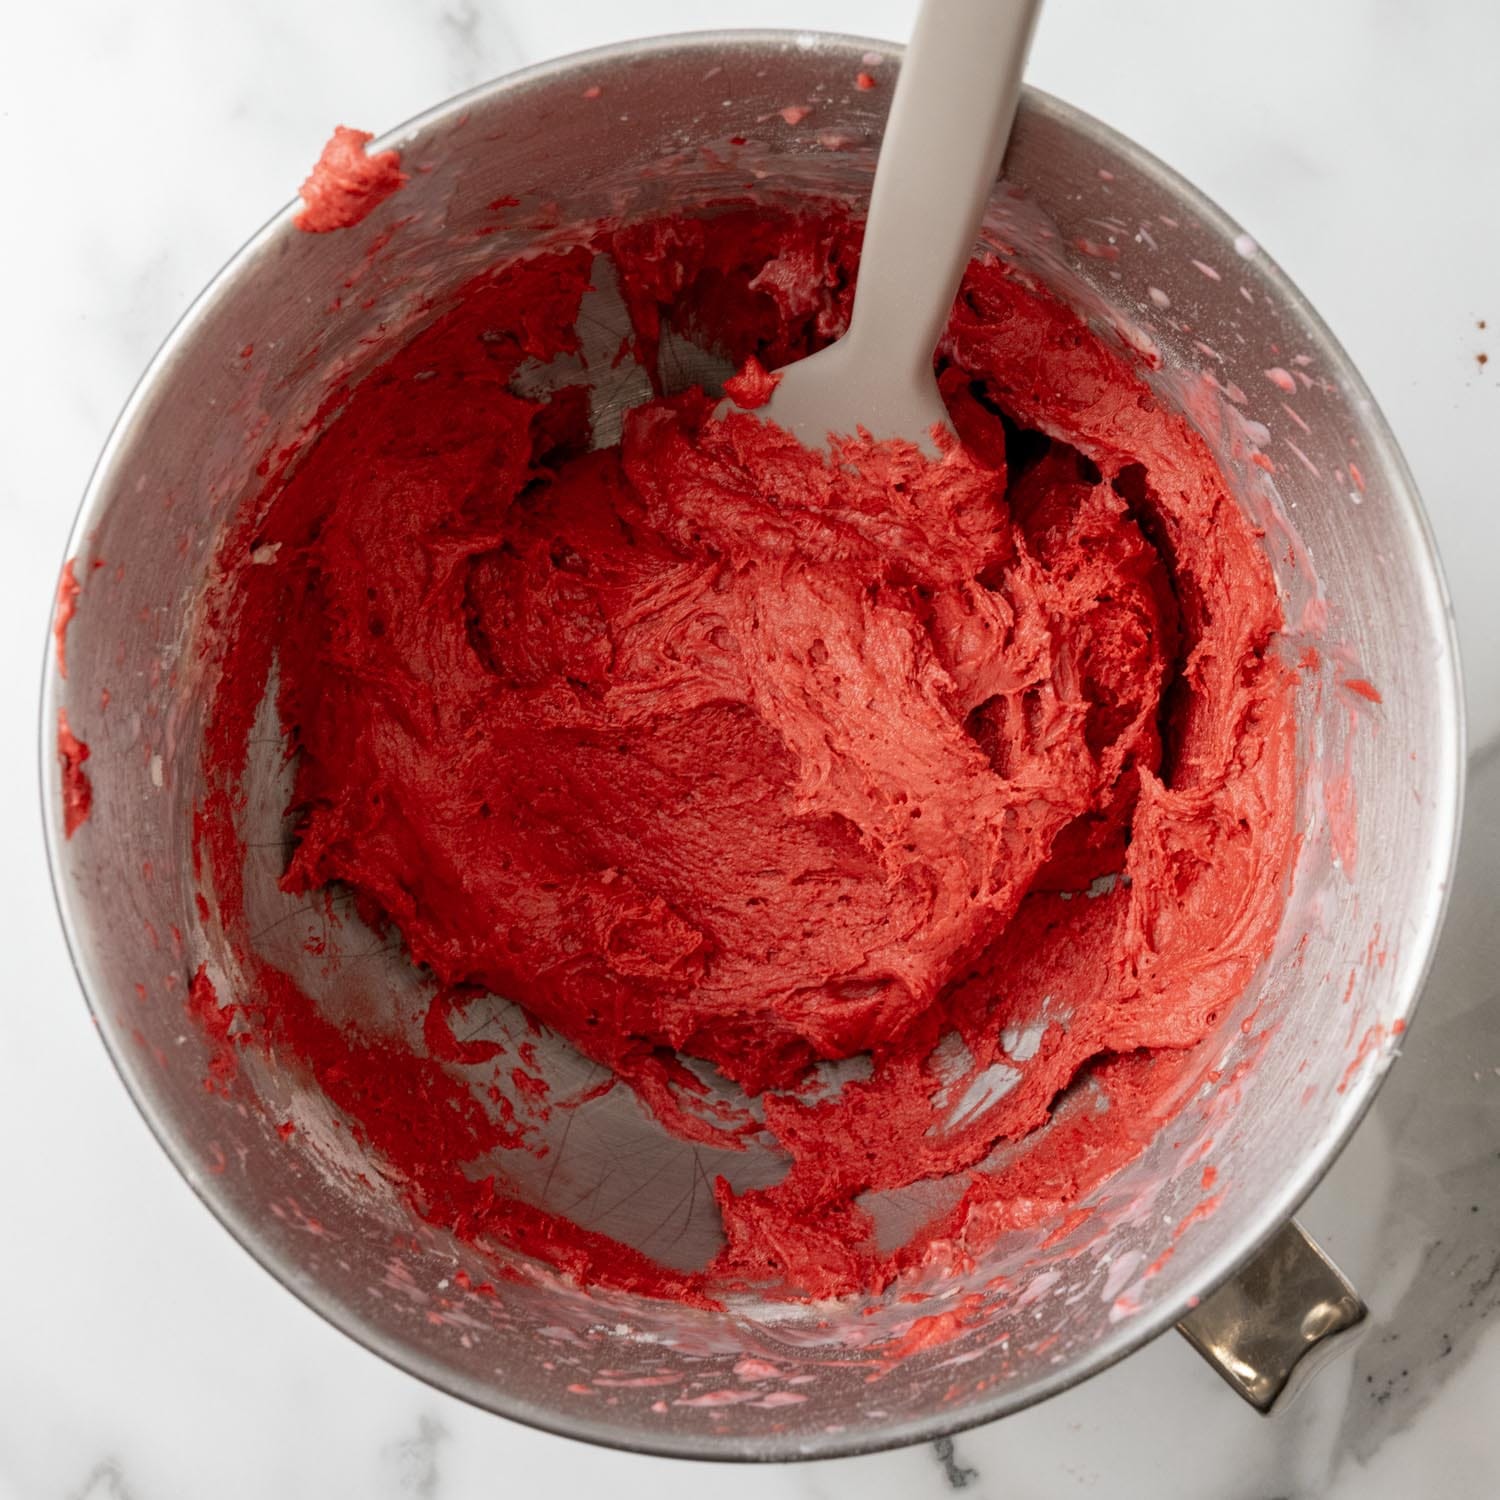
- Add the dry ingredients to the butter mixture and mix at low speed until combined. Add the buttermilk and mix until smooth.
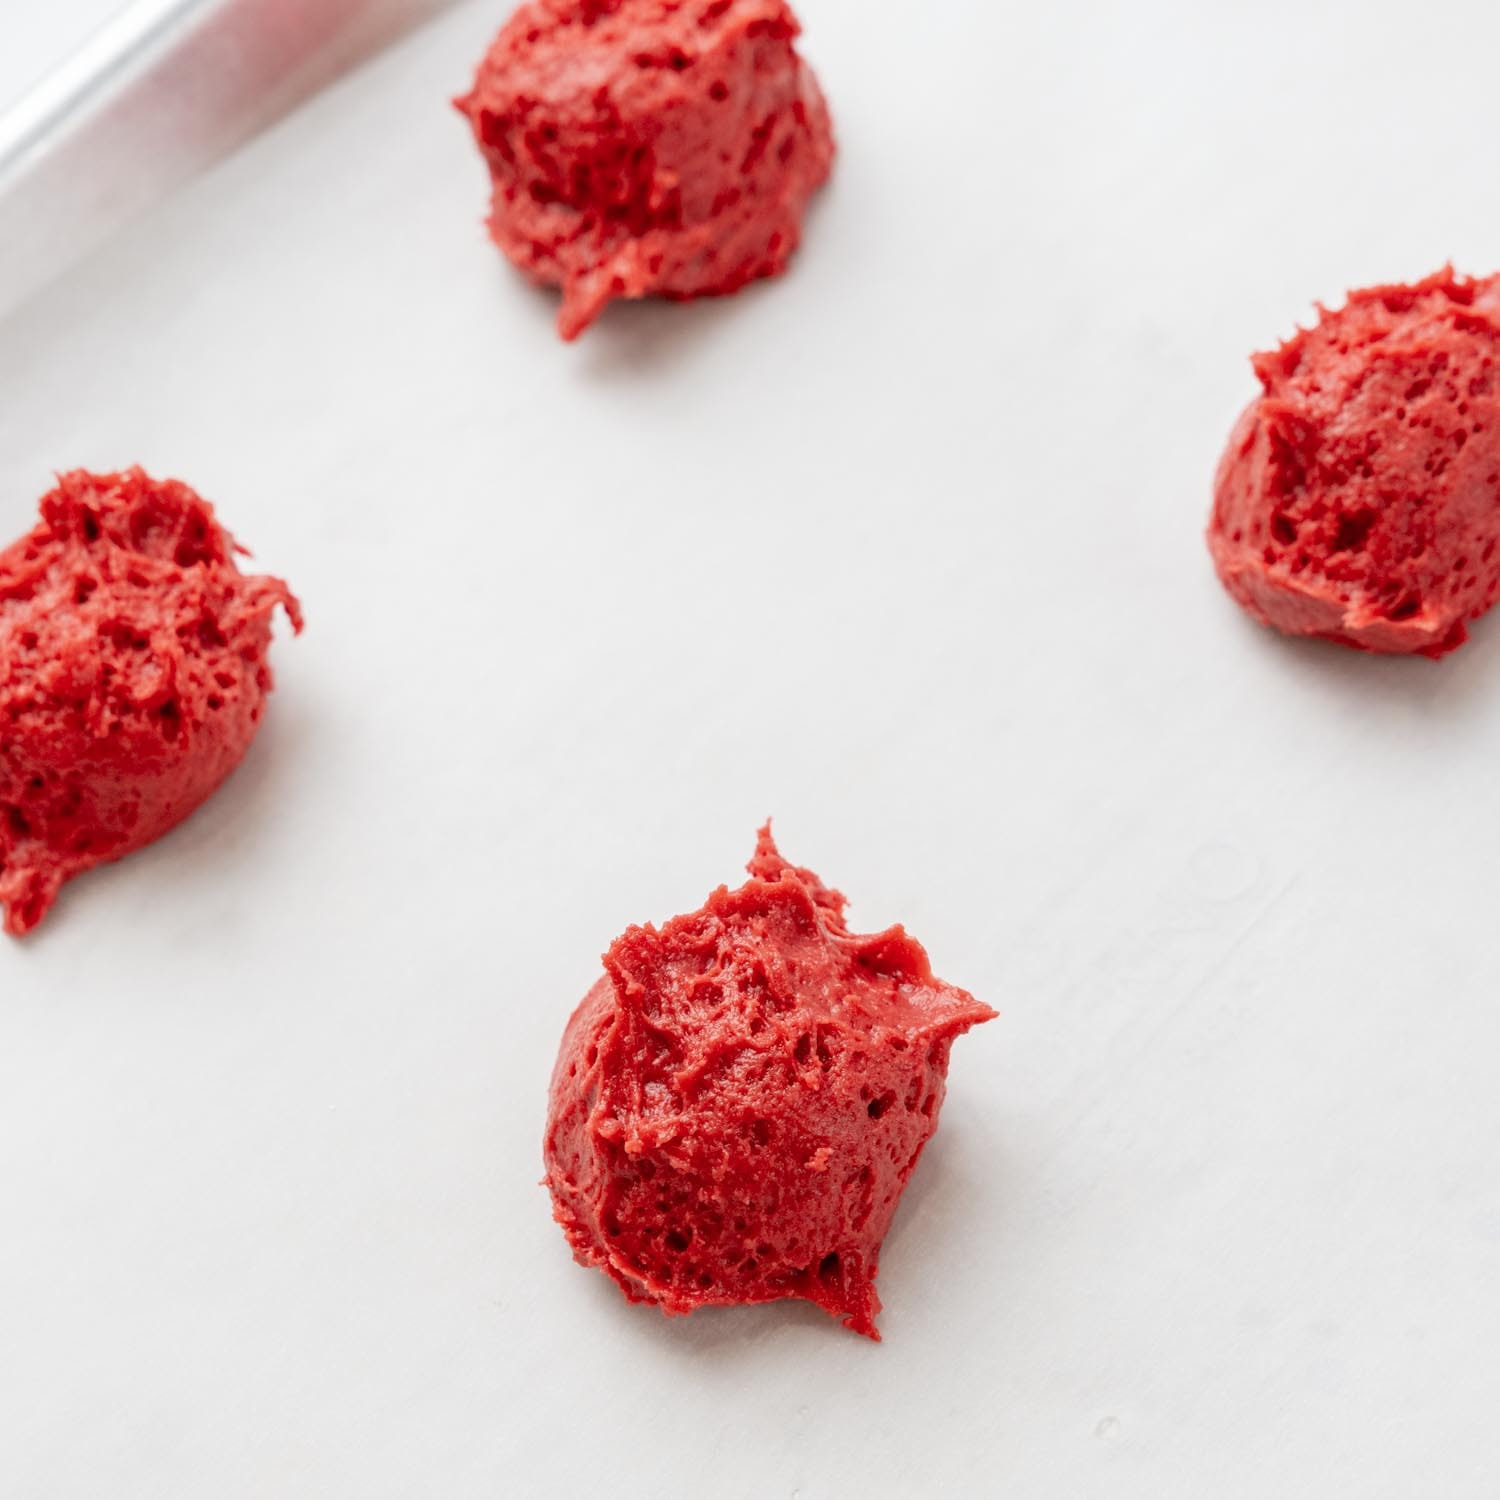
- Scoop the batter using a small cookie scoop (approximately 1 ½ tablespoons) and place it on the prepared baking sheets, spacing them 2 inches apart.
- Bake for 12-15 minutes or until the cookies are puffed and a toothpick inserted into the center comes out clean.
- Allow the cookies to cool on the baking sheets for 5 minutes before transferring them to a wire rack to cool completely.
For the Cream Cheese Frosting:
- In the bowl of a stand mixer, beat the softened cream cheese and butter until smooth and creamy.
- Gradually add the powdered sugar in two additions, mixing well after each addition.
- Add 1-2 tablespoons of heavy cream and beat on high speed until the frosting reaches the desired consistency. Mix in the vanilla extract.
Assemble the Whoopie Pies:
- Pipe or spread frosting onto the flat side of half the cookies.
- Top with the remaining cookies to create sandwiches.
Notes:
- Use room temperature ingredients. Anything that’s usually cold, including the butter, egg, buttermilk, and cream cheese, need to be at room temperature before you get started with the recipe. Let everything sit out on the counter for 30 minutes to an hour.
- Make the cookies the same size so that each sandwich will be even. A cookie scoop is the best tool to ensure that the batter is portioned evenly.
- For extra decoration, sprinkle the red velvet whoopie pies with powdered sugar just before serving.
- Store in the fridge for up to 5 days, or freeze for up to 6 months.
Nutrition Information
This website provides approximate nutrition information for convenience and as a courtesy only. Nutrition data is gathered primarily from the USDA Food Composition Database, whenever available, or otherwise other online calculators.
© Little Sunny Kitchen


Leave a Review!