
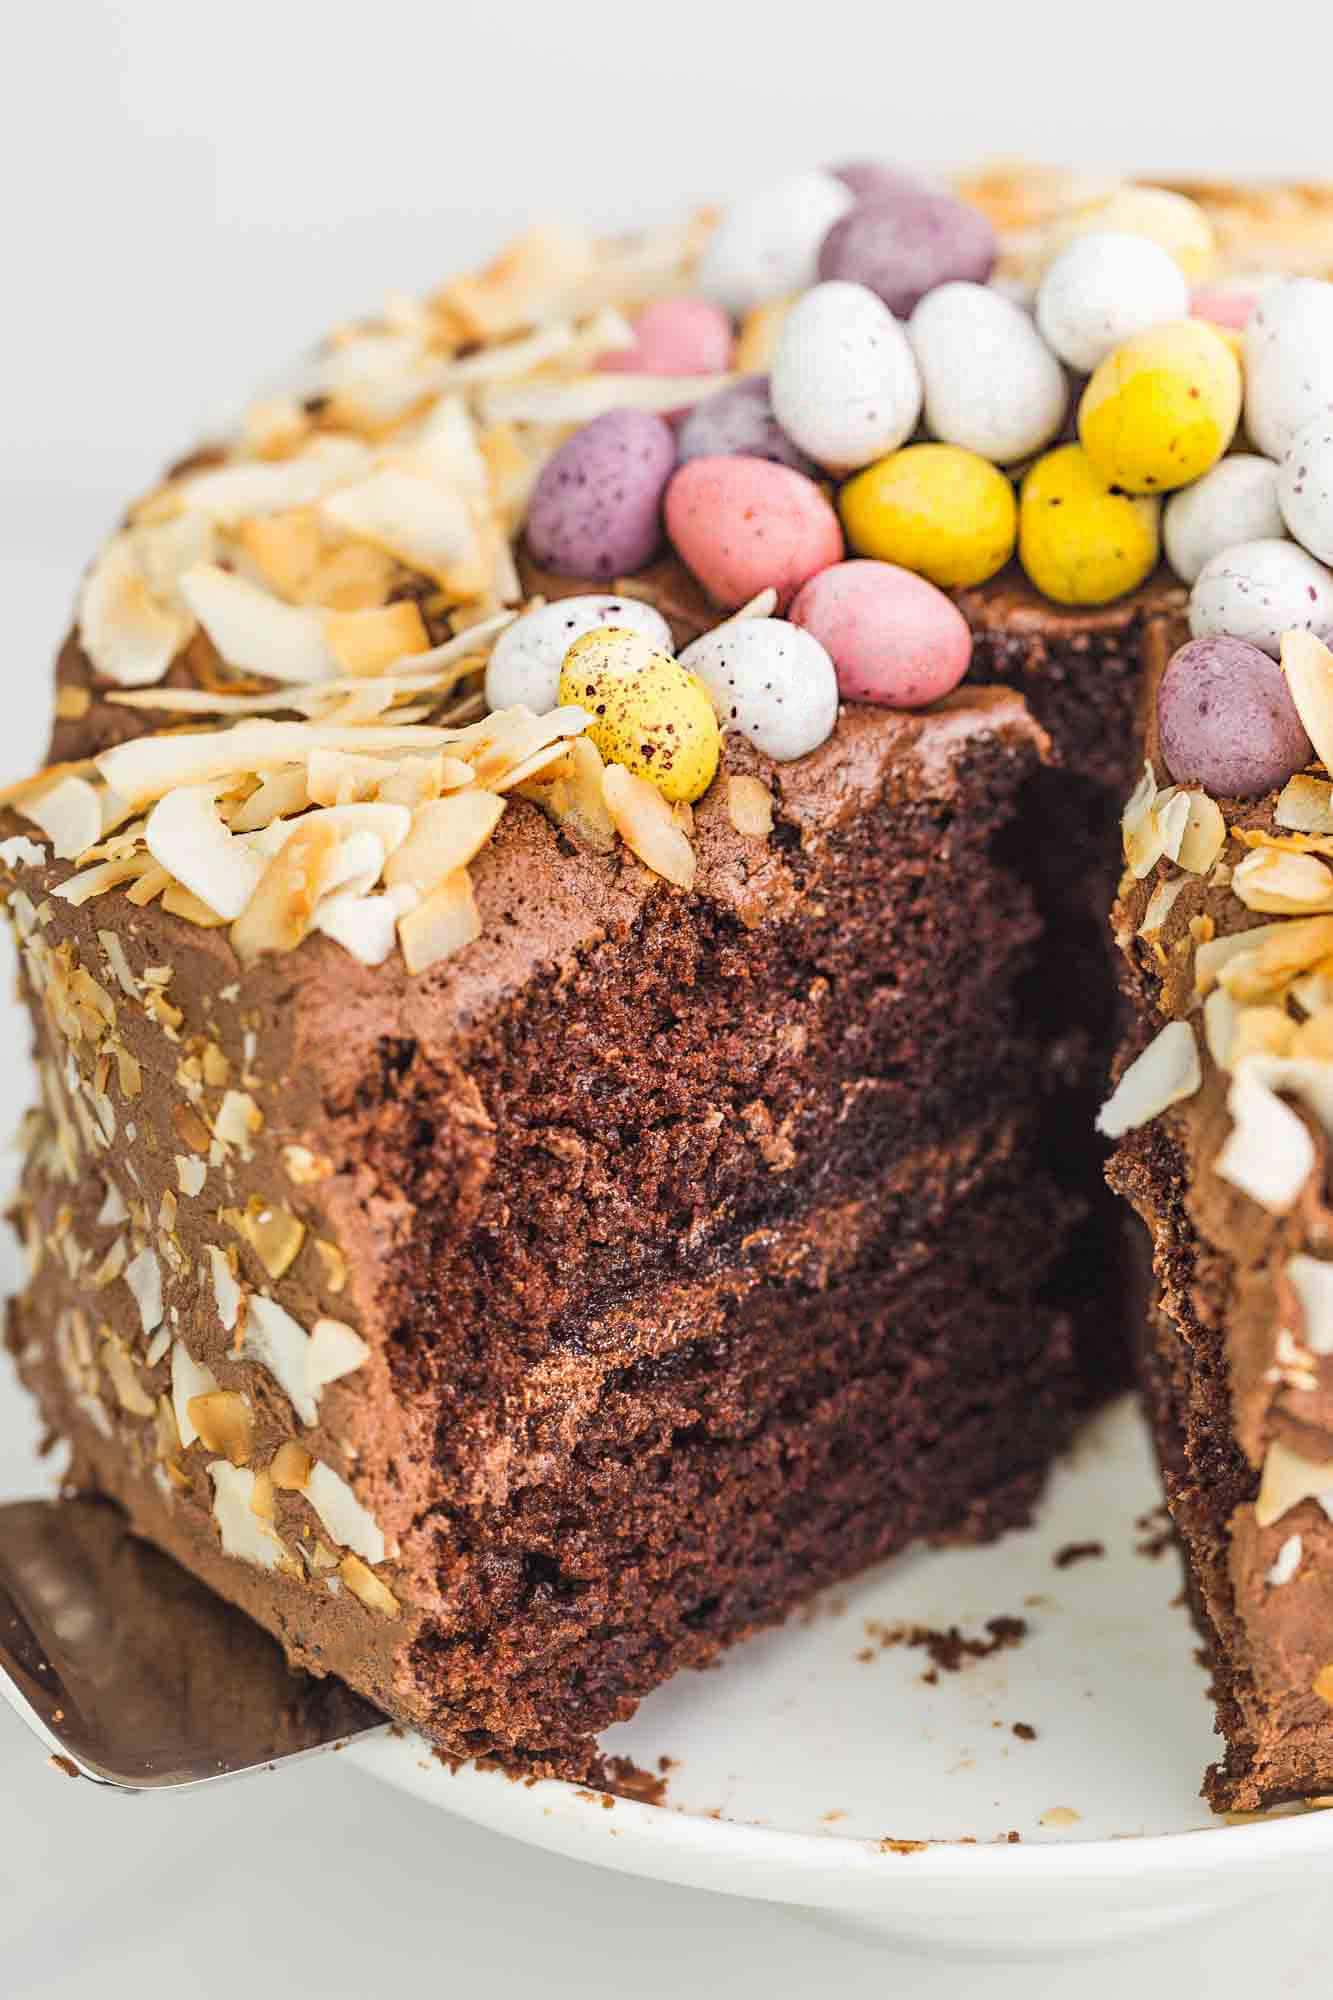
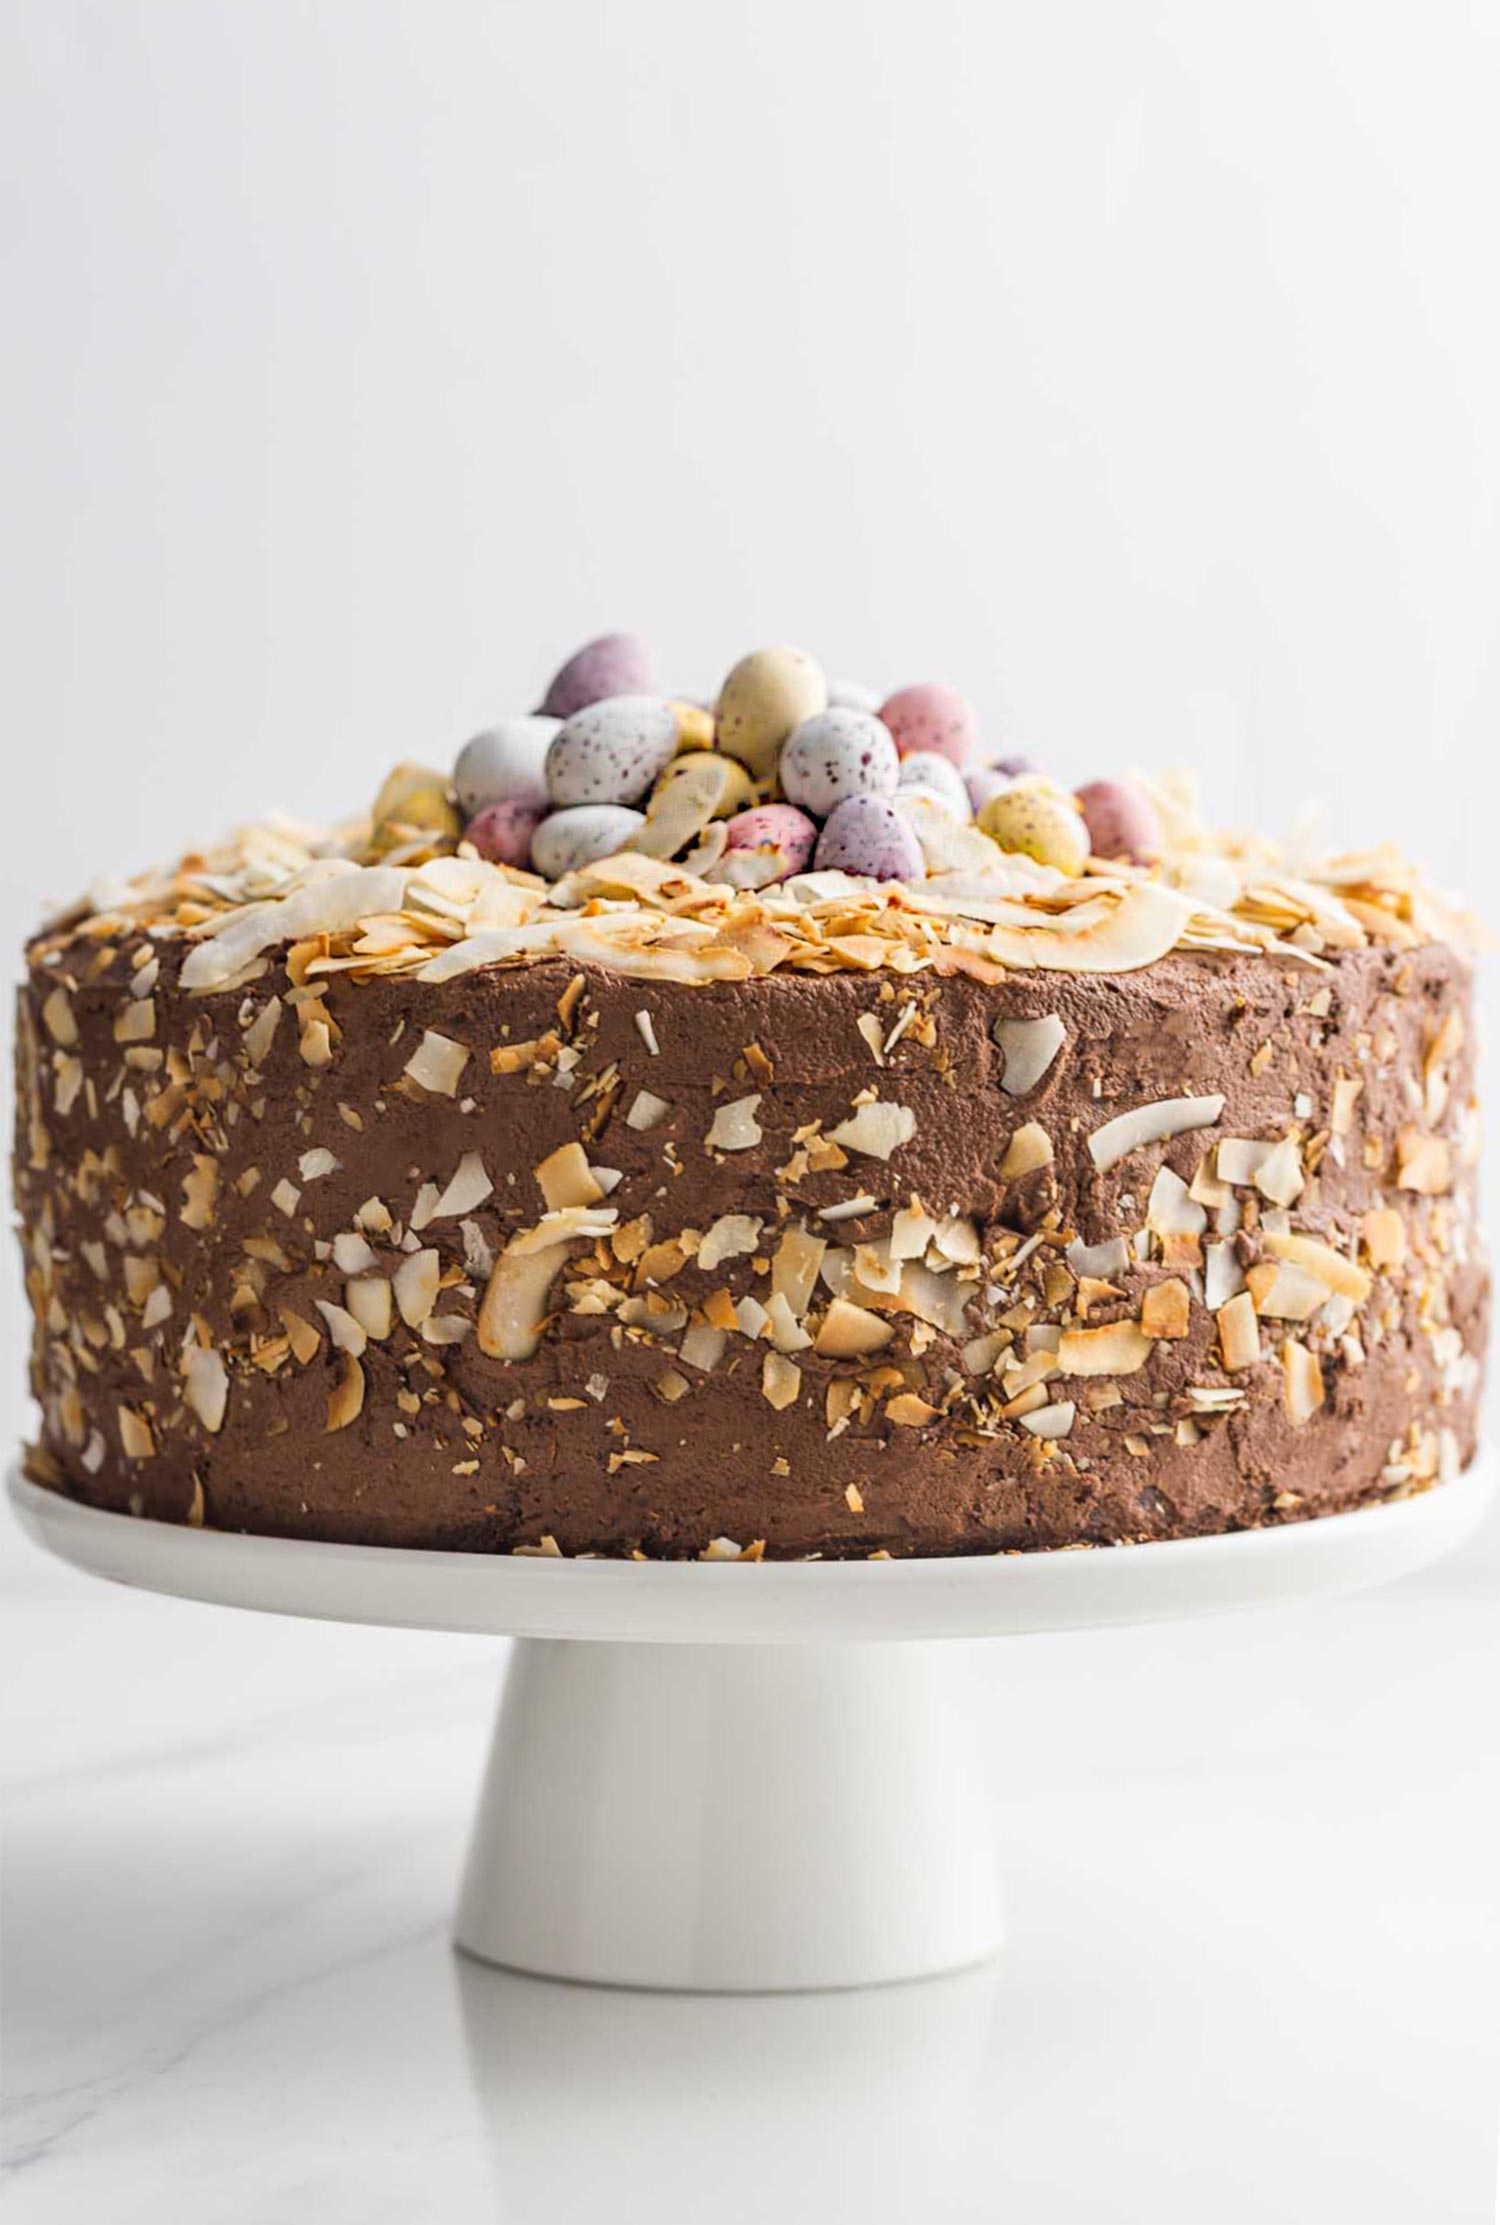
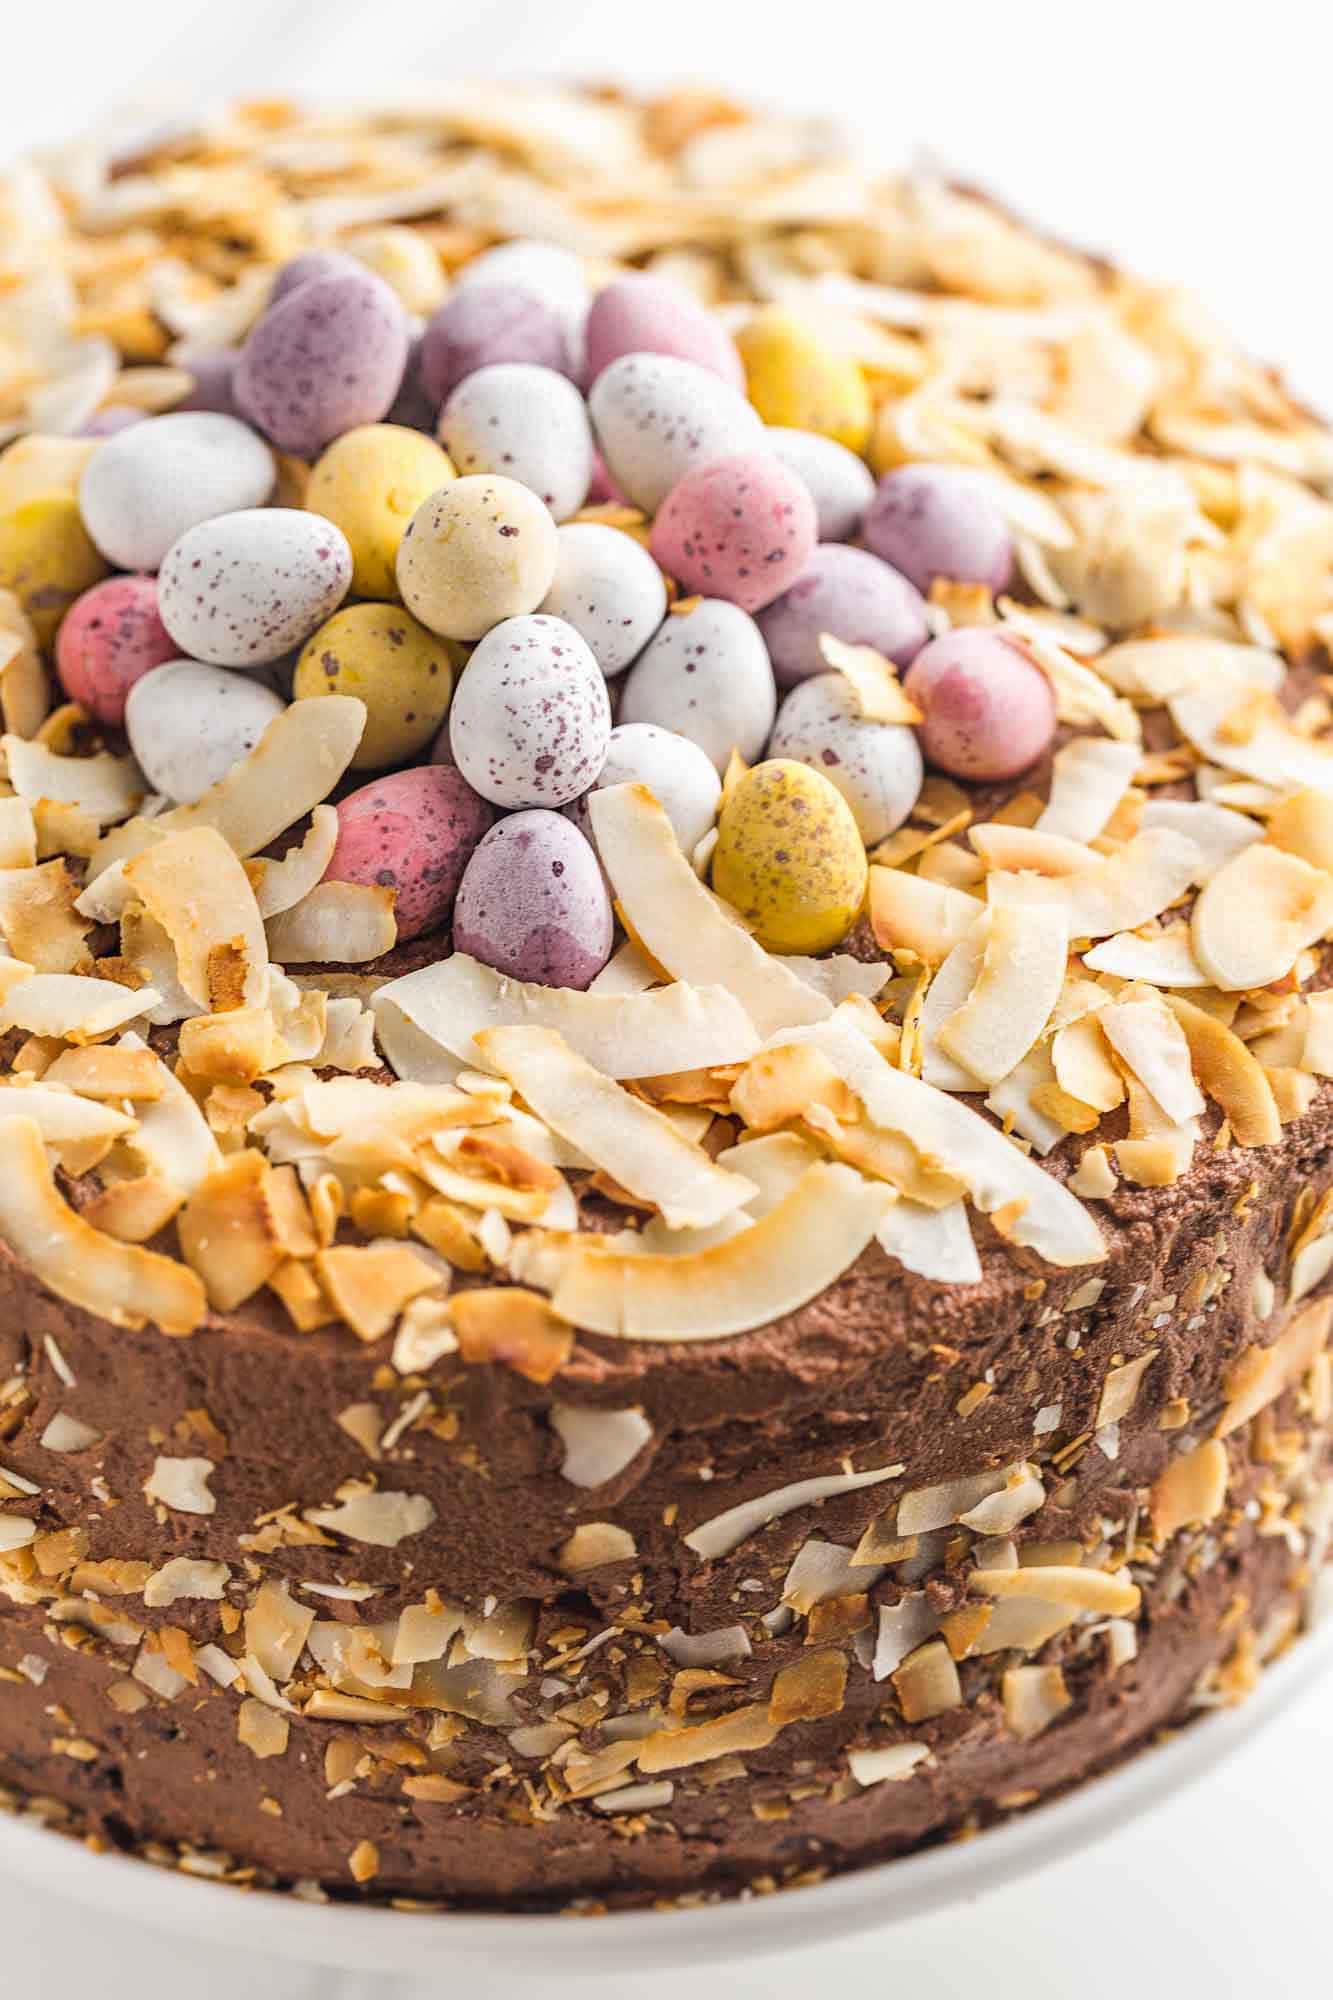
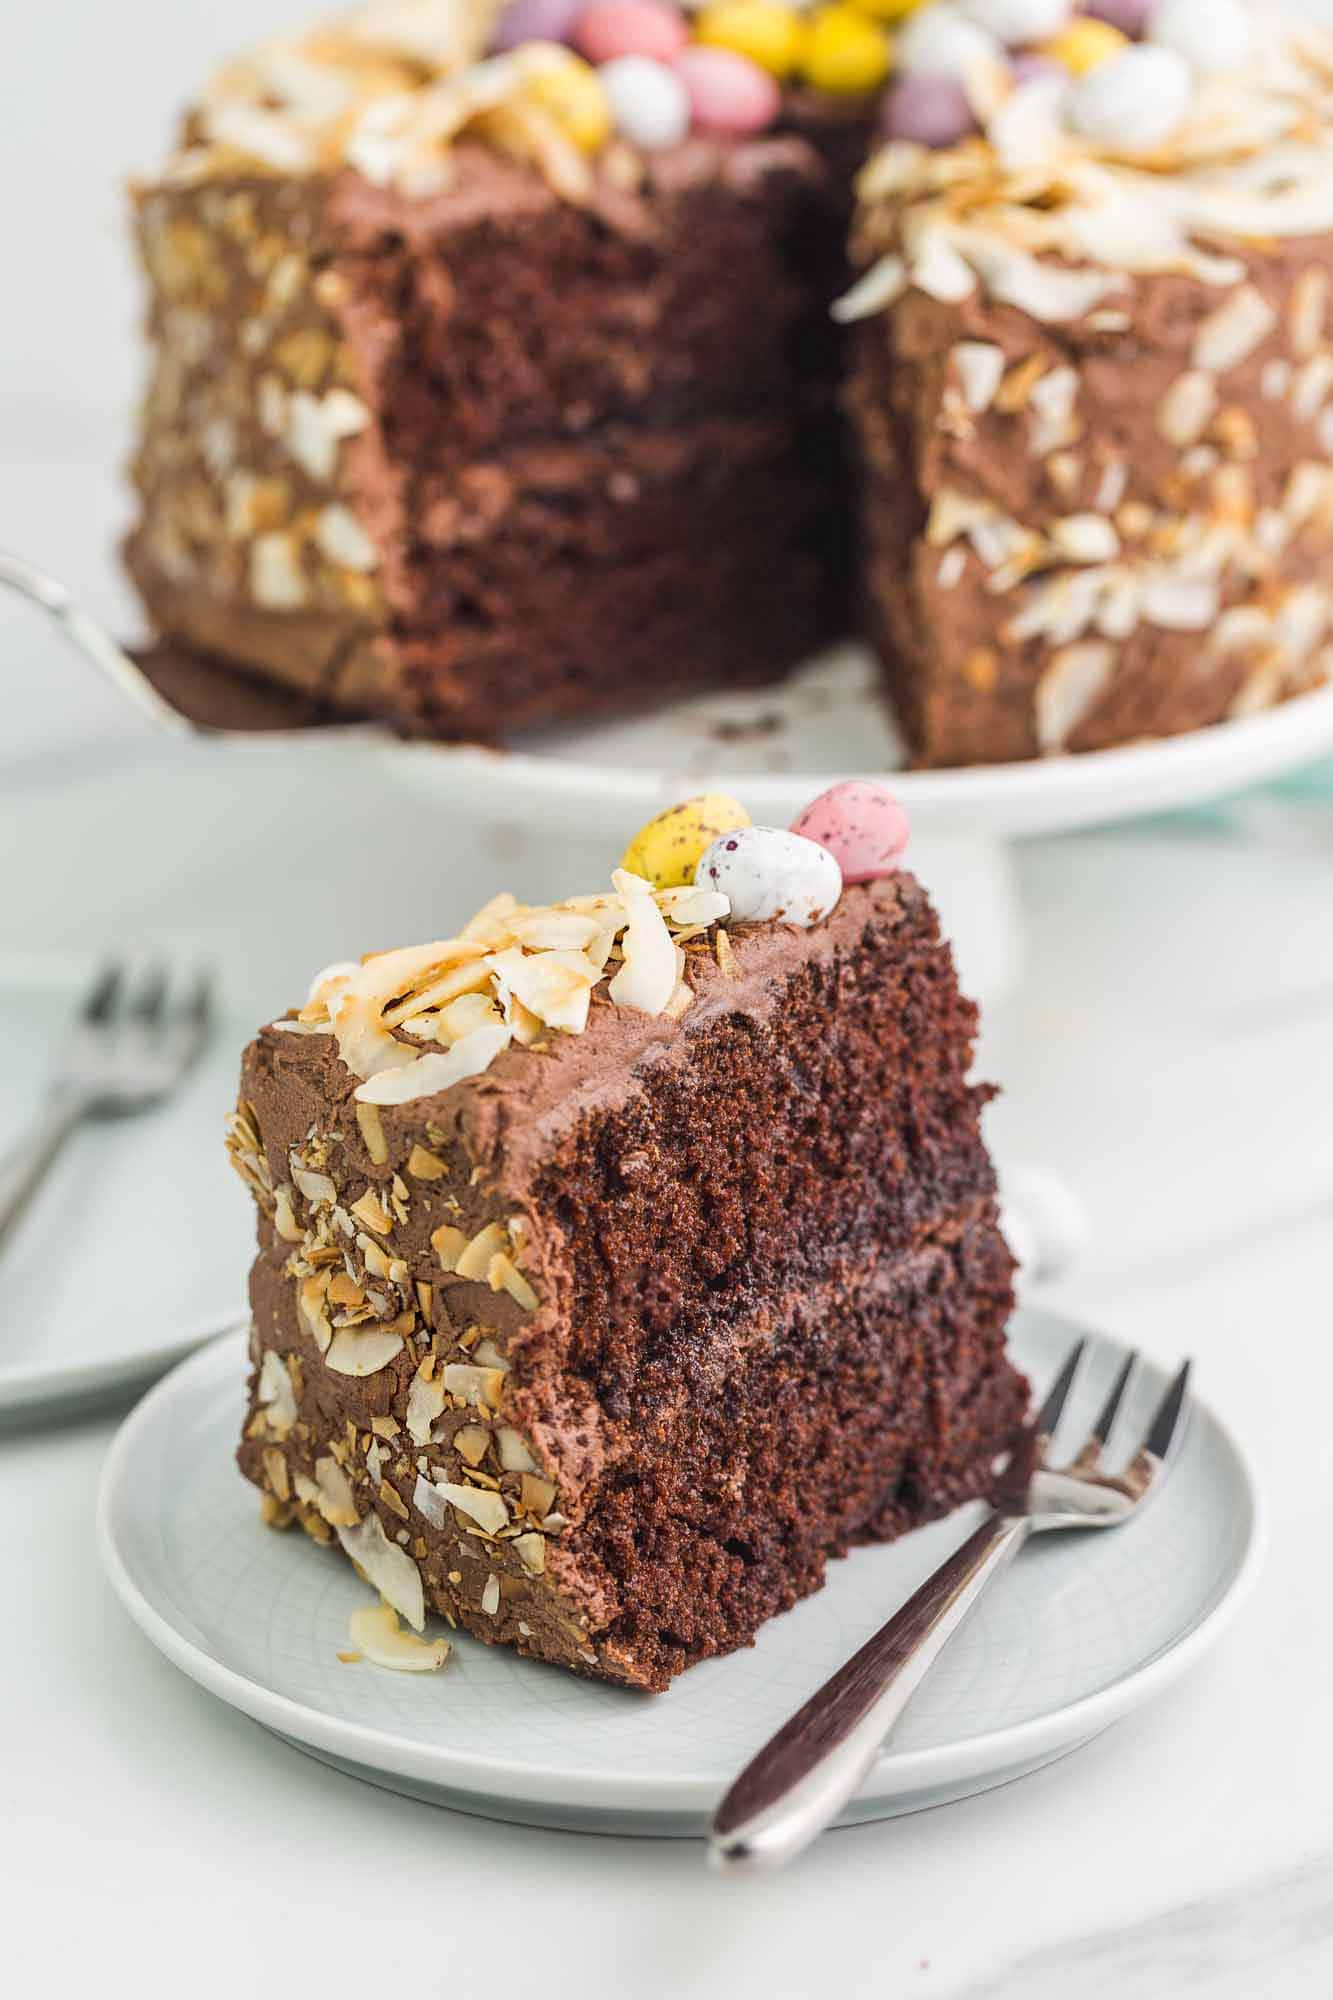
This Easter cake is a decadent and moist chocolate layer cake, frosted with chocolate buttercream, and decorated with toasted shredded coconut and mini Cadbury eggs for a fun Easter nest look. It’s much easier to make than you think, and the result is very impressive!
This Easter cake became a tradition in our family. Everyone LOVES a moist and super chocolatey chocolate cake especially when it’s paired with coconut. It makes the best combination EVER!
So I’ve been making this cake for years now, and as I shared this recipe on here in 2017, I thought it was about time to improve the recipe and take new pictures.
The cake consists of 2 8-inch cakes stacked and frosted with simple but decadent American chocolate buttercream. It is as simple as that! And the rest are just decorations that you can play with and change as you like.
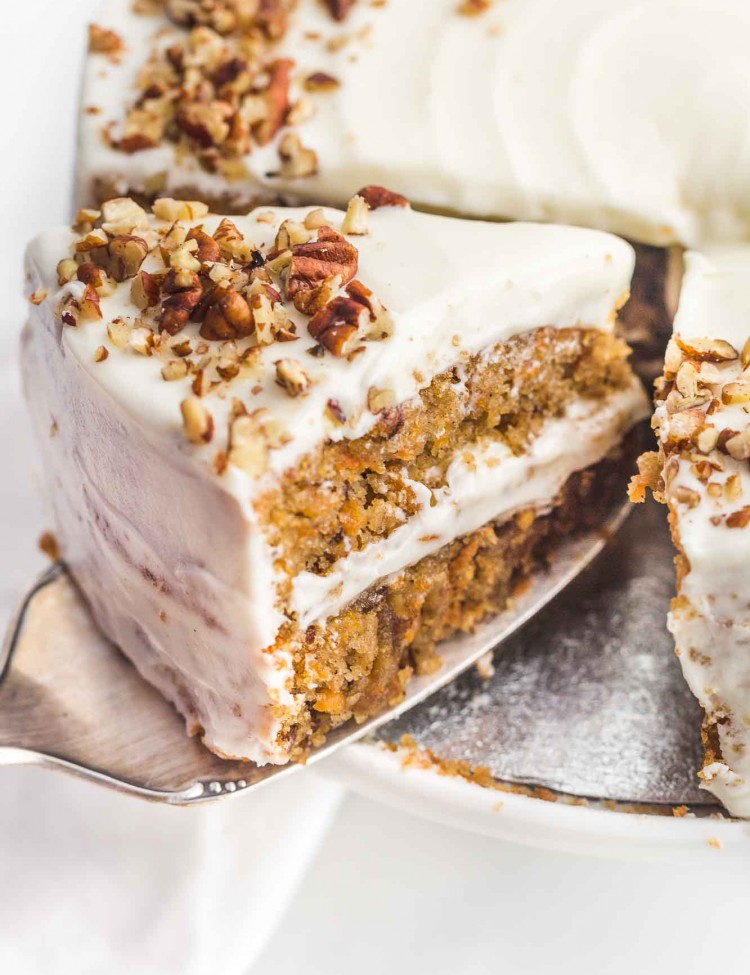
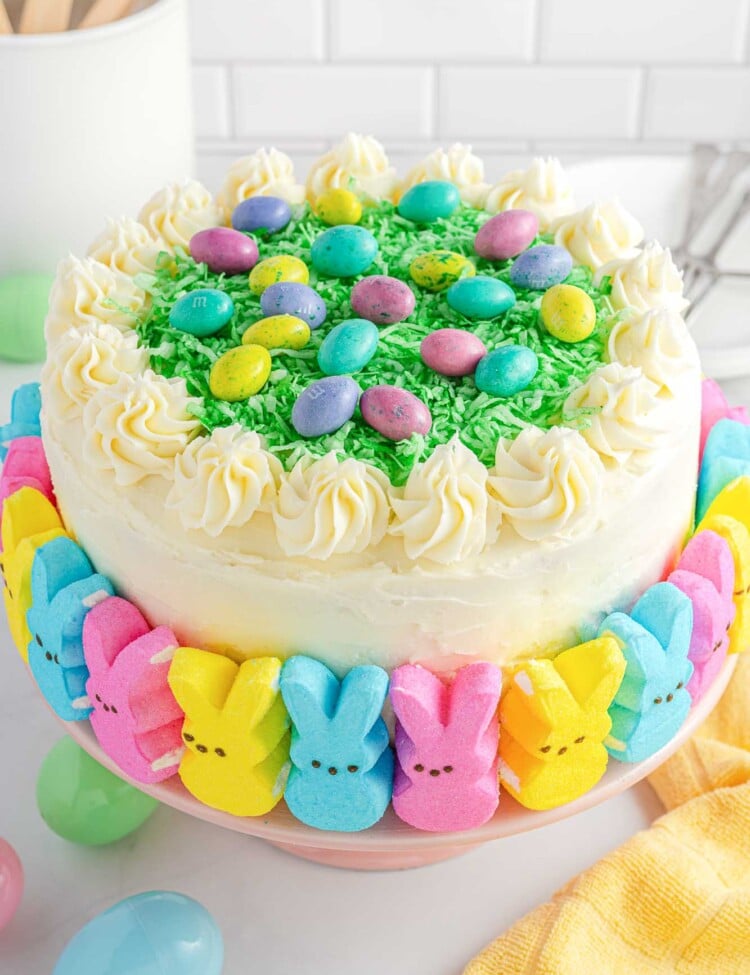
I have more Cakes for Easter that you can try! Carrot Cake is an Easter tradition for some, or try this fun Easter Peep Cake – it’s decorated with green coconut grass and Easter M&M’s! I also have a delicious Easter Cake Roll with pastel buttercream filling that is always a hit.
Feeling more traditional? Try my Russian Kulich Easter Bread instead.
This chocolate cake recipe has another look too! Check out this Peeps Sunflower Cake.
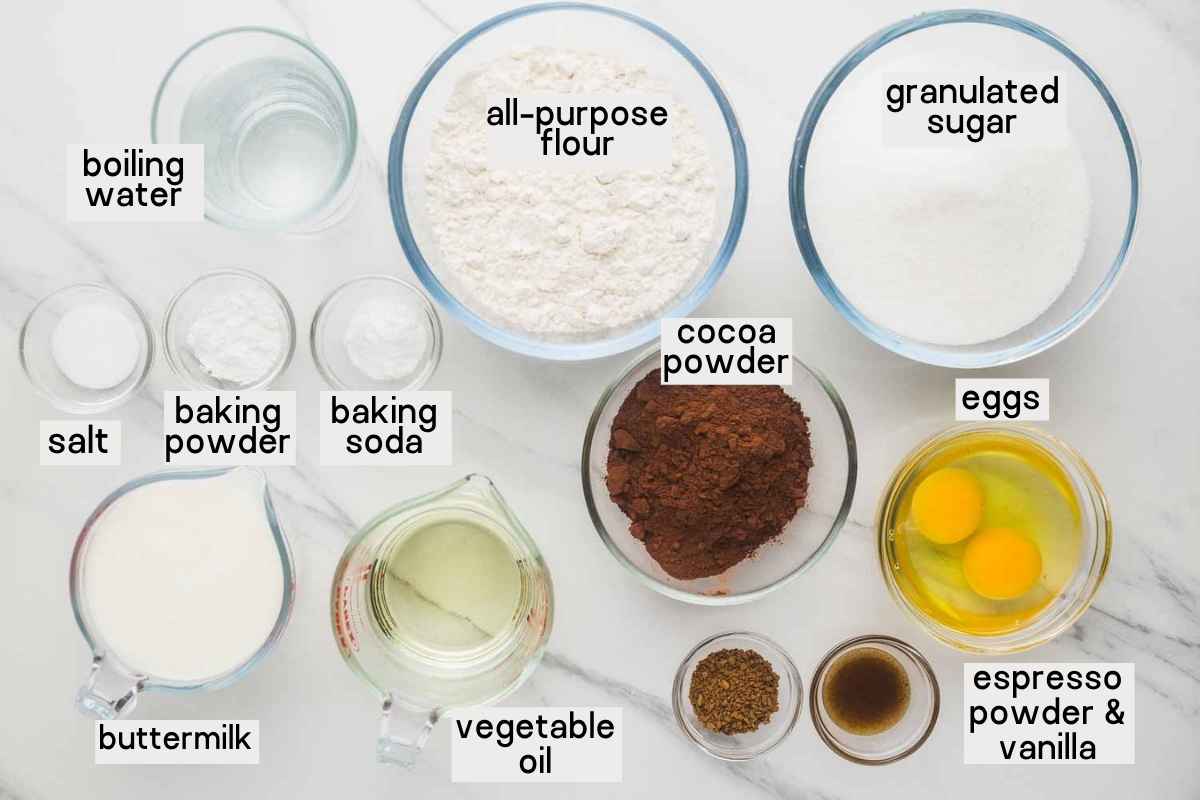
The Ingredients
Here’s what you’ll need to make a chocolate cake:
No cake flour or any uncommon ingredients are required.
How to Make Chocolate Cake
Preheat the oven to 375°F/190°C (170°C for fan oven).
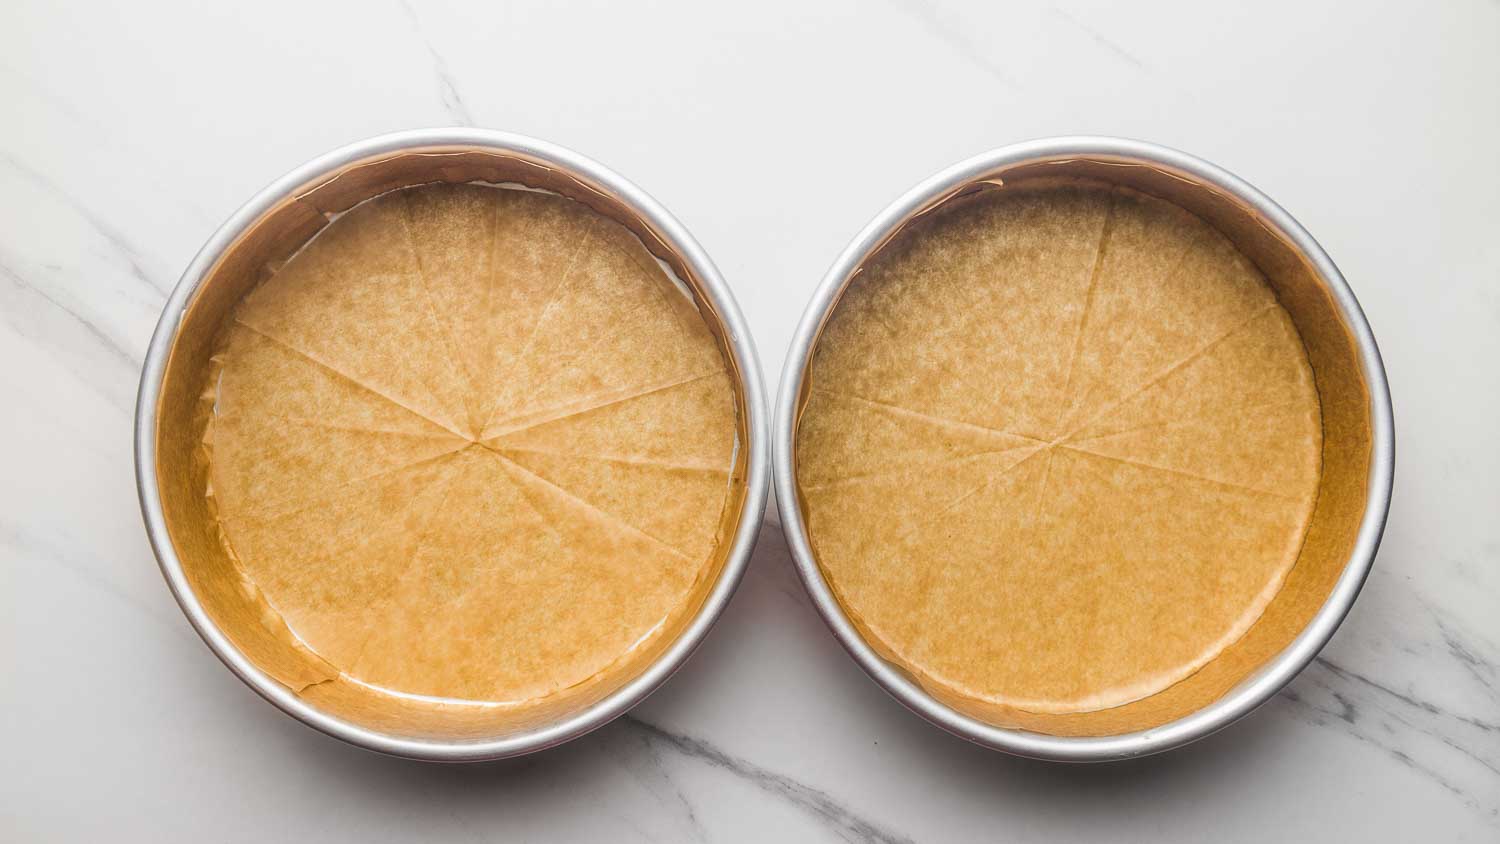
- Prep Cake Pans – Start by prepping 2 x 8-inch/20cm cake pans by greasing them with butter and lining them with parchment paper. You can either cut out 8-inch circles and long strips for the sides or buy parchment cake circles from Amazon.
- In a bowl sift the dry ingredients (flour, cocoa powder, baking powder, and salt), add the sugar and set aside.
- In a separate bowl, combine the eggs with the buttermilk, oil, and vanilla extract. Mix well, then add the wet ingredients to the dry ingredients and mix to just combine (do not overmix, you don’t want to work the gluten for a moist cake).
- Stir in boiling coffee or water, this will thin out the batter and make it runny and that’s what you want (see image 3 below).
- Bake – Pour the batter into the cake pans, and bake for 30 minutes or until a toothpick inserted in the center of the cake comes out clean.
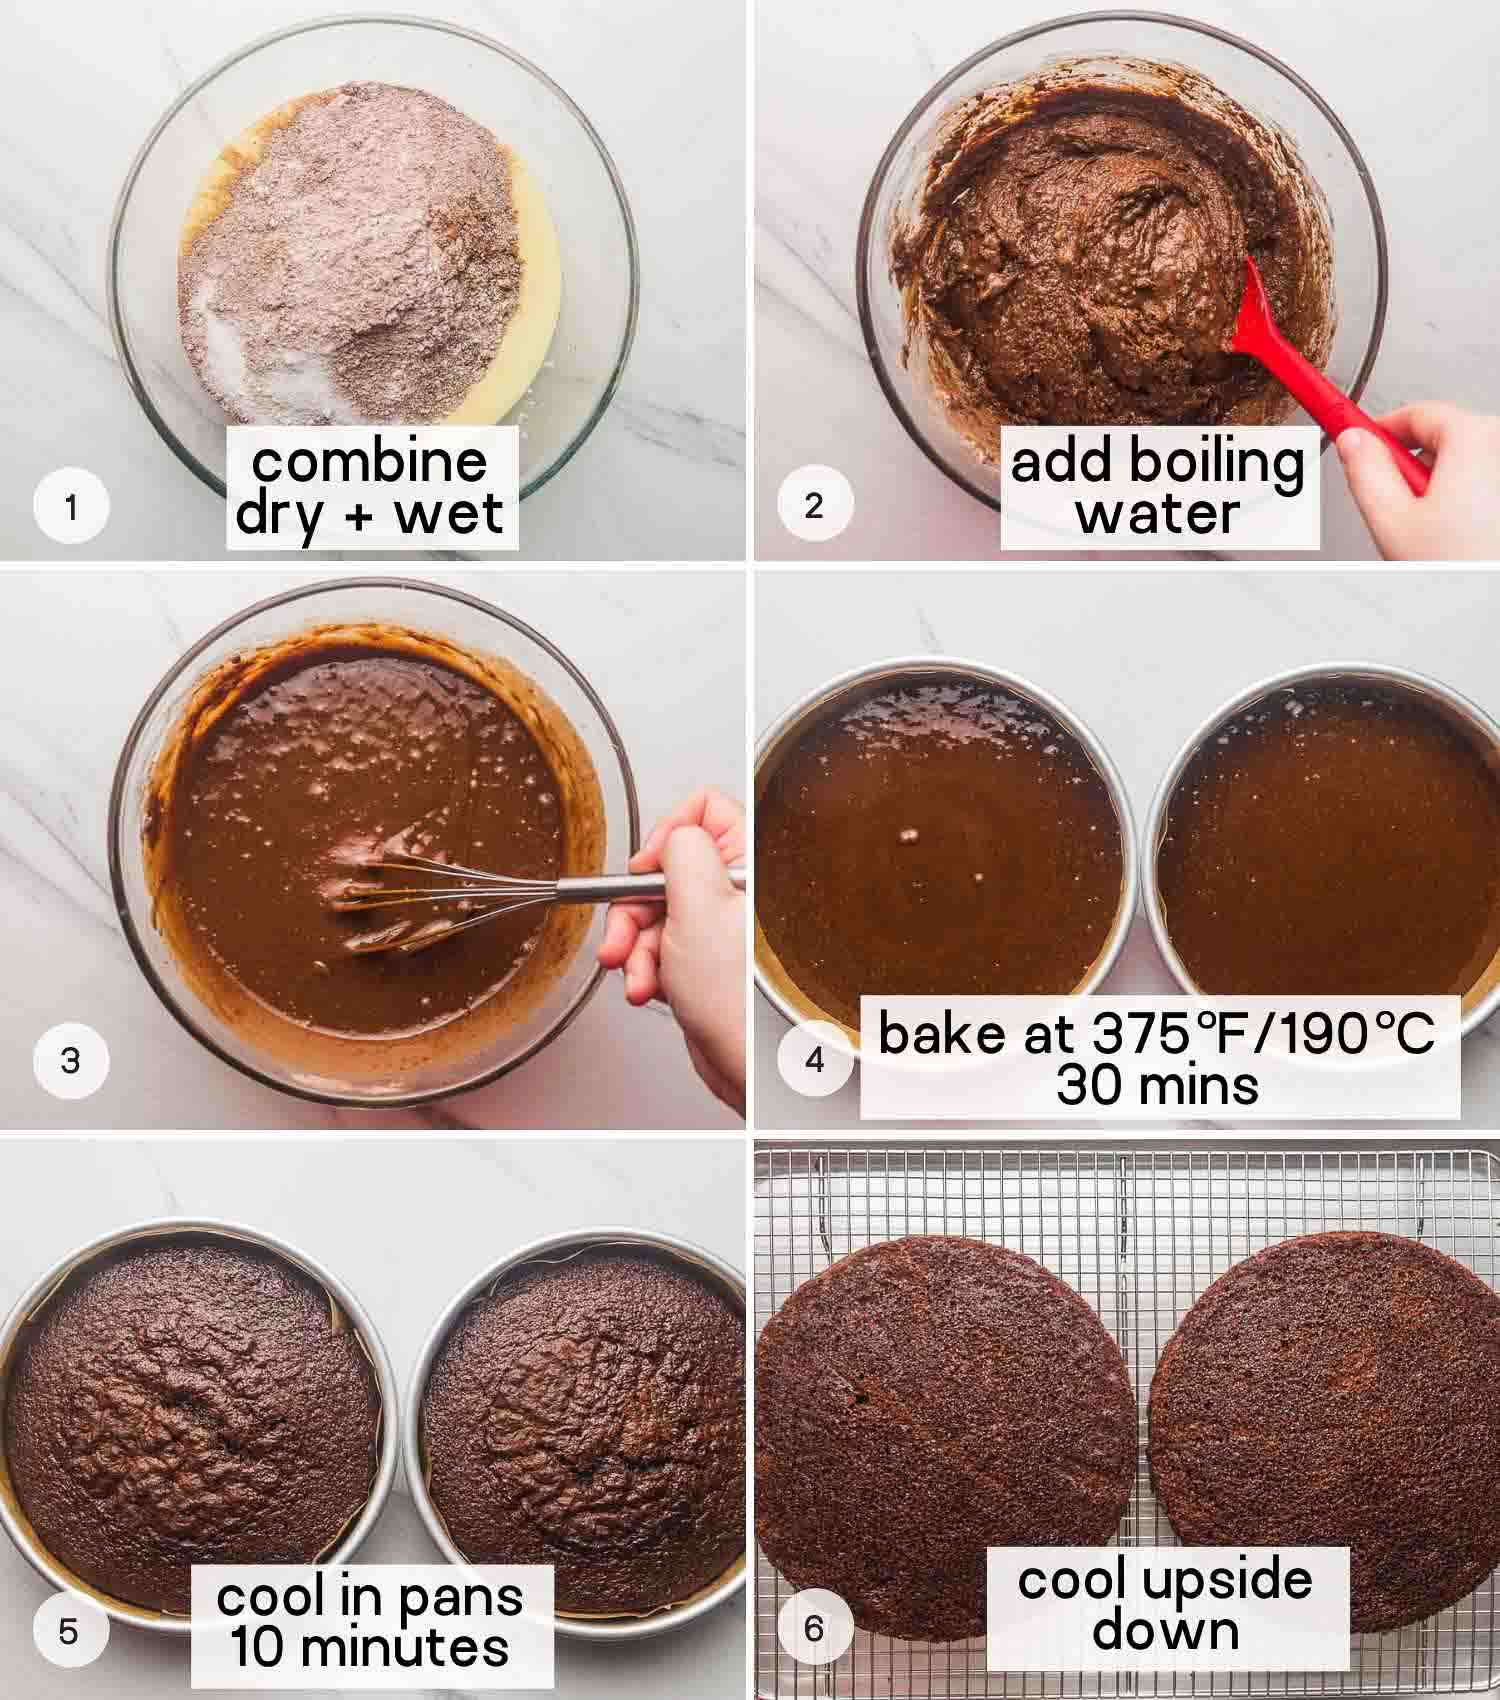
- Cool – Remove the cakes from the oven and allow them to cool in cake pans for 10 minutes. Gently turn out on a cooling rack upside down, and leave them to cool completely.
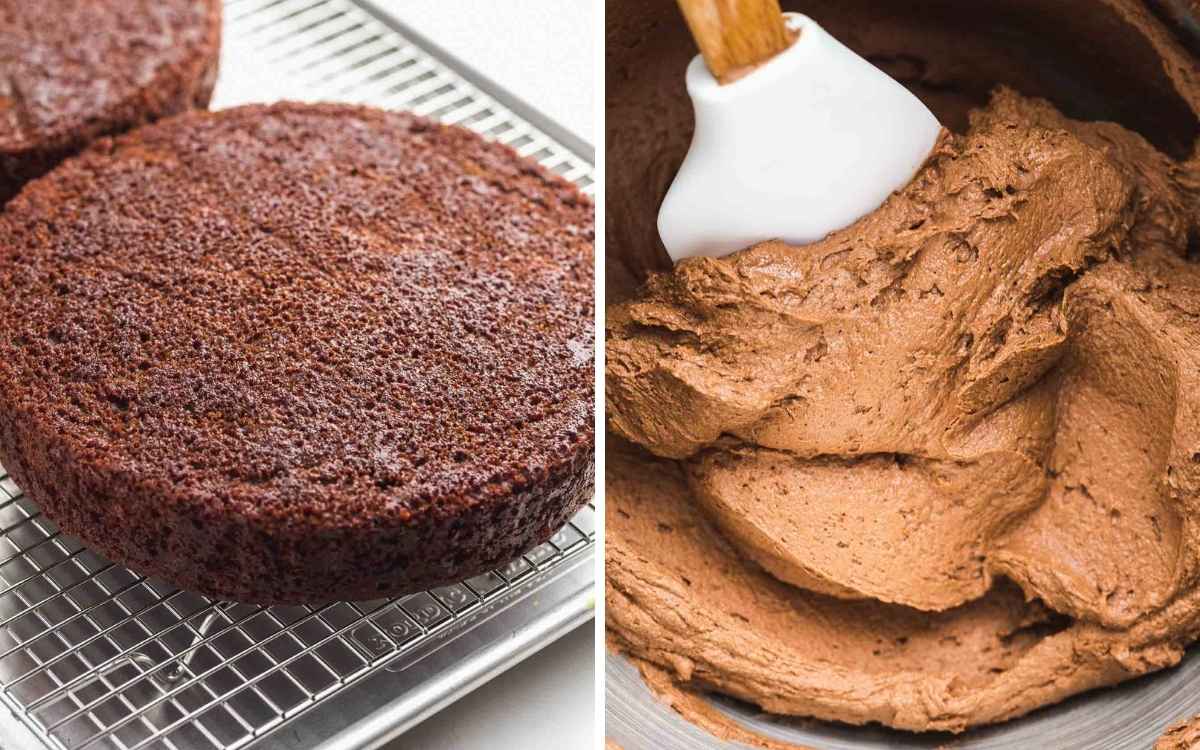
Allowing the cakes to cool upside down will flatten the slight dome and result in neater layers.
As the cakes cool down, toast the shredded coconut.
How to Toast Coconut
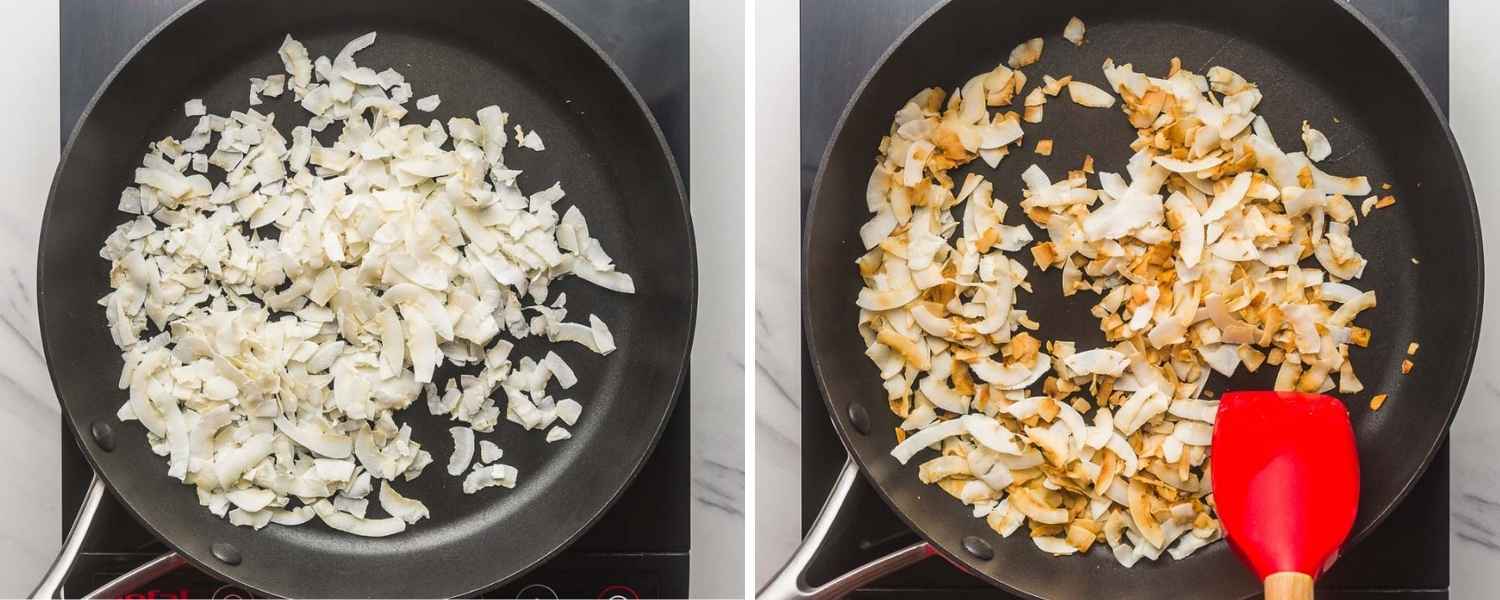
You can either use shredded coconut or desiccated coconut to decorate the cake. In a dry pan over medium heat, add the coconut and keep stirring until it toasts (not so evenly). When you’re happy with the color, remove the coconut from the pan immediately onto a plate so it doesn’t toast further and burn.
Alternatively, you can toast the shredded coconut in the oven at 320°F/160°C for 5 minutes.
How to Frost and Decorate The Cake
Make chocolate buttercream by beating the butter with powdered sugar until light and fluffy (find the recipe in the recipe card below). Use the frosting immediately, if you refrigerate it, you will need to beat it again before using.
Crumb coat – it is useful to have a cake turntable but not necessary. Fill the cake between the 2 layers with the chocolate buttercream, and frost it from the outside with a thin layer. This will lock in all of the crumbs and make the cake easier to frost.
Place the cake in the fridge for 20 minutes, this will harden the butter in the frosting and give it a solid shape. Frost again with the remaining frosting so the cake is fully covered with buttercream.
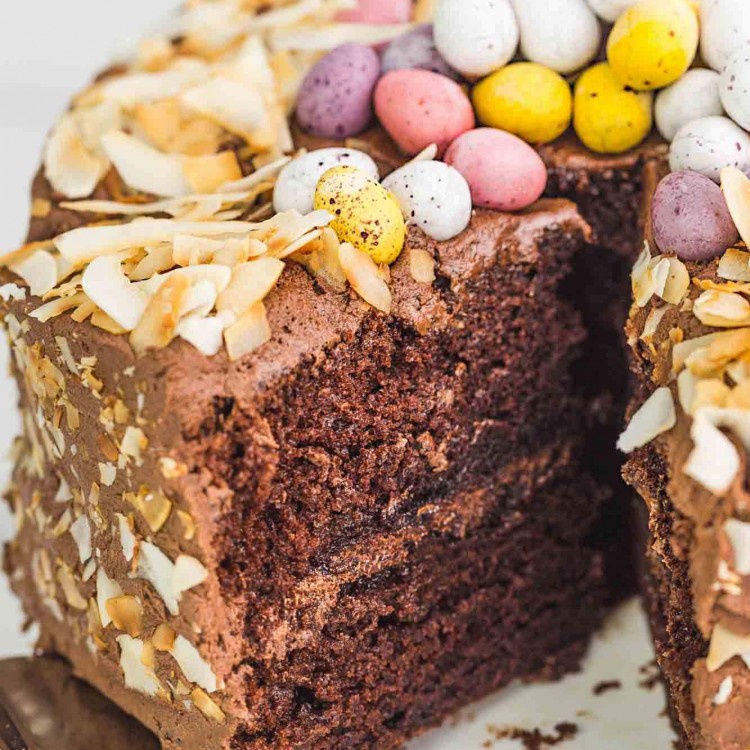
Decorate – to decorate the cake, top the center with Cadbury mini eggs (I like to pile them up, you can even break some of them for a different look). Then cover with toasted coconut on top and from the sides, pressing very gently for the coconut to stick.
Have extra chocolate eggs? Use them to fill these adorable Easter basket cookie cups or make a batch of Mini Egg Chocolate Chip Cookies!
Frequently Asked Questions
Yes! You can bake the cake and wrap in parchment paper followed by plastic wrap and store at room temperature for up to 2 days. Frosted cakes keep perfectly for 4-5 days covered at room temperature. If it’s hot where you are, store in the fridge but take it out of the fridge 1 hour before serving).
You can decorate the cake with shaved chocolate, sprinkles, or very thinly sliced almonds.
Yes, you can use a 9-inch cake pan but the baking time will be around 25 minutes instead of 30.


Your family is going to be so impressed with this fun Easter Cake that you make for them! Be sure to Pin this recipe to save it for later.
Did you make this? Be sure to leave a review below and tag me on Facebook, Instagram, or Pinterest!
Chocolate Easter Nest Cake Recipe
Equipment
- 2 8" inch cake pans
Ingredients
Chocolate Cake
- 1 ¾ cups (210 g) all-purpose flour
- ¾ cup (75 g) unsweetened cocoa powder
- 1 ½ teaspoons baking powder
- 1 ½ teaspoons baking soda
- 1 teaspoon salt
- 2 cups (400 g) granulated sugar
- 2 large eggs 2oz each
- 1 cup (240 ml) buttermilk or milk
- ½ cup (120 ml) oil vegetable or canola
- 2 teaspoons (10 ml) pure vanilla extract
- 1 teaspoon espresso powder optional
- 1 cup (240 ml) boiling water
Chocolate Buttercream
- ½ cup (113 g) unsalted butter softened at room temperature
- ¾ cups (75 g) cocoa powder
- 3 cups (360 g) powdered sugar
- 3 tablespoons (45 ml) milk you might need a little more
- 1 teaspoon (5 ml) pure vanilla extract
Decorations
- 80g Cadbury mini eggs
- 75g shredded coconut
Instructions
Prepare and bake the cake
- Preheat the oven to 350°F (180°C), or 160°C for a fan oven.
- Prep 2 x 8-inch/20cm cake pans by greasing them with butter and lining them with parchment paper.
- In a bowl sift the dry ingredients (flour, cocoa powder, baking powder, baking soda, and salt), add the sugar, whisk and set aside.
- In a separate bowl, combine the eggs with the buttermilk or milk, oil, and vanilla extract. Mix well.
- Add the wet ingredients to the dry ingredients and mix to just combine (do not overmix, you don't want to work the gluten for a moist cake).
- Stir in boiling water (mixed with espresso powder, if using) this will thin out the batter.
- Pour the batter into the cake pans, and bake for 30 minutes or until a toothpick inserted in the center of the cake comes out clean.
- Remove the cakes from the oven and allow to cool in cake pans for 10 minutes. Gently turn out on a cool rack upside down, and leave them to cool completely.
Chocolate buttercream
- In a stand mixer with a paddle attachment, beat the butter until creamy for 3 minutes.
- Add the cocoa powder, and beat at medium speed for 2 minutes.
- Add the powdered sugar slowly, and beat for 2 more minutes at medium speed.
- Add milk and vanilla extract and beat again for 1 minute.
Toast the coconut
- You can either use shredded coconut or desiccated coconut to decorate the cake. In a dry pan over medium heat, add the coconut and keep stirring until it toasts (not so evenly). When you're happy with the color, remove the coconut from the pan immediately onto a plate so it doesn't toast further and burn. Alternatively, you can toast the shredded coconut in the oven at 320°F/160°C for 5 minutes.
Frost and decorate
- Fill the cake with buttercream between the 2 cake layers, and frost it from the outside with a thin layer. This will lock in all of the crumbs and make the cake easier to frost.
- Place the cake in the fridge for 20 minutes, this will harden the butter in the frosting and give it a solid shape. Frost again with the remaining frosting so the cake is fully covered with buttercream.
- To decorate the cake, place Cadbury mini eggs in the center of the top of the cake. Then cover with toasted coconut on top and from the sides, pressing very gently for the coconut to stick.
Notes:
- This recipe makes 1200 grams of batter, use this as a guide to evenly divide the batter between 2 or 3 cake pans.
- Use cake pans instead of springform pans as the batter of this cake is thin and might cause leakage.
- Before you start, make sure that your baking powder is active and not past its expiry date. To check, add half a teaspoon of baking powder to a bowl with 2 teaspoons of hot water. If the baking powder bubbles, then it’s good to go. If not, then it’s dead and you need to get a new one.
- This cake makes 8 to 10 servings.
- Storing: You can bake the cake and wrap it in parchment paper followed by plastic wrap and store it at room temperature for up to 2 days. Frosted cakes keep perfectly for 4-5 days covered at room temperature. If it’s hot where you are, store it in the fridge but take it out of the fridge 1 hour before serving).
- Nutrition: a rough estimate is calculated per slice of cake without the frosting or decoration.
Nutrition Information
This website provides approximate nutrition information for convenience and as a courtesy only. Nutrition data is gathered primarily from the USDA Food Composition Database, whenever available, or otherwise other online calculators.
© Little Sunny Kitchen


Sarah says
Made this cake a day before Easter and it was AMAZING! Everyone loved it so much that there were no leftovers. I broke some of the mini eggs as per your recommendation and it looked pretty. Thanks for sharing.
Brandi says
Gorgeous cake and sooo good!