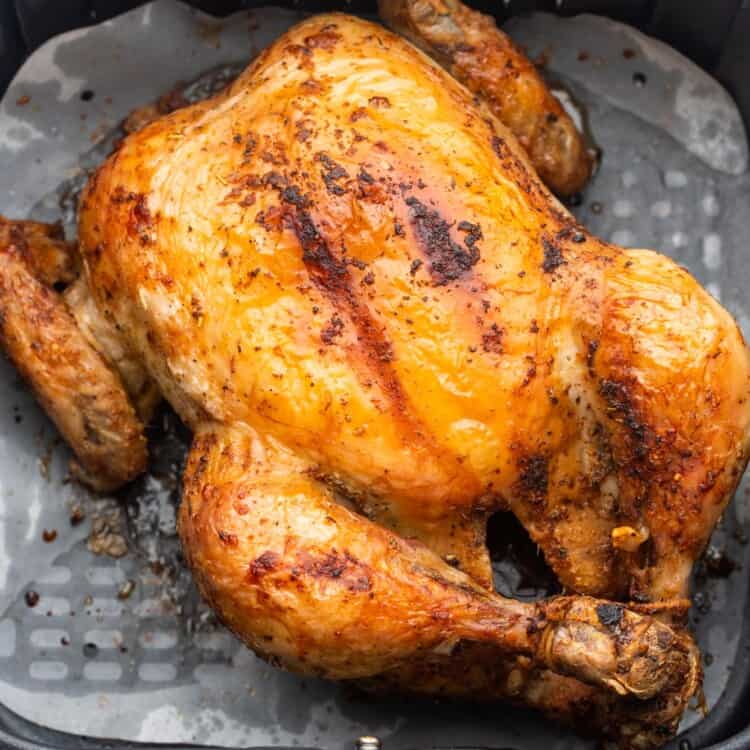
Learn how to make the best roast whole chicken with this simple and perfectly cooked Chicken Under a Brick Recipe!
A whole, butterflied chicken is pressed and seared in a skillet to make the skin extra crispy before it’s roasted with potatoes in a flavorful marinade.

In Italian, this simple yet amazing roast chicken recipe is called “Pollo al Mattone”, which just means Chicken Under a Brick.
The goal for this Italian baked chicken recipe is simple: Create the crispiest skin possible on a roast chicken. And we’ll accomplish that nicely by spatchcocking the chicken so that it’s thin and flat, and then searing it, breast side down, in a hot skillet while the chicken is weighed down.
It is common for home cooks in Italy to own a tool called a mattone, which is usually a heavy, round clay press used expressly for weighing meat down while grilling or searing it.
Since I don’t have one of those, I’m using one of my heavy cast iron dutch ovens as my weight. You can also use a literal brick, or even a 5 lb weight from your exercise set up! Just be sure to wrap it with foil to keep things clean.
I’ll show you exactly how to butterfly or spatchcock a chicken, so you can use that skill to make chicken using multiple methods.
Other than this brick chicken method, I also often grill spatchcock chicken, and sometimes I simply roast spatchcock chicken, skipping the brick part.

Why You’ll Love This Recipe
- It’s ready in a hour – Butterflying the chicken before cooking it means that it will cook in less time than it would take to roast it the traditional way. From start to finish, the chicken and the crispy potatoes are ready in 60 minutes.
- Everything is ready at the same time – There’s no need to worry about timing or making sure that your sides are ready at the same time as the meat with this recipe. The potatoes and chicken are cooked in the same pan, and ready to serve simultaneously!
- It’s a fun and effective cooking method to learn! Cooking with bricks is an old-school cooking method that you may not have used at home before, but once you learn how to cook chicken under a brick (or a heavy pot), you’ll realize why chefs love it so much. The chicken skin is so crispy!
Key Ingredients
Here’s what you need to make this Chicken Under a Brick Recipe:
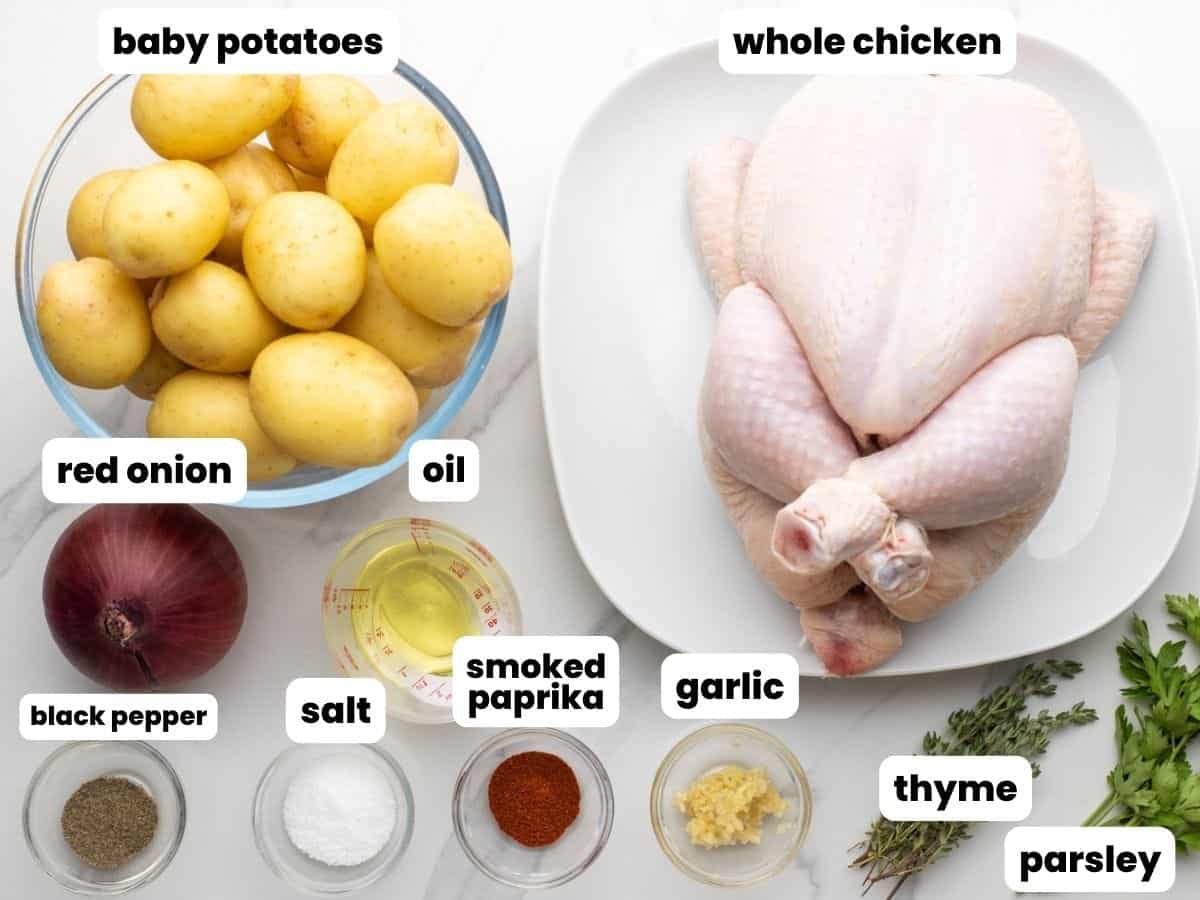
- A Whole Chicken – This recipe will work best with a smaller chicken, so look for one that is about 1.5 pounds. You need it to be able to fit in your skillet! If your chicken is frozen, be sure to safely and fully thaw it before starting this recipe.
- Potatoes and Onions – I love that we decided to cook the potatoes with the chicken here. Halved baby potatoes take on the wonderful flavor of the marinade, and get nice and crispy in the oven.
- Marinade – The marinade we’re using for this Italian baked chicken includes olive oil, fresh garlic, thyme, and lemon juice Smoked paprika adds warm color and flavor to the chicken as well.
Complete list of ingredients and amounts can be found in the recipe card below.
How to Butterfly a Whole Chicken
This method, also called “spatchcocking” is the best way to cook a whole chicken quickly and evenly. The basic idea is that we will remove the backbone from the bird, and then flatten it out.
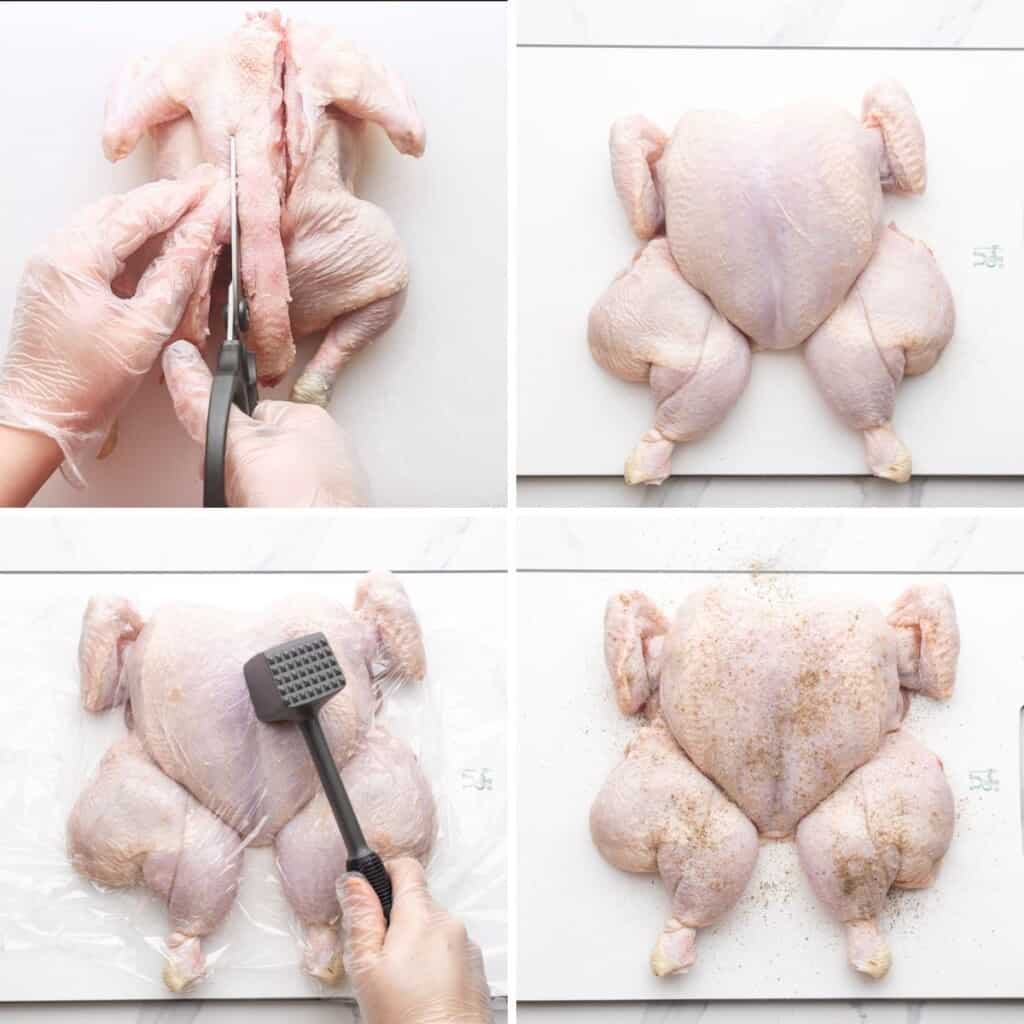
- Place the chicken on your cutting board, breast side down, and use kitchen shears to cut along both sides of the backbone starting at the tail and working towards the neck. (Save the backbone for homemade chicken stock!)
- Now flip the chicken over and pull the legs out to the sides.
- Place a piece of plastic wrap over the chicken, and use a meat mallet to firmly press down on the breast until you hear the breastbone crack. You can pound on the rest of the bird to be sure that everything is as flat as you can get it.
- Finally, tuck the wings underneath the chicken, and season generously on both sides with kosher salt and ground black pepper.
If you’d rather leave the whole chicken un-butterflied, try my recipe for Dutch Oven Roast Chicken with potatoes. It’s easy and also delicious!
How To Make Chicken Under a Brick
While you’re preparing the chicken, heat an oven-safe non-stick pan over medium heat on the stove with a touch of oil. You can also preheat the oven at 375°F (190°C).
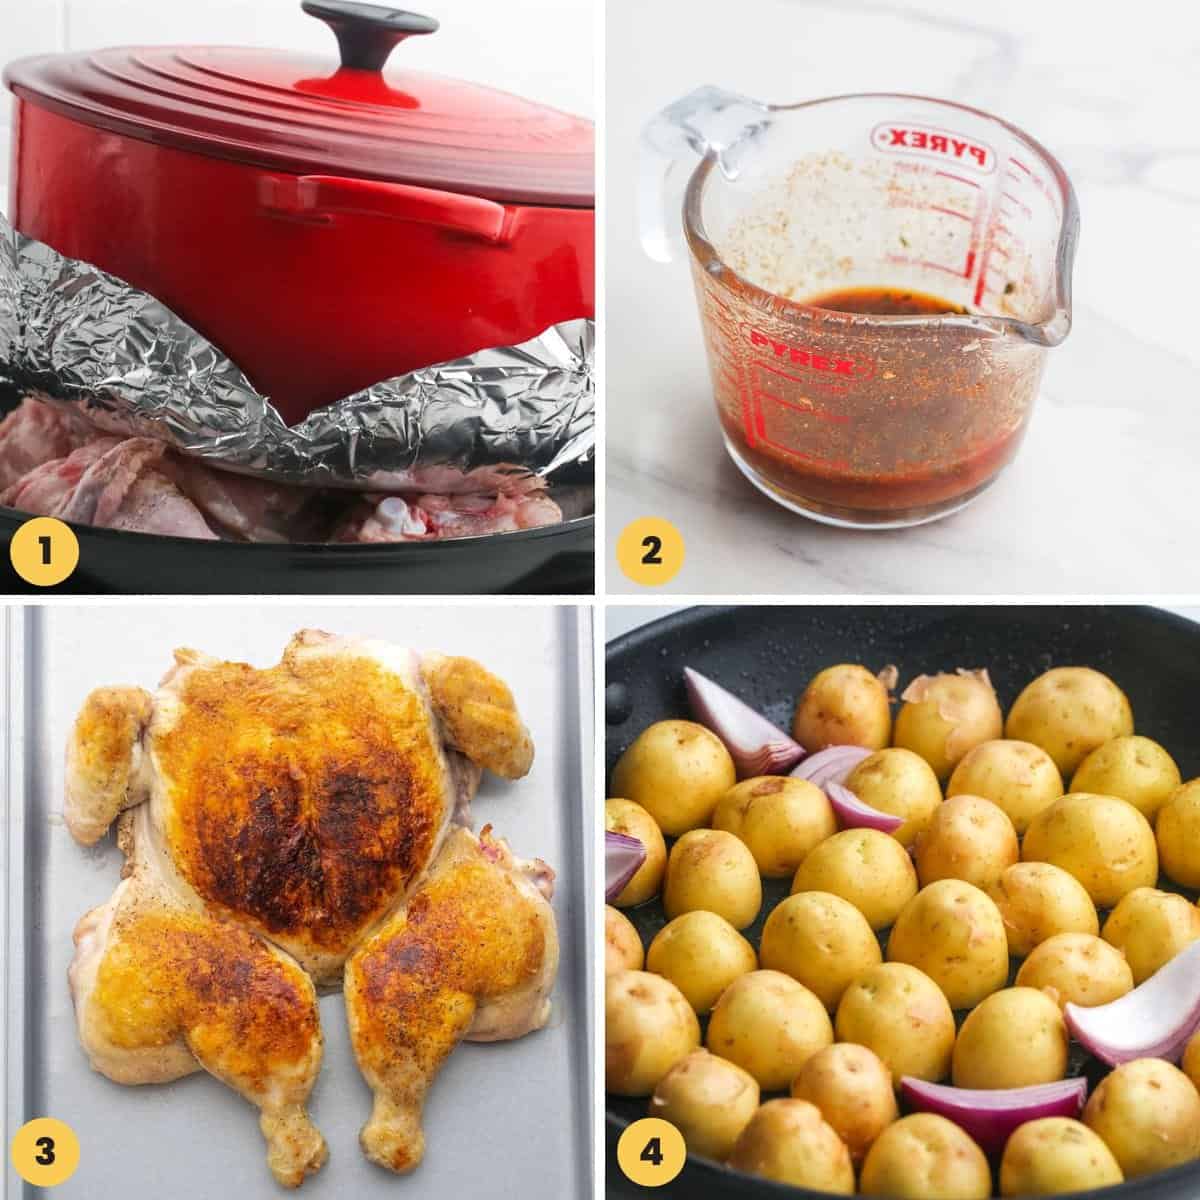
- Sear the Chicken: Once your pan is hot, add the chicken, breast side down. Weigh it down with a heavy object, such as a foil-wrapped brick or a Dutch oven. Cook for 15 minutes, checking every 5 minutes and adjusting the heat if needed to prevent burning.
- Make the Marinade: While your chicken is cooking, mix together olive oil, lemon juice, minced garlic, thyme, smoked paprika, salt, and pepper in a small bowl.
- Remove the Chicken: Remove the pan from the heat, and take the chicken out of the skillet (carefully, to avoid ruining the perfectly crispy skin), and place it on a sheet pan. Drain the excess fat from the skillet.
- Add the Potatoes: Place the baby potatoes, cut side down, into the skillet. Then add sliced red onions.

- Return the Chicken to the Pan: Carefully transfer the brick chicken back to the skillet, placing it over the potatoes, this time breast side up. Pour the prepared marinade over the chicken, and bake in the preheated oven for 20 minutes, or until the chicken is fully cooked.
- Finish the Potatoes: Remove the chicken to a platter and let it rest. Put the potatoes back into the oven and continue to cook them for 10 minutes or until crisp and tender. Serve the chicken and potatoes garnished with fresh parsley and lemon wedges.
Tip!
Make sure that your skillet is large enough to hold the entire spatchcocked chicken, and is safe to be put in the oven. I’m using a non-stick pan, but a well-seasoned cast iron skillet will work equally well.
Recipe Tips
- 30 minutes before roasting the chicken, remove it from the fridge and let it sit at room temperature. This step will help the chicken cook more quickly and evenly.
- Use a meat thermometer to check to be sure that the chicken is fully cooked. The internal temperature of the meat should be 165°F/74°C.
- Allow the chicken to rest for at least 20 minutes before carving into it. This will let the juices from the meat redistribute, keeping the chicken from drying out.
- The marinade for this recipe isn’t used like a traditional marinade. We add it to the chicken after the initial weighted searing is complete. This way, the aromatics don’t burn in the skillet and their flavors will soak into the meat as it roasts in the oven.

Storing Tips
Leftover brick chicken can be stored in the fridge for up to 5 days in an airtight container.
You can also freeze the cooked chicken for up to 3 months. Pull off the meat to put in the freezer, and then use the carcass to make a delicious pot of chicken noodle soup!
What To Serve With Chicken Under a Brick
This recipe is pretty close to a full meal already, with chicken, potatoes, and some veggies in the form of onions already included!
I think that you will enjoy making a healthy salad to go with this hearty meal. My Olive Garden Salad is pretty amazing, and you can’t go wrong with a classic Caesar Salad.
Bring a bit of Italy into your dessert too! My easy Tiramisu Recipe will be perfect.
Recipe FAQs
Regardless of what you use to weigh down the chicken, it’s common for some to use actually bricks to accomplish this cooking method. So it’s also common for this meal to be called brick chicken or chicken under a brick.
You can! If you’d prefer not to cook the chicken whole, you can cut the whole chicken into smaller pieces first, or use this recipe to cook whole, bone-in chicken breasts. Adjust the bake time as needed so that you don’t overcook the meat.
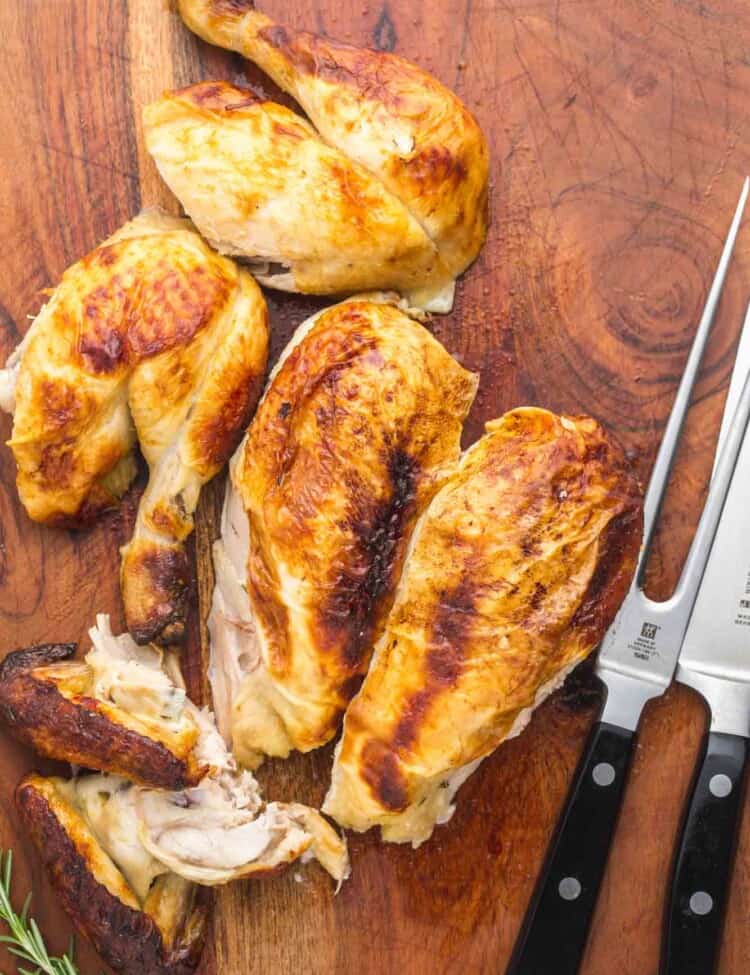
Follow my easy tutorial for How to Carve a Chicken for all of the details! It’s easy to carve a chicken into serving pieces, and everyone can have their favorite white or dark meat meal.
Chicken Under A Brick is such a fun and easy recipe once you get the hang of it, and with this recipe, you’ll be serving up the most delicious crispy-skinned whole chicken for dinner in under an hour! Be sure to save the recipe!
Did you make this? Be sure to leave a review below and tag me on Facebook, Instagram, or Pinterest!

Chicken Under a Brick
Equipment
- Oven proof skillet
Ingredients
- 1 ½ lb (675 g) whole chicken
- 1 tablespoon (15 ml) vegetable oil
- Salt and pepper to taste
- 1 ½ lb (675 g) baby potatoes halved
- 1 red onion quartered
- Fresh parsley for garnish
- Lemon wedges for serving
For the Marinade:
- 1 tablespoon (15 ml) olive oil
- 1 tablespoon (15 ml) fresh lemon juice
- 3 cloves garlic minced
- 2 teaspoons fresh thyme leaves
- ½ teaspoon smoked paprika
- Salt and pepper to taste
Instructions
- Preheat the oven to 375°F (190°C).
- Spatchcock the chicken: remove the backbone, crack the breast bone, and flatten the chicken. Tuck in thhewings and season both sides generously with kosher salt and pepper.
- Heat an oven-safe, non-stick pan (or well-seasoned cast iron pan) over medium heat. Add the vegetable oil.
- Once the pan is hot, place the chicken breast-side-down and weigh it down with a heavy object like a foil-wrapped brick or a dutch oven. This ensures even contact with the pan for proper browning.
- Cook the chicken on the stovetop for 15 minutes, checking and adjusting the heat every 5 minutes to prevent burning.
- While the chicken is cooking, prepare the marinade by combining the olive oil, lemon juice, minced garlic, thyme leaves, smoked paprika, salt, and pepper in a bowl.
- Remove the chicken from the pan and place it on a sheet pan. Turn off the heat, and drain the excess fat from the skillet.
- Add the halved baby potatoes to the pan, cut side down. Add the quartered red onion.
- Place the chicken on top of the vegetables, breast-side-up. Pour the prepared marinade evenly over the chicken.
- Transfer the pan to the preheated oven and bake for 20 minutes, or until a meat thermometer inserted into the thickest part of the breast reads 165°F (74°C).
- Remove the chicken from the pan with tongs, taking care not to tear the skin. Return the pan to the oven and continue to cook the potatoes for another 10 minutes. Let the chicken rest while the potatoes finish cooking.
- To serve, plate the chicken with the potatoes, garnish with fresh parsley, and serve with lemon wedges.
Notes:
- Make sure that your skillet is large enough to hold the entire spatchcocked chicken, and is safe to be put in the oven. I’m using a non-stick pan, but a well-seasoned cast iron skillet will work equally well.
- 30 minutes before roasting the chicken, remove it from the fridge and let it sit at room temperature. This step will help the chicken cook more quickly and evenly.
- Allow the chicken to rest for at least 20 minutes before carving into it. This will let the juices from the meat redistribute, keeping the chicken from drying out.
- The marinade for this recipe isn’t used like a traditional marinade. We add it to the chicken after the initial weighted searing is complete. This way, the aromatics don’t burn in the skillet and their flavors will soak into the meat as it roasts in the oven.
- Leftover brick chicken can be stored in the fridge for up to 5 days in an airtight container.
Nutrition Information
This website provides approximate nutrition information for convenience and as a courtesy only. Nutrition data is gathered primarily from the USDA Food Composition Database, whenever available, or otherwise other online calculators.
© Little Sunny Kitchen






Natasha says
I love this old school method. It was a huge success and it with my family! We all loved this very delicious chicken recipe, so tasty!
Little Sunny Kitchen says
Thank you, Natasha! That’s so amazing to hear it was a success with your family!
Jade says
The spices used in this recipe plus the fresh lemon juice made the chicken more flavorful. The cooking method from stove to oven was a great tip to make it crispy and tender.
Little Sunny Kitchen says
Thank you, Jade, for the great review! I’m glad to hear that you enjoyed this recipe!
Sharina says
My fam thought I bought this roast whole chicken! They were addicted to it! It is perfectly seasoned and sooo delicious. Definitely making this again!
Little Sunny Kitchen says
I am so happy to hear that your family loved this chicken recipe, Sharina! Thank you for taking the time to write this kind review!