
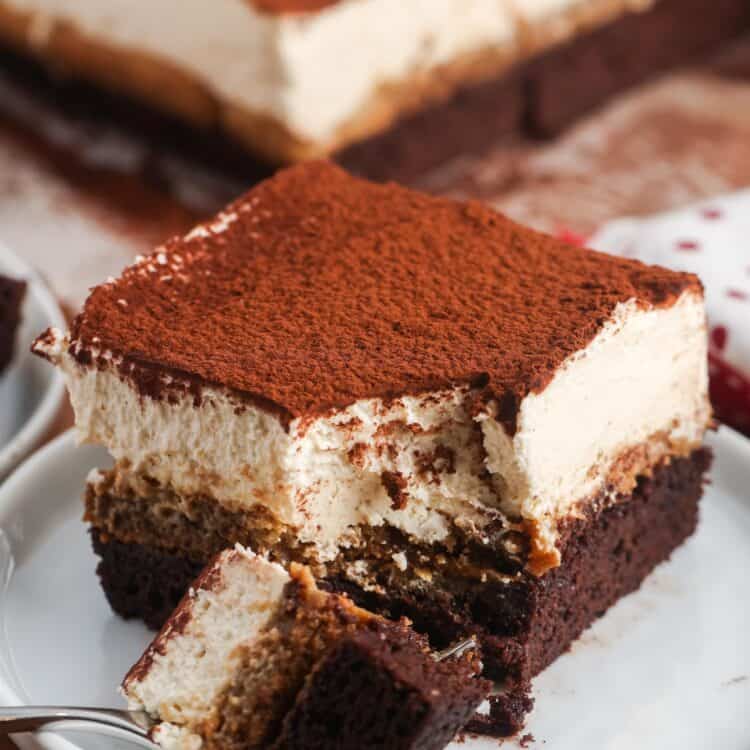
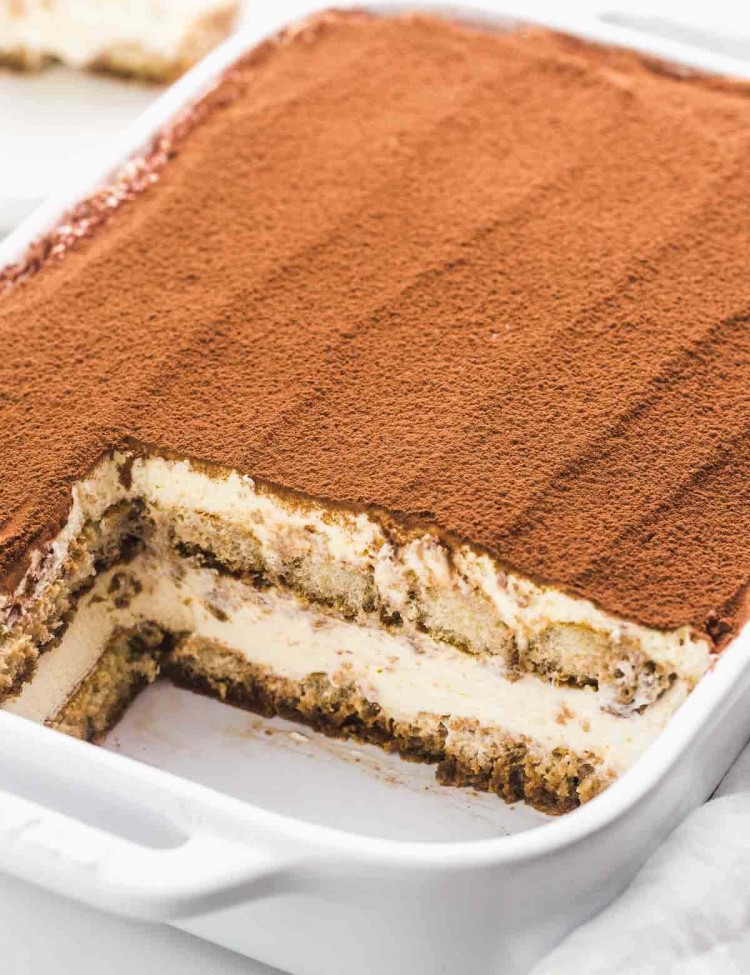
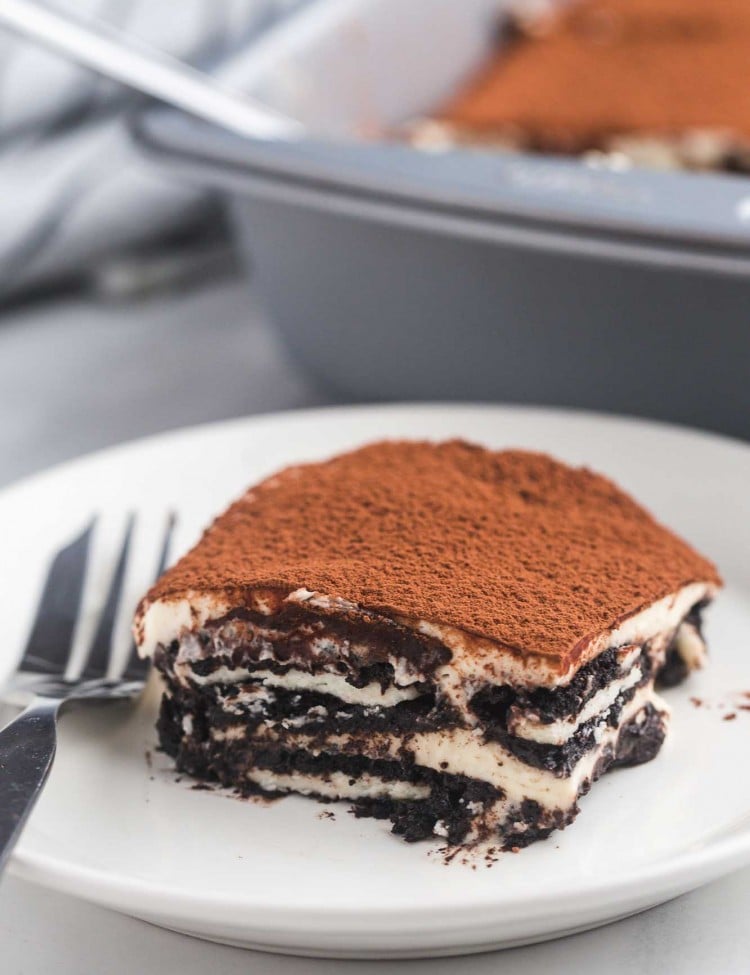
These Tiramisu Brownies are a decadent fusion of rich fudgy brownies and classic Italian tiramisu!
Espresso-infused brownies form the base of this dessert and are topped with coffee-soaked ladyfingers and creamy mascarpone. Everyone will absolutely love this delicious dessert mash-up!
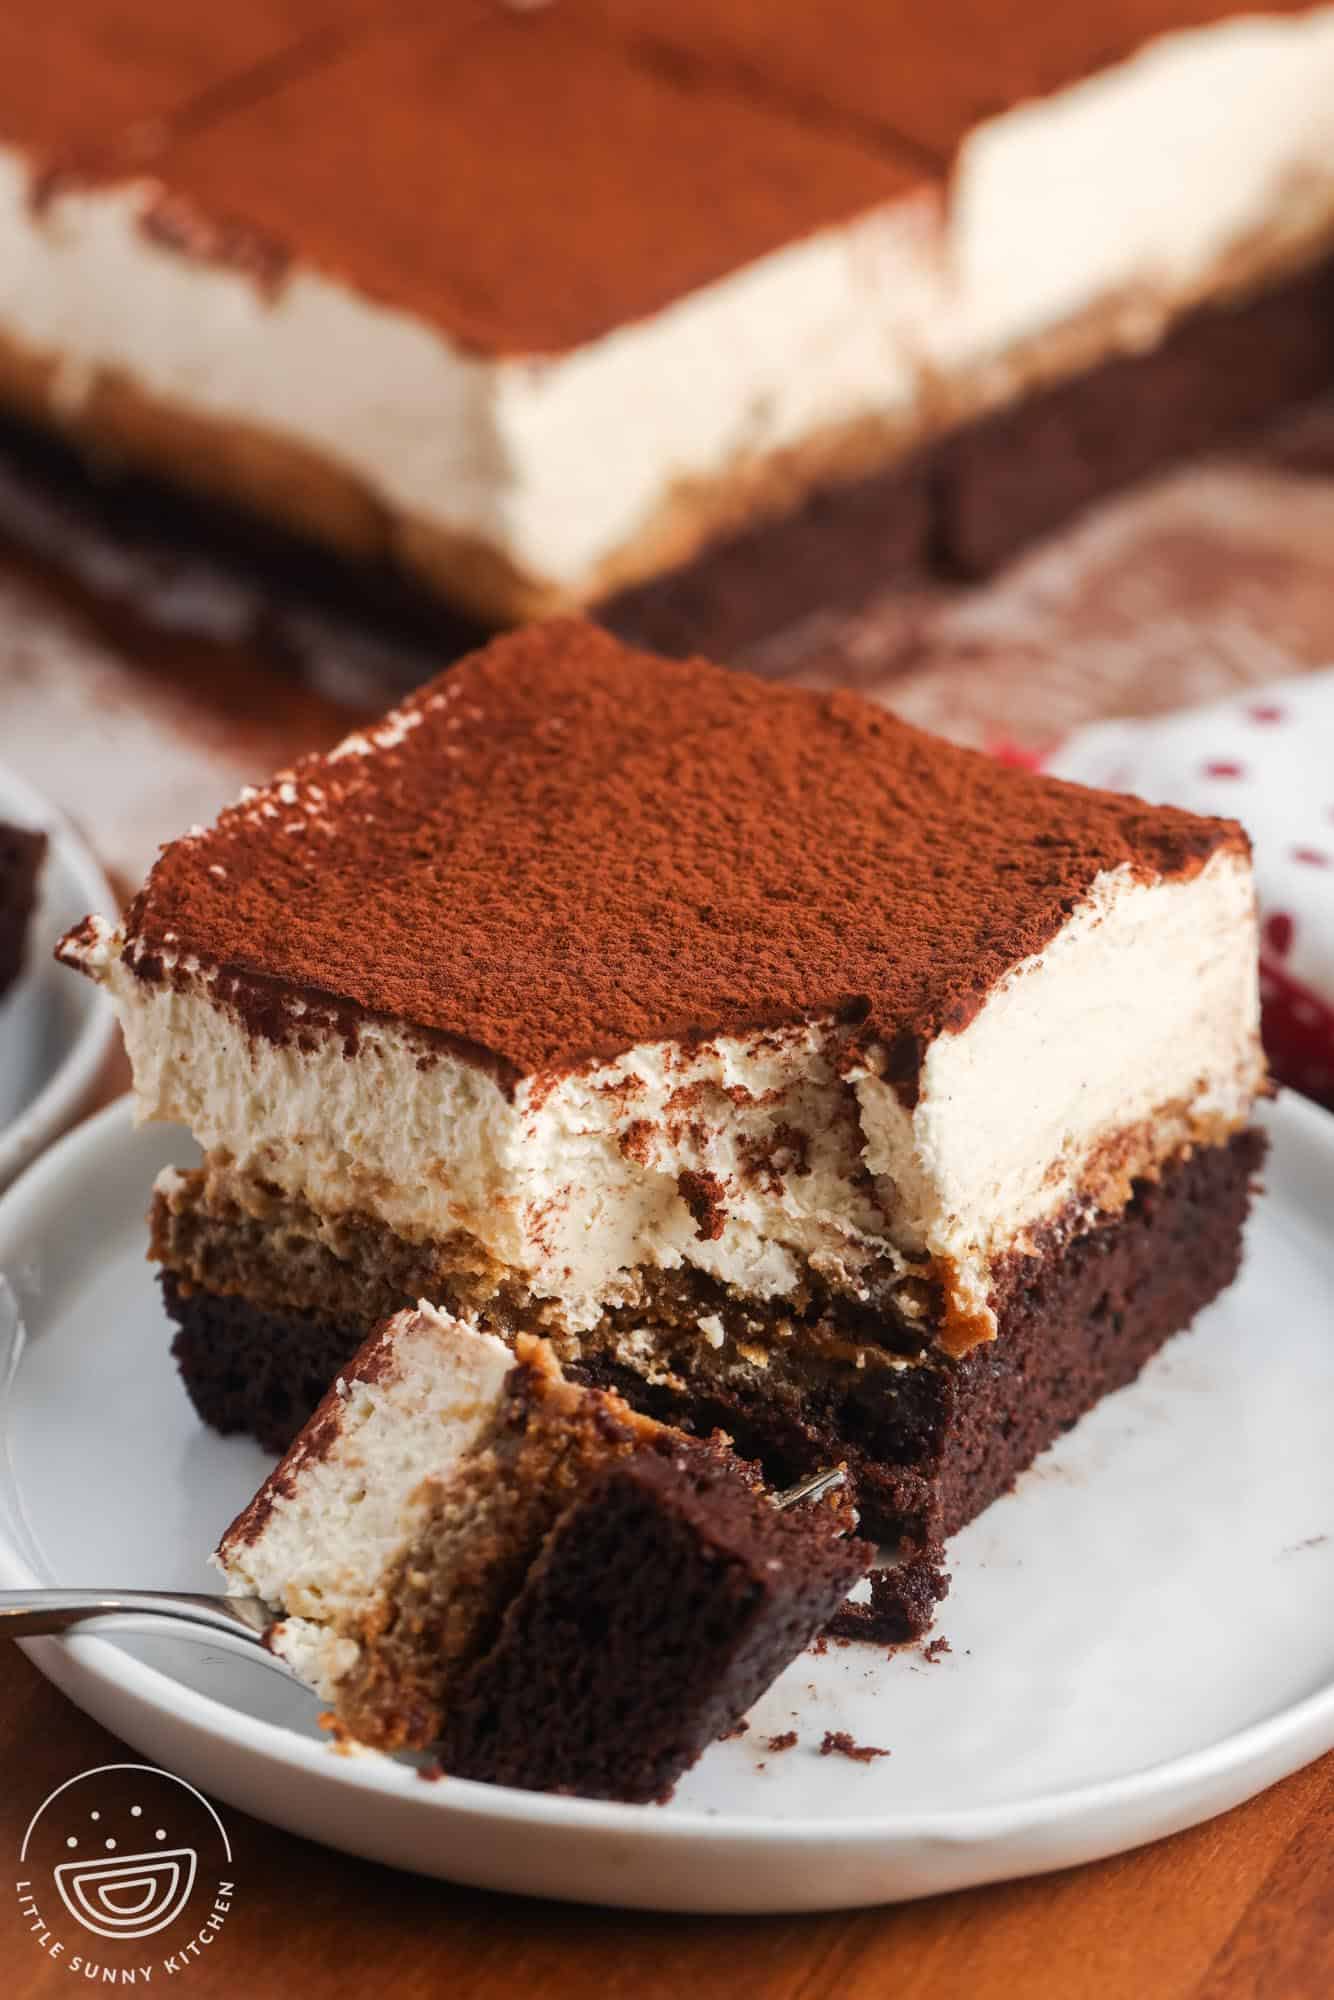
This layered brownie recipe is the perfect marriage of two of my favorite go-to desserts. First, we have rich, fudgy chocolate brownies, which would be amazing all by themselves, but we aren’t done yet!
On top of the baked brownies, we’ll add a layer of classic tiramisu, complete with coffee-soaked Savoiardi sponge biscuits and a thick and creamy mascarpone cheese layer.
To simplify things a little bit, we’re skipping the usual tiramisu step of making a custard with eggs. Instead, this tiramisu filling is egg-free, and a bit firmer than a traditional tiramisu.
This makes the thick, layered tiramisu brownies easier to cut and enjoy!
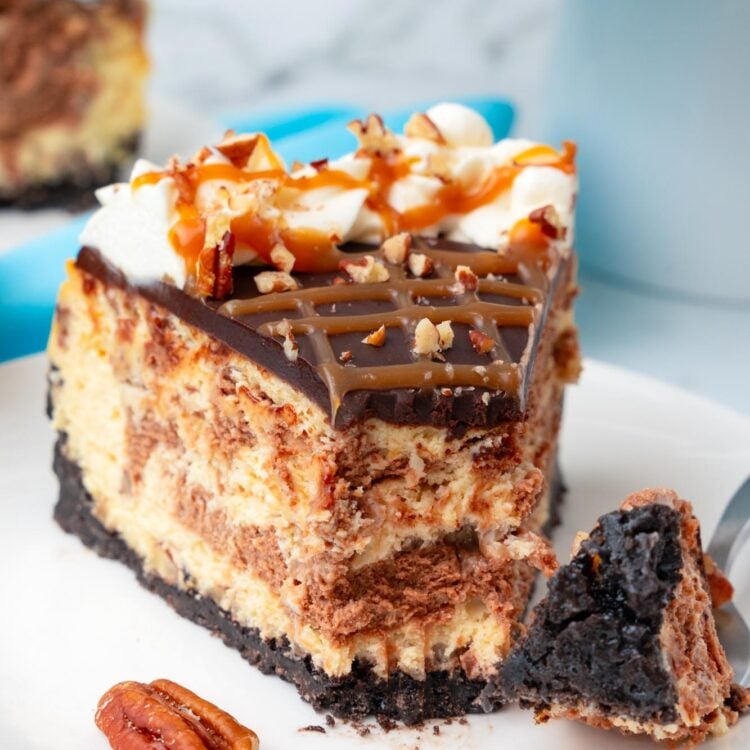
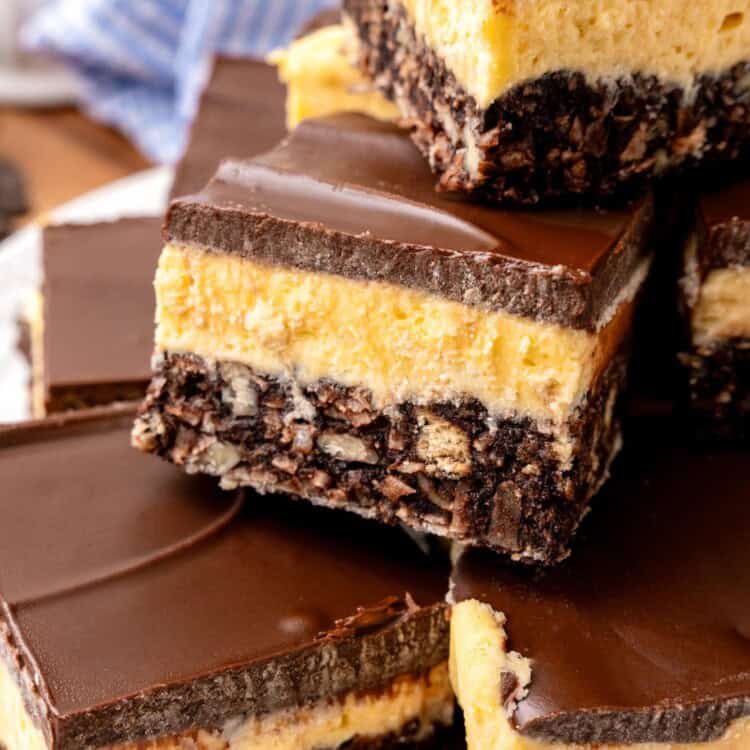
If you love brownies, you’ll want to try some of my other recipes too! Buckeye Brownies also have layers, but the top layer is a luscious peanut butter cream.
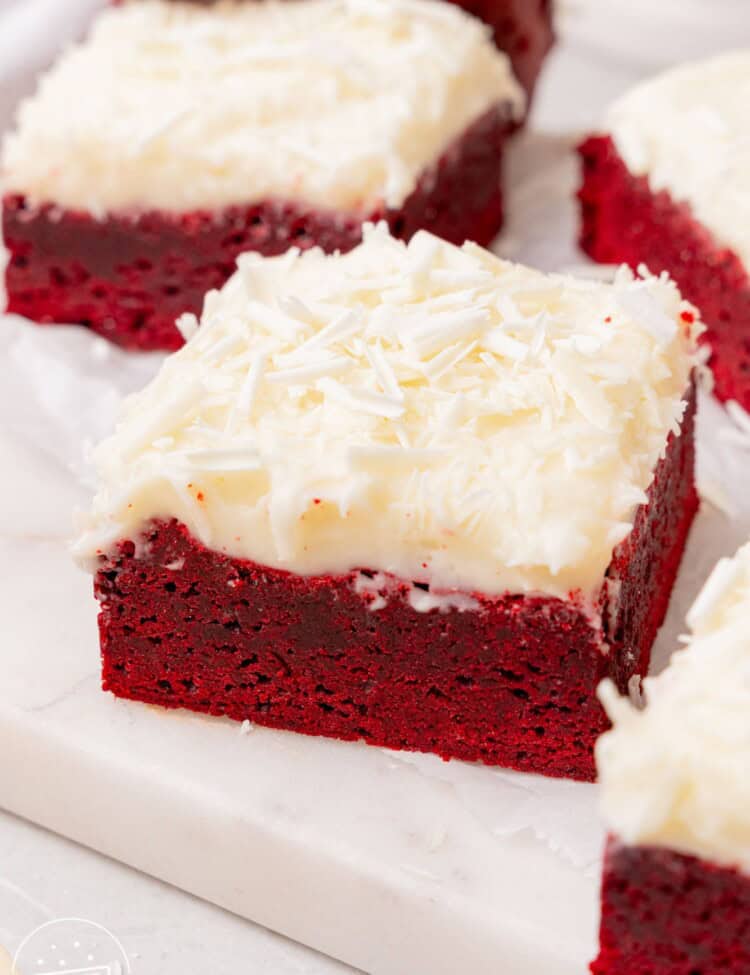
Next, check out my Red Velvet Brownies, Swirled Pumpkin Brownies, or a healthier option, Sweet Potato Brownies.

Tiramisu Brownies Recipe Highlights
- 3 Delicious Layers – The variations of flavors and textures in these dessert bars is part of what makes them spectacular! Each square is tall and the layers are thick and visible. These are best eaten with a fork.
- Traditional Tiramisu Flavors – Everything you’d expect from a tiramisu is in here, and made even more delicious by pairing it with a rich layer of chocolate brownies.
- Espresso Infused Brownies – Instant espresso powder is the key ingredient here. It elevates the chocolate flavor of the brownies and makes them the perfect base layer for the coffee-infused tiramisu.
Key Ingredients
Here’s what you need to make these brownies, which are like two perfect desserts in one! The recipe is made in layers.

Complete list of ingredients and amounts can be found in the recipe card below.
- Brownie Layer: Butter, eggs, flour, and a combination of brown sugar and granulated sugar are the main ingredients in these brownies. For flavor, we’ll add vanilla extract, cocoa powder, and instant espresso.
- Tiramisu Layer: You’ll need ladyfinger biscuits, aka ladyfingers, savoiardi, or sponge fingers to dip into brewed coffee. Look for these where you’d find Italian specialty items in the grocery store, or order them online.
- Mascarpone Cream Layer: Remember, we aren’t using any eggs to make our cream today! Instead, you’ll need softened mascarpone cheese, heavy whipping cream, powdered sugar, and vanilla.
How To Make Tiramisu Brownies


Recipe Tips
- Extra Flavor: When testing this recipe, I played around with adding things to the cream layer. While not entirely necessary, you can try adding 2 tablespoons of instant vanilla pudding powder and/or 1 teaspoon of instant coffee.
- Fluffy Topping: Don’t mix the mascarpone with the whipped cream too much. Fold the two together gently to keep the topping airy and light.
- Chilling is Important! First, the brownies must be completely cool before you add the tiramisu to them. Then, you should chill the assembled dessert for at least 2 hours to set. Plan for 4 hours if you have the time.
- For Clean Slices: Remove the brownies from the pan and place them on a cutting board. Slice with a large, clean knife. In between each cut, clean the knife under hot running water and dry it off.
Did you make this? Be sure to leave a review below and tag me on Facebook, Instagram, or Pinterest!
Tiramisu Brownies
Equipment
- Electric Hand mixer or Stand mixer
Ingredients
Brownies
- 4 tablespoons (56 g) unsalted butter melted and cooled
- ½ cup (100 g) granulated sugar
- ⅓ cup (75 g) light brown sugar
- 2 large eggs at room temperature
- 1 teaspoon (5 ml) pure vanilla extract
- ¼ teaspoon salt
- ½ cup (45 g) unsweetened cocoa powder
- ⅓ cup (40 g) all-purpose flour
- 1 teaspoon espresso powder
Tiramisu Layer
- 12 ladyfingers savoiardi biscuits
- 1 cup (240 ml) hot brewed coffee
Mascarpone Cream
- 8 ounces (225 g) mascarpone cheese at room temperature
- 1 cup (240 ml) heavy whipping cream
- ½ cup (60 g) powdered sugar
- 2 teaspoons pure vanilla extract or 1 teaspoon vanilla bean paste
- 1 teaspoon instant espresso powder optional, for a stronger flavor
Topping
- 1 tablespoon unsweetened cocoa powder for dusting
Instructions
Make the Brownies
- Preheat the oven to 350°F (180°C), or 320°F (160°C) for a fan oven. Grease and line an 8×8-inch (20×20 cm) baking pan with parchment paper.
- In a large bowl, whisk together the melted butter, granulated sugar, and brown sugar until smooth. Add the eggs, vanilla, and salt, then whisk until combined.
- Sift in the cocoa powder, flour, and espresso powder. Stir until just combined and no dry streaks remain.
- Pour the batter into the prepared pan, spreading it evenly. Bake for 15 minutes, or until a toothpick inserted in the center comes out with a few moist crumbs.
- Let the brownies cool in the pan.
Assemble the Tiramisu Layer
- Pour hot coffee into a shallow bowl. Quickly dip each ladyfinger once on each side (do not oversoak), then arrange them in a single layer over the cooled brownies.
Make the Mascarpone Cream
- In a bowl, beat or whisk the mascarpone cheese until smooth.
- In a separate bowl, beat the heavy whipping cream, powdered sugar, and vanilla extract (plus optional espresso powder) until soft peaks form. Be careful not to overwhip.
- Gently fold the whipped cream into the mascarpone until smooth and creamy.
Assemble & Chill
- Evenly spread the mascarpone mixture over the ladyfinger layer.
- Cover with plastic wrap and refrigerate for at least 2 hours to set.
Serve
- Before serving, sift a thin layer of cocoa powder over the top. Slice into squares and serve.
Notes:
- Extra Flavor: While not entirely necessary, you can try adding 2 tablespoons of instant vanilla pudding powder and/or 1 teaspoon of instant coffee to the mascarpone mixture.
- Fluffy Topping: Don’t mix the mascarpone with the whipped cream too much. Fold the two together gently to keep the topping airy and light.
- Chilling is Important! First, the brownies must be completely cool before you add the tiramisu to them. Then, you should chill the assembled dessert for at least 2 hours to set. Plan for 4 hours if you have the time.
- For Clean Slices: Remove the brownies from the pan and place them on a cutting board. Slice with a large, clean knife. In between each cut, clean the knife under hot running water and dry it off.
Nutrition Information
This website provides approximate nutrition information for convenience and as a courtesy only. Nutrition data is gathered primarily from the USDA Food Composition Database, whenever available, or otherwise other online calculators.
© Little Sunny Kitchen

Storage Tips
These tiramisu brownies should be stored in an airtight container in the refrigerator and will stay fresh for up to 3 days. They’re best served chilled, right from the fridge.
Recipe FAQs
Can I make this gluten free?
Yes! I actually tested this recipe using gluten free ingredients and it turned out perfectly. You’ll want to find gluten-free ladyfingers, and substitute the all-purpose flour with a 1:1 GF blend. You can also leave out the ladyfingers and top the brownies with the mascarpone cream. Add a teaspoon of instant coffee or instant espresso powder to the mixture for more flavor.
Is there alcohol in tiramisu?
Traditionally, tiramisu does include alcohol in the coffee dipping mixture for the ladyfingers. To make this tiramisu brownies recipe easy and family friendly, I’m skipping the alcohol. It’s not needed!
Can I make Tiramisu Brownies without eggs?
This recipe does not include eggs in the mascarpone cream, and we aren’t making a traditional sabayon so there is no concern about raw eggs either. My brownie recipe does call for eggs though. To make these egg-free, use your favorite egg-free brownie recipe for the base layer.
More Amazing Dessert Recipes
All desserts →

You’re going to love making this delicious fusion dessert, and your friends and family will love it too! Be sure to save the recipe by Pinning it so that you can easily find it to make it again and again.


Leave a Review!