
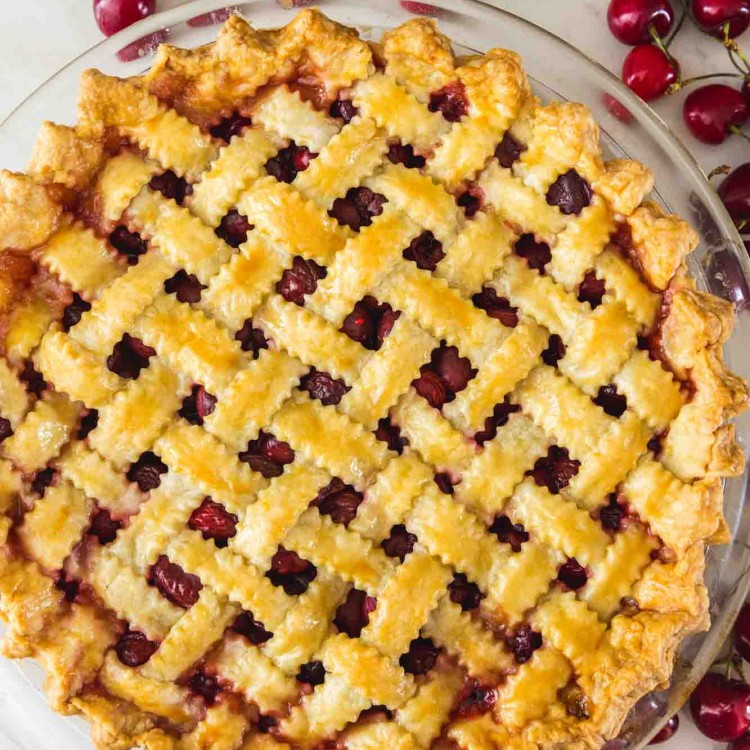
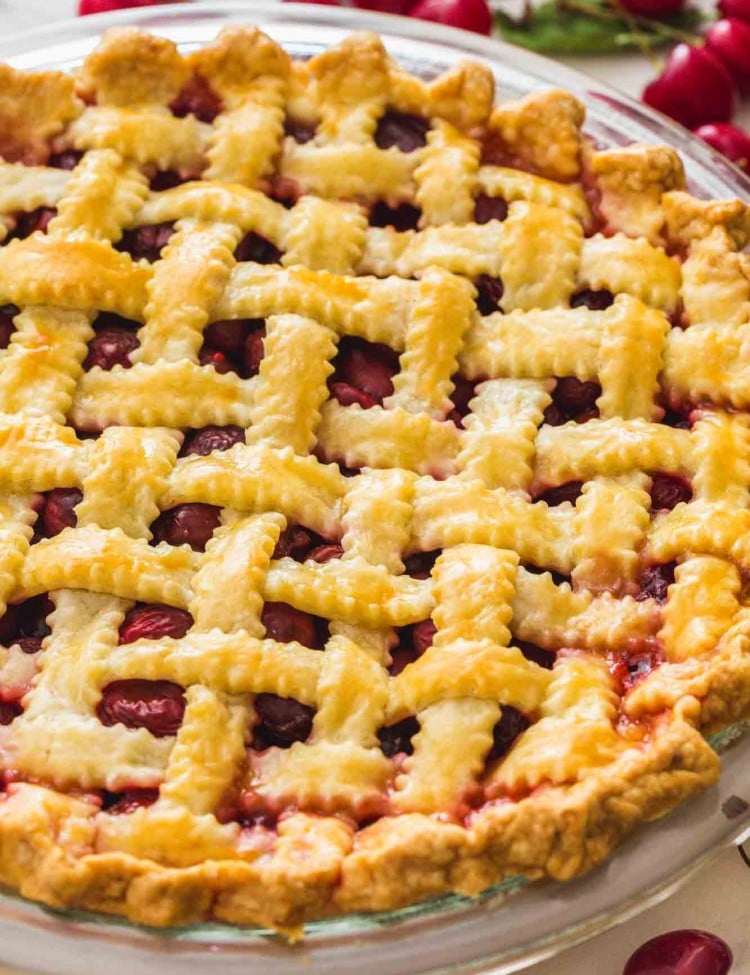
I know you’ve seen them. You know, the gorgeous fruit pies with the basketweave top crust. It’s called a lattice pie top, it’s so easy to make and I’m going to show you exactly how to do it!
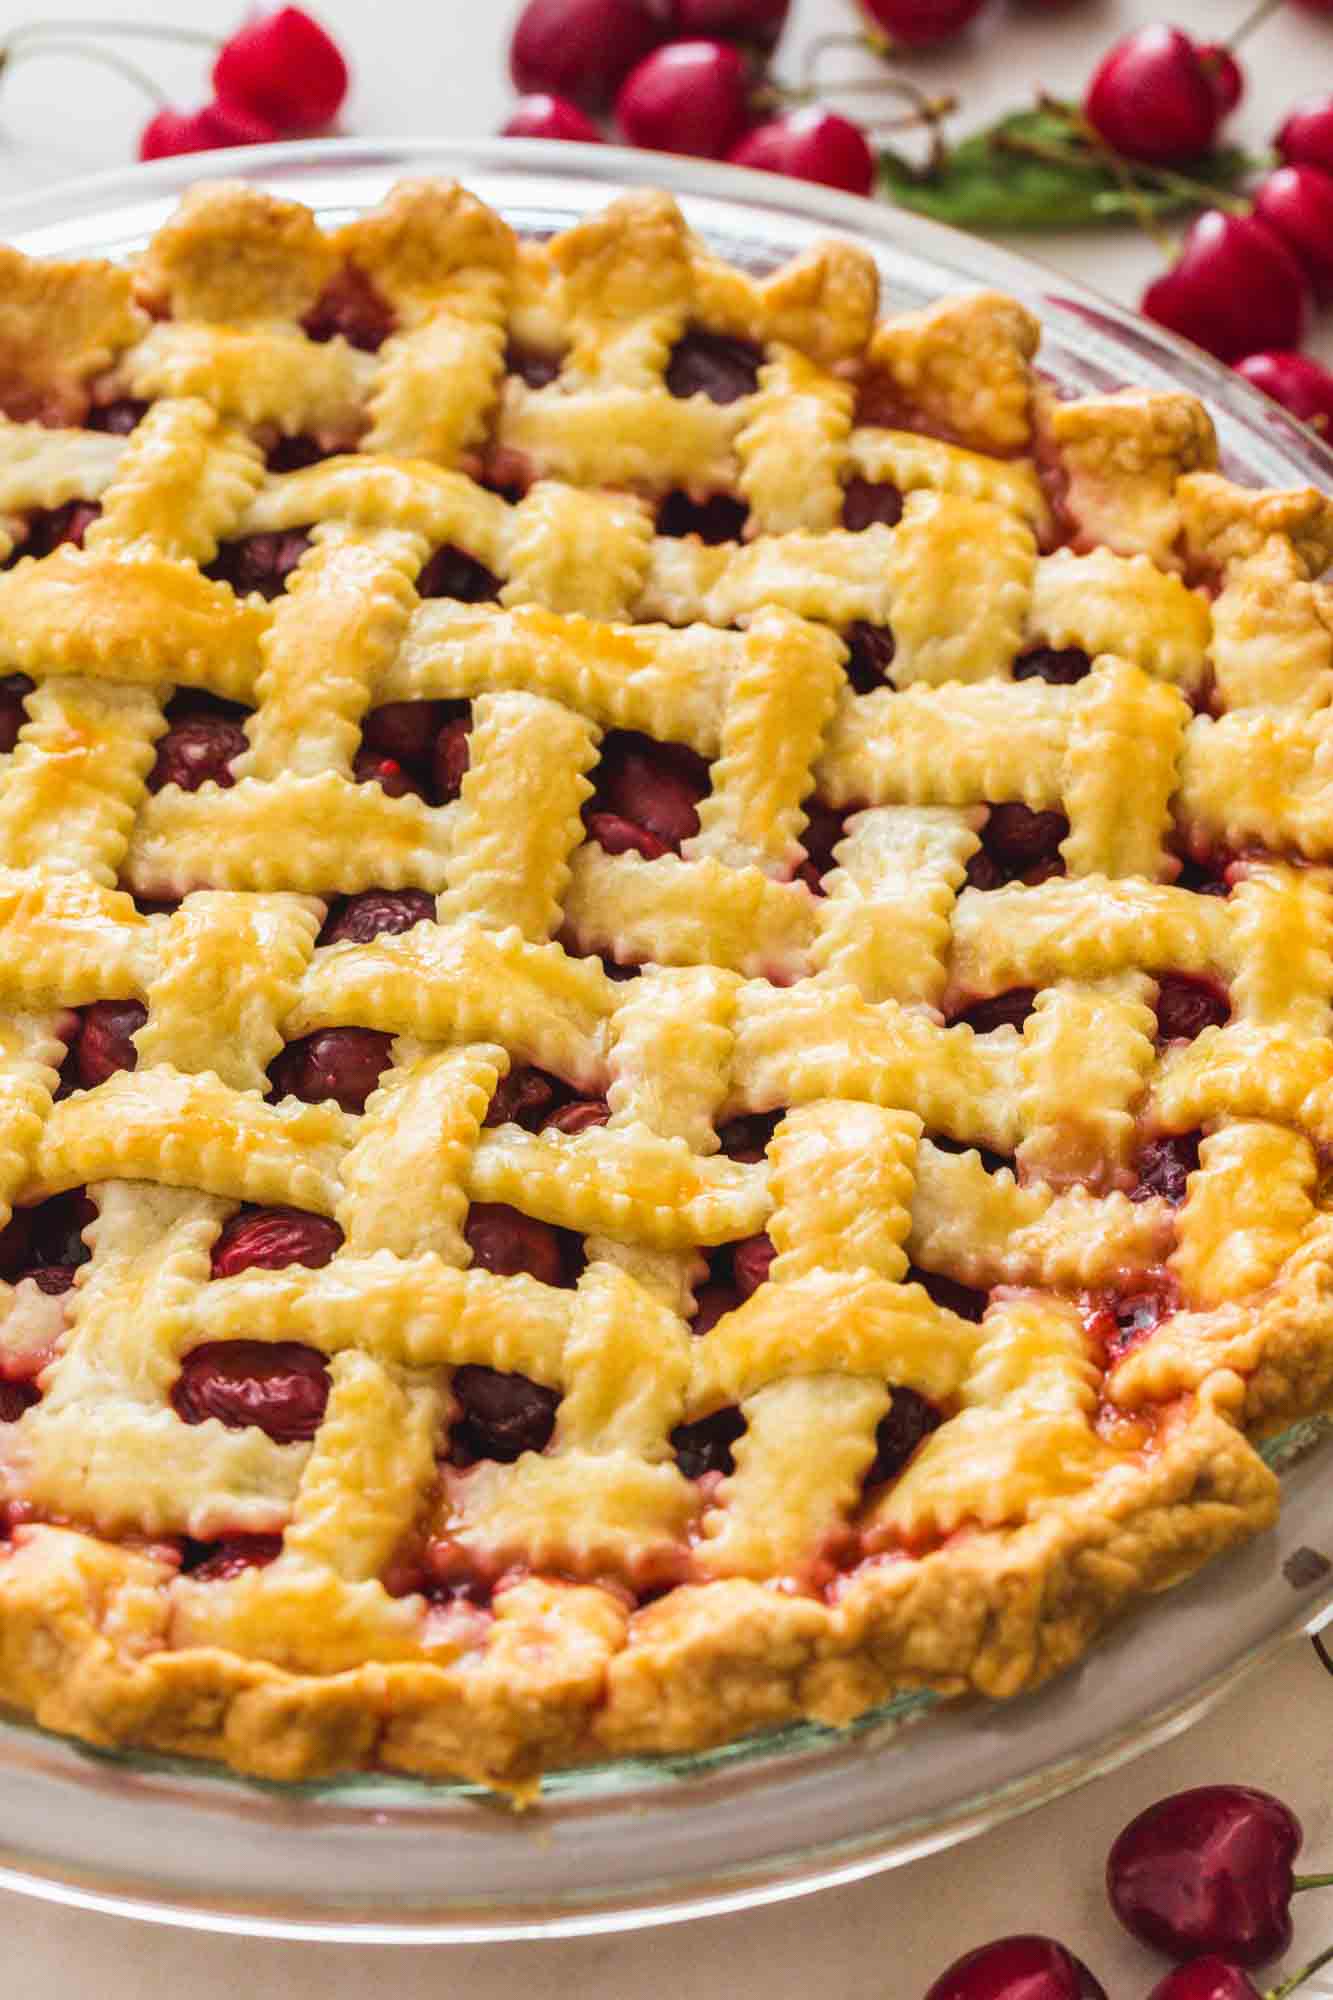
Lattice topped pies look really fancy and complicated, but with a good tutorial and some patience, it’s not very difficult at all to create this beautiful design.
I love making pies. Not only are they delicious, I find them relaxing to make. There’s something about creating a dough, and putting together a beautiful pie that is very satisfying, and it’s even more satisfying when the pie comes out of the oven all brown and bubbly.
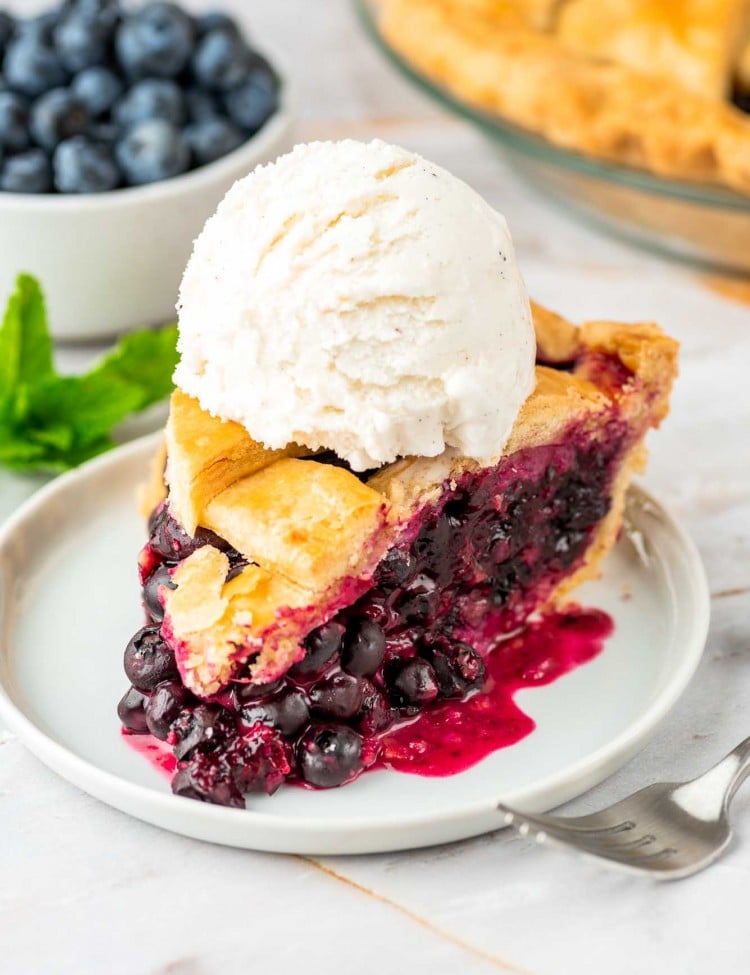
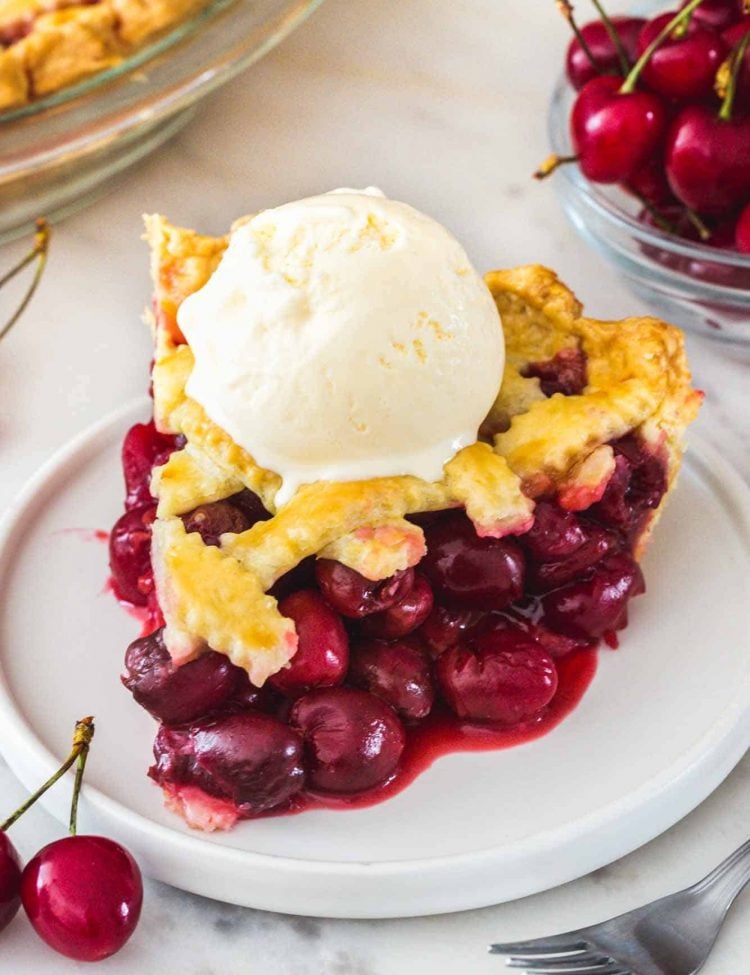
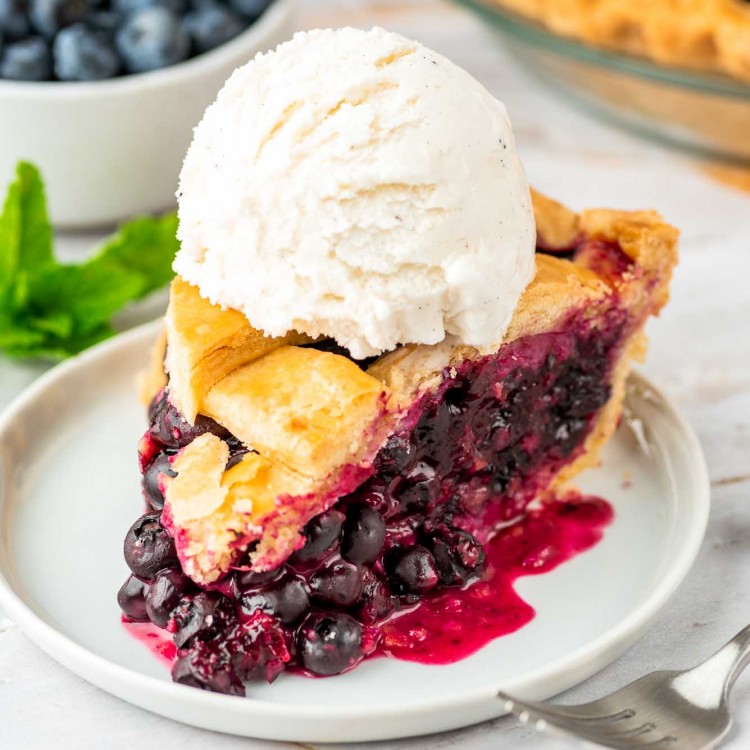
This lattice method is perfect on my Strawberry Rhubarb Pie, Blueberry Pie, Cherry Pie, or my Peach Pie. Any fruit pie is made better with a lattice crust.
Why You Should Use a Lattice Pie Top
- It’s Impressive. Serving a lattice top pie makes you look like a pie-making master chef. Particularly for people who don’t know how to do this technique, they will think you are a pastry wizard with magical powers.
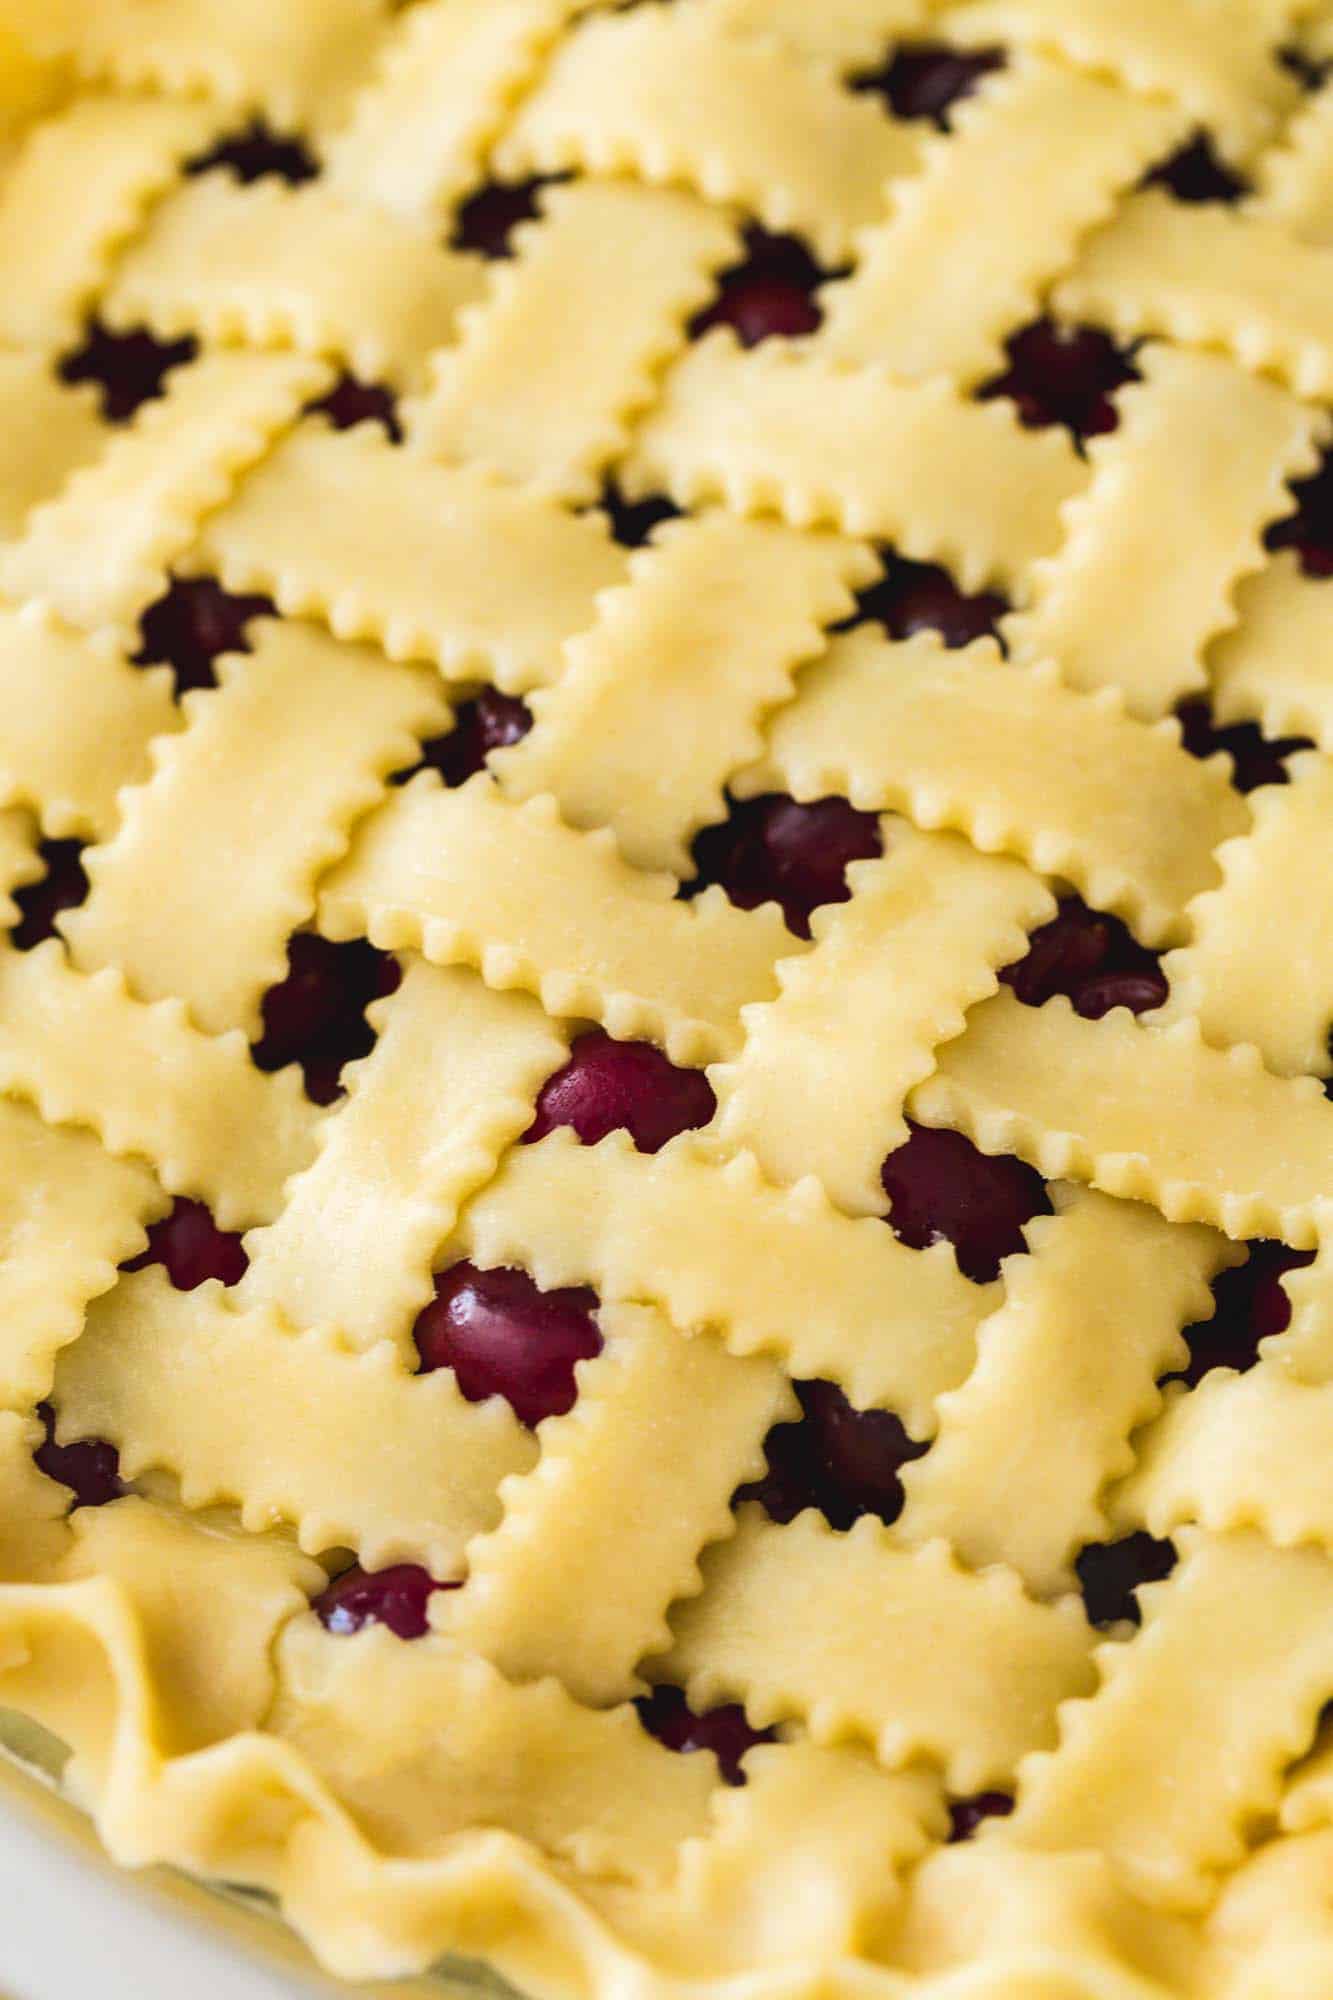
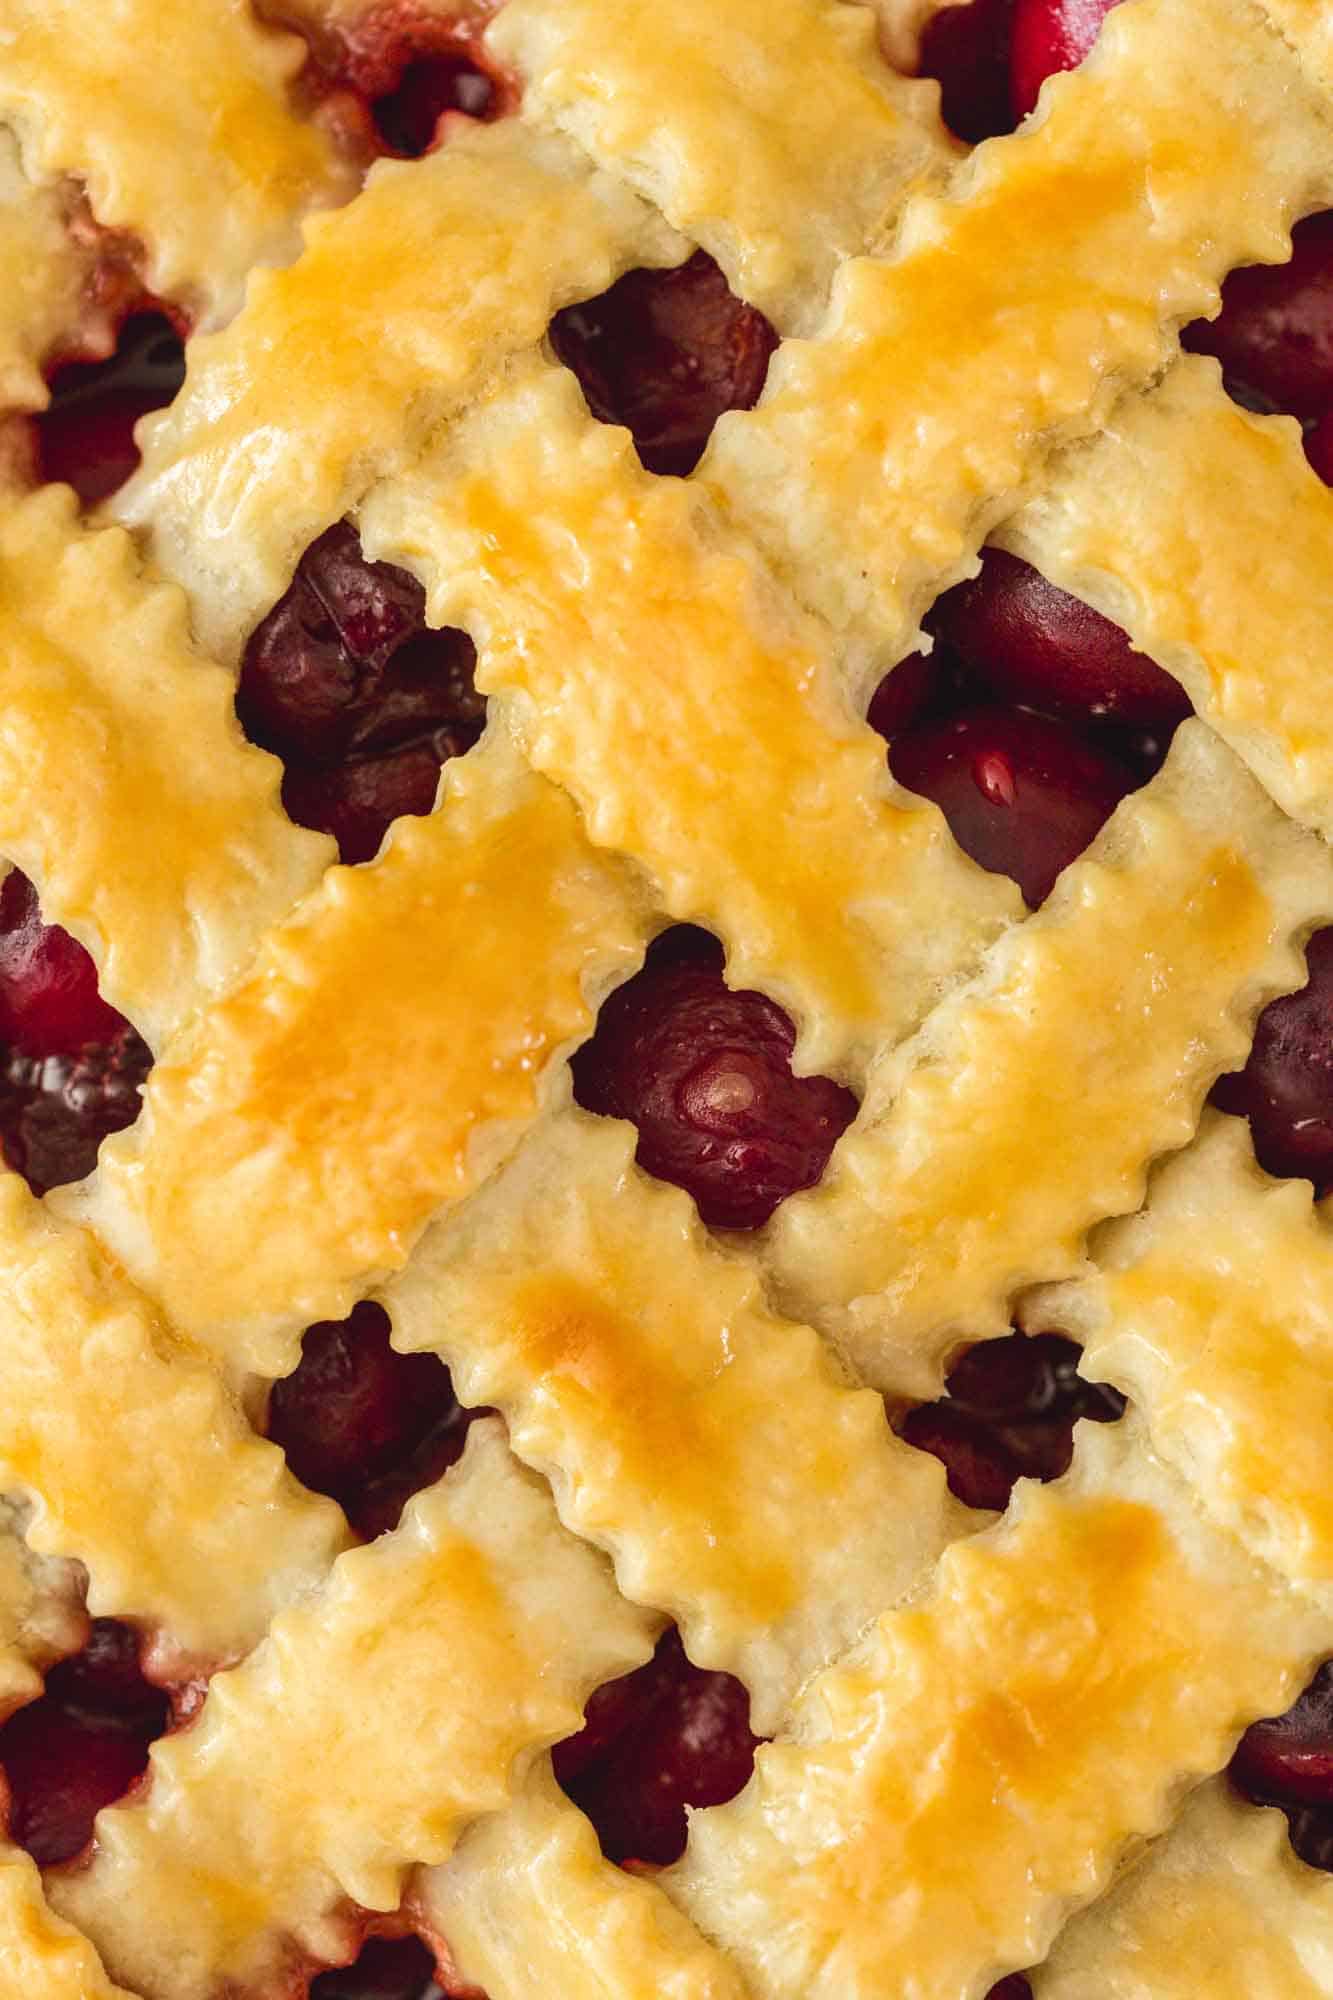
- Presentation. Using a lattice pie crust allows your pie filling to show through in the small spaces in between the strips of crust. Not only is that great for knowing exactly what kind of pie you’re about to eat, but the color contrast between the bright fruit colors and the golden-brown crust is totally gorgeous.
- Texture. Having overlapping pieces of crust on top of the pie is just different than having a flat pie crust. Lattice crusts are crispier and flakier than flat ones because there is more surface area to get brown and tasty.
Things You’ll Need to Create a Lattice Pie
- A Double Pie Crust – Use your favorite recipe, or try mine it’s perfect! You can also use a pre-made pie crust dough.
- Rolling Pin – We’ll use this to roll out the dough perfectly even.
- Pastry Wheel – This is a fantastic tool to have in your kitchen if you like to bake. A pizza cutter or a sharp knife will work here as well. A fluted pastry cutter adds a ruffled edge to the strips adding even more texture and interest.
- Pastry Brush – This is for brushing on an egg wash before baking your pie. I like to use a silicone pastry brush because it’s easy to wash and sanitize.
You’ll also need a large counter space to work on, your pie pan, and your prepared pie filling.
How to Lattice a Pie Crust
Follow these simple steps to create a lattice top pie.
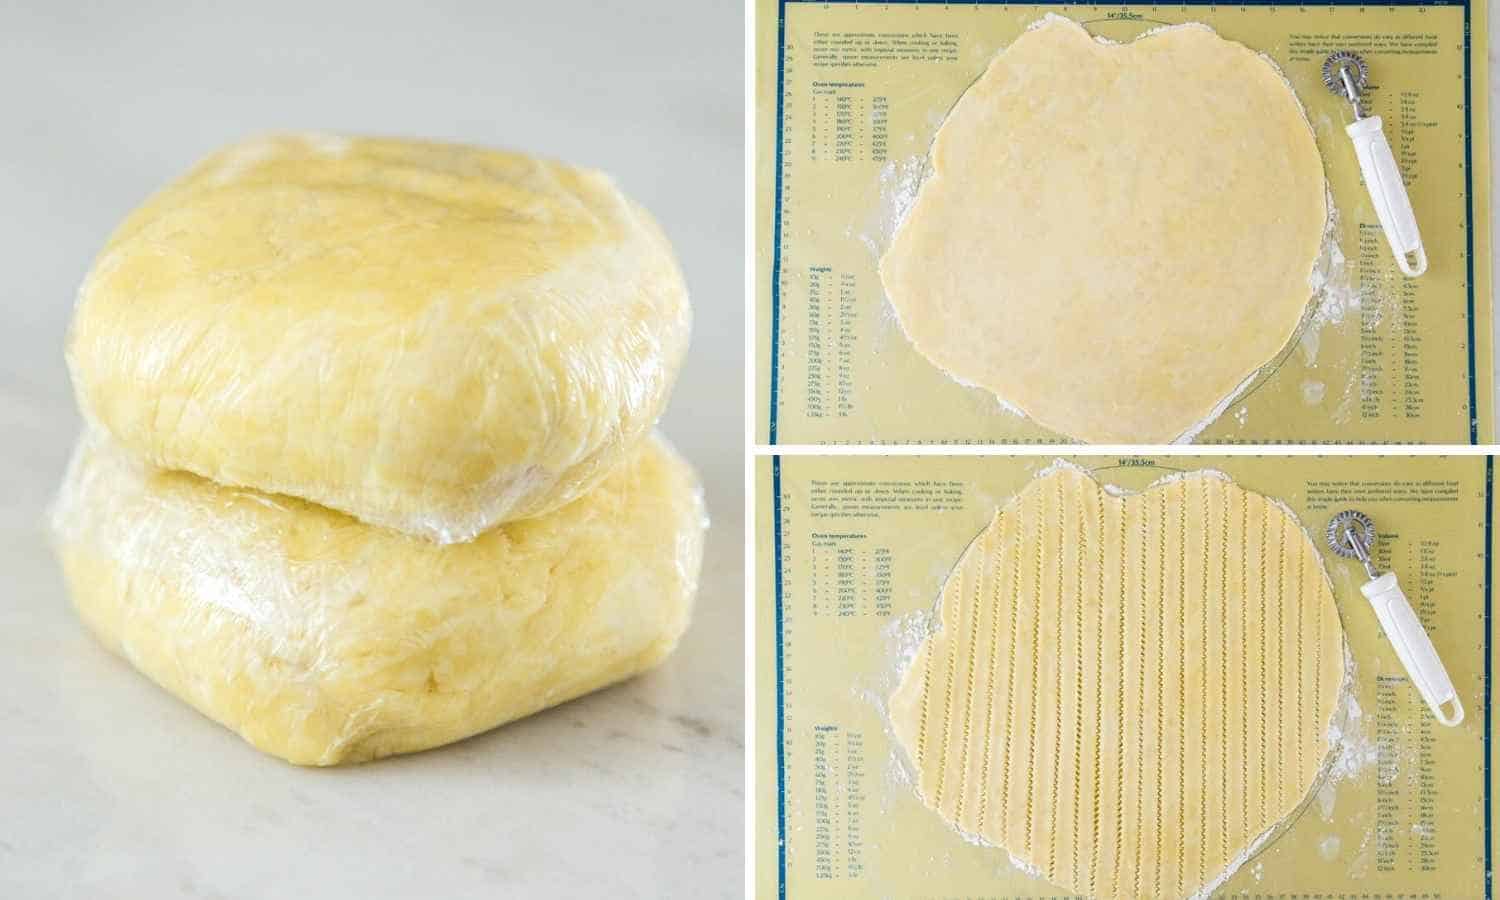
- Roll out Dough: Using half of your double pie crust dough, roll it out into a 12 or 13-inch circle.
- Cut Strips: With a pizza cutter or pastry wheel, cut the circle into ½ to 1-inch strips. The width is up to you. If you want super neat strips, use a ruler to measure.

- Lay Out Strips: Lay half of your strips over your pie filling, spaced out evenly with about ½ inch of space in between them. The space is left both for design and to allow ventilation for the pie while it’s baking.
- Fold back every other strip.
- Start Weaving: Lay another strip in the center of the pie, perpendicular to the others. Then unfold back the first strips. Now those original strips are laying over the perpendicular strip.
- Repeat: Continue with the other unused strips to weave the rest of the lattice pie until the pie is covered.
- Trim Dough: Trim off any access dough at the edges of the pie.
- Create Pie Edge: Fold the bottom pie dough up over the lattice strips and crimp the edges of the dough.
- Chill: Chill the pie in the fridge for 30 minutes to an hour before baking. Since we worked with the dough with our hands, it warmed up. Chilling will get it back to the right consistency for baking.
- Brush and Bake: When ready to bake, brush the top of the pie with egg wash and then bake as directed in your recipe. Always place the pie pan on a sheet pan to catch any drips.

We did it! Doesn’t this look beautiful?
Best Pie Crust for Lattice
I suggest using the crust recipe from my Blueberry Pie recipe. It holds up really well to manipulation and has the perfect flaky texture. This method will work for almost any pie crust recipe though, so if you already have a favorite or a trusted family recipe, use that one!
Tips for Making Lattice Pies
- My biggest tip: Keep the dough cold. Cold pie dough is your friend when making this design, and warm pie dough will be messy.
- If at any point your dough becomes difficult to work with, just put it back in the refrigerator for 20-30 minutes. Even if you’re in the middle of weaving, you can put everything on a tray and chill it. It’s so much easier to work with cold pie dough, especially when making a decorative crust design.
- I also suggest that you chill the whole pie after you’re done making the lattice, to get the dough back to a cold temperature before baking. Baking cold dough makes a flakier crust.
How to Keep Lattice Crust from Burning
Occasionally your crust will cook faster than the pie filling. This is common and normal, and super simple to remedy.
If your crust is perfectly browned, but the filling still needs time to bake, use aluminum foil to create a DIY pie crust shield. Usually, it’s just the outer edges that need this treatment, but you can put foil on any part of the pie that needs it. If you make a lot of pies, you may want to consider purchasing a reusable pie crust shield to make things easier.
I hope you take these tips and go out to create your own beautiful, impressive pies to serve your family and friends. Make sure to Pin this recipe/method so you can refer to it over and over again, and so that others can learn how to make lattice pies too!
Did you make this? Be sure to leave a review below and tag me on Facebook, Instagram, or Pinterest!
How To Lattice a Pie
Ingredients
- 1 double pie crust homemade or store-bought
- 1 egg beaten with 1 tablespoon of water or milk, for the egg wash
Instructions
- Roll out Dough: Using half of your double pie crust dough, roll it out into a 12 or 13 inch circle.
- Cut Strips: With a pizza cutter or pastry wheel, cut the circle into ½ to 1 inch strips. The width is up to you. If you want super neat strips, use a ruler to measure.
- Lay Out Strips: Lay half of your strips over your pie filling, spaced out evenly with about ½ inch of space in between them. The space is left both for design and to allow ventilation for the pie while it’s baking. Fold back every other strip
- Start Weaving: Lay another strip in the center of the pie, perpendicular to the others. Then unfold back the first strips. Now those original strips are laying over the perpendicular strip.
- Repeat: Continue with the other unused strips to weave the rest of the lattice pie until the pie is covered.
- Trim Dough: Trim off any access dough at the edges of the pie.
- Create Pie Edge: Fold the bottom pie dough up over the lattice strips and crimp the edges of the dough.
- Chill: Chill the pie in the fridge for 30 minutes to an hour before baking. Since we worked with the dough with our hands, it warmed up. Chilling will get it back to the right consistency for baking.
- Brush and Bake: When ready to bake, brush the top of the pie with egg wash and then bake as directed in your recipe. Always place the pie pan on a sheet pan to catch any drips.
Notes:
- Keep the dough cold. Cold pie dough is your friend when making this design, and warm pie dough will be messy.
- If at any point your dough becomes difficult to work with, just put it back in the refrigerator for 20-30 minutes. Even if you’re in the middle of weaving, you can put everything on a tray and chill it. It’s so much easier to work with cold pie dough, especially when making a decorative crust design.
- I also suggest that you chill the whole pie after you’re done making the lattice, to get the dough back to a cold temperature before baking. Baking cold dough makes a flakier crust.
Nutrition Information
This website provides approximate nutrition information for convenience and as a courtesy only. Nutrition data is gathered primarily from the USDA Food Composition Database, whenever available, or otherwise other online calculators.
© Little Sunny Kitchen


Leave a Review!