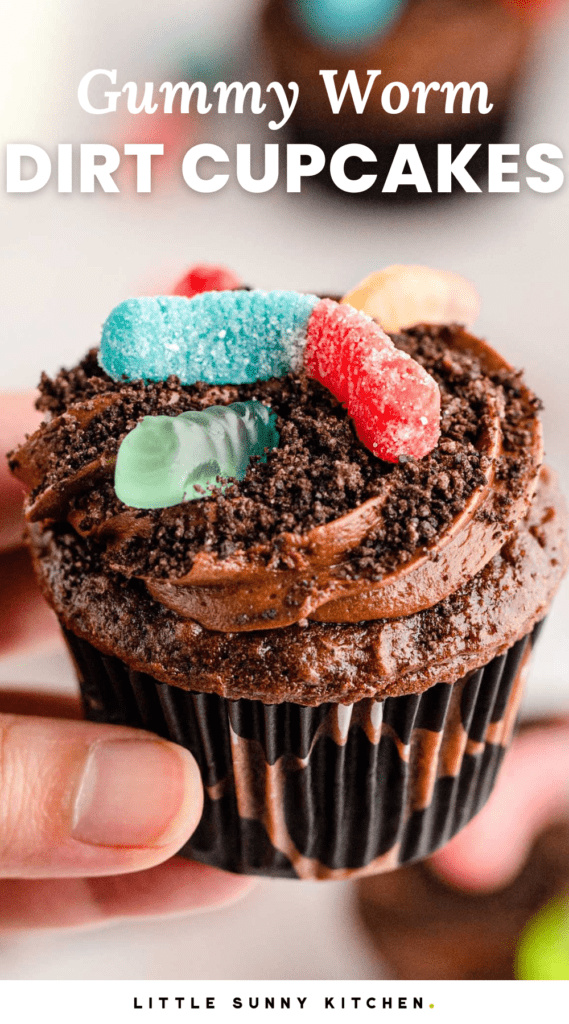
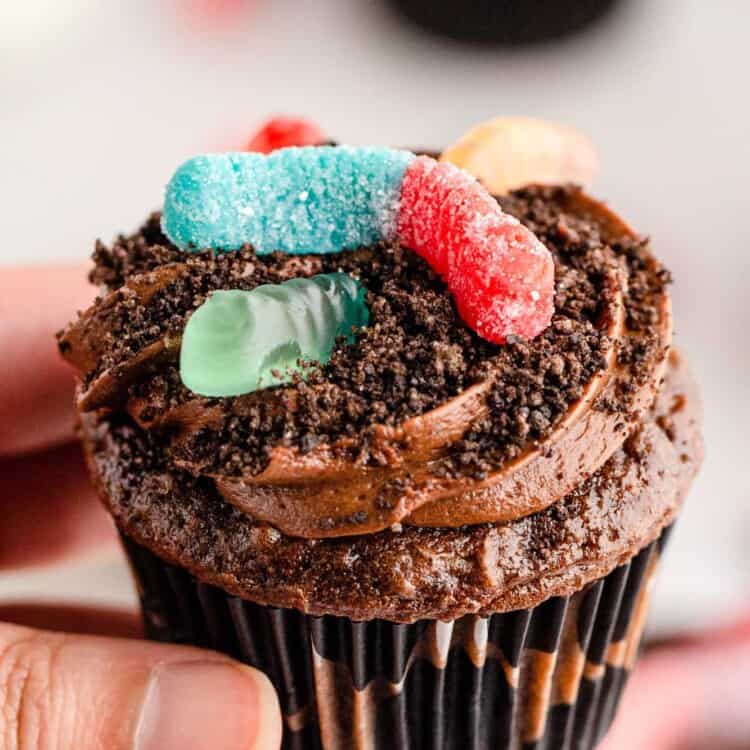
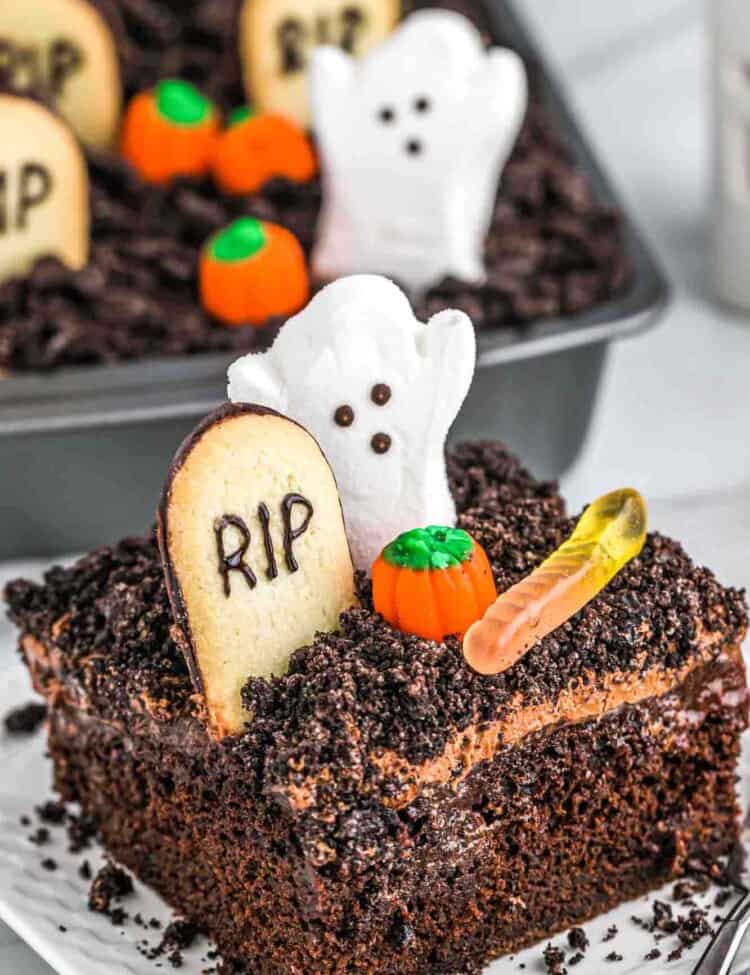
These made from scratch Halloween Dirt Cupcakes are as decadent and delicious as they are fun to look at! Kids love desserts with gummy worms on them, and everyone will rave about your homemade chocolate cupcakes and rich frosting.
Worms and dirt is such a fun theme for Halloween desserts. It’s great as a pudding cup or a graveyard dirt cake, but it’s extra delicious when you use the creepy crawly theme to decorate Halloween cupcakes that are baked from scratch with a rich chocolate cream cheese frosting.
Do you want more tasty Halloween dessert recipes? Check out my Wicked Witch Finger Cookies, Haloween Peanut Butter Cupcakes, Candy Corn Jello Cups, or these Candy Corn Marshmallow Squares.
Why You’ll Love This Recipe
- Scratch Cupcake Recipe. This chocolate cupcake recipe is totally fool-proof, I make it all the time. It’s really easy to make this cupcake recipe from scratch, and it’s not overly sweet.
- Amazing Chocolate Cream Cheese Frosting. Again, it’s worth it to make this frosting from scratch instead of buying pre-made stuff. It’s rich, creamy, and perfect.
- Fun and Easy Decorations. The Halloween decorations on these cupcakes are as simple as cookie crumbs and candy worms. Anyone (including you!) can make these cupcakes look great.
If you are looking for a super easy recipe with a fun Halloween spin, Check out how I made Dracula’s Dentures Cookies with marshmallows and chocolate chip cookies.
Key Ingredients
Here’s what you need to make these delectable chocolate cupcakes topped with dirt and worms:
Complete list of ingredients and amounts can be found in the recipe card below.
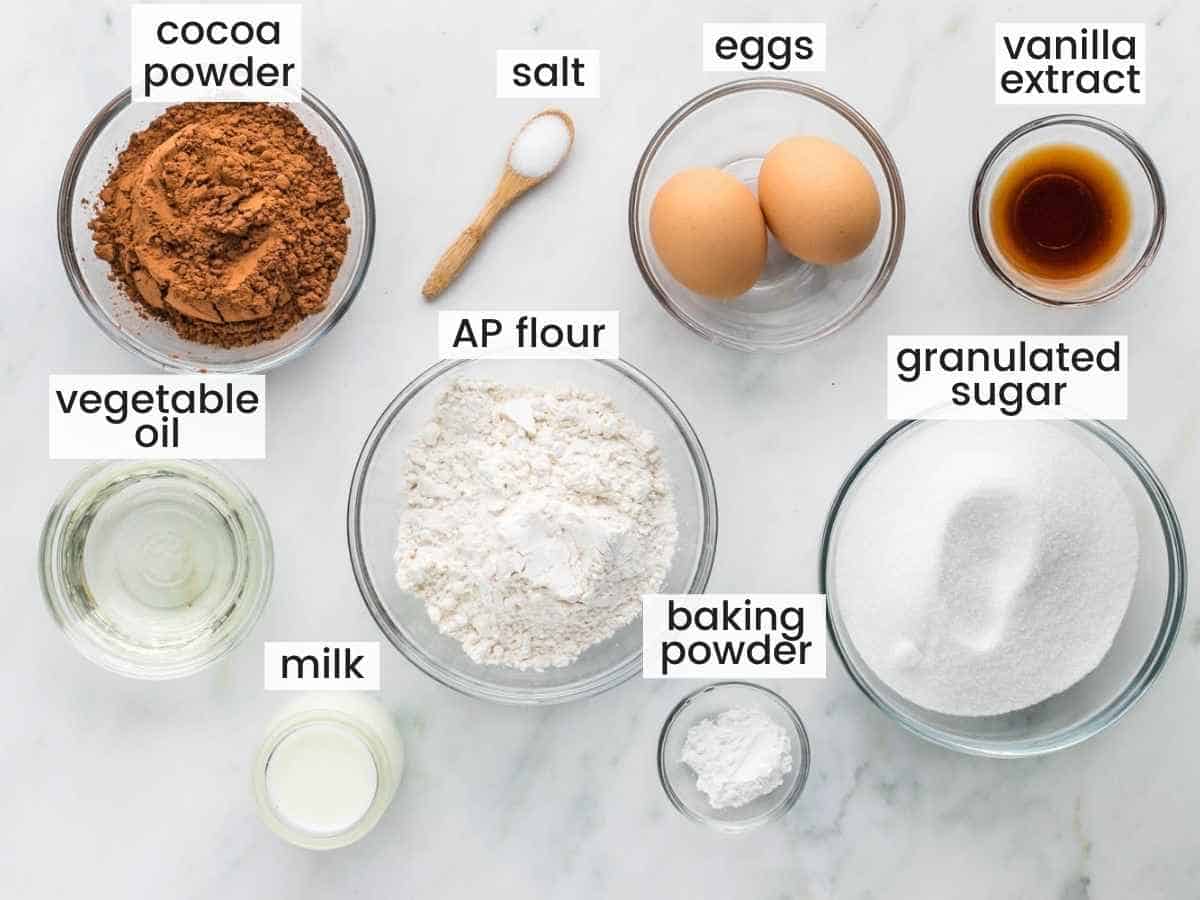
- To Make Chocolate Cupcakes: a combination of common ingredients including flour, baking powder, cocoa powder, sugar, eggs, vanilla, oil, and milk makes the most amazing chocolate cupcakes.
- For Chocolate Cream Cheese Frosting: I’ll show you how to combine softened butter and cream cheese with powdered sugar, more cocoa powder, melted chocolate chips, and vanilla extract to make the best chocolate frosting you’ve ever tasted.
- Cupcake Decorations: Turn half a package of Oreos into crumbly dirt, and choose your favorite gummy worms.
How To Make Halloween Cupcakes
Make Homemade Chocolate Cupcakes
- Get Ready to Bake: Preheat the oven to 350°F/180°C. Add cupcake liners to a muffin tin and set it aside.
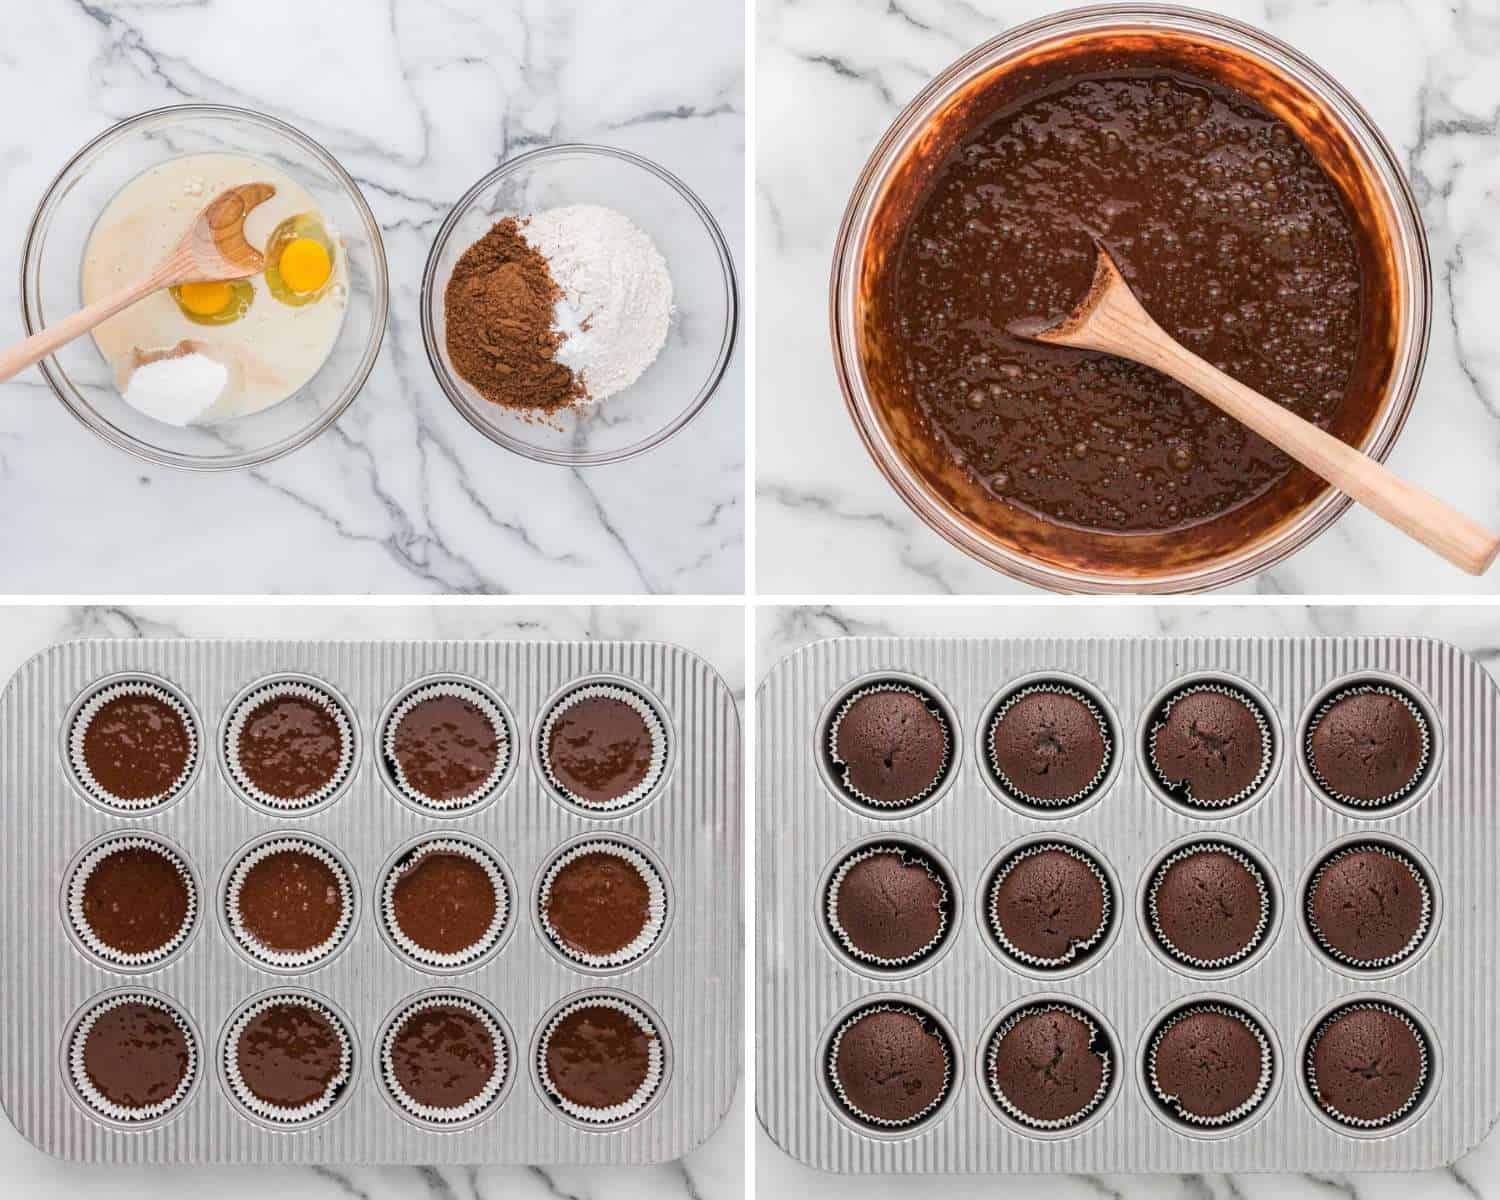
- Mix the Dry Ingredients: In a bowl, combine the dry ingredients (flour, cocoa powder, baking powder, and salt).
- Mix the Wet Ingredients: In a separate bowl, combine the eggs with sugar, oil, milk, and vanilla.
- Mix and Bake: Add the dry ingredients to the wet ingredients, and mix until incorporated but not overmixed. Then fill the cupcake liners ¾ of the way full. Bake for 18-22 minutes or until a toothpick comes out clean from the center. Allow cupcakes to cool down in the pan. Be sure they are completely cooled before frosting and decorating.
Make Chocolate Cream Cheese Frosting
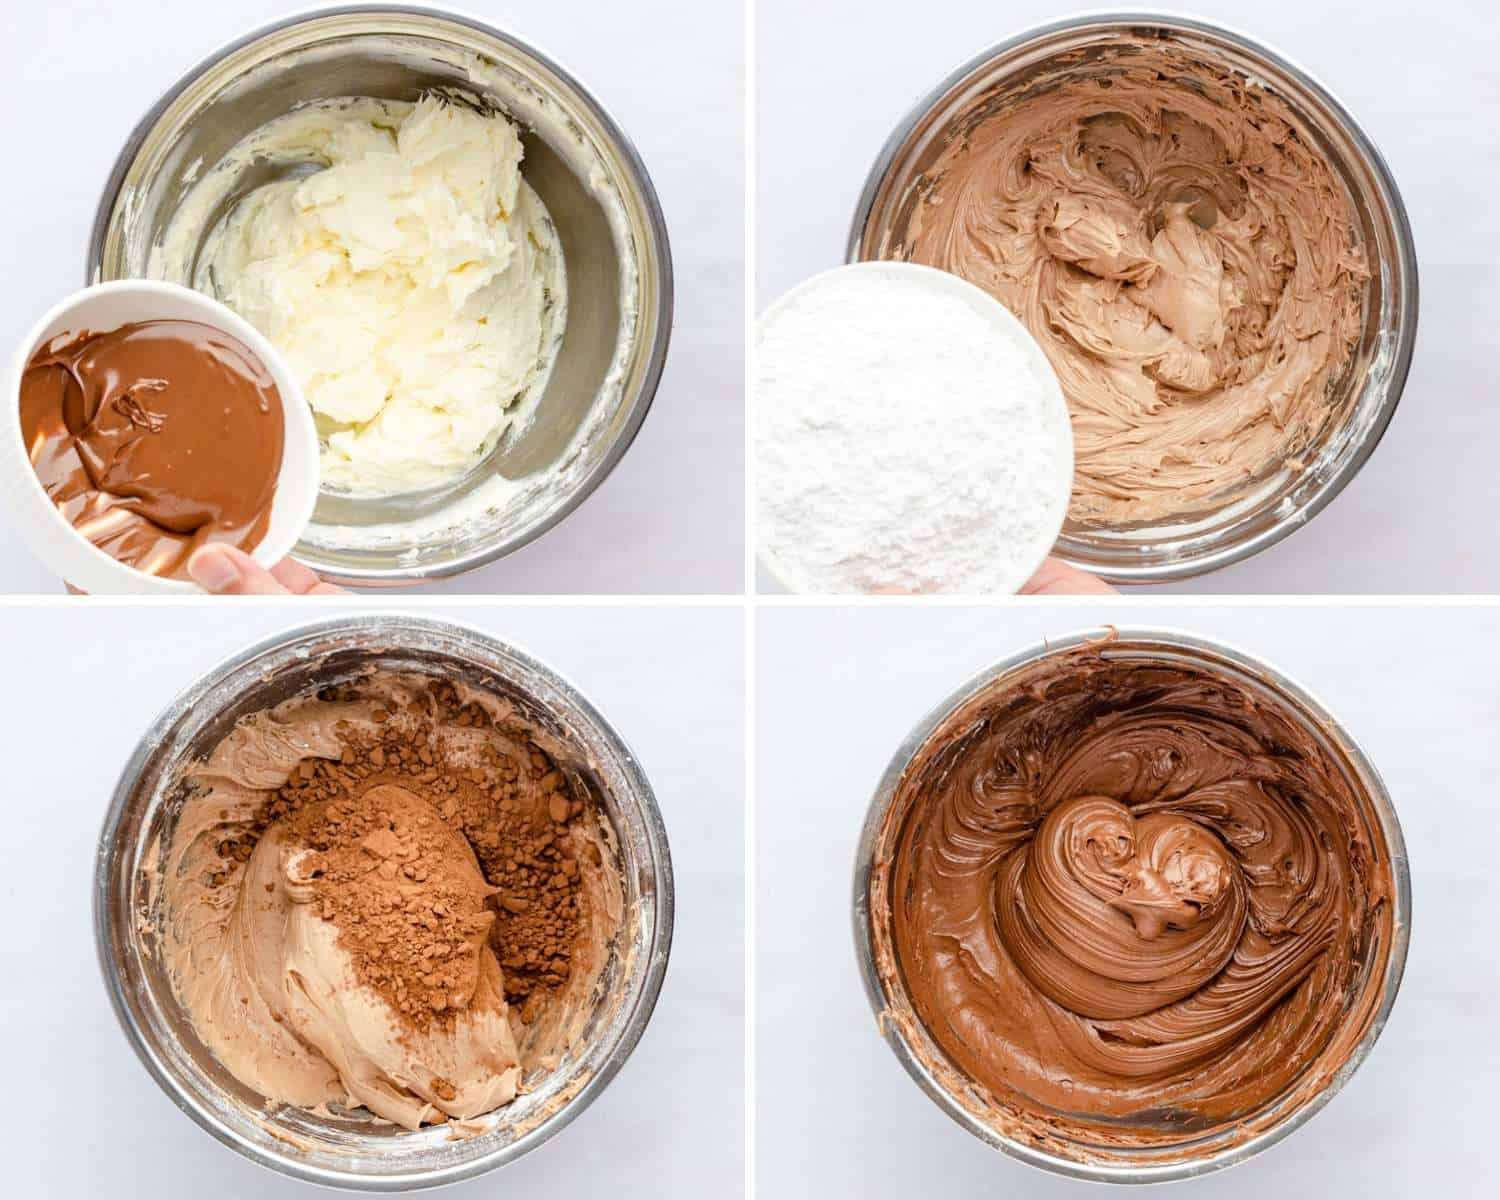
- Melt Chocolate Chips: Add the chips to a microwave-safe bowl and microwave for 30 seconds. Stir. If needed, microwave again for 15 seconds and stir. Continue with 15-second intervals until the chocolate is smooth.
- Mix Frosting: Use a handheld mixer and a large mixing bowl, or your stand mixer with the paddle attachment. Cream together the butter and cream cheese on medium speed until smooth and creamy. Then add the melted chocolate and mix to combine. Gradually add the powdered sugar, then gradually add the cocoa powder, mixing well between each addition. Finally, mix in the vanilla extract.
Worms and Dirt Halloween Cupcake Decorations
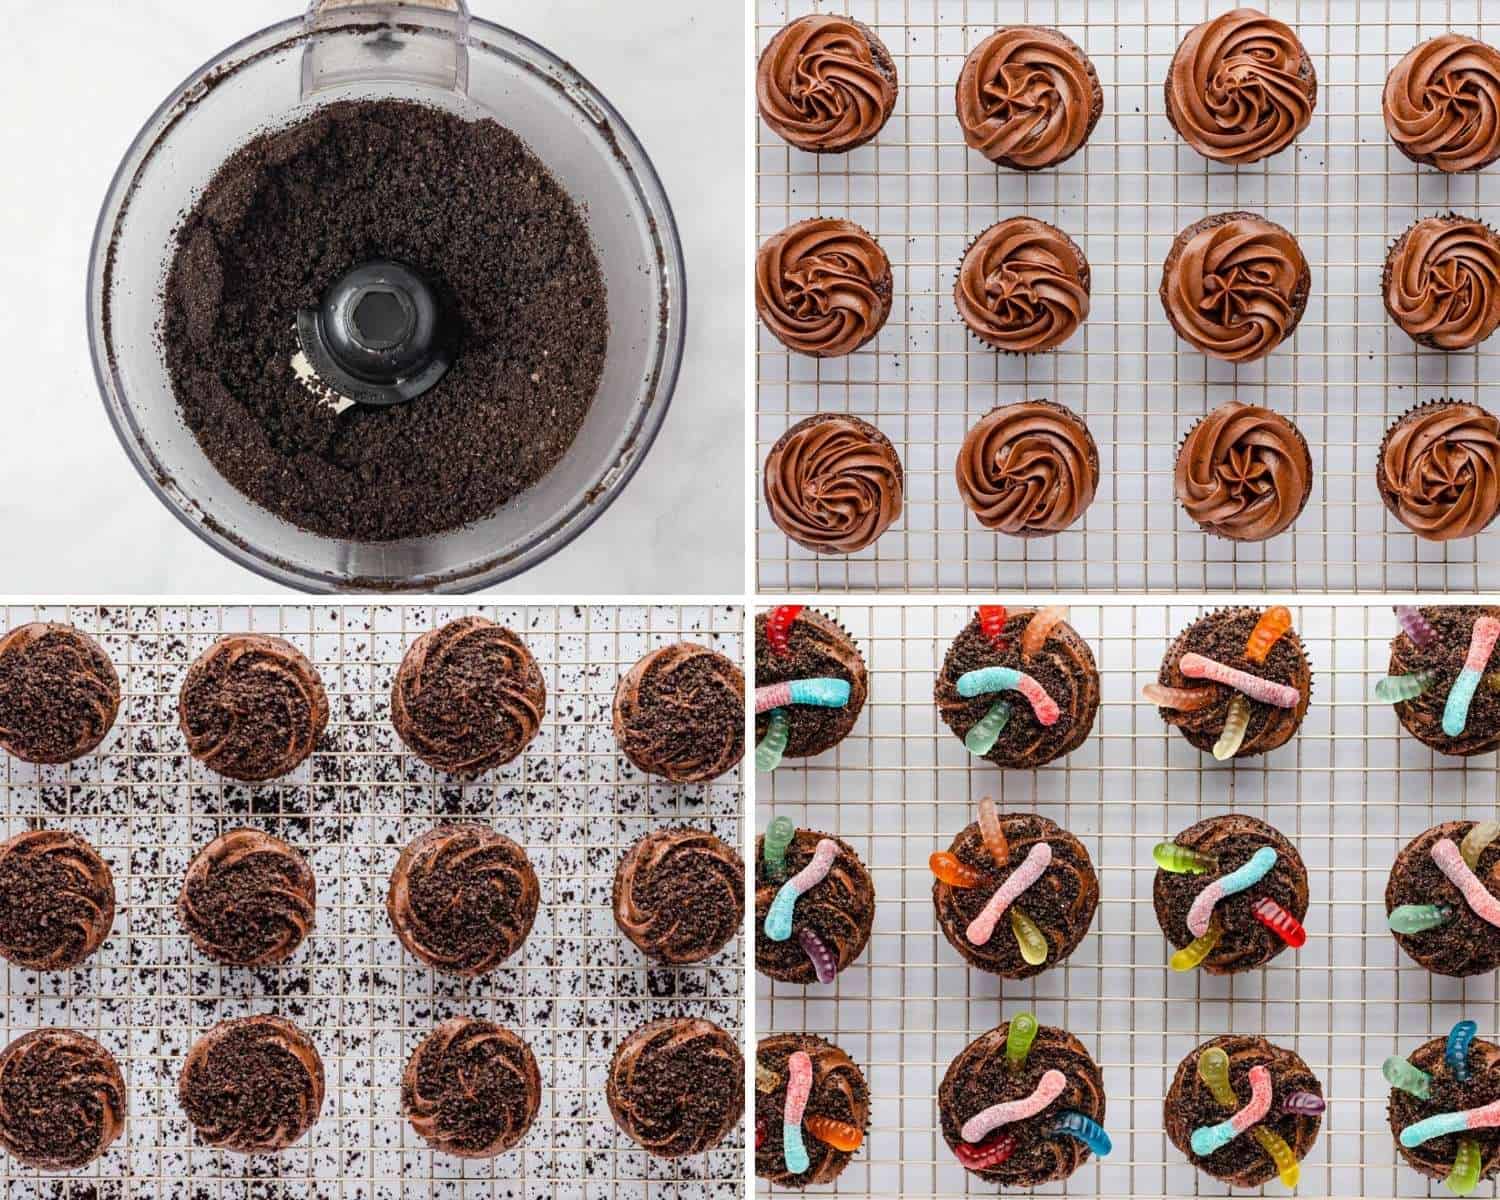
- Make Oreo Dirt: Add Oreo cookies to a food processor and pulse until you get fine crumbs that look like dirt. You can also crush the cookies using a ziplock bag and a rolling pin or another heavy object.
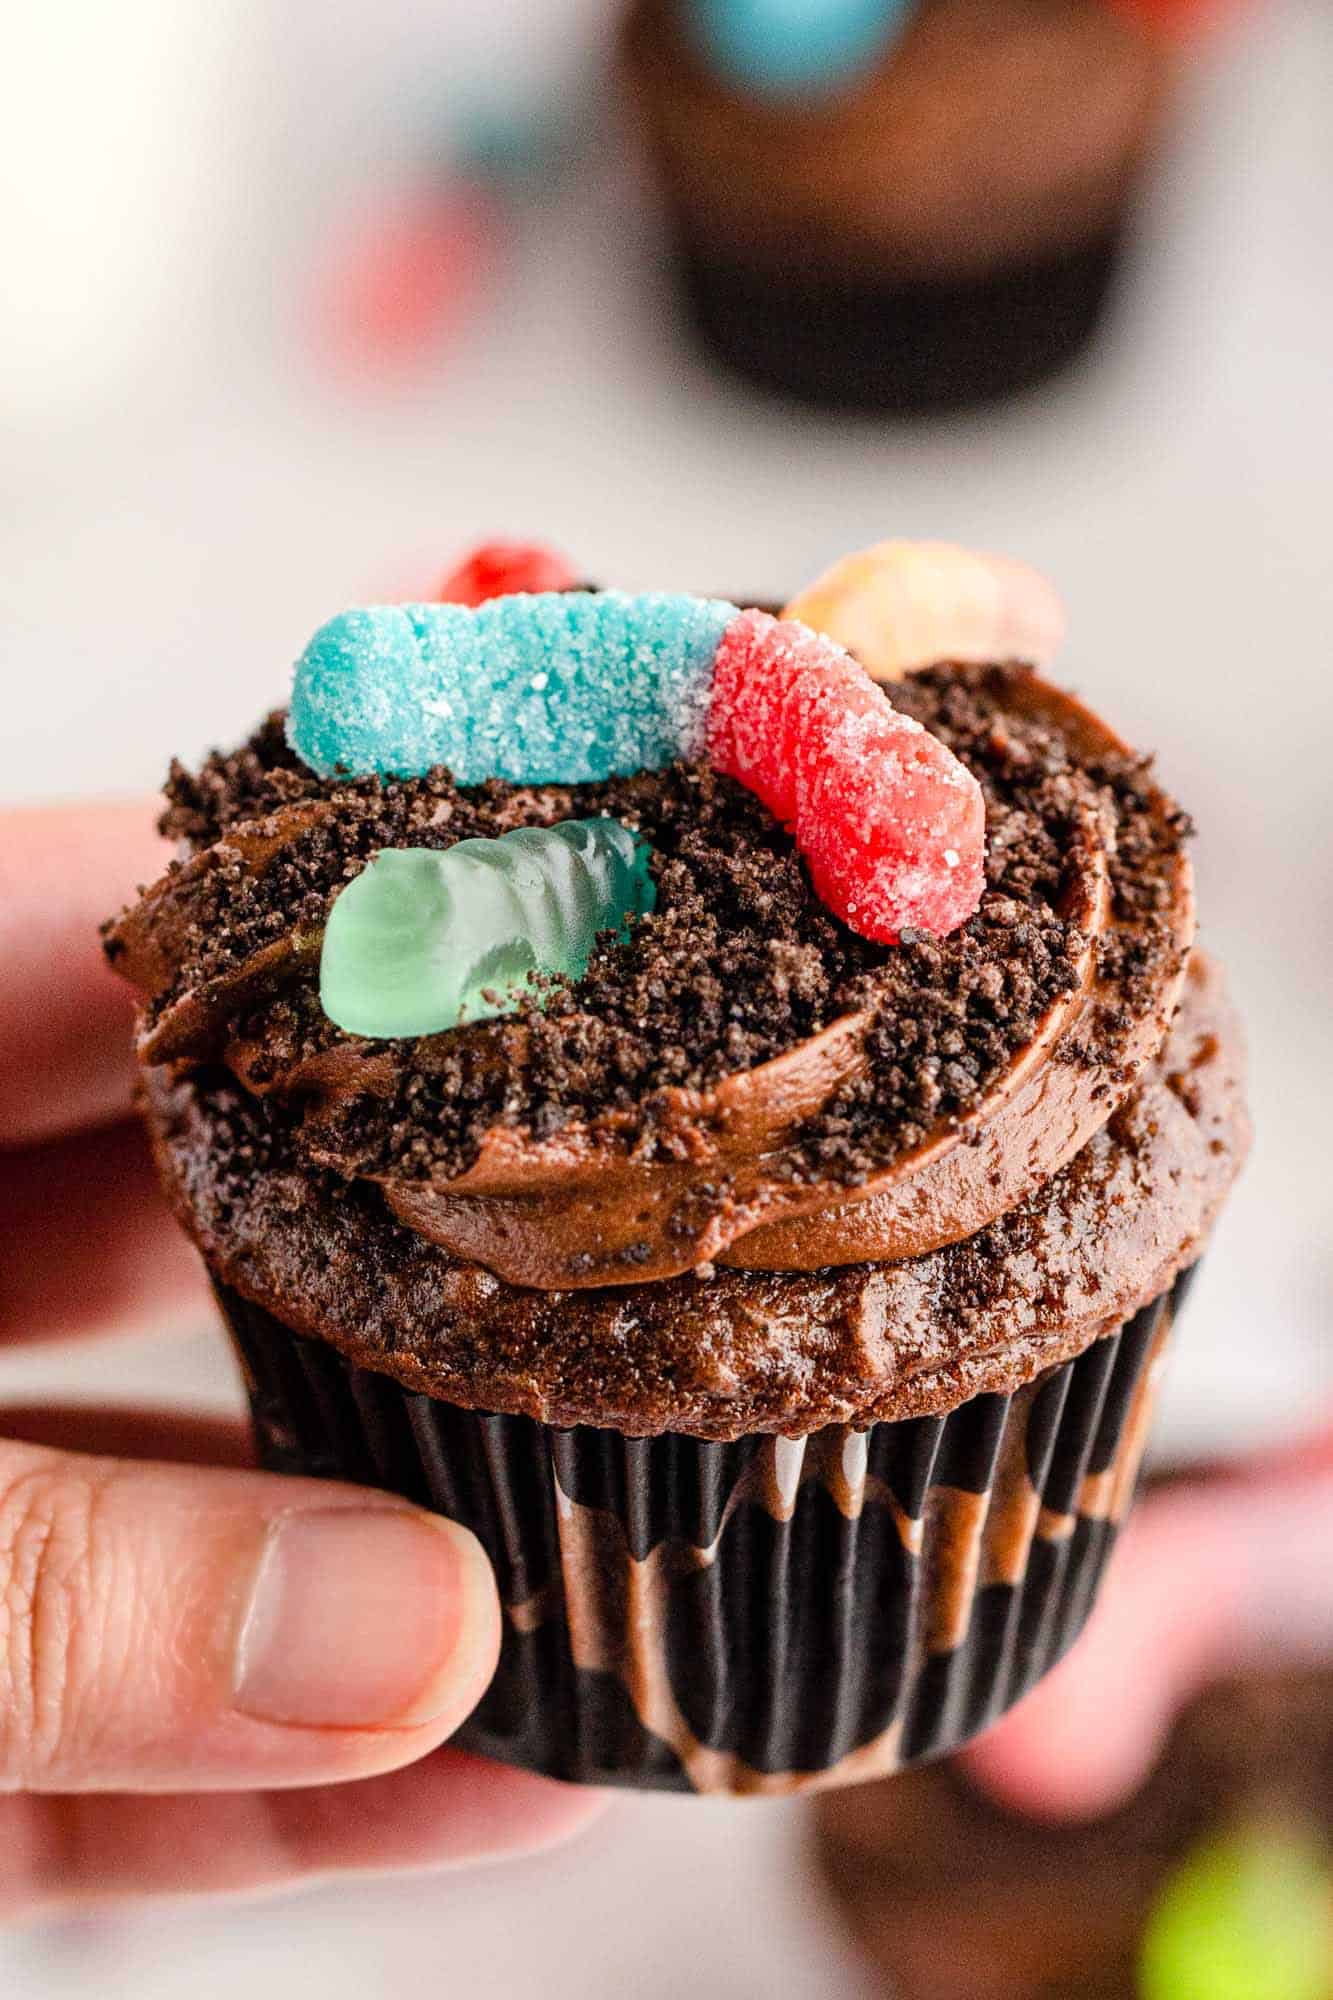
- Frost and Decorate: Make sure the cupcakes are fully cool. Fill a piping bag fitted with a large star tip with the frosting. Pipe a swirl on each cupcake, then sprinkle with 1 or 2 spoonfuls of Oreo crumbs. Have fun arranging gummy worms on top.
Tip!
Don’t feel like you have to use a piping bag for these. You can spread the frosting on with a knife or spatula and then cover the frosting with Oreo crumbs!
Recipe Tips
- Get Creative with the Worms: Halloween cupcake decorations should be fun! First, feel free to use any flavor or type of gummy worms. I picked up a few different packages so I had an assortment of sweet and sour worms. Then, arrange the worms to look like they’re crawling out of the dirt! It helps if you cut them in half first.
- Look for Different Candy Toppings: Gummy slugs are actually a thing, as are all types of creepy gummy bugs. These are easy to find in large stores close to Halloween. You could also add plastic spider rings, Halloween sprinkles (these vampire graveyard themed ones are cool), or candy corn pumpkins.
- Make Cookie Tombstones: Check out how I turn Milano cookies into tiny RIP-labeled tombstones for my Graveyard Dirt Cake.
- Try Other Frostings: This cream cheese frosting is completely divine, but if you’d rather, canned frosting or chocolate buttercream can be used instead.

Storing Tips
Store your cupcakes in an airtight container in the refrigerator. They’ll stay fresh for 3-4 days this way.
Since the frosting on these Dirt Cupcakes is made with cream cheese, you should keep these refrigerated until you’re ready to eat them. Let them sit out at room temperature for 10-15 minutes so that the frosting softens.
Also, it’s best not to add the gummy decorations too far ahead of time. They tend to melt when exposed to the moisture from the frosting. Add the worms just before serving so they look perfect.
FAQs
Yes! Instead of making the chocolate cupcakes from scratch, use your favorite chocolate cake mix. Follow the instructions on the packaging to bake them, then finish with the Halloween cupcake decorations listed here.
I find that regular Oreos make the best looking dirt since there is a relatively small amount of creme in them. You can use double stuffed, but the dirt will be a little bit more “dusty” looking. Feel free to try other Oreo flavors too.
If you are a fan of the traditional Dirt cake with a creamy layer of chocolate pudding, you might be missing it here! It’s ok, you can add a filling to the cupcakes if you would like. simply punch a hole in the top of each cupcake with a large piping tip. Remove part of the middle, and fill in the space with prepared chocolate pudding. Then cover with frosting and decorations!
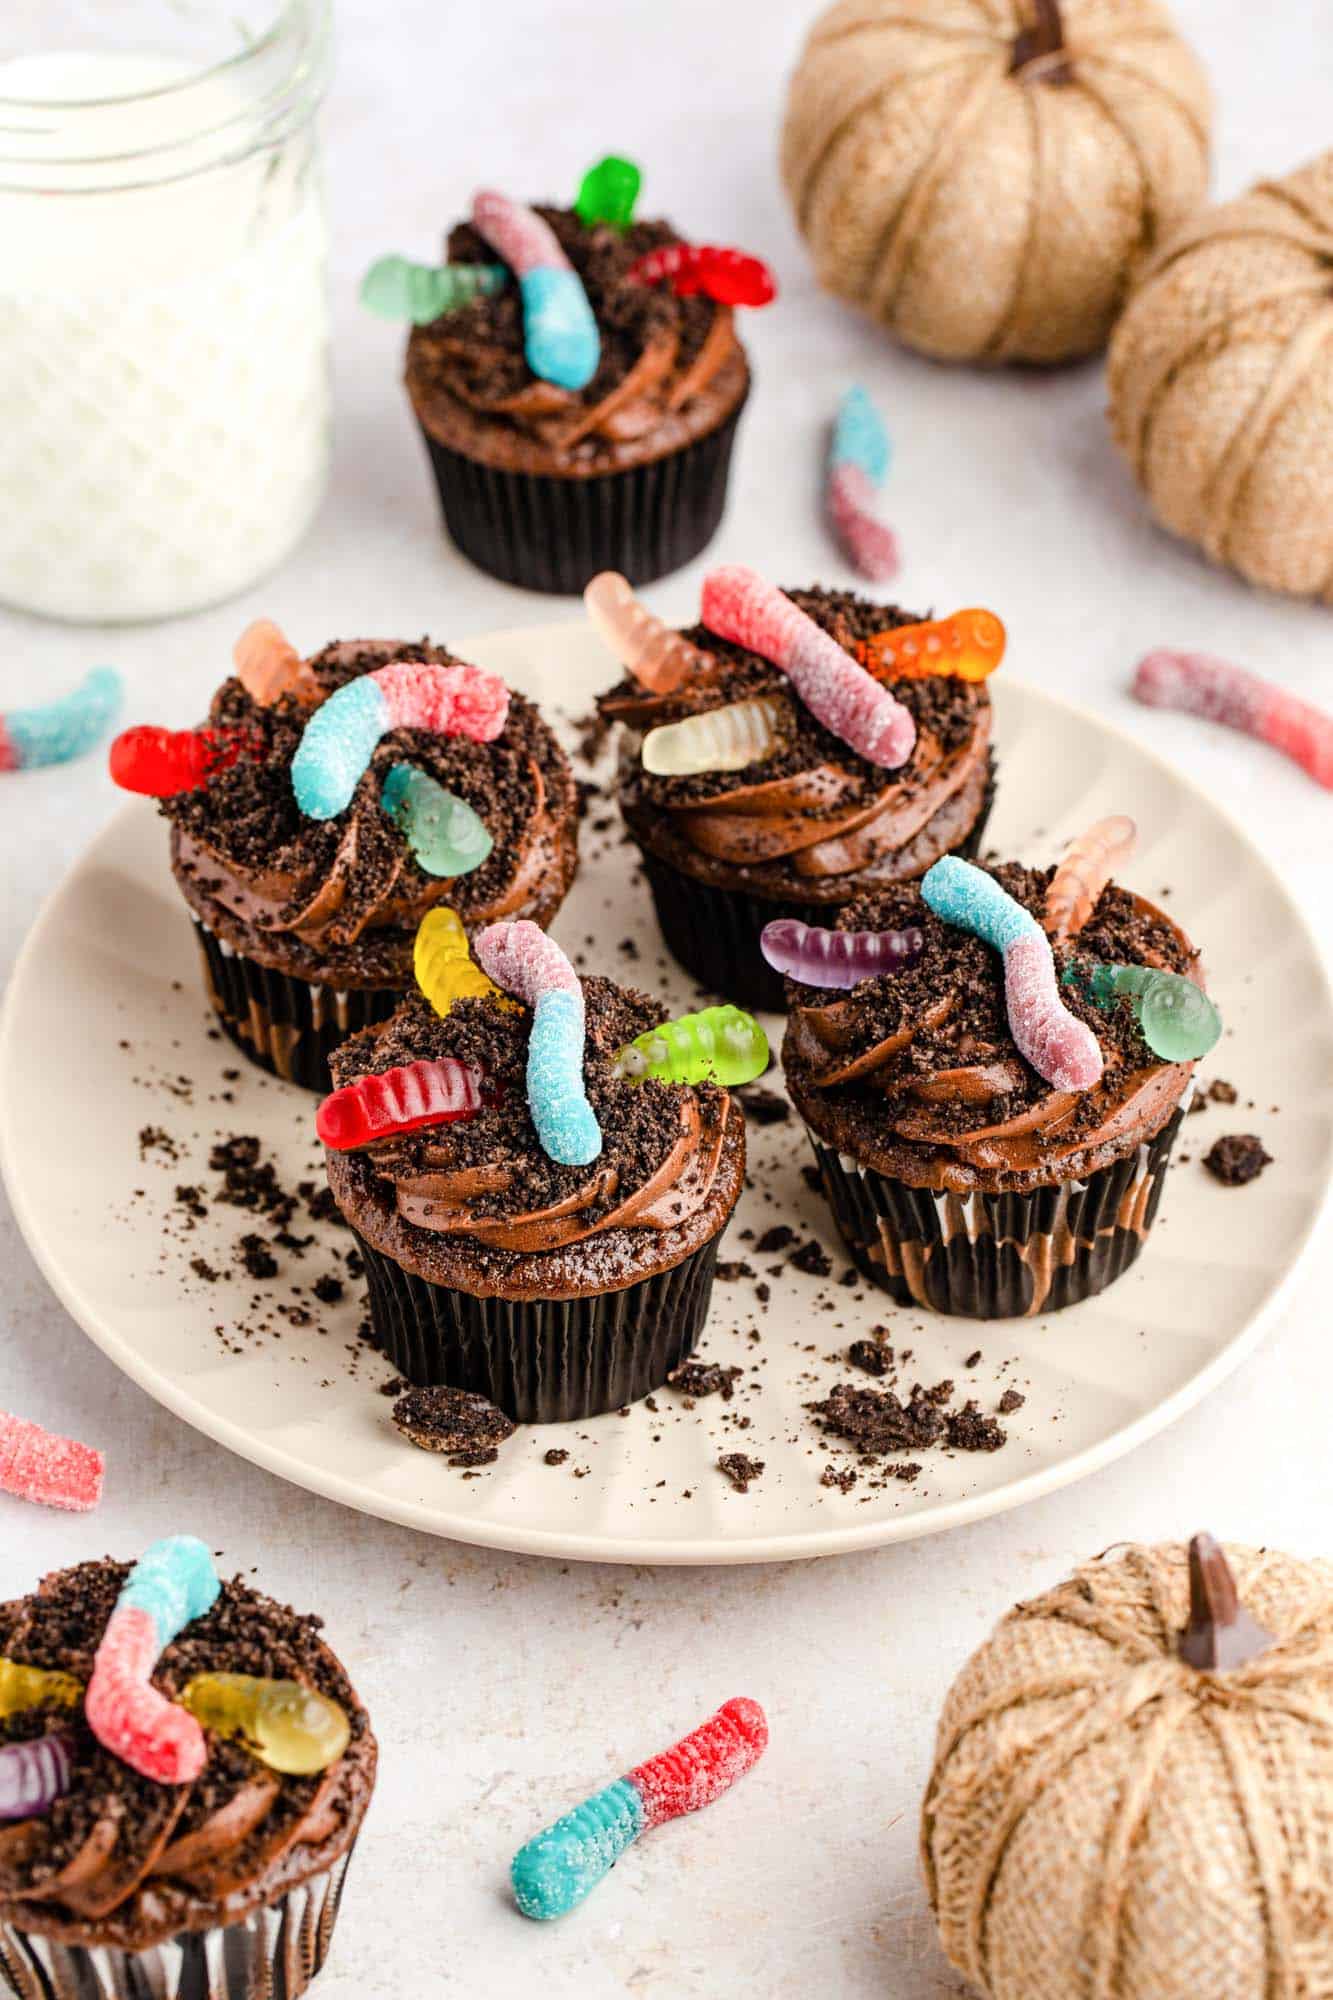
Halloween Dirt Cupcakes are delicious, easy, and super fun to decorate! Everyone is going to love these when you bring them to Halloween parties. Don’t forget to Pin the recipe!
Did you make this? Be sure to leave a review below and tag me on Facebook, Instagram, or Pinterest!
Halloween Dirt Cupcakes
Equipment
- Electric Hand mixer or Stand mixer
- Cupcake liners
- Large piping bag fitted with a large tip
- 12 cup muffin pan
Ingredients
For the Chocolate Cupcakes
- ¾ cup (90g) all-purpose flour
- ⅔ cup (65g) cocoa powder
- 1 teaspoon baking powder
- ¼ teaspoon salt
- 2 large eggs at room temperature
- 1 cup (200g) granulated sugar
- ⅓ cup (78ml) vegetable oil
- ½ cup 120ml milk at room temperature
- 2 teaspoons pure vanilla extract
For the Chocolate Cream Cheese Frosting
- ¼ cup milk chocolate chips
- ¼ cup (½ stick) unsalted butter softened
- 4 ounces full-fat cream cheese softened
- pinch salt
- ½ teaspoon pure vanilla extract
- 1 cup powdered sugar
- ¼ cup cocoa powder
Decorations
- 10-12 oreos
- 1 package gummy worms
Instructions
Make Chocolate Cupcakes
- Preheat the oven to 350°F/180°C.
- In a bowl, combine the dry ingredients (flour, cocoa powder, baking powder and salt).
- In a separate bowl, combine the eggs with sugar, oil, milk and vanilla extract.
- Add the dry ingredients to the wet ingredients, whisk until they’re incorporated but do not over mix.
- Fill the cupcake liners ¾ of the way full. Bake for 18-22 minutes or until a toothpick comes out clean from the center of a cupcake. Allow cupcakes to cool down in the pan. Be sure they are completely cooled before frosting and decorating.
Make Chocolate Frosting
- Add the chocolate chips to a microwave safe bowl and microwave for 30 seconds. Stir. If needed, microwave again for 15 seconds and stir. Continue with 15 second intervals until the chocolate is smooth.
- Use a handheld mixer and a large mixing bowl, or your stand mixer with the paddle attachment. Cream together the butter and cream cheese on medium speed until smooth and creamy. Then add the melted chocolate and mix to combine.
- Gradually add the powdered sugar, then gradually add the cocoa powder, mixing well between each addition. Lastly, mix in the vanilla extract and salt, and set the frosting aside.
Decorate
- Add Oreo cookies to a food processer and pulse until you get fine crumbs that look like dirt. You can also crush the cookies using a ziplock bag and a rolling pin or other heavy object.
- When the cupcakes are fully cooled, you can decorate! Fill a piping bag fitted with a large star tip with the frosting. Pipe a swirl on each cupcake, then sprinkle with 1 or 2 spoonfuls of Oreo crumbs. Have fun arranging gummy worms on top.
Notes:
- The cupcake batter will not rise up well if it’s mixed too much. Mix the dry ingredients into the wet ingredients just until no dry spots remain.
- Putting frosting on warm cupcakes is a recipe for a melty disaster. Be patient and wait for the cupcakes to cool down completely before starting to decorate. Along the same theme, you may want to keep the candy in the fridge until you’re ready to use it so it doesn’t melt in your hands.
- Don’t feel like you have to use a piping bag for these. You can spread the frosting on with a knife or spatula and then cover up any mistakes with Oreo crumbs!
- If you want to, you can use a boxed cake mix to make the cupcakes. Simply follow the instructions on the box, then finish with the homemade frosting, dirt, and worms. You could also use store-bought frosting if you prefer.
- Cut the gummy worms in half if you want to make it look like they’re crawling out of the dirt.
- Look for other creepy crawly candies, sprinkles, or decorations to add to these cupcakes too.
- This recipe can easily be doubled to make 24 cupcakes if you’d like.
- To Store: Keep frosted cupcakes in an airtight container in the fridge for up to 4 days. If you plan to store them for more than a day, wait to add the gummy worms until closer to serving time so that they don’t melt from the moisture of the frosting.
Nutrition Information
This website provides approximate nutrition information for convenience and as a courtesy only. Nutrition data is gathered primarily from the USDA Food Composition Database, whenever available, or otherwise other online calculators.
© Little Sunny Kitchen
Leave a Review!