
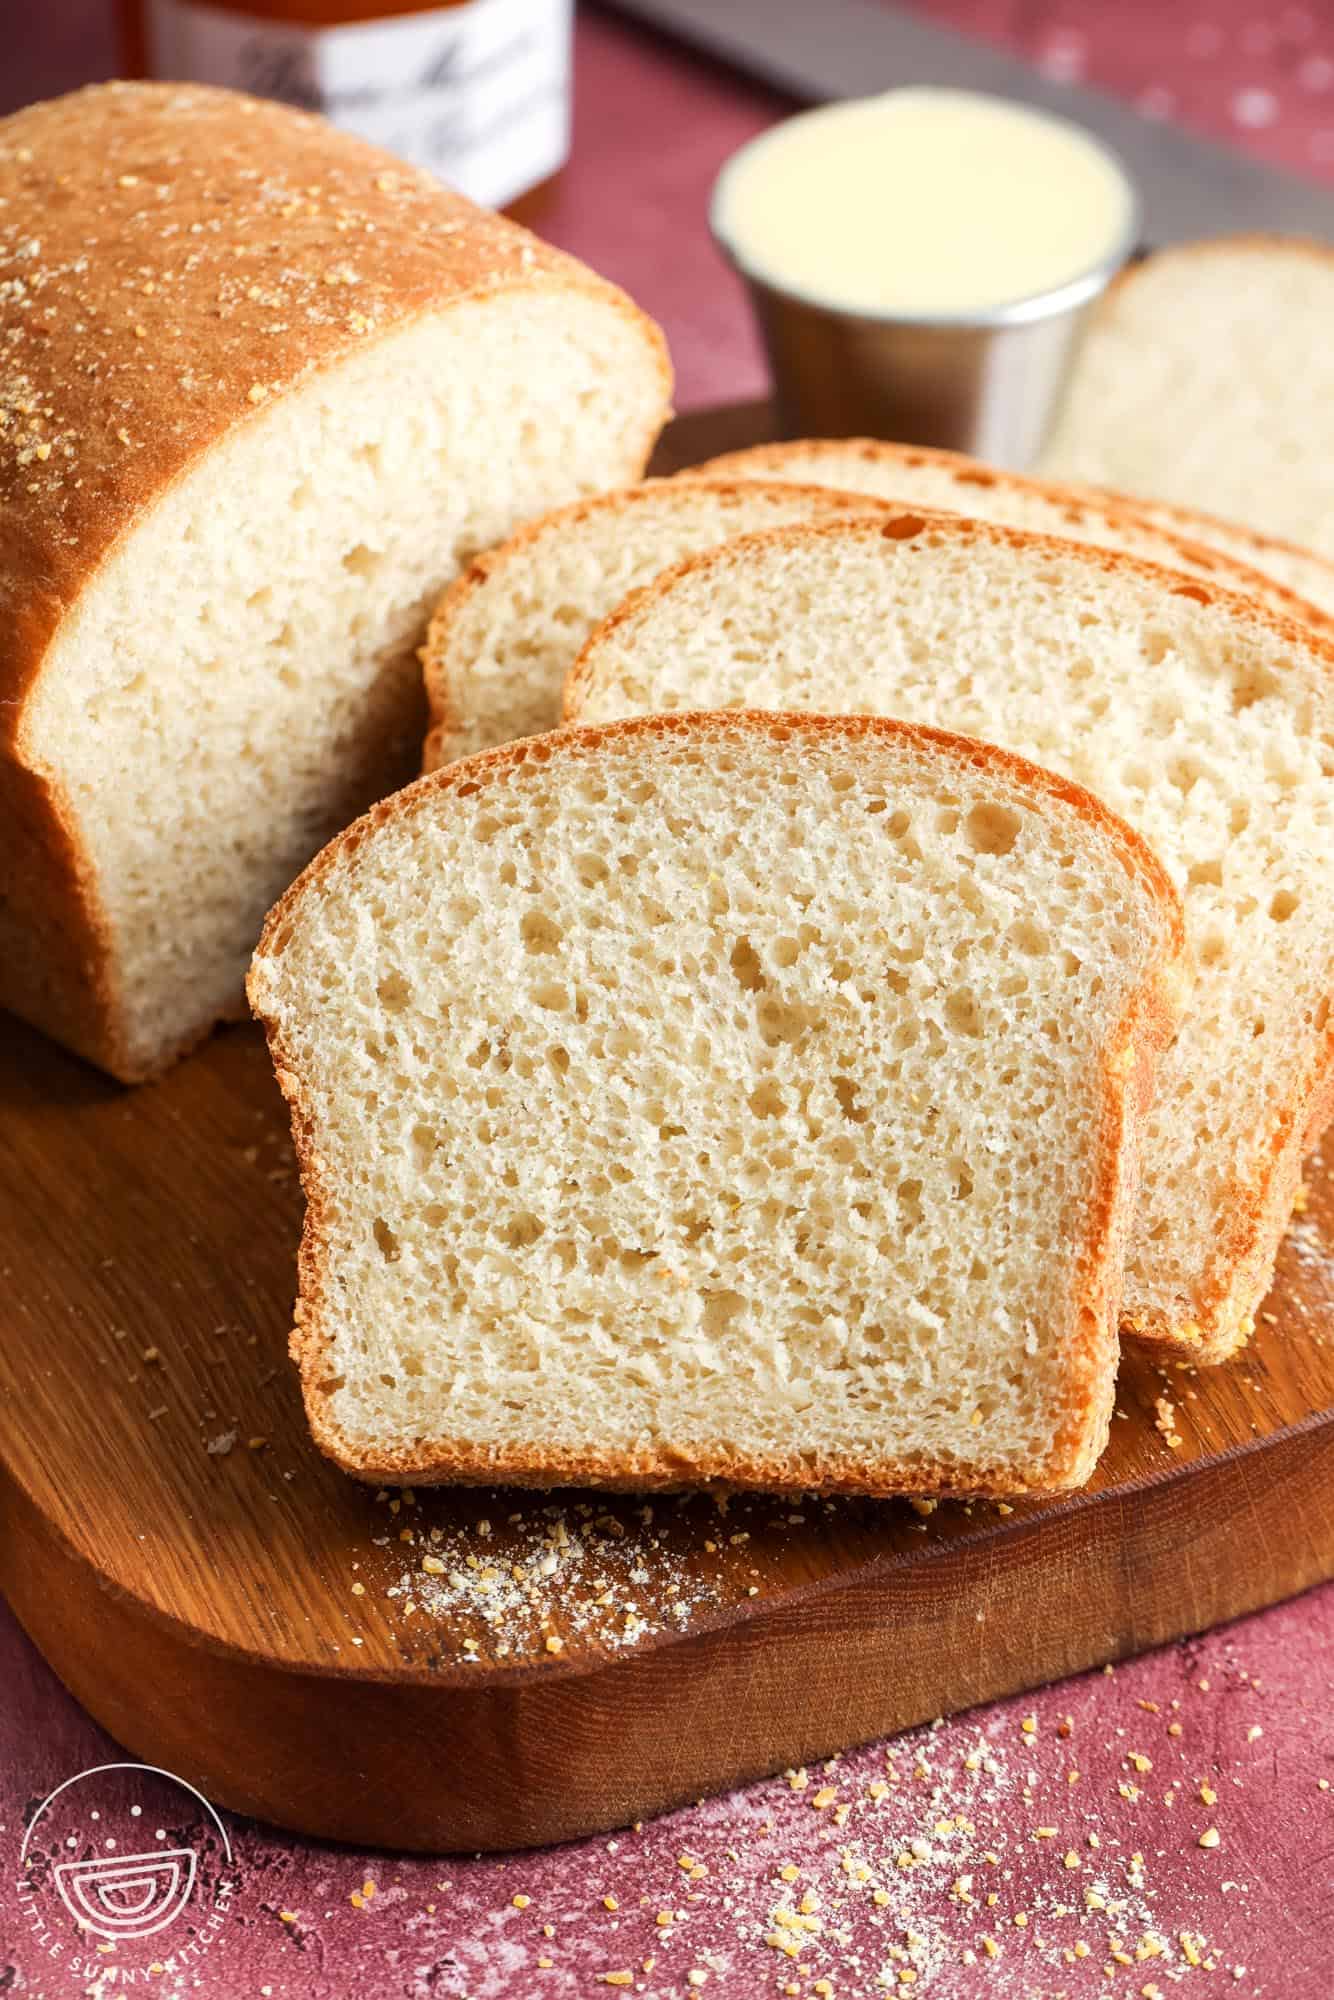
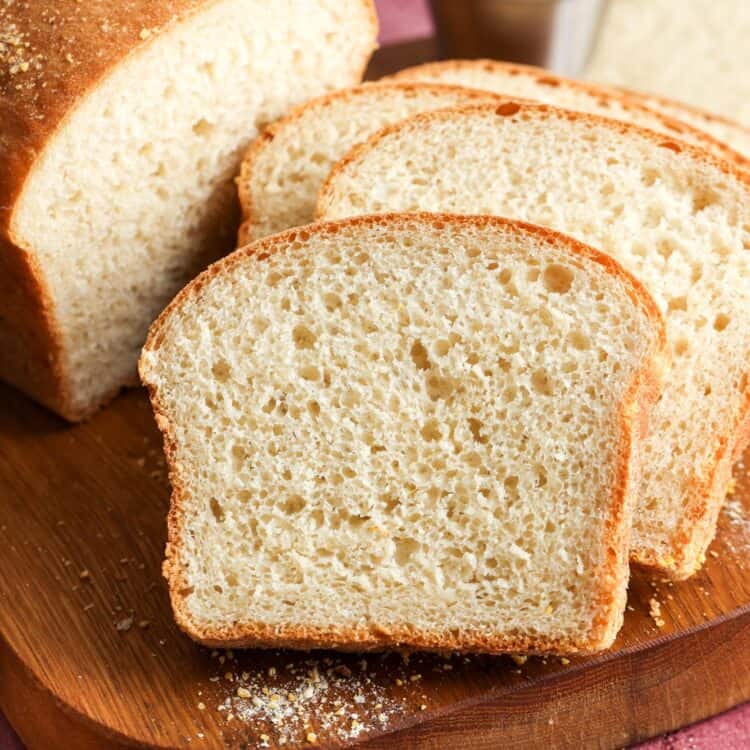
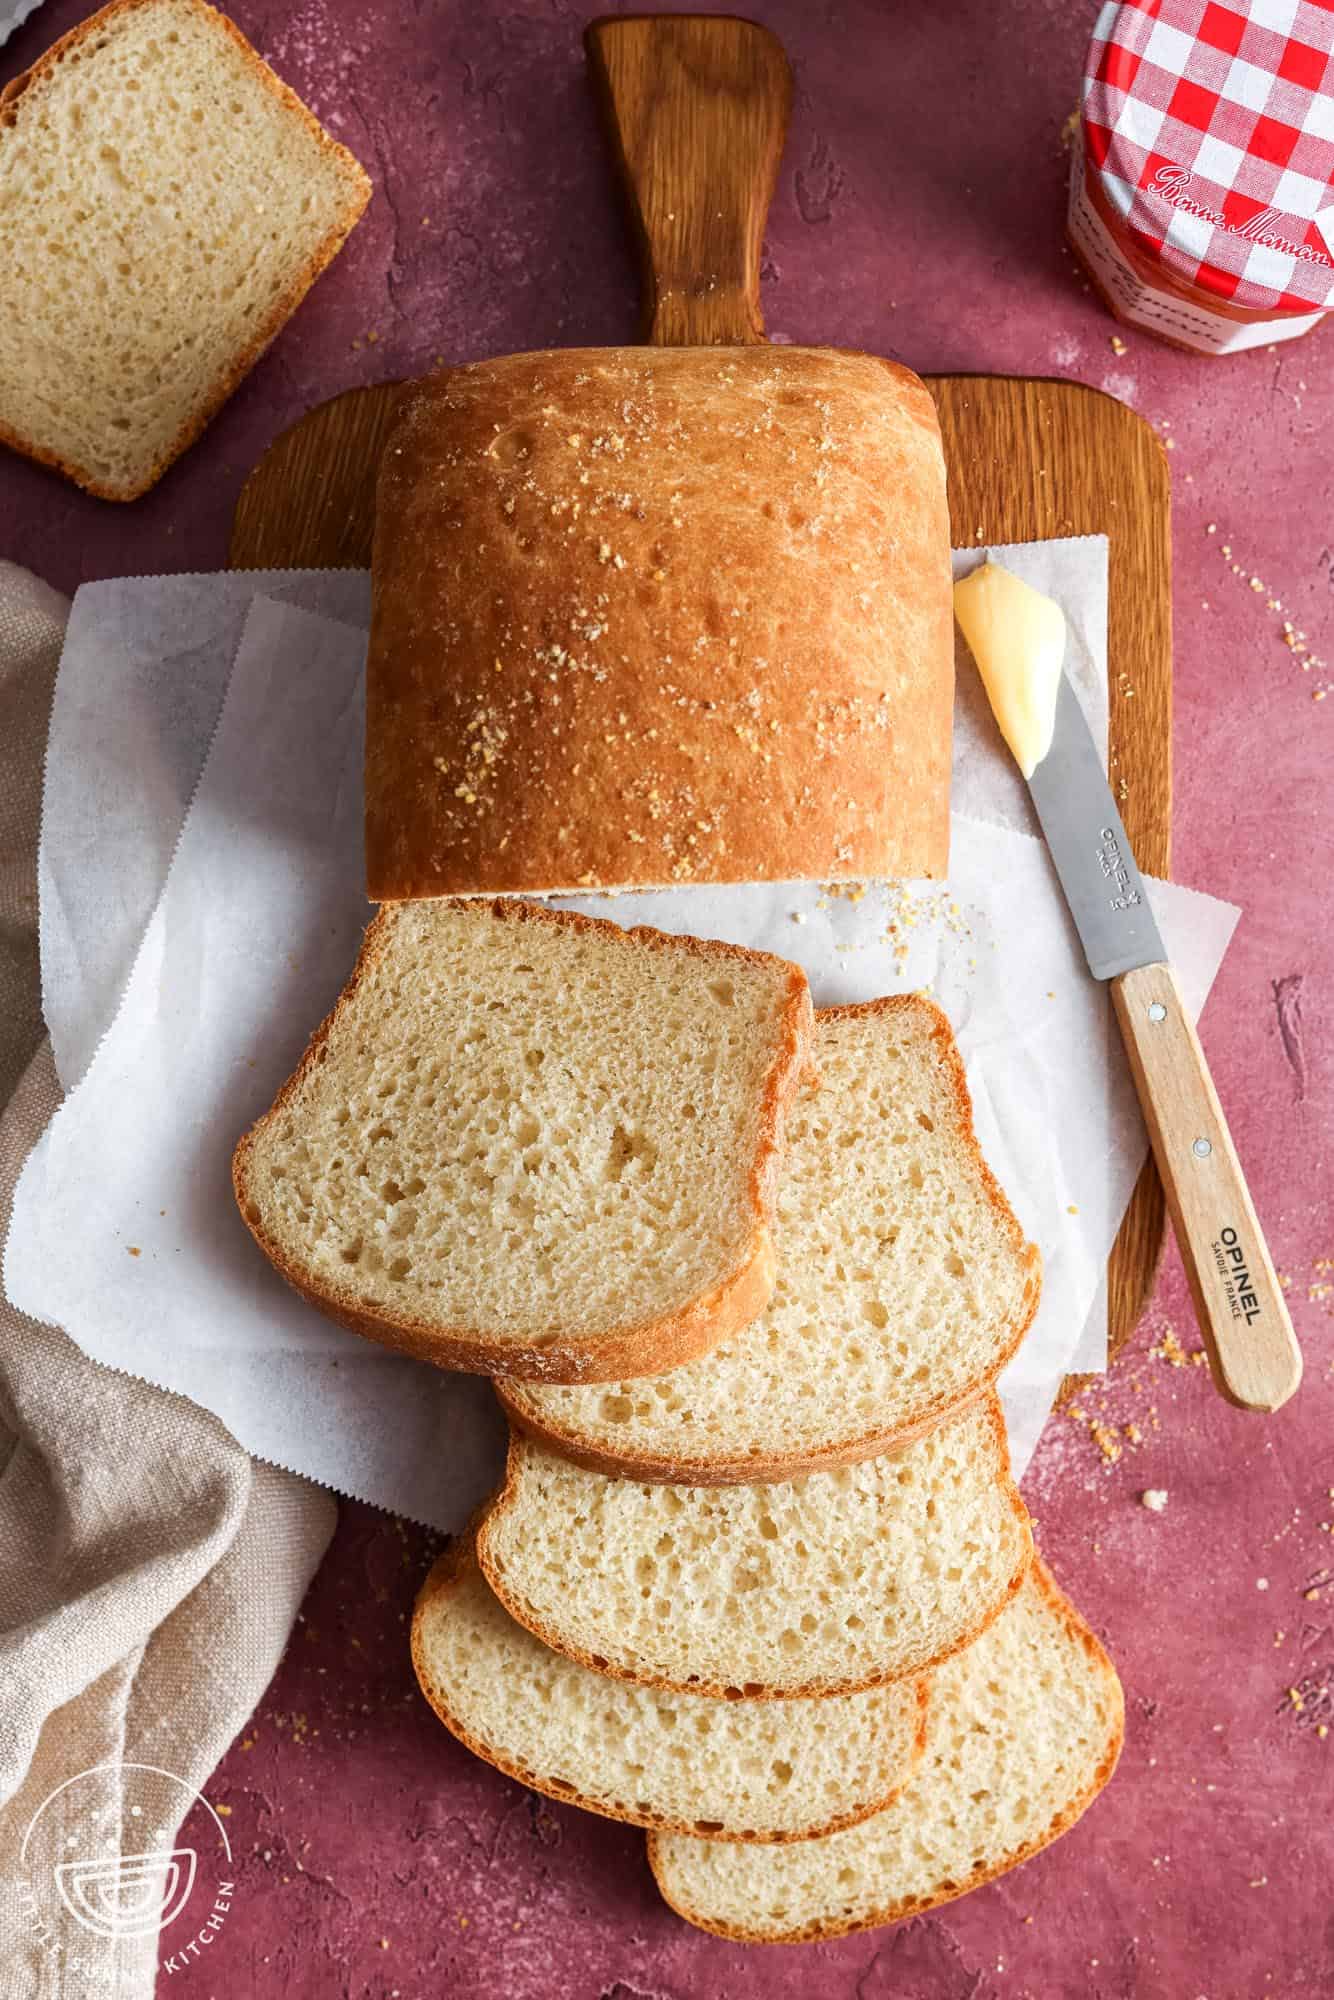
This easy no-knead recipe for English Muffin Bread gives you everything you love about a toasted English Muffin: crusty edges, nooks and crannies, and a chewy crumb, all in loaf form.
It’s quick to make, perfect for toasting, and works beautifully in the bread machine too.


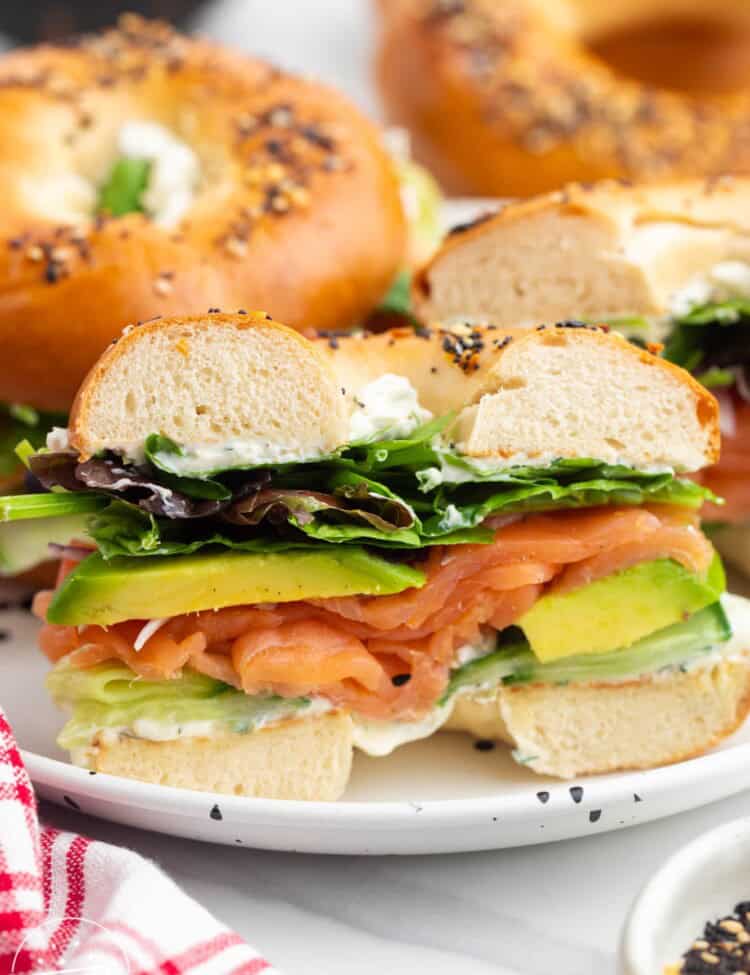
Take your Breakfast Sandwich Game to the next level!
I cannot believe how good this English Muffin Bread recipe turned out, and let me tell you, we have been enjoying the most amazing egg and cheese sandwiches all week using toasted slices of it!
I have found that the key to making a loaf of bread with a similar texture to a classic English muffin is a high hydration level. In fact, this yeasted bread dough is 83.3% hydration, which is why it has a wonderfully dense crumb with lots of little nooks and crannies.
You don’t need to worry too much about hydration numbers, though! Just follow along with this easy no-knead bread recipe, and you’ll have the most perfect loaf of English Muffin Bread ready in under 2 hours.
I’ve included traditional oven baking instructions as well as bread machine instructions if you prefer. And if you enjoy this recipe, you should try my perfect bread machine white bread or my easy, rustic, no-knead bread recipe too!
Ingredient Notes
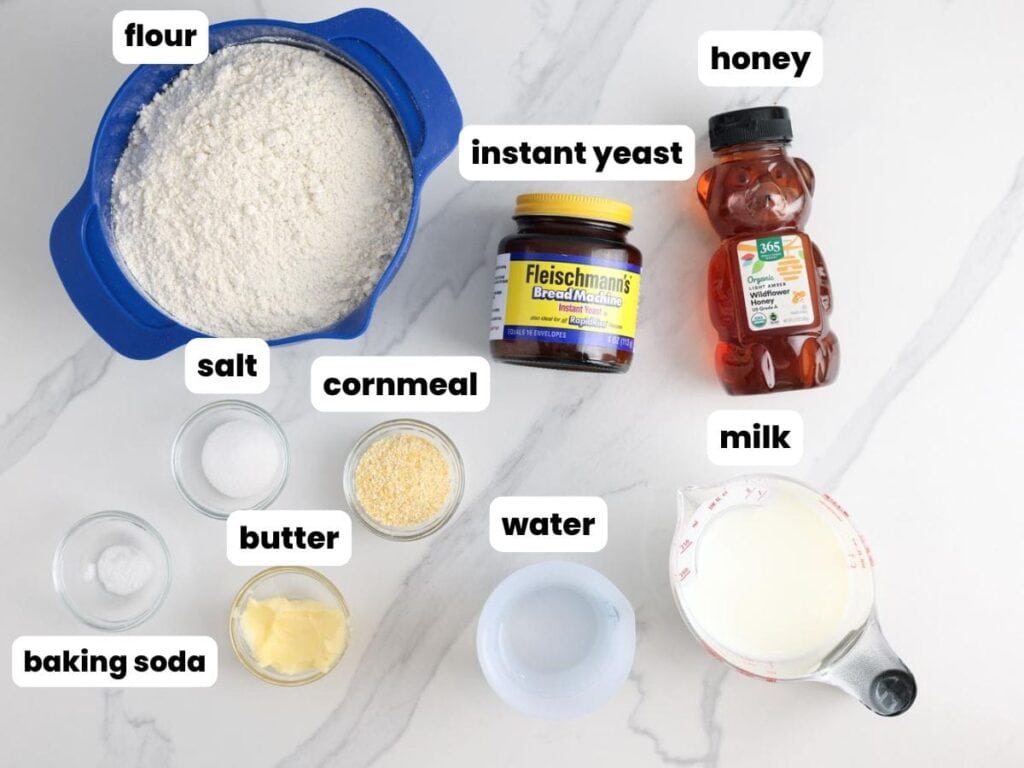
Complete list of ingredients and amounts can be found in the recipe card below.
- Flour: I tested this recipe with both all-purpose flour and bread flour. The AP flour works really well. Bread flour made the loaf just a little bit sturdier. Either type of flour can be used here.
- Water and Whole Milk: It’s important to warm the liquids for this recipe to a temperature of 110°F/43°C. This temperature is perfect for waking up the yeast and making it work faster, but it isn’t so hot that it will kill the yeast.
- Butter and Honey: These ingredients further enrich the English muffin bread dough and add rich and sweet flavor notes.
- Yeast and Baking Soda: This might seem redundant, but both leaveners are necessary for this loaf. The combination of baking soda and yeast is the traditional way to add the bubbly nooks and crannies to English muffins.
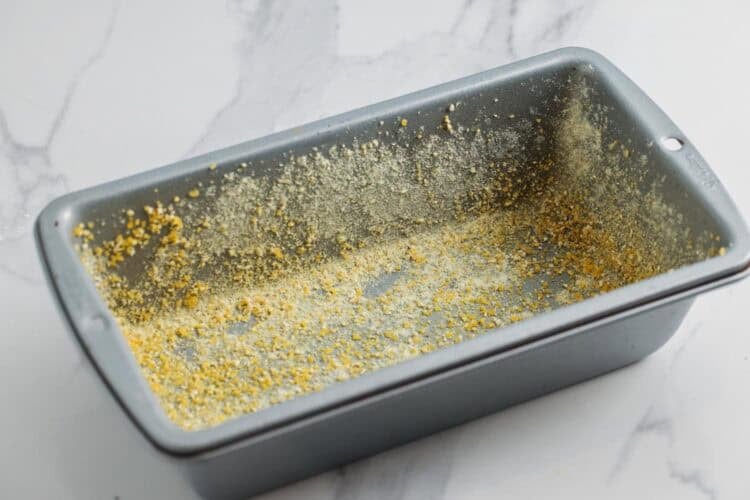
- Cornmeal: My favorite part about a toasted English muffin is the crunchy cornmeal bottom! If you’re baking your loaf in the oven (rather than in a bread machine), you can add cornmeal to the loaf pan to give each slice that same texture.

Recipe Tips
- Don’t add extra flour! This bread dough is meant to be loose and sticky. Adding more flour will make the loaf dry and dense.
- Watch your timing. Overproofing this dough will lead to a loaf that bakes up flat or unevenly. Keep an eye on the dough as it’s rising. Once the dough has doubled and feels airy when gently pressed, it’s ready to bake.
- Cool the bread completely before slicing. Cutting into it while it’s hot will be tempting, but that will allow steam to release and interrupt the process of creating the perfect crumb. Covering the bread while it’s still warm can also cause the crust to soften.
- This bread is perfect for toasting, and I think I enjoy it best that way as a vessel for butter, jam, or a hearty breakfast sandwich. You might enjoy it fresh and soft, too.
- If you’re making this recipe in your bread machine, be sure to omit the cornmeal. You might also want to try to smooth the top of the loaf after the dough rises. I find that helps to avoid misshapen or lopsided loaves of bread.
- For an extra chewy crust, bake the loaf in the oven with steam. To accomplish this, add a metal baking dish to the bottom rack of your oven while it preheats. Pour 1-2 cups of boiling water into the baking dish, add your bread to the middle rack, and quickly close the oven door.
More Homemade Bread Recipes


I hope you have an amazing time making this English Muffin style bread from scratch! Homemade bread is just so much better than what you’ll find in the store, and it will be a real treat for your family.
Did you make this? Be sure to leave a review below and tag me on Facebook, Instagram, or Pinterest!
English Muffin Bread
Equipment
- Mixing bowl or stand mixer
- Danish dough whisk
- 8.5×4.5 inch loaf pan (oven method)
- Plastic wrap
- Oven Thermometer
- Digital thermometer
Ingredients
- ¾ cup (180 ml) whole milk heated to 110°F (43°C)
- ½ cup (120 ml) water heated to 110°F (43°C)
- 1 tablespoon (14 g) unsalted butter melted
- 1 tablespoon (15 ml) honey or granulated sugar
- 1½ teaspoons table salt
- 3 cups (360 g) all-purpose flour or bread flour for a sturdier loaf
- ⅛ teaspoon baking soda
- 1 teaspoon instant yeast
- 2 tablespoons (20 g) cornmeal for oven version only
Instructions
Oven Instructions
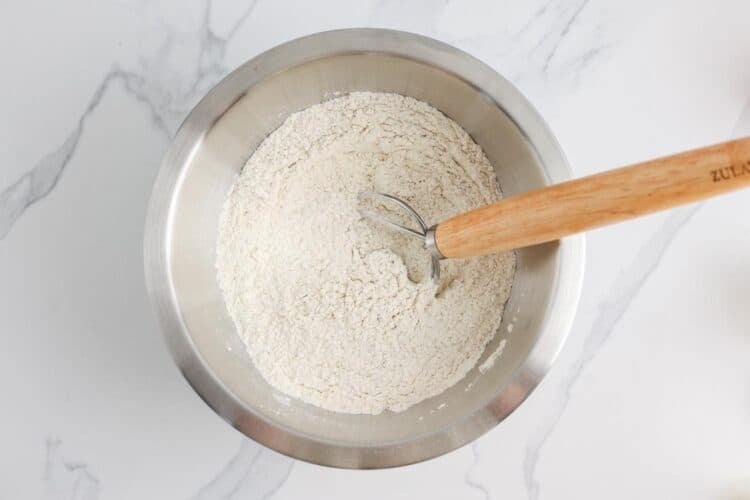
- In a large mixing bowl, whisk together the flour, baking soda, yeast, and salt.

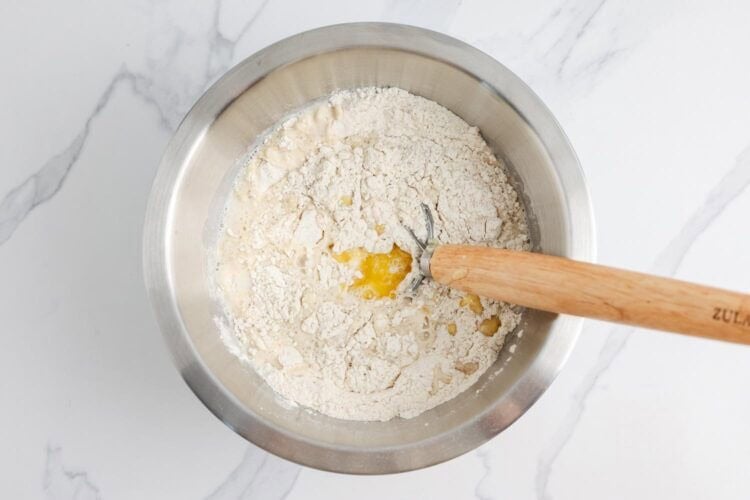
- Add the warm milk, warm water, honey, and melted butter.
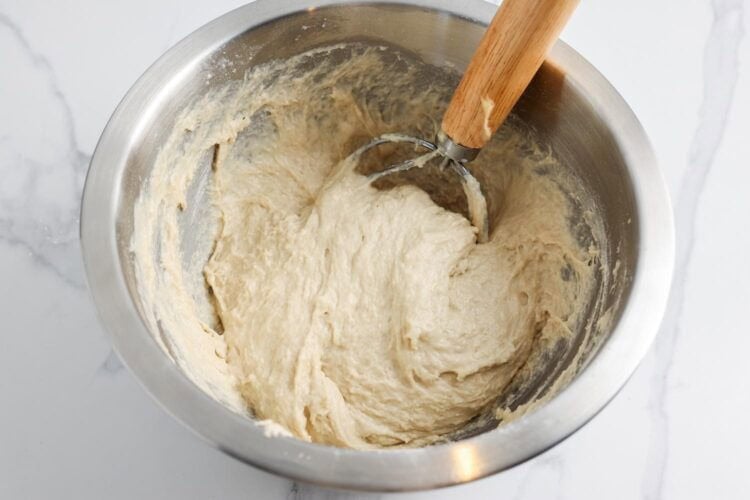
- Mix with a Danish dough whisk or wooden spoon for 3 minutes, until the dough becomes slightly smooth but remains shaggy. Alternatively, mix with a stand mixer fitted with a dough hook on high speed for 2 minutes.
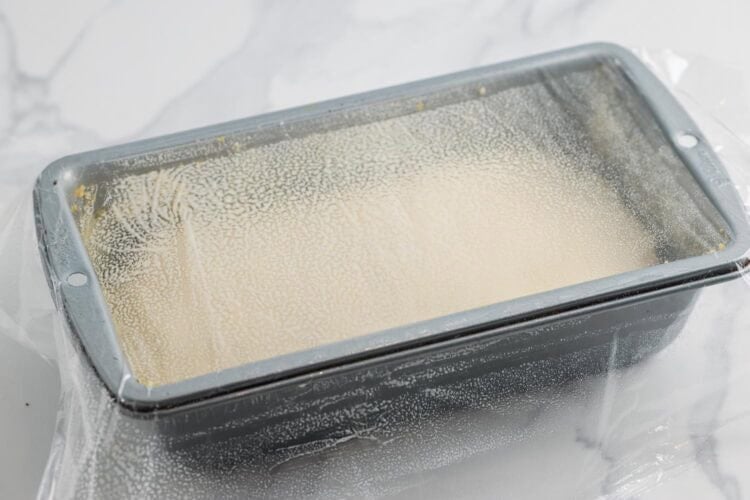
- Grease an 8.5×4.5 inch (22×11 cm) loaf pan and sprinkle the bottom and sides with 2 tablespoons of the cornmeal.
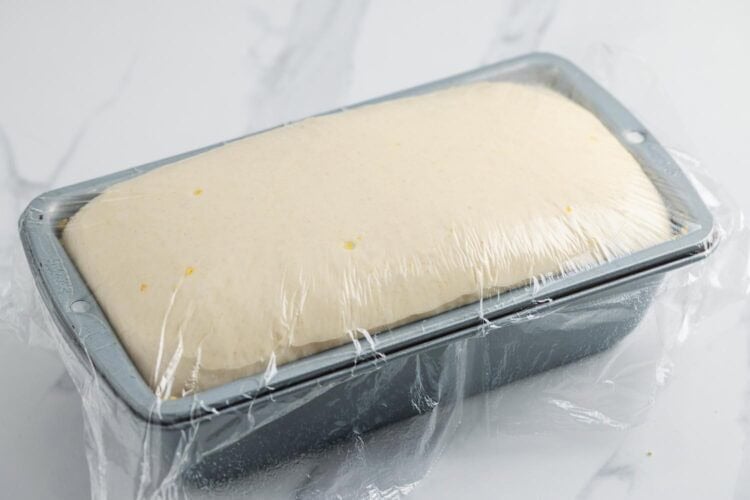
- Transfer the dough into the prepared pan and smooth the top if needed. Loosely cover with greased plastic wrap
- Let the dough rise in a warm spot for 1 hour or until the dough reaches the top edge of the pan.
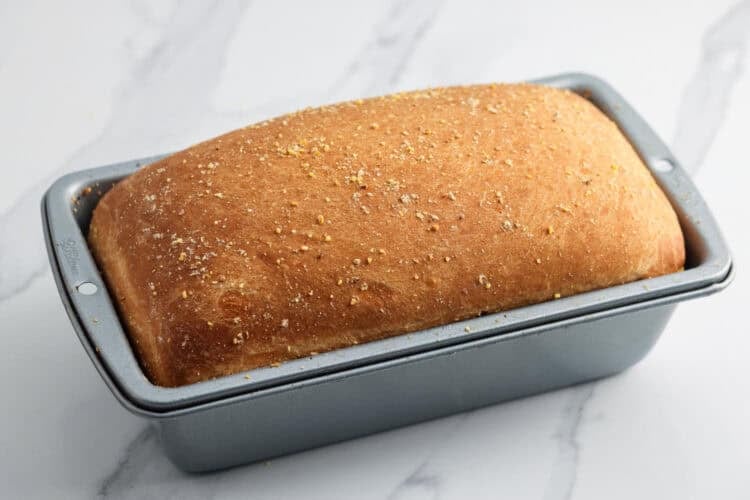
- Preheat the oven to 400°F (200°C). Bake the loaf for 25 minutes or until golden brown and the internal temperature reaches 190°F (88°C).
- Remove from the oven and let cool in the pan for 10 minutes. Then transfer to a wire rack to cool completely before slicing.
Bread Machine Instructions
- Omit the cornmeal.
- To the bread pan, add the following ingredients in this order: warm milk, warm water, melted butter, honey, salt, flour, baking soda, and yeast.
- Insert the bread pan into the machine and make sure it is secured. Close the lid and plug in the machine.
- Select the basic bread setting, loaf size (small, or 1 lb), and preferred crust color (light, medium, or dark). Start the cycle.
- If you are nearby after the kneading stage and before the dough begins to rise, open the lid and smooth the top of the dough with a damp spatula or clean fingers. This helps avoid an uneven or lopsided loaf, which can happen if the dough is stuck to one side of the pan.
- Once the baking cycle ends, unplug the machine. Wearing kitchen mittens, carefully remove the bread pan and allow it to cool for 10 minutes.
- Turn the loaf out onto a wire rack and let it cool completely before slicing. If the paddle remains in the loaf, gently remove it.
Notes:
- If desired, sprinkle the top of the loaf lightly with additional cornmeal before baking in the oven.
- Bread flour gives a sturdier, chewier loaf. All-purpose flour yields a softer result.
- Be sure to cool the bread fully before slicing to maintain its structure.
- If using a bread machine and you are nearby after kneading, open the lid and smooth the top of the dough before it rises. This helps prevent a misshapen or slanted loaf.
- This bread is perfect for toasting and makes excellent breakfast sandwiches.
- Storage: Keep in an airtight container or wrapped tightly at room temperature for up to 3 days. For longer storage, slice the bread and freeze it.
Nutrition Information
This website provides approximate nutrition information for convenience and as a courtesy only. Nutrition data is gathered primarily from the USDA Food Composition Database, whenever available, or otherwise other online calculators.
© Little Sunny Kitchen


Audrey O. says
Making homemade bread always intimidated me, but I’m glad I took the chance at this one. My son said it tasted just like English muffins, and we all enjoyed it very much. I’m looking forward to making it again. Thanks so much for sharing such a great recipe. Your directions say to slice and freeze for longer storage. Would you recommend u wrap each slice separately in aluminum foil or plastic wrap or can they all just go in a gallon size ziploc bag? Do you know how long they should be in the freezer max and the best way to defrost and reuse them? Thanks again!
Diana says
I’m so glad you gave it a try, Audrey, and that it turned out so well! I’d slice it first, then freeze the slices in a freezer bag with the air pressed out. If you’d like, you can separate them with a little parchment so they’re easier to grab. They should keep well for about 3 months, and you can thaw them at room temperature or pop them straight into the toaster.
Marty says
Thank you for the recipe. Could this be done on the dough cycle in a bread machine and then cooked in a cast iron skillet on the stove?
Little Sunny Kitchen says
Hi Marty! I haven’t tried that at all, but you’re welcome to test it out! Stop back and let me know how it works for you.
Marty says
They turned out great! Thank you for the recipe.
Diana says
So glad to hear that. Thanks for trying the recipe!
Greg says
I made this using the bread maker option. This really makes a loaf of bread like an English muffin. The honey a hint of sweetness. great toasted
Diana says
Thanks, Greg for trying my recipe! I’m glad you enjoyed it!