Make the ultimate chocolate cupcakes from scratch with my easy recipe! Featuring a dark, fudgy flavor and luscious chocolate buttercream, these cupcakes are a must-try for any chocoholic.
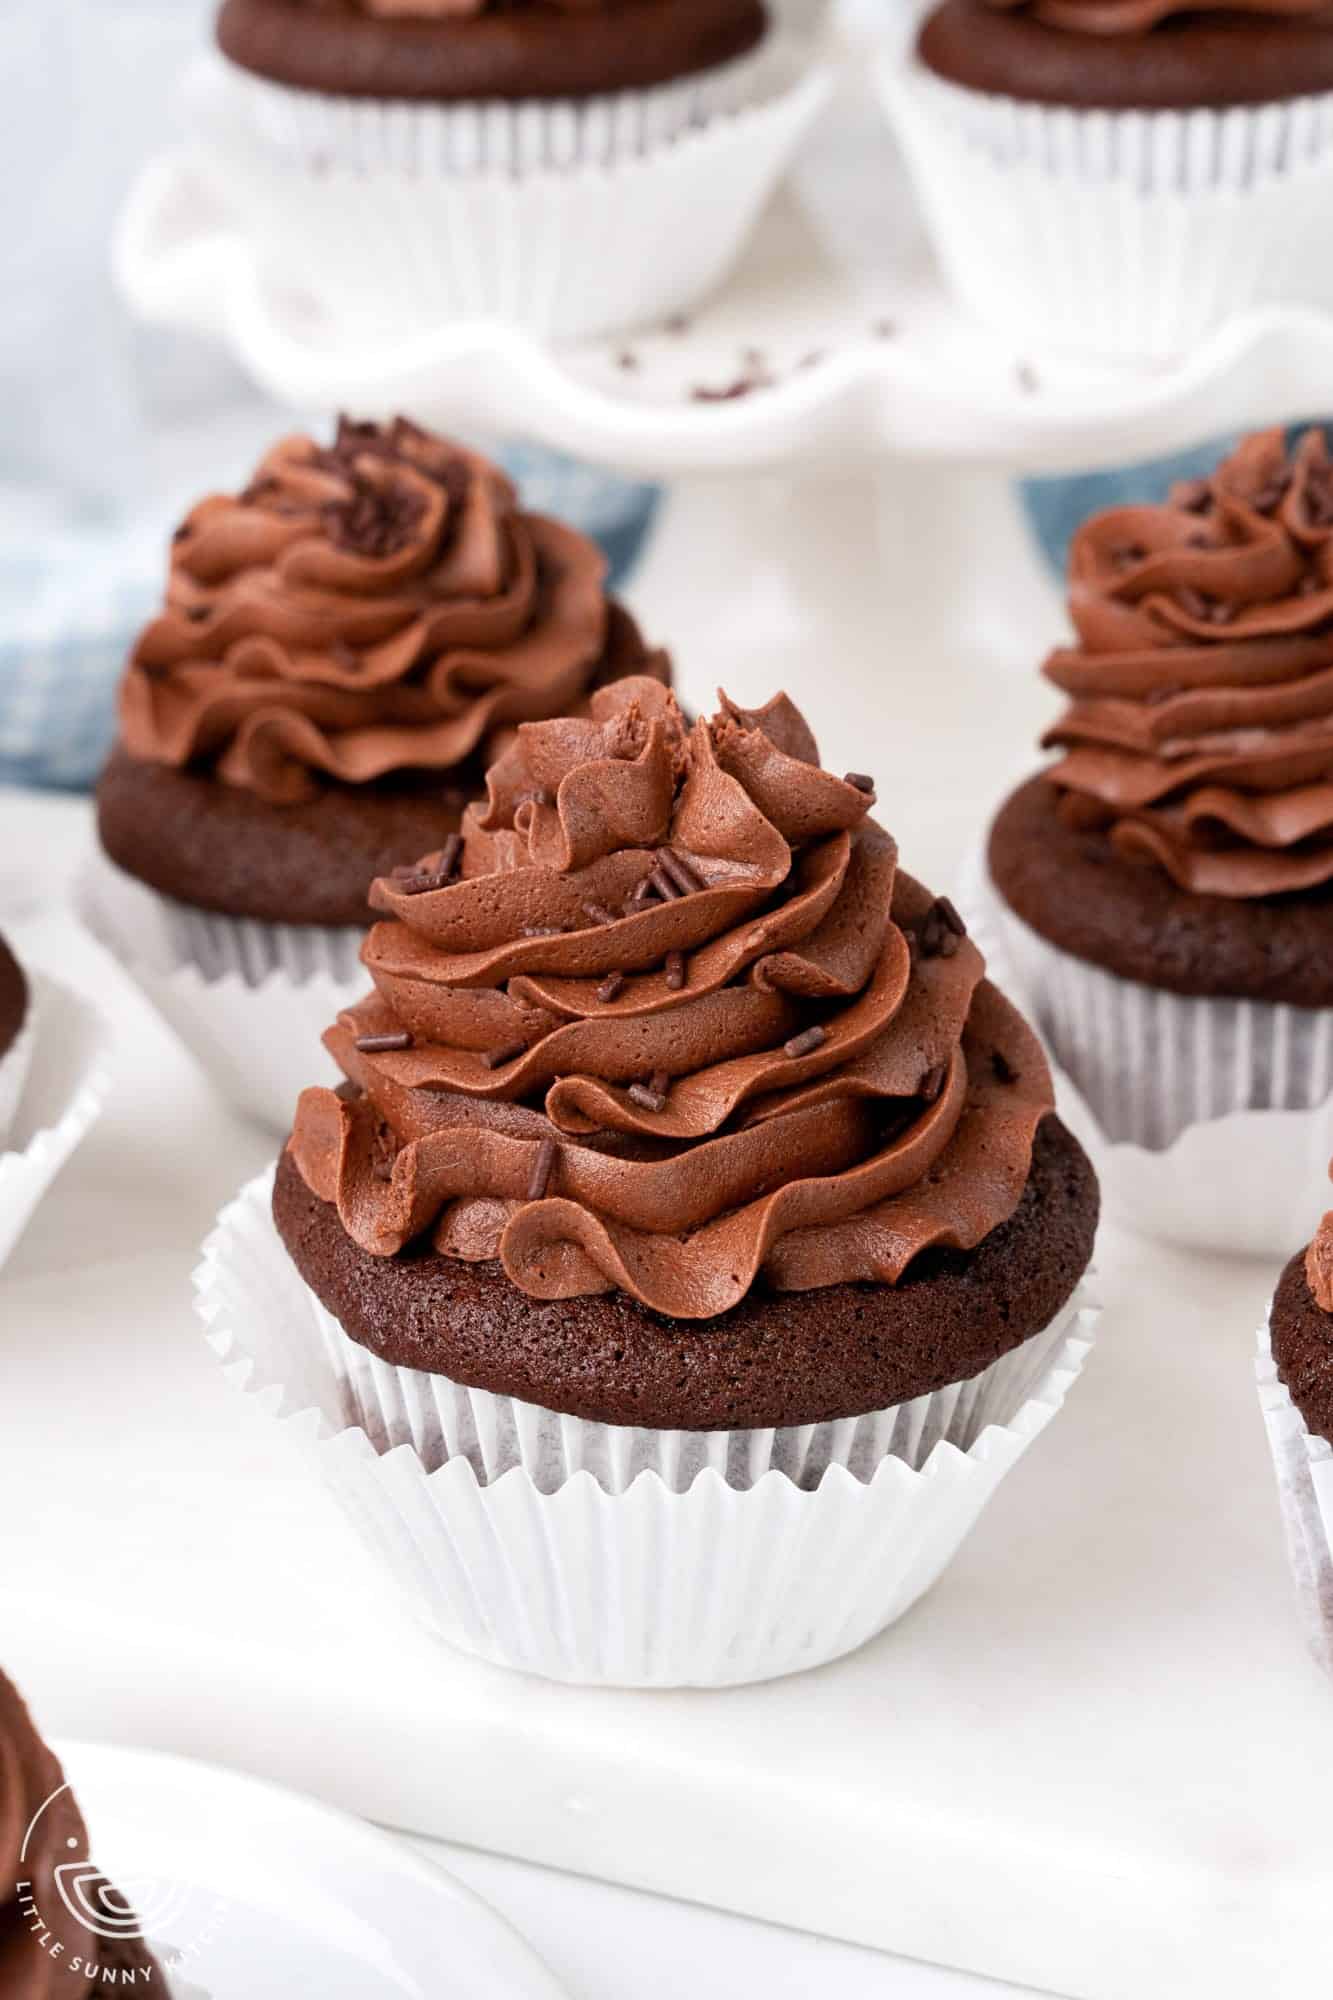
If you’re anything like me, rich fudgy chocolate cupcakes from scratch are pretty hard to resist! There’s nothing better than moist and tender cupcakes topped with luscious chocolate buttercream.
I’ve been making this recipe for a long time and to me, it is perfect. The version in this post is the same one that I first published in 2014, but I wanted to update the post for you to give you some more helpful tips on the process. Plus, I took some new photos which I think really capture these cupcakes in all their glory!
Whether you’re celebrating a special occasion or just looking for a simple indulgence on a weeknight, making your own homemade cupcakes is always a fun option!
Why You’ll Love This Recipe
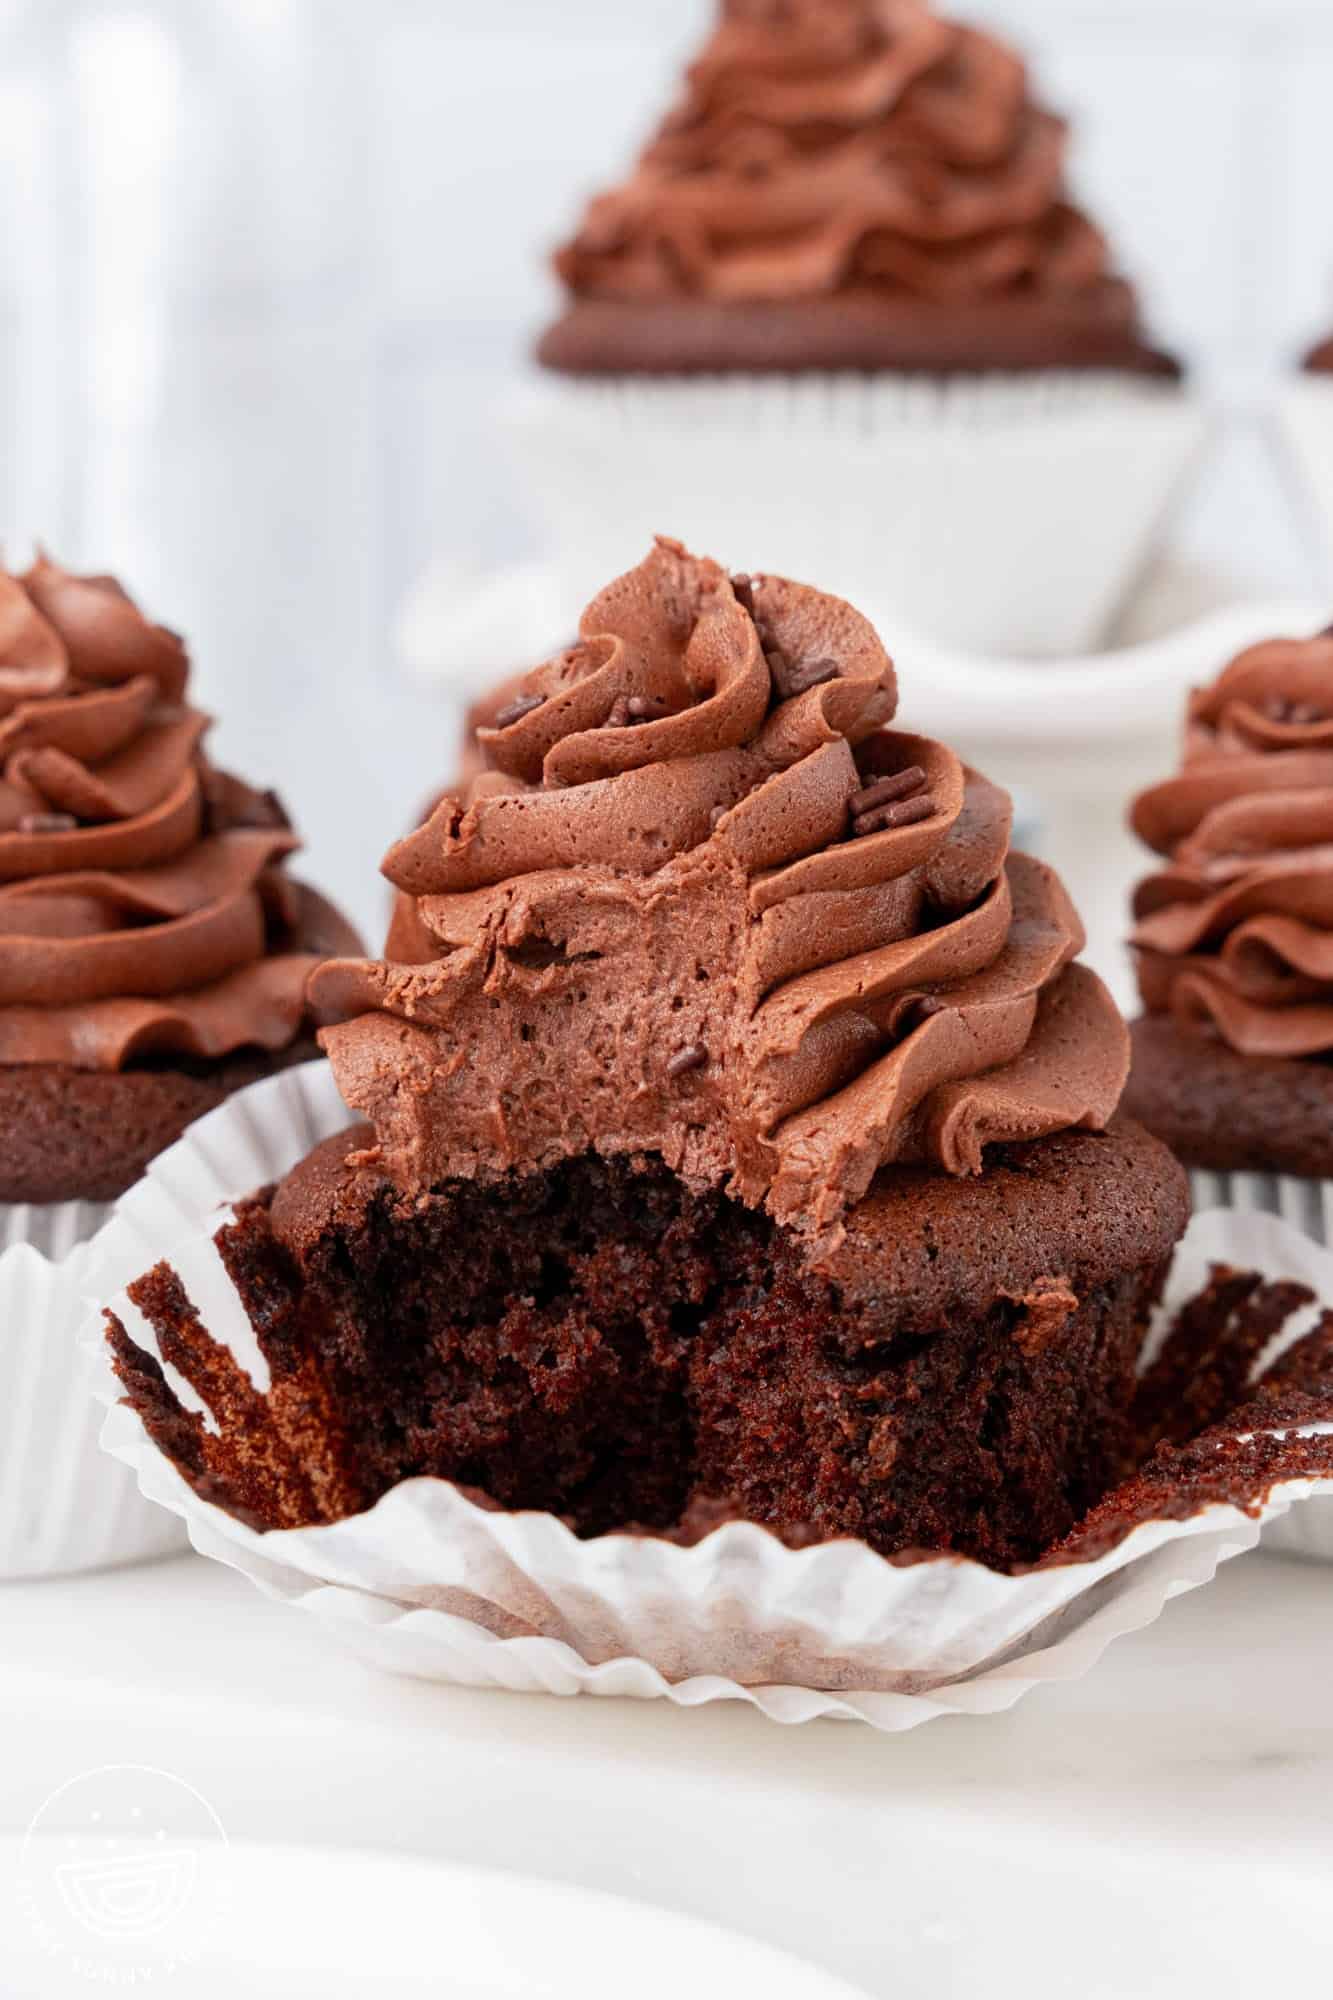
Get ready for the best chocolate cupcake recipe around! This easy recipe makes the richest and fluffiest chocolate cupcakes I’ve ever had. The cake is moist and tender with a dark fudgy flavor and the chocolate buttercream is so good, you’ll be licking it off the spoon!
They also keep beautifully in the fridge or freezer, so you can make a batch and enjoy them whenever you want a decadent treat.
Ingredients Needed
Vegetable oil and two types of sugar help to make these cupcakes ultra-moist! Plus, we will add a special ingredient to bring out all that rich chocolate flavor.
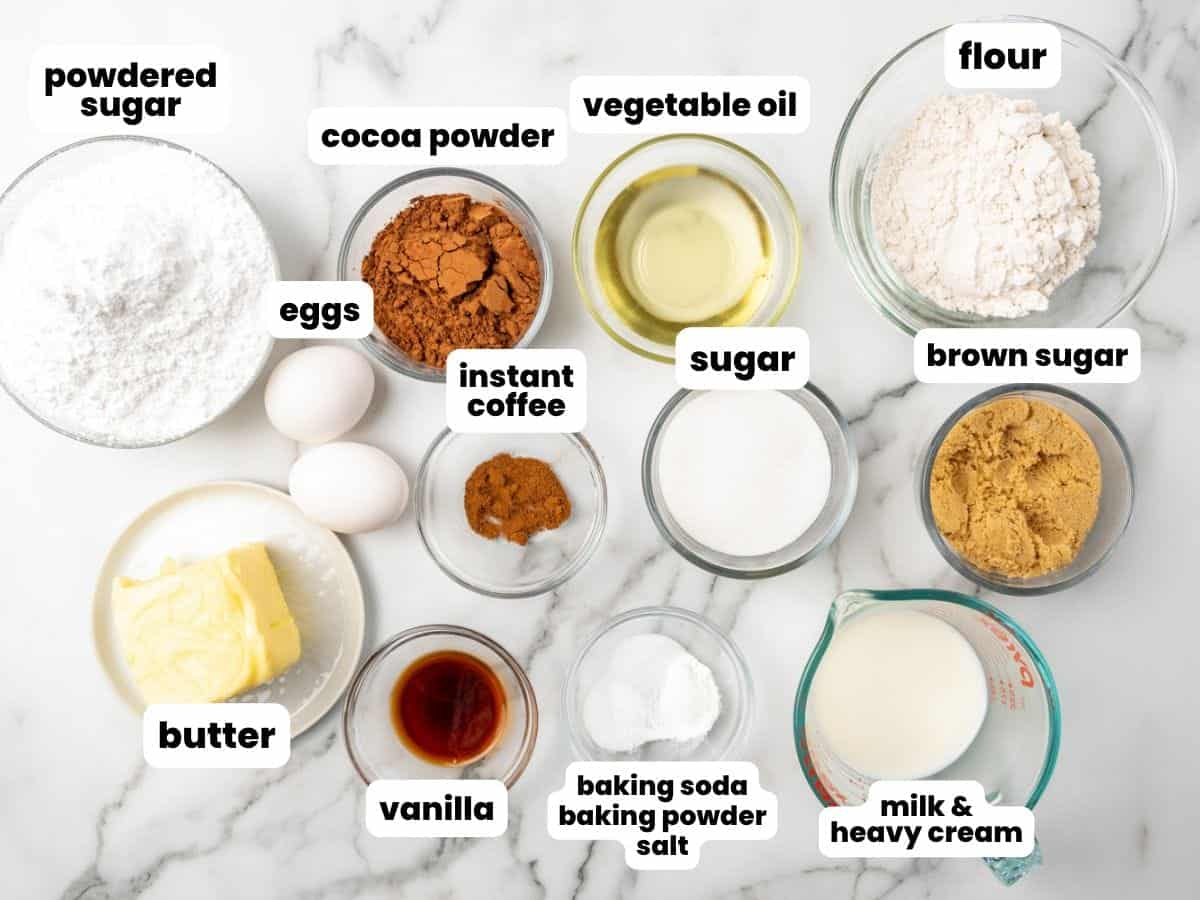
For the Cupcakes
- Unsweetened cocoa powder: Preferably Dutch process. This cocoa powder is darker and less acidic than regular cocoa powder and it makes super fudgy chocolate cakes.
- Espresso powder: This is the special ingredient that will make the chocolate flavor shine! You only need a small amount for it to work its magic without turning your cupcakes into a mocha flavor. If you don’t have espresso powder, you can substitute it with instant coffee, but the chocolate flavor may not be quite as rich tasting.
- Sugars: Using both white and light brown sugars gives you the best flavor, color, and texture, plus they help to add moisture to the cupcakes.
- Fat: I prefer to use vegetable oil in my cupcakes for the ultimate fudgy texture. Butter is great for flavor, but because it’s solid at room temperature, it doesn’t deliver the same amount of moistness that a liquid oil can.
- Milk: I recommend using whole milk for a richer batter.
For the Buttercream
This is an easy American-style buttercream, which you can make all in one bowl.
- Unsalted butter: Make sure your butter is softened before you start making your buttercream or you’ll have a hard time getting a smooth and silky texture.
- Unsweetened cocoa powder: Use the same cocoa powder that you used for your chocolate cupcakes.
- Heavy whipping cream: Whipping cream will give you the richest and creamiest texture, but you can also use half and half, or whole milk.
- Salt: Chocolate always needs a pinch of salt to really bring out its flavor.
- Vanilla extract: I prefer pure vanilla extract for the best flavor.
Complete list of ingredients and amounts can be found in the recipe card below.
How To Make Chocolate Cupcakes
You can make this cupcake batter with just a bowl and a spoon (no mixer is needed!). It takes about 10 minutes to prep the batter and then you can make the buttercream while the cupcakes are baking.
Bake the Cupcakes
Before you do anything, preheat the oven to 350°F/180°C (160°C fan oven) and line a muffin pan with cupcake liners.
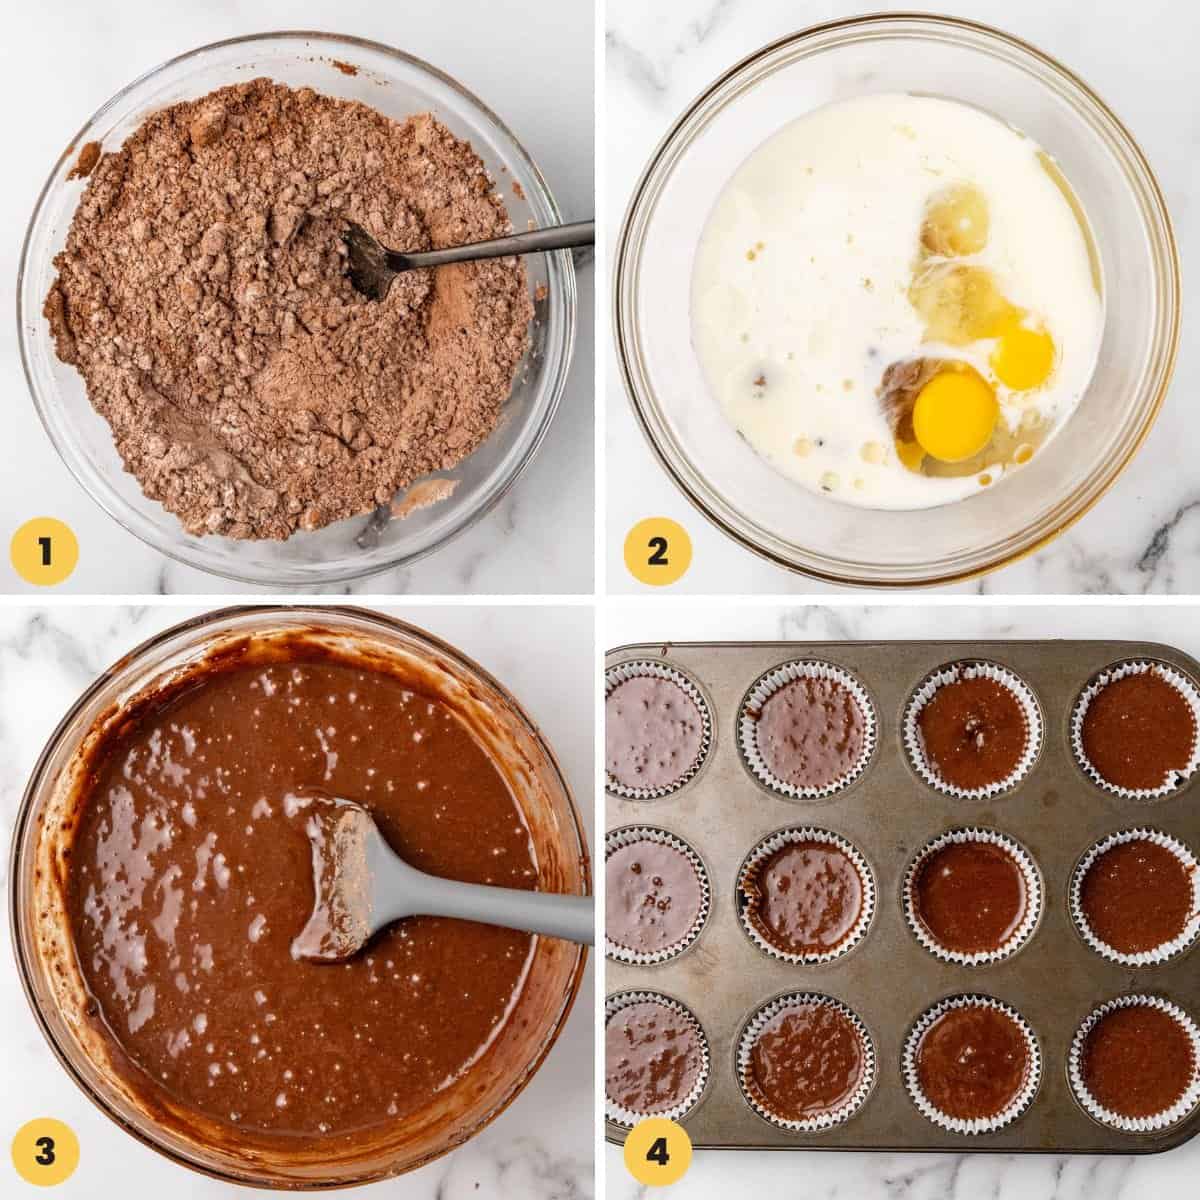
- Combine dry ingredients in a medium-sized bowl and set aside.
- Whisk room-temperature eggs with sugars, oil, vanilla, and milk until they’re combined.
- Mix the dry ingredients with the wet ingredients by gently stirring until everything is just combined. Be careful not to overmix the batter.
- Pour the batter into the liners until they’re three quarters full, then bake for 20 minutes or until a toothpick comes out clean from the center of a cupcake. Remove the chocolate cupcakes from the oven and let them cool down completely.
Tip!
Be patient and allow the cupcakes to cool down completely after they’re out of the oven! If you try to frost warm cupcakes, your frosting will melt and slide right off the side.
Make the Chocolate Buttercream Frosting
I suggest using an electric mixer to make the frosting, but if you don’t have one, don’t worry! You can beat it by hand with a wooden spoon or whisk, it will just take a bit longer to get the desired consistency.
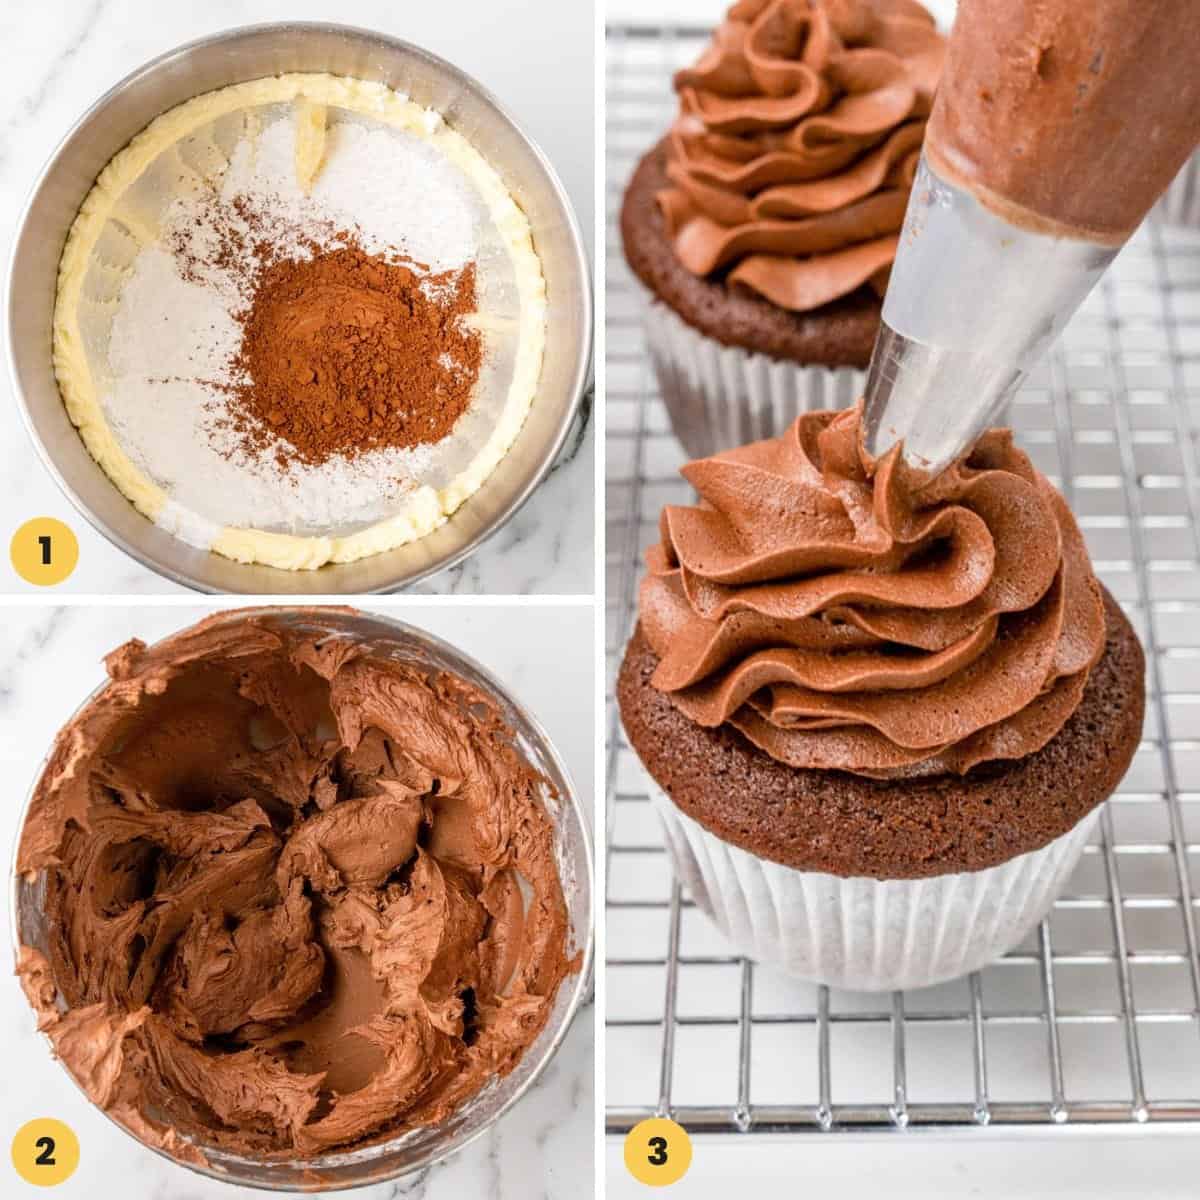
- Beat the softened butter in a large bowl using a hand mixer or stand mixer that’s fitted with either the whisk or paddle attachment. Beat butter at medium speed until creamy. This will take about a minute.
- Slowly mix in the powdered sugar, cocoa powder, heavy cream, vanilla, and salt then once the sugar is mixed in, turn the mixer up to high and continue to beat for three minutes. The frosting should be smooth and creamy.
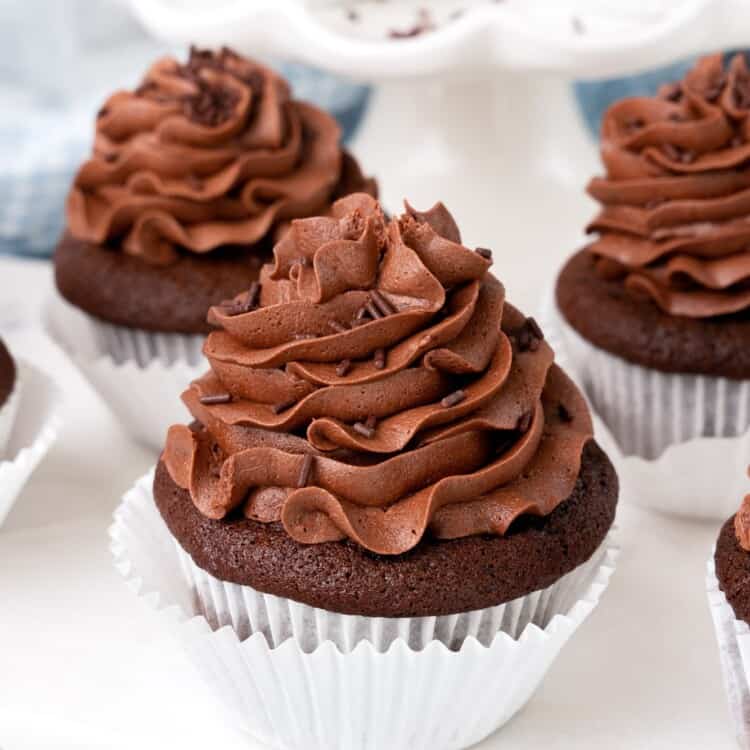
- Frost the cupcakes using a Wilton 1M piping tip and decorate with chocolate sprinkles!
Tip!
If your buttercream tastes too sweet, try adding a pinch more salt or a splash of lemon juice to balance the sweetness. You could also add another sprinkle of cocoa powder to help tone it down.
Recipe Tips
- Using an ice cream scoop to portion out the cupcake batter is a good way to ensure you get even-sized cupcakes.
- If your buttercream is too stiff, add a splash of cream or milk to help loosen it and continue to whip it until it reaches the desired consistency.
- If your buttercream looks a bit too thin, pop it into the fridge for a few minutes to chill then whip it some more when you bring it out. You can also sprinkle over some more powdered sugar to help thicken it up.
- Chocolate buttercream is the classic choice, but why not switch it up with cinnamon cream cheese frosting or white chocolate buttercream instead?!
Using Chocolate Cupcake Leftovers
These chocolate cupcakes store well, so they definitely won’t go to waste, but you can also repurpose them to make new chocolatey treats!
- Trifle: I’ll often crumble leftover cake or chocolate cupcakes and layer them in a trifle with some fresh fruit and whipped cream. It’s an easy dessert that’s always popular!
- Milkshake: You can also toss crumbled unfrosted chocolate cupcakes into a blender with some ice cream and whizz it all up to make a decadent milkshake.
- Cake Pops: Lastly, if cake pops are your thing, mash up some chocolate cupcake and chocolate buttercream frosting with some cream cheese, roll the mixture into little balls and dip them into melted chocolate and let the chocolate harden before serving. This one is fun for the whole family to make!
Storing and Freezing Tips
- Storing unfrosted cupcakes at room temperature: Let the chocolate cupcakes cool completely and then store them in an airtight container for up to one week.
- To store frosted cupcakes in the refrigerator: Once you’ve decorated your cupcakes with buttercream, they should be stored in the fridge in an airtight container.
- Storing unfrosted cupcakes in the freezer: Unfrosted chocolate cupcakes will keep well in the freezer for up to 2 months. Let them cool completely then store them in a freezer-safe container or a zip-top bag.
- To store frosted cupcakes in the freezer: I recommend storing the buttercream and cupcakes separately and then decorating them once you’re ready to serve them. If you want to freeze your decorated cupcakes while preserving the frosting as best as you can, then place the cupcakes onto a baking sheet or in a muffin tin and freeze for 2 – 3 hours. This time will let the buttercream chill and harden enough for you to then wrap each cupcake in plastic wrap and store in a zip-top bag.
- When you’re ready to serve, remove the cupcakes from the freezer and carefully unwrap them, then allow them to thaw in the fridge overnight, or for the softest texture, at room temperature.
Recipe FAQs
If your cupcakes are coming out flat, it could be time to check your baking powder or baking soda. Make sure they’re both fresh and active. To test, add a little bit to warm water to see if they fizz. If you don’t see any action, it’s time to toss it.
Sometimes beautifully domed cupcakes sink once we bring them out of the oven, and this could happen for a few reasons. Avoid overmixing your batter which incorporates too much air into it. They’ll rise quickly and fall just as quickly!
Also, make sure you don’t overfill your cupcake liners. The batter can overflow and result in flat sunken cupcakes.
If your cupcakes collapse, don’t worry about it though! Pipe on some of the silky buttercream frosting and no one will know the difference.
You can bake this recipe in two 8” pans for 35 minutes or two 9” pans for around 30 minutes. Bake the layers until a toothpick inserted in the center of the cakes comes out clean.
This recipe uses oil as the fat, which helps to keep the chocolate cupcakes nice and moist. Make sure you don’t overbake them and be sure to measure your flour accurately, as adding too much can cause your cupcakes to be dry.
Save this recipe for the next time you have a hankering for moist double chocolate cupcakes! Pin it for more people to enjoy too!
Did you make this? Be sure to leave a review below and tag me on Facebook, Instagram, or Pinterest!
Chocolate Cupcakes
Equipment
- 1 12 muffin pan
- Cupcake liners
- Electric Hand mixer or Stand mixer
Ingredients
- ½ cup (50 g) unsweetened cocoa powder preferably Dutch process
- 1 teaspoon espresso powder
- ¾ cup (90 g) all-purpose flour
- ½ teaspoon baking soda
- ¾ teaspoon baking powder
- ¼ teaspoon salt
- 2 large eggs at room temperature
- ½ cup (100 g) granulated sugar
- ½ cup (100 g) light brown sugar
- ⅓ cup (80 ml) vegetable oil
- 1 teaspoon pure vanilla extract
- ½ cup (120 ml) whole milk
Chocolate buttercream
- ¾ cup (185 g) unsalted butter softened
- 2 ½ cups (310 g) powdered sugar
- ½ cup (50 g) unsweetened cocoa powder
- 2-3 tablespoons (50 ml) heavy whipping cream or half and half, or milk
- 1 ½ teaspoons pure vanilla extract
- ⅛ teaspoon salt
- Chocolate sprinkles optional
Instructions
- Preheat the oven to 350°F/180°C (160°C fan oven), line a muffin pan with cupcake liners.
- In a bowl, combine cocoa powder with espresso powder, flour, baking soda, baking powder, and salt.
- In a separate bowl, whisk the eggs with sugars, oil, vanilla extract and milk.
- Add the dry ingredients to the wet ingredients, and gently stir until just combined. Do not over mix the batter.
- Pour the batter into cupcake liners ¾ full. Bake for 20 minutes or until a toothpick inserted in the center of a cupcake comes out clean.
- Remove from the oven, and allow to cool down completely. As you wait, make the chocolate buttercream.
To make the chocolate buttercream:
- In a large bowl using a hand mixer, or using a stand mixer that’s fitted with a whisk or a paddle attachment. Beat the butter at medium speed for 1 minute until creamy.
- Decrease the speed to low, and gradually add the powdered sugar, cocoa powder, heavy cream, vanilla extract, and salt and beat again.
- When the sugar is mixed in, increase the speed to high and beat for 3 minutes.
- If the frosting is too thick, add cream and beat again. If it’s too thin, add powdered sugar and beat again.
- Frost the cupcakes using a Wilton 1M piping tip, and decorate with chocolate sprinkles if desired.
Notes:
- Be patient and allow the cupcakes to cool down completely after they’re out of the oven! If you try to frost warm cupcakes, your frosting will melt and slide right off the side.
- Storing unfrosted cupcakes at room temperature: Let the chocolate cupcakes cool completely and then store them in an airtight container for up to one week.
- To store frosted cupcakes in the refrigerator: Once you’ve decorated your cupcakes with buttercream, they should be stored in the fridge in an airtight container.
- Storing unfrosted cupcakes in the freezer: Unfrosted chocolate cupcakes will keep well in the freezer for up to 2 months. Let them cool completely then store them in a freezer-safe container or a zip-top bag.
Nutrition Information
This website provides approximate nutrition information for convenience and as a courtesy only. Nutrition data is gathered primarily from the USDA Food Composition Database, whenever available, or otherwise other online calculators.
© Little Sunny Kitchen
This recipe was first shared on the blog in September 2014, then was updated with new images and helpful tips in April 2023. The recipe remained the same.

Debbie T says
I made for my son’s party at school and everyone loved them. Mine even looked as pretty as yours!
Little Sunny Kitchen says
That’s so wonderful to hear, Debbie! Thank you for the kind review!
Kara says
The cupcakes were perfectly chocolatey, and don’t even get me started on the frosting. I could eat that stuff by the spoonful!
Little Sunny Kitchen says
Thank you, Kara! I’m so glad to hear you loved these cupcakes!
Sharina says
yey! These chocolate cupcakes are soooo addicting! So chocolatey and fudgy!
Little Sunny Kitchen says
Thank you for the great review, Sharina! I’m so happy you loved them!
Carolyn padley says
Absolutely moist, soft and taste amazing! Brilliant recipe 😊😊😊😊
Veena Azmanov says
Wow, these CLASSIC CHOCOLATE CUPCAKES look so cute! I really like the colors, it looks very tasty! I definitely want to try this! Thank you for sharing this great recipe!