• Skip to primary navigation
  • Skip to main content
  • Skip to primary sidebar
Free Dinner Ebook! Get your copy!
  • About
  • Videos
  • Learn to Cook
  • Visit my other site: Fun Cookie Recipes

Little Sunny Kitchen

Delicious Recipes for Real Life

  • All Recipes
  • Course
    • Appetizers
    • Breakfast
    • Sides
    • Dinner
    • Casseroles
    • Salads
    • Sandwiches
    • Pasta
    • Soups & Chilis
    • Desserts
    • Snacks
    • Sauces & Dressings
    • Beverages
  • Holiday
    • Easter
    • Summer
    • Fall
    • Halloween
    • Thanksgiving
    • Christmas
    • Valentine’s
    • Game Day
    • Ramadan
  • Method
    • Instant Pot
    • Air Fryer
    • Slow Cooker
    • Oven
    • Casseroles
    • Stovetop
    • Grill
    • Bread Machine
  • Easy Meals
  • Slow Cooker
  • Air Fryer
  • Breakfast
  • Snacks
  • Copycat Recipes
  • Beef
  • Low Carb
  • Chicken
Home Dessert Cookie Recipes

Christmas Pinwheel Cookies

These old-fashioned Christmas pinwheel cookies are soft, delicious, and really fun to make! They're so colorful, Christmassy, and deserve to be in everyone's Christmas cookie exchange boxes this year!
5
/5 –
Rate Recipe 8 Comments
Jump to Recipe
  • Share
By: Diana Published on December 1, 2024

This post may contain affiliate links. Please read my disclosure policy.

Close-up of a festive batch of Christmas pinwheel cookies featuring red, green, and white swirls, coated with red, green, and white sprinkles, with bold text overlay reading 'Christmas Pinwheel Cookies.'

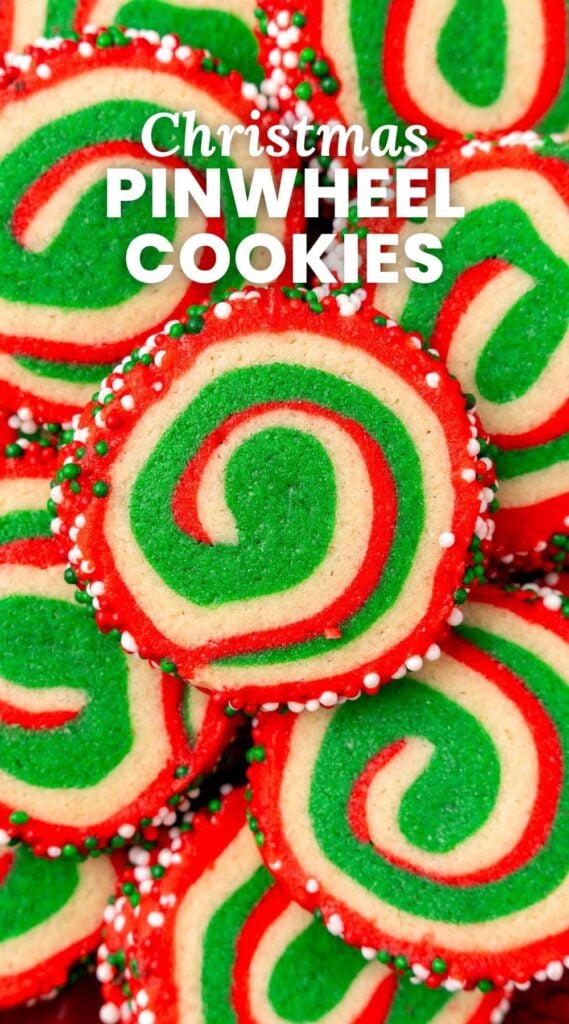
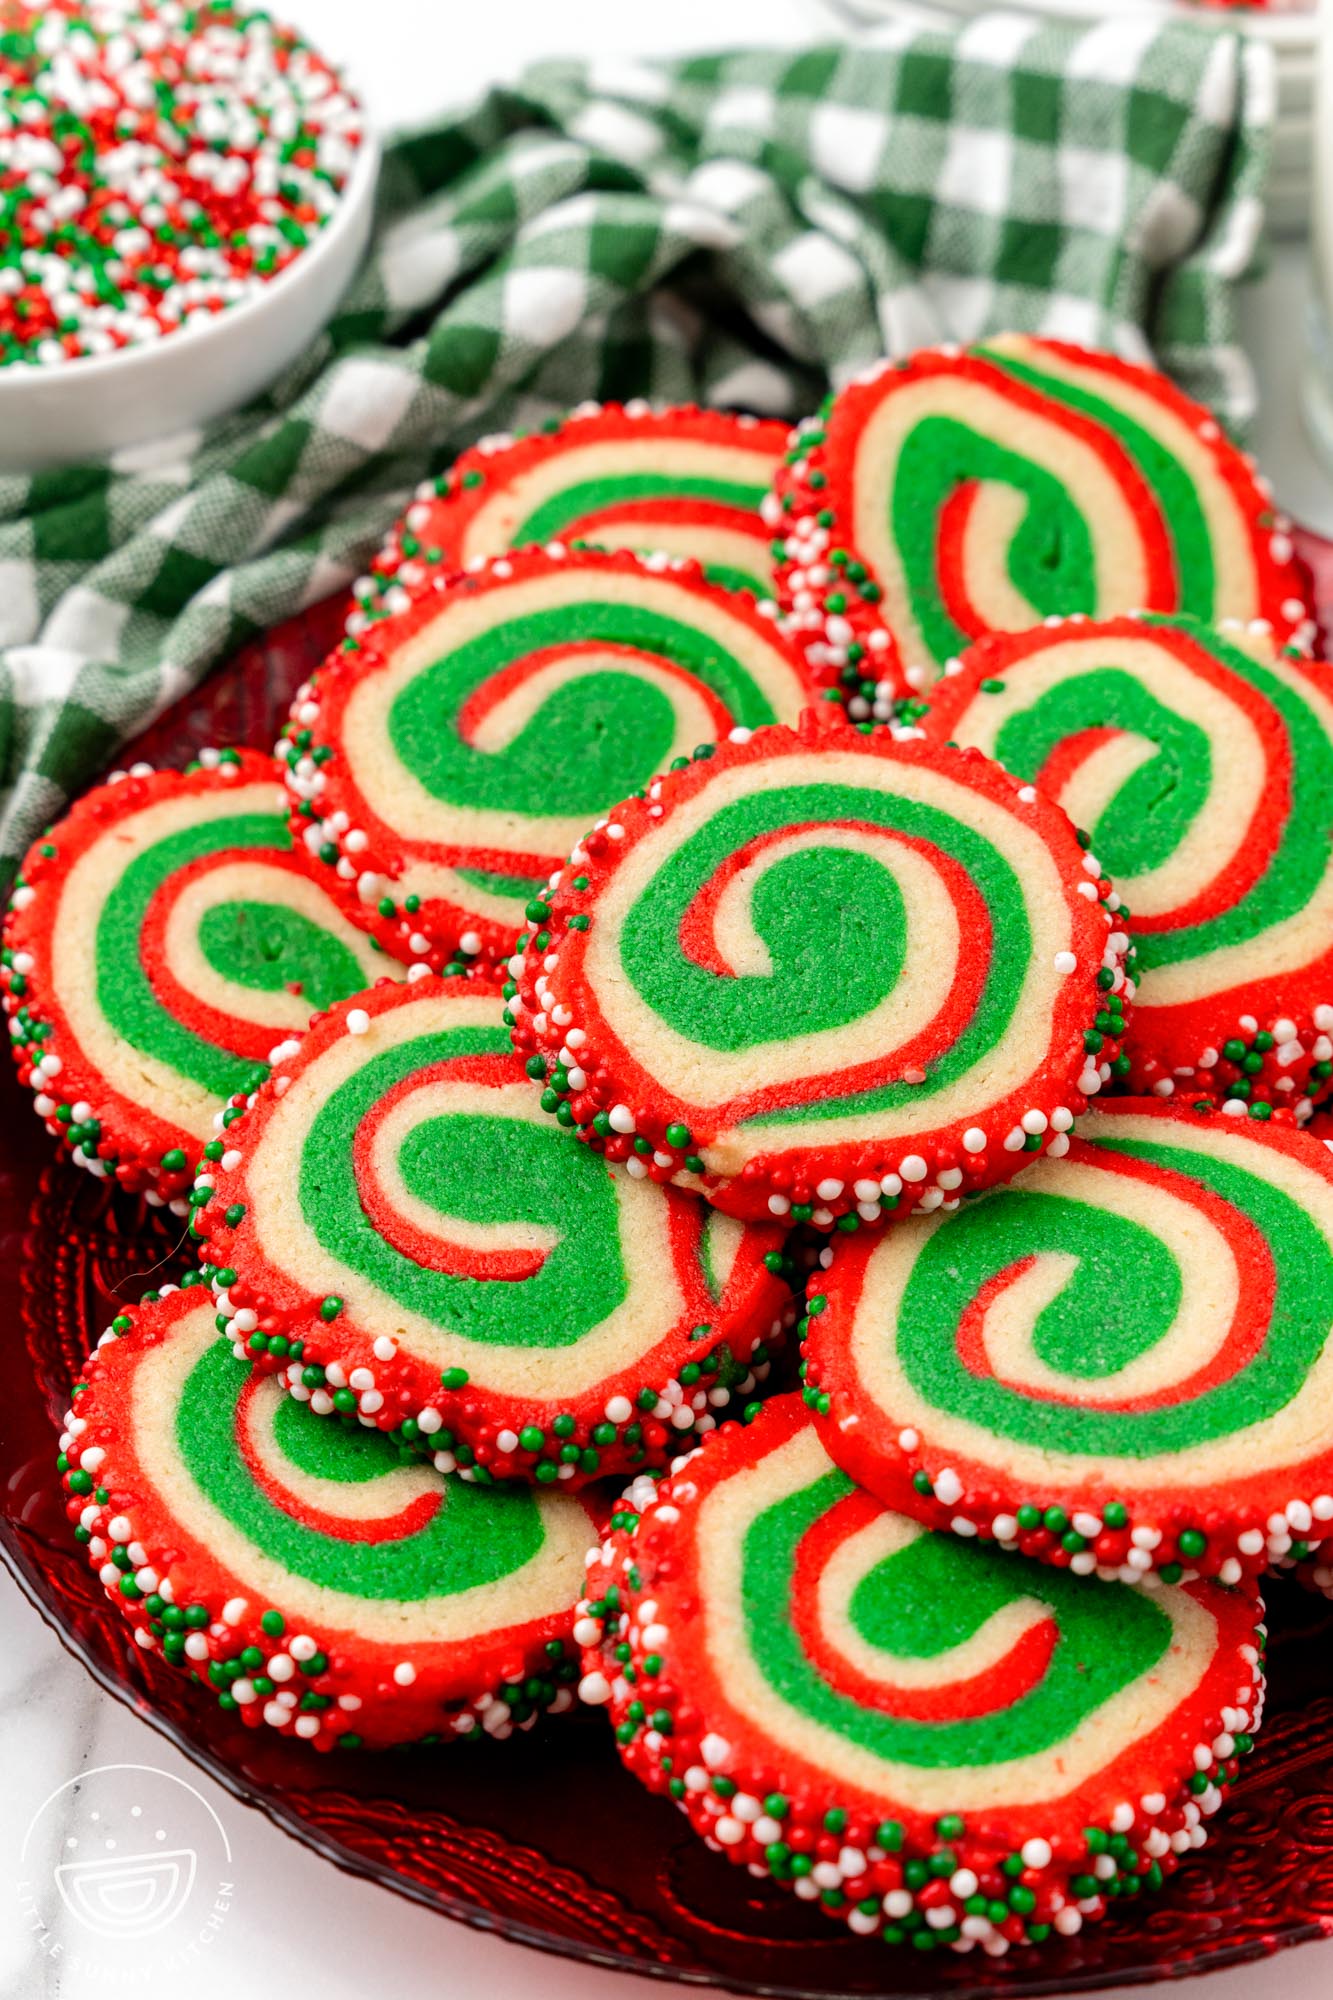
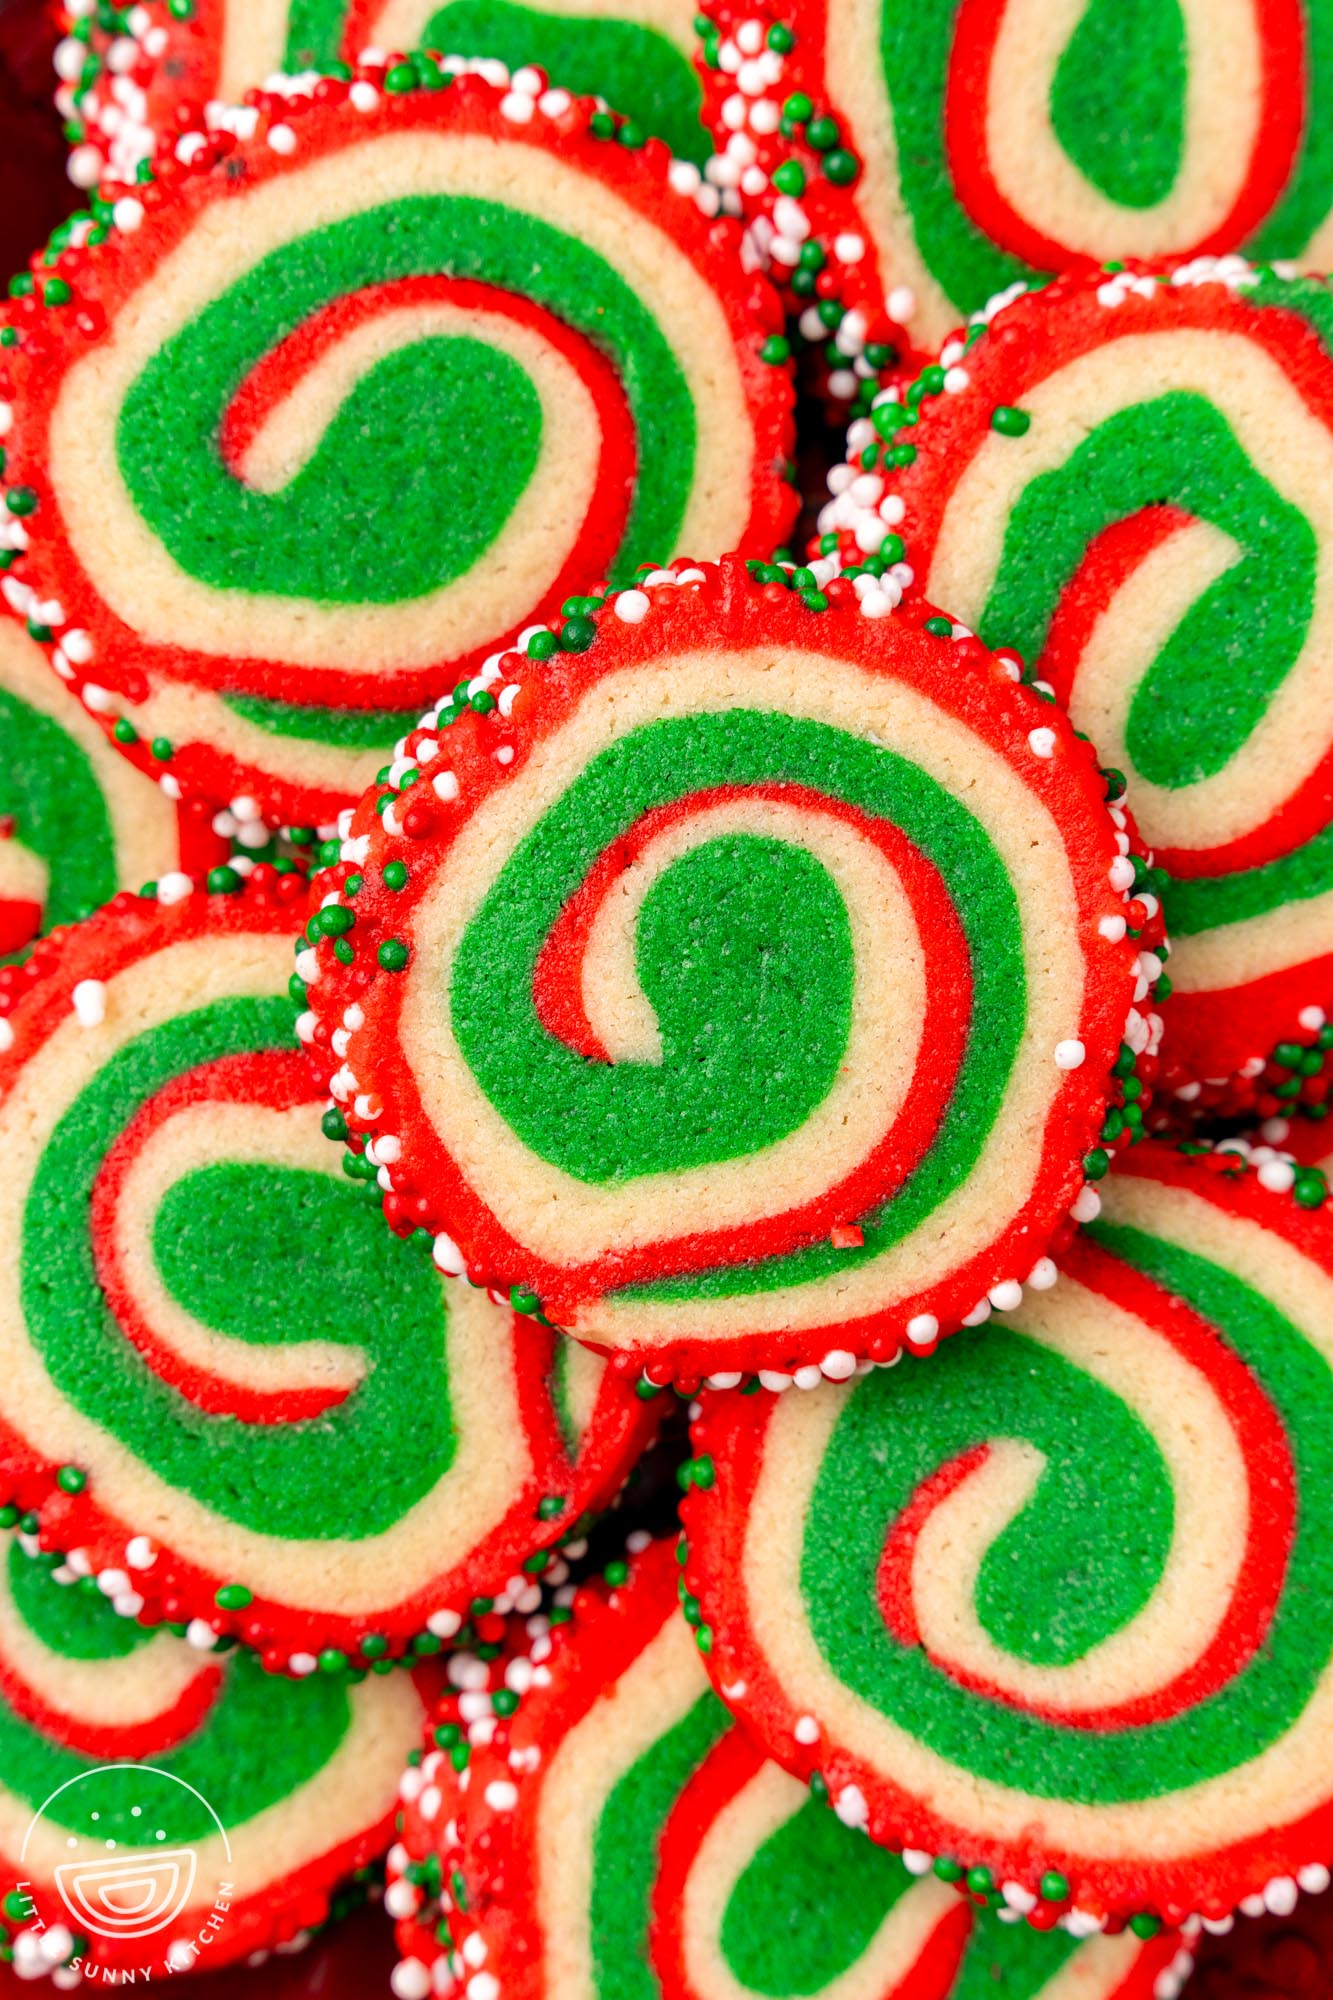
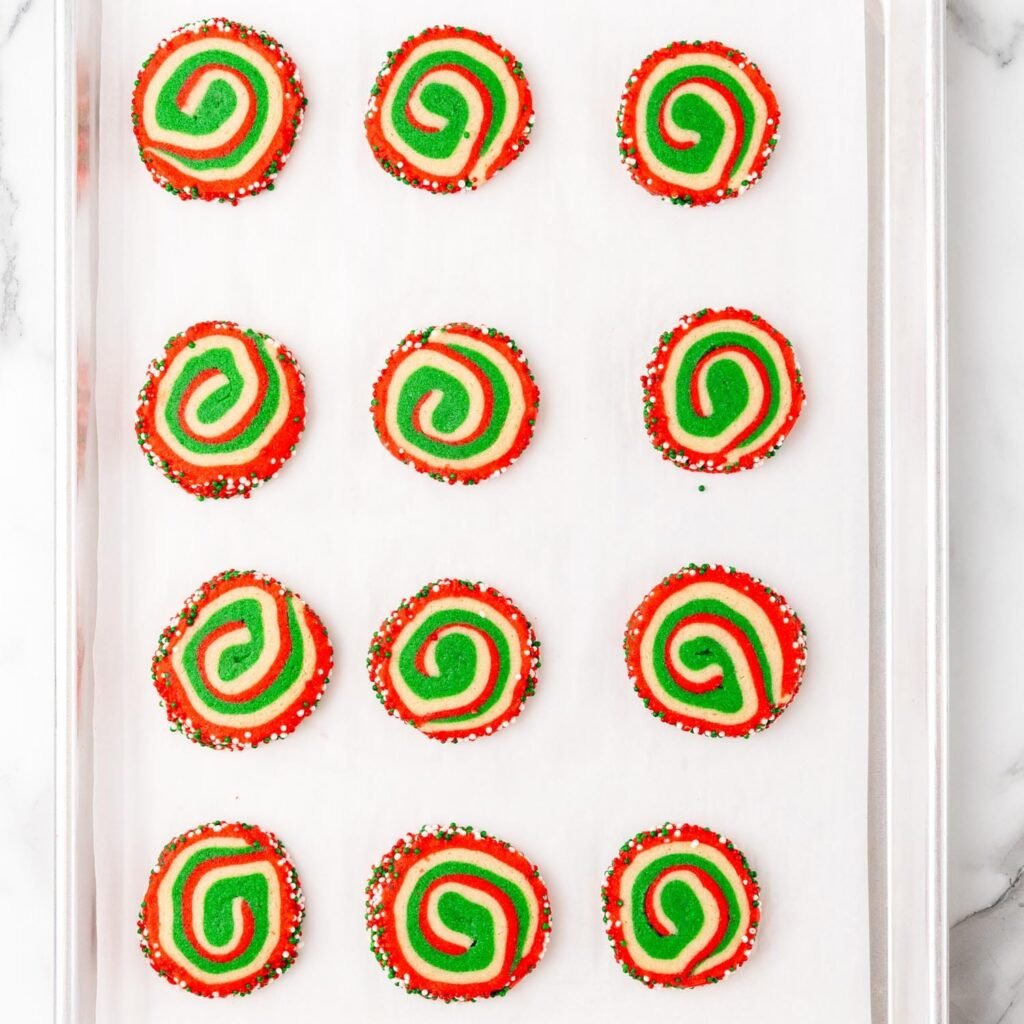
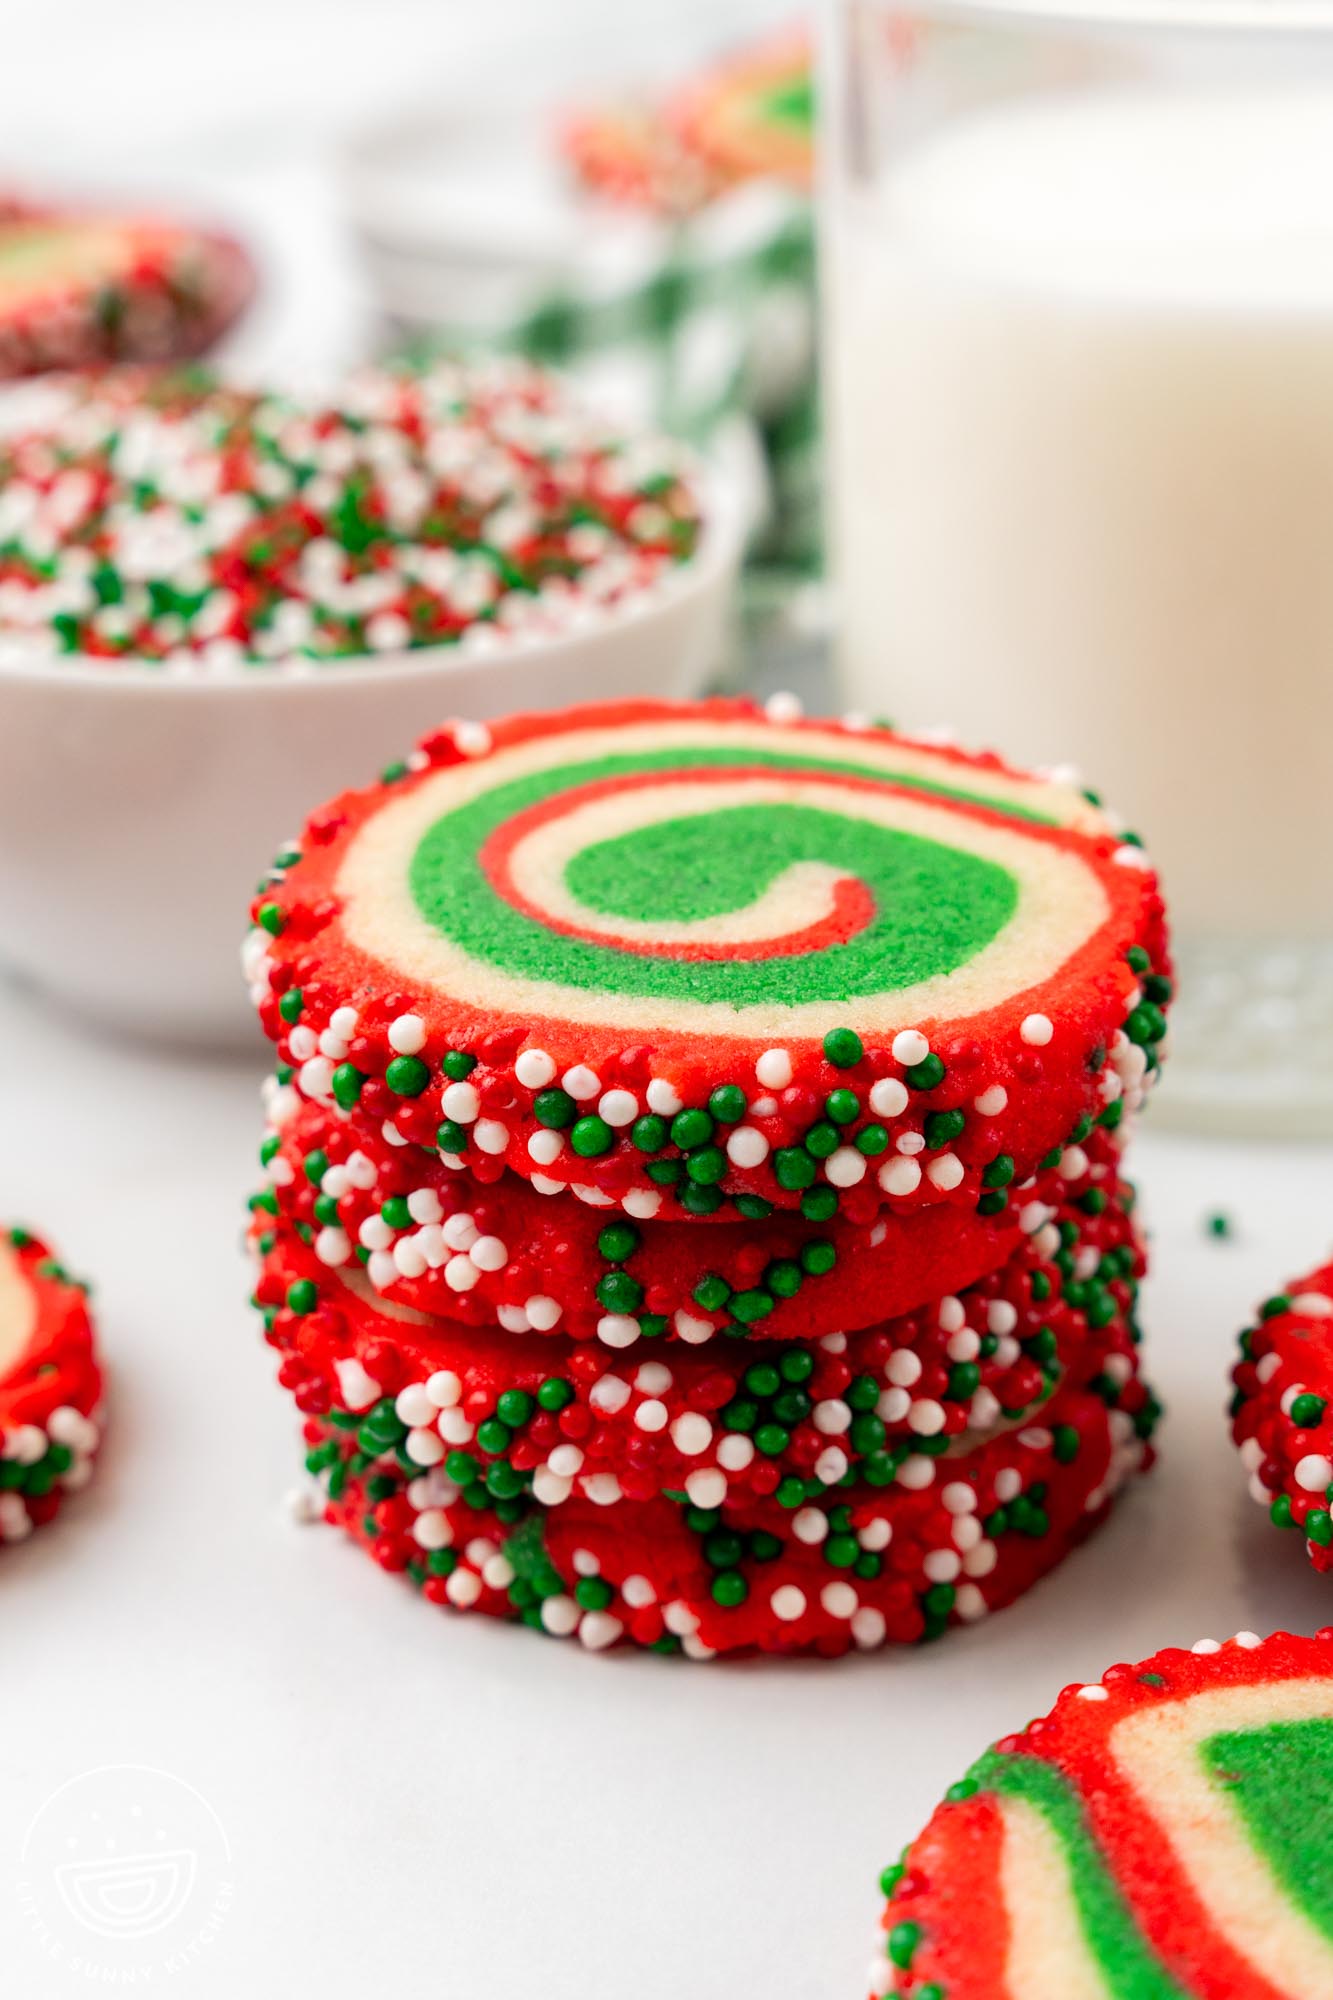
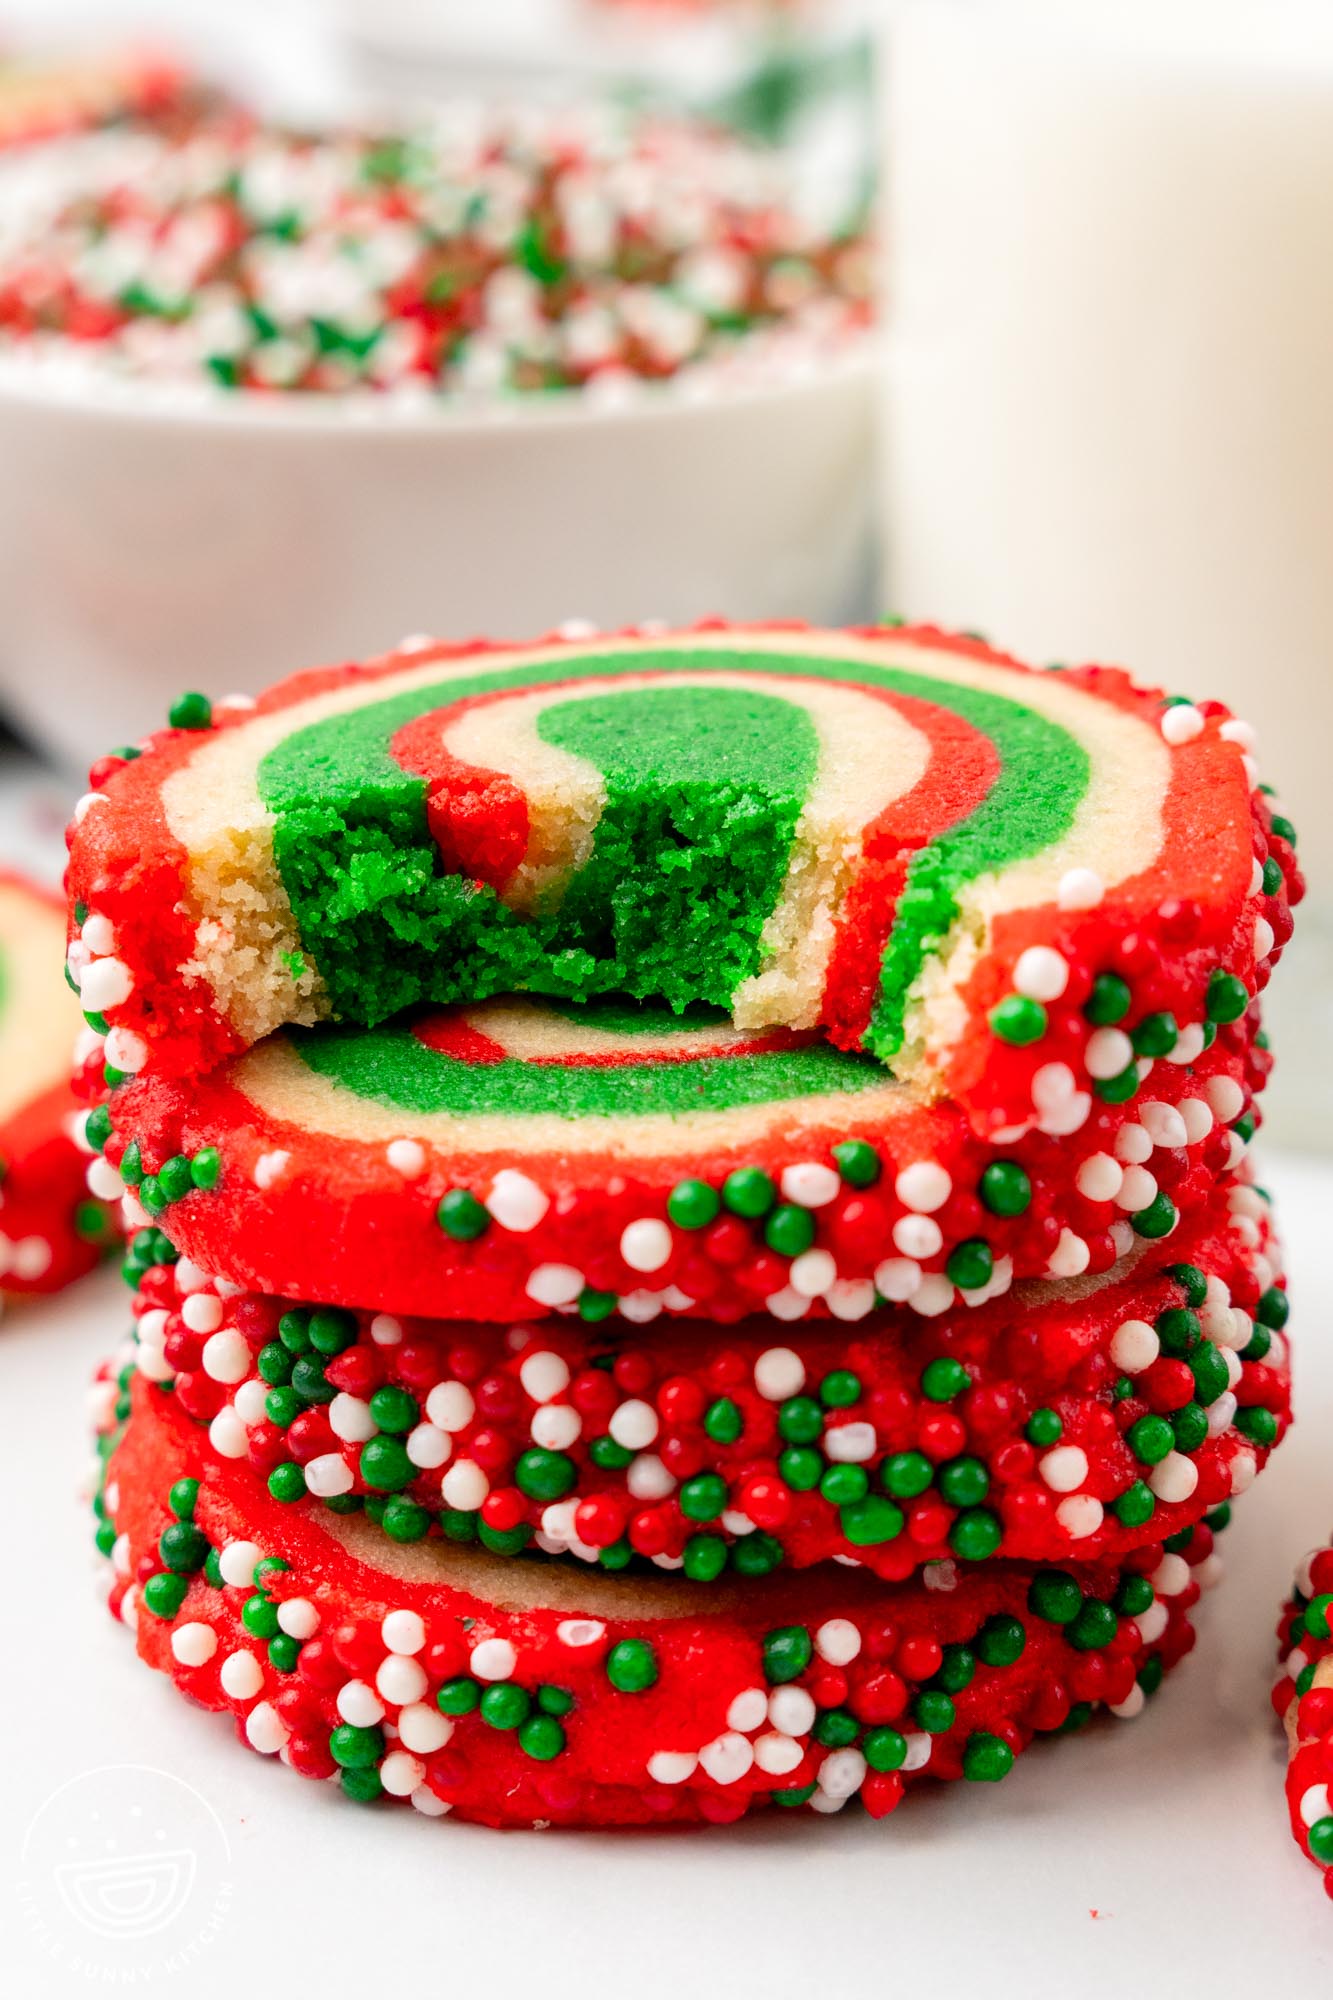
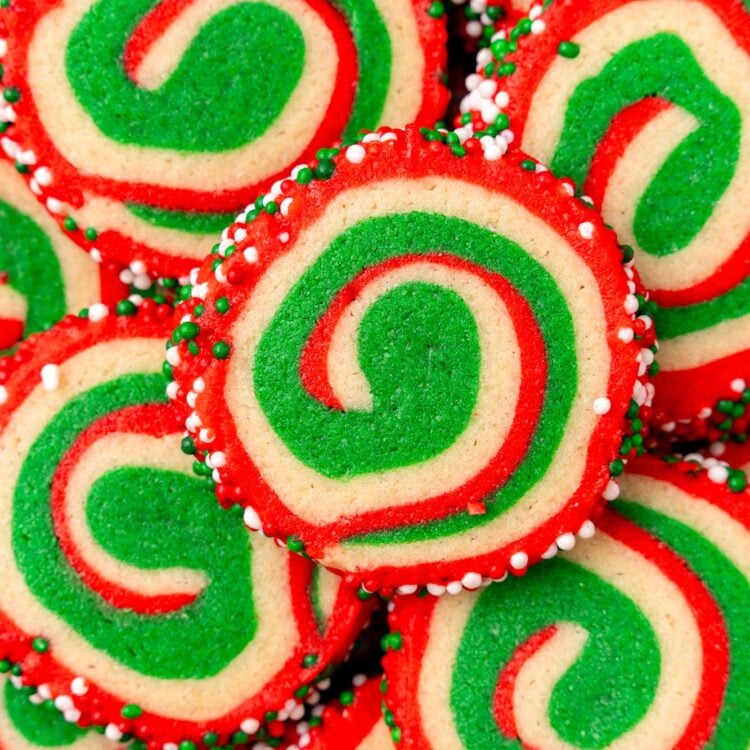
Bring a touch of nostalgia to your holiday baking with these old-fashioned Christmas pinwheel cookies! Their vibrant swirls of red, green, and white make them a festive favorite, while their soft texture and classic flavor capture the magic of the Christmas past. Perfect for cookie exchanges, gift boxes, or sharing with loved ones, these cookies are as fun to make as they are to eat.

Christmas pinwheel cookies in vibrant red, green, and white colors stacked on a festive red platter


What are Pinwheel Cookies?

Pinwheel cookies are soft and colorful sugar cookies made by layering and rolling three different colors of dough to create a striking spiral pattern. Once shaped, the dough is rolled in festive sprinkles, chilled, and sliced to reveal beautifully swirled cookies. They’re a slice-and-bake cookie, just like my Slice and Bake Rum Cookies, and they’re super easy to make!

These cookies are perfect for adding color to your holiday cookie box. In this recipe, I’ve used red and green food coloring to make them ideal for Christmas, but you can customize them with any colors you like! A favorite variation of mine includes alternating layers of vanilla and chocolate dough with cocoa powder for a classic chocolate pinwheel cookies twist.

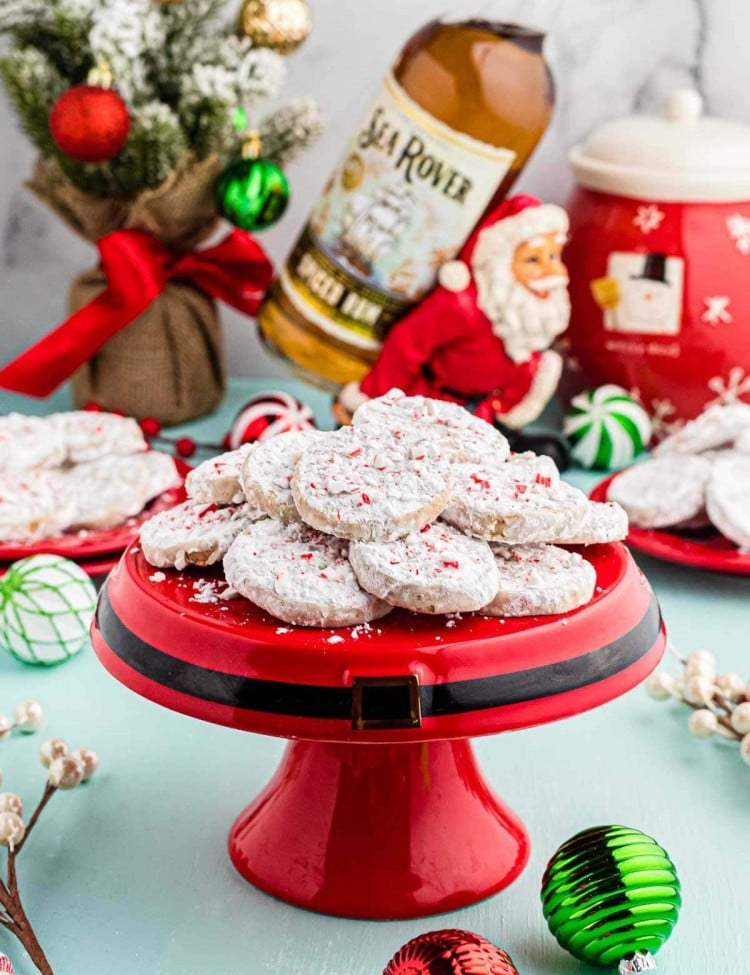
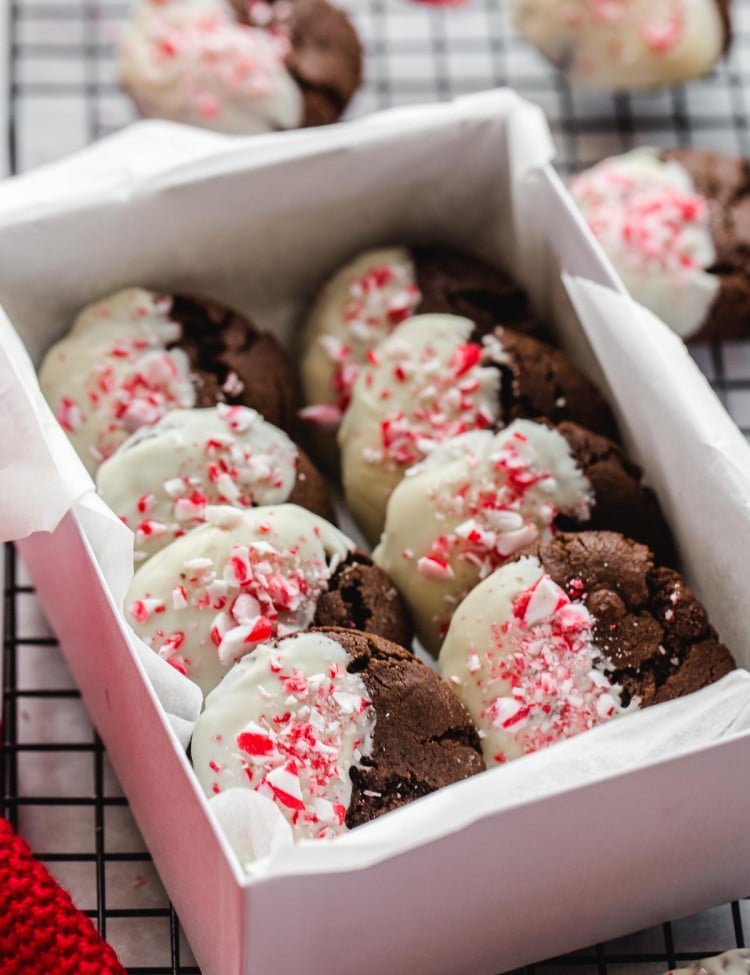
If you love vibrant Christmas cookies, check out my Peppermint Shortbread Cookies! These are dipped in chocolate, sprinkled with crushed candy canes, and decorated in red and green for an extra festive touch.

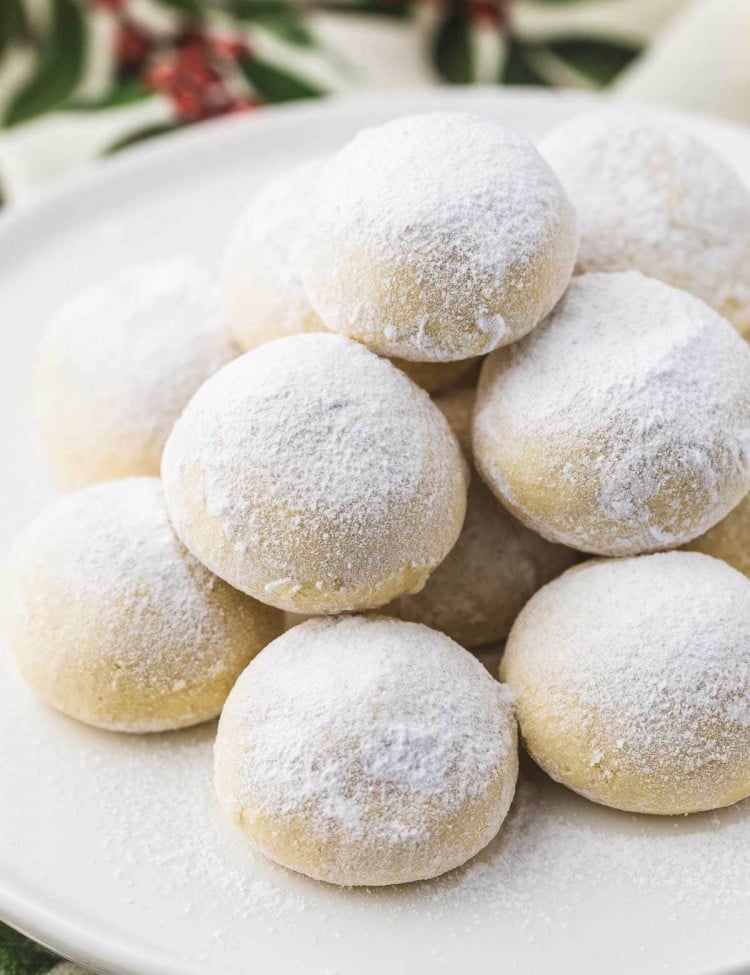
For more classic favorites, don’t miss my buttery Italian Butter Cookies or my delicate, nutty Almond Crescent Cookies. These recipes are perfect for rounding out your Christmas cookie tray with a mix of colors, flavors, and textures!

Close-up of a festive batch of Christmas pinwheel cookies featuring red, green, and white swirls, coated with red, green, and white sprinkles.

Why you Will Love This Recipe

  1. Festive and Eye-Catching: These vibrant pinwheel cookies bring holiday cheer with their bright red, green, and white swirls, rolled in colorful sprinkles. They’re perfect for cookie exchanges, gift boxes, or adding a festive touch to your dessert table.
  2. Easy to Make: Despite their impressive look, these cookies are surprisingly simple to prepare! The slice-and-bake method makes them beginner-friendly, and the dough is easy to work with.
  3. Customizable: You can stick to the classic Christmas colors or customize the dough for other holidays or occasions. Try combining chocolate and vanilla layers for a delicious variation, or experiment with different sprinkle styles for a unique touch.

Key Ingredients

To make these swirl cookies, you will need:

Overhead view of ingredients for Christmas pinwheel cookies, including butter, brown sugar, granulated sugar, vanilla, an egg, all-purpose flour, baking powder, salt, red and green gel food coloring, and festive sprinkles, all neatly arranged on a white marble surface.
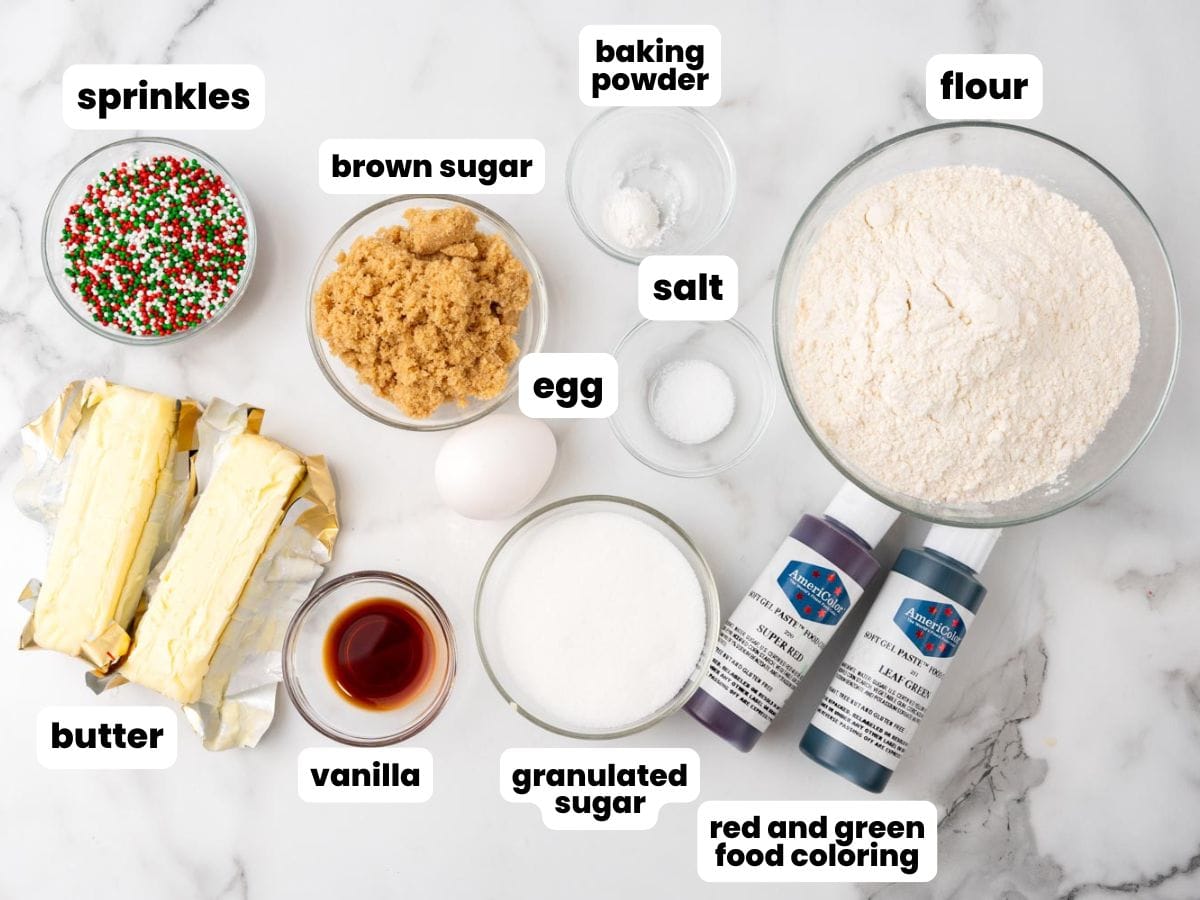
  • Butter – I almost exclusively use unsalted butter for baking, and add a pinch of salt to the cookie dough. You can salted butter and skip the salt if preferred, but you will have less control over how much salt goes into your cookie dough.
  • Flour and Baking Powder – You need all-purpose (plain) flour, and baking powder to give the cookies some lift.
  • Sugars – We are using white granulated and light brown sugar for flavor, structure, and chewiness.
  • Egg – One large egg is what you need here, and a large egg is the standard for baking.
  • Pure vanilla extract – can be substituted with other extracts such as almond extract, rum, peppermint, orange or lemon for more variations of the cookies.
  • Gel Food Coloring – You will not be able to get these deep, vibrant Christmas colors with liquid food color drops. To create these tones I started with at least ½ teaspoon of Americolor gel coloring (super red and leaf green) and added more until I was happy with the colors.

How to Make Pinwheel Cookies

Step 1. Combine dry ingredients in a bowl, and set aside.
Step 2. Cream the butter and sugars in a mixer with a paddle attachment. Then add the egg and vanilla extract and mix until everything is well combined.
A mixing bowl containing the dry ingredients (flour, baking powder, and salt) added to the wet mixture of butter, sugars, egg, and vanilla, ready to be combined for Christmas pinwheel cookie dough.
Step 3. Add the dry ingredients to the wet mixture and mix until just combined and no streaks of flour remain.
Three bowls of dough: one plain, one colored green, and one colored red, ready for layering to make Christmas pinwheel cookies.
Step 4. Divide the dough into three equal portions. Leave one plain, color one with red food coloring, and the other with green, mixing each until evenly colored.
Rolled-out red dough on parchment paper with a rolling pin nearby, ready to be layered for Christmas pinwheel cookies.
Step 5. Using a rolling pin, roll each colored dough portion into a 12×8-inch (30×20 cm) rectangle. Start with one color and repeat for the other layers.
A rolled log of layered red, green, and white dough on parchment paper, showing a spiral pattern at the end, ready to be chilled for Christmas pinwheel cookies.
Step 6. Layer the rolled dough (green on the bottom, then white, then red) and tightly roll it from the long edge into a log. Press gently as you roll to ensure the layers stick together.
A log of layered red, green, and white dough coated in festive sprinkles, wrapped in plastic wrap, and ready to be chilled for Christmas pinwheel cookies.
Step 7. Roll the dough log in nonpareil sprinkles until fully coated. Wrap it tightly in plastic wrap and refrigerate for at least 3 hours to firm up before slicing.
A log of Christmas pinwheel cookie dough coated in sprinkles, partially sliced into vibrant red, green, and white spiral cookies, ready for baking.
Step 8. Slice the chilled dough into ¼-inch thick slices using a sharp knife. Place the slices cut-side down onto a parchment-lined baking sheet, ready to bake.
Sliced Christmas pinwheel cookies arranged on a parchment-lined baking sheet, showing vibrant red, green, and white spirals, ready to be baked.
Step 9. Arrange the sliced cookies on a silicone mat or parchment-lined baking sheet, spacing them about an inch apart to allow for slight spreading while baking.
Baked Christmas pinwheel cookies on a parchment-lined baking sheet, showing vibrant red, green, and white swirls.
Step 10. Bake the cookies in a preheated oven at 350°F (180°C) for 8–10 minutes, or until they are slightly puffed and just beginning to turn golden.

Success Tips

  • Refrigerate the Dough Properly: Chilling the dough is essential for maintaining the shape of the cookies. If you skip this step, the dough will be too soft to roll and cut neatly, and the cookies may spread too much during baking.
  • Use Room Temperature Butter: Softened butter is key for creating a smooth dough that blends evenly with the other ingredients. Cold butter won’t cream properly, and melted butter will make the dough too sticky.
  • Roll the Dough Evenly: Roll each layer of dough to the same thickness for uniform spirals. If the layers are uneven, the cookies may look lopsided or bake unevenly.
  • Use Gel Food Coloring: I use AmeriColor gel food coloring for vibrant colors, and it’s my favorite because you don’t need much to achieve bold, festive hues. Gel coloring is also better than liquid, as it won’t make the dough too wet or sticky.
  • Work Quickly Once Layered: Once you’ve layered and rolled the dough, wrap it tightly and refrigerate it promptly to prevent the layers from blending together or becoming too soft.
  • Use a Sharp Knife for Slicing: A dull knife can squish the log and distort the spiral pattern. Wipe the knife clean after each slice to ensure neat, crisp cuts.
Stack of vibrant Christmas pinwheel cookies with red, green, and white swirls, coated in festive sprinkles, placed on a white surface with a glass of milk and bowls of sprinkles in the background.

Storing Tips

  • Store baked cookies in layers separated by plastic wrap or wax paper in an airtight container at room temperature for up to 5 days, or in the fridge for up to 10 days.
  • Don’t leave baked cookies sitting on a countertop uncovered for extended periods of time, they can get stale quite quickly.
  • If storing in the fridge, allow them to come to room temperature before serving.

Freezing

  • Freeze unbaked cookies on sheet pans for an hour, then transfer them to Ziploc bags for up to 3 months. When ready to bake, remove them from the freezer 30 minutes before baking and leave them on a sheet pan. Bake as instructed in the recipe card.
  • To freeze baked cookies, allow them to cool down completely after baking, then freeze them in Ziploc bags or an airtight container for up to 3 months. Thaw in the fridge overnight before serving.
Stack of vibrant Christmas pinwheel cookies showing a bite shot with red, green, and white swirls, coated in festive sprinkles, placed on a white surface with a glass of milk and bowls of sprinkles in the background.

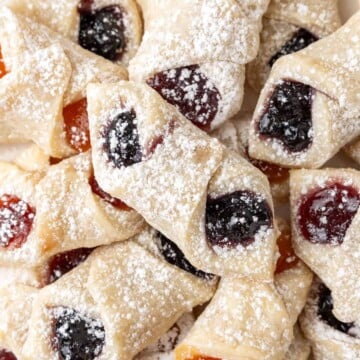
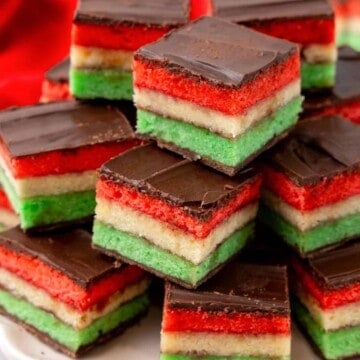
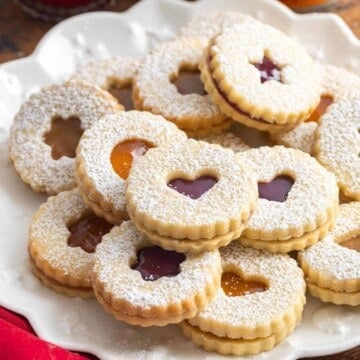
More Christmas Cookie Recipes

Peppermint Shortbread Cookies

Kolaczki (Polish Cookies)

Italian Rainbow Cookies

Linzer Cookies

All Cookies →

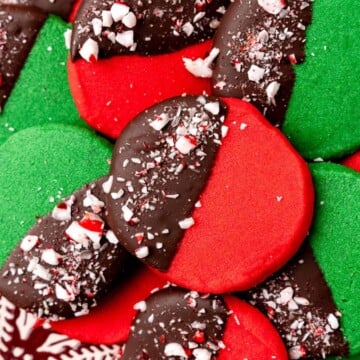
Get in the holiday spirit with these perfect Pinwheel Cookies! Pin it to your holiday cookies board so that you’re ready for the season.

Did you make this? Be sure to leave a review below and tag me on Facebook, Instagram, or Pinterest!

Recipe
Close up shot of christmas pinwheel cookies
5 from 4 votes
(Click stars to rate!)

Christmas Pinwheel Cookies

Prep Time: 30 minutes mins
Cook Time: 10 minutes mins
Chill time: 3 hours hrs
Total Time: 3 hours hrs 40 minutes mins
Author: Diana
Print Rate Recipe
These old-fashioned Christmas pinwheel cookies are soft, delicious, and really fun to make! They're so colorful, Christmassy, and deserve to be in everyone's Christmas cookie exchange boxes this year!
36 3 inch cookies
These old-fashioned Christmas pinwheel cookies are soft, delicious, and really fun to make! They're so colorful, Christmassy, and deserve to be in everyone's Christmas cookie exchange boxes this year!

Ingredients 

  • 3 cups (360 g) all purpose flour
  • ½ teaspoon baking powder
  • ¼ teaspoon salt
  • 1 cup (225 g) unsalted butter softened to room temperature
  • ½ cup (100 g) light brown sugar
  • ½ cup (100 g) granulated sugar
  • 1 large egg at room temperature
  • 1 teaspoon pure vanilla extract
  • ½ teaspoon each red and green food coloring
  • ½ cup Holiday sprinkles

Instructions 

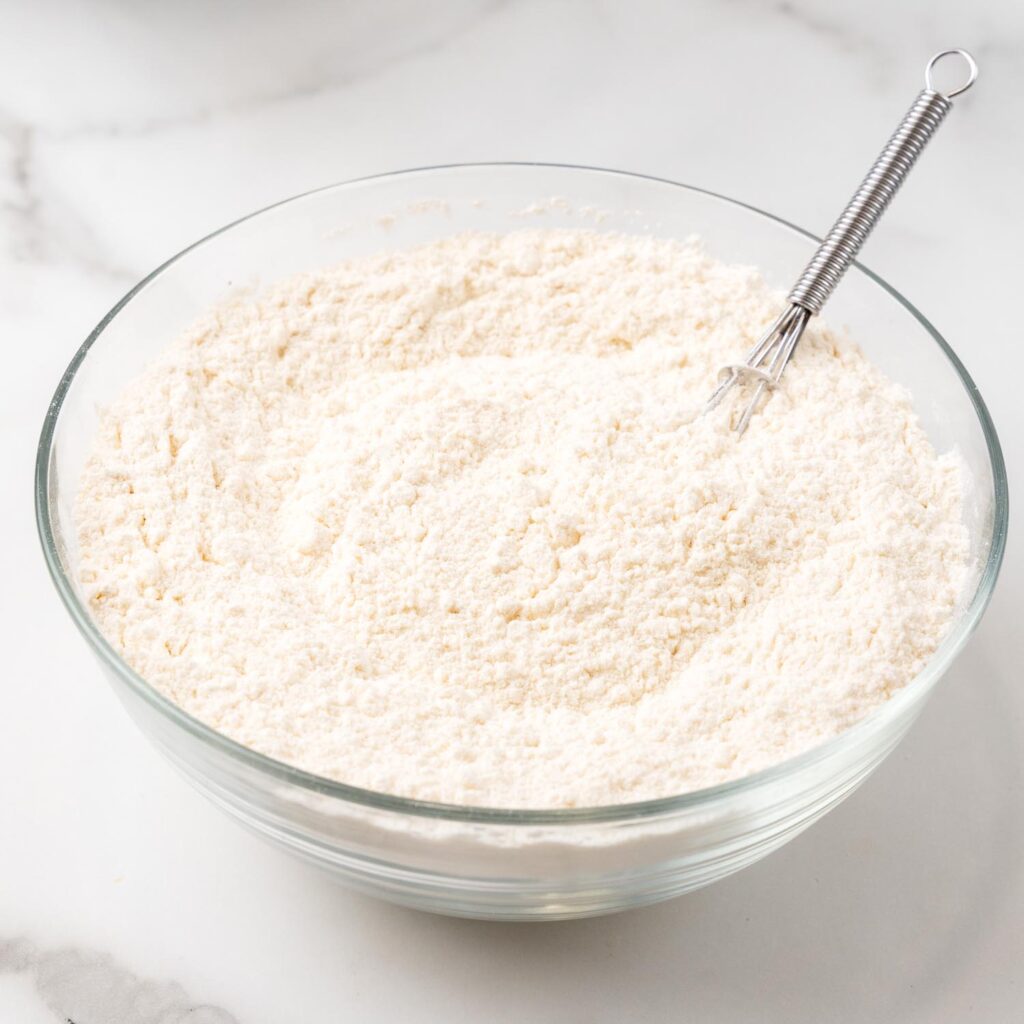
  • In a mixing bowl combine flour, baking powder, and salt; set aside.
  • In a separate mixing bowl, cream the butter, brown sugar and granulated sugar until smooth, about 2 minutes. Add the egg and vanilla and mix well.
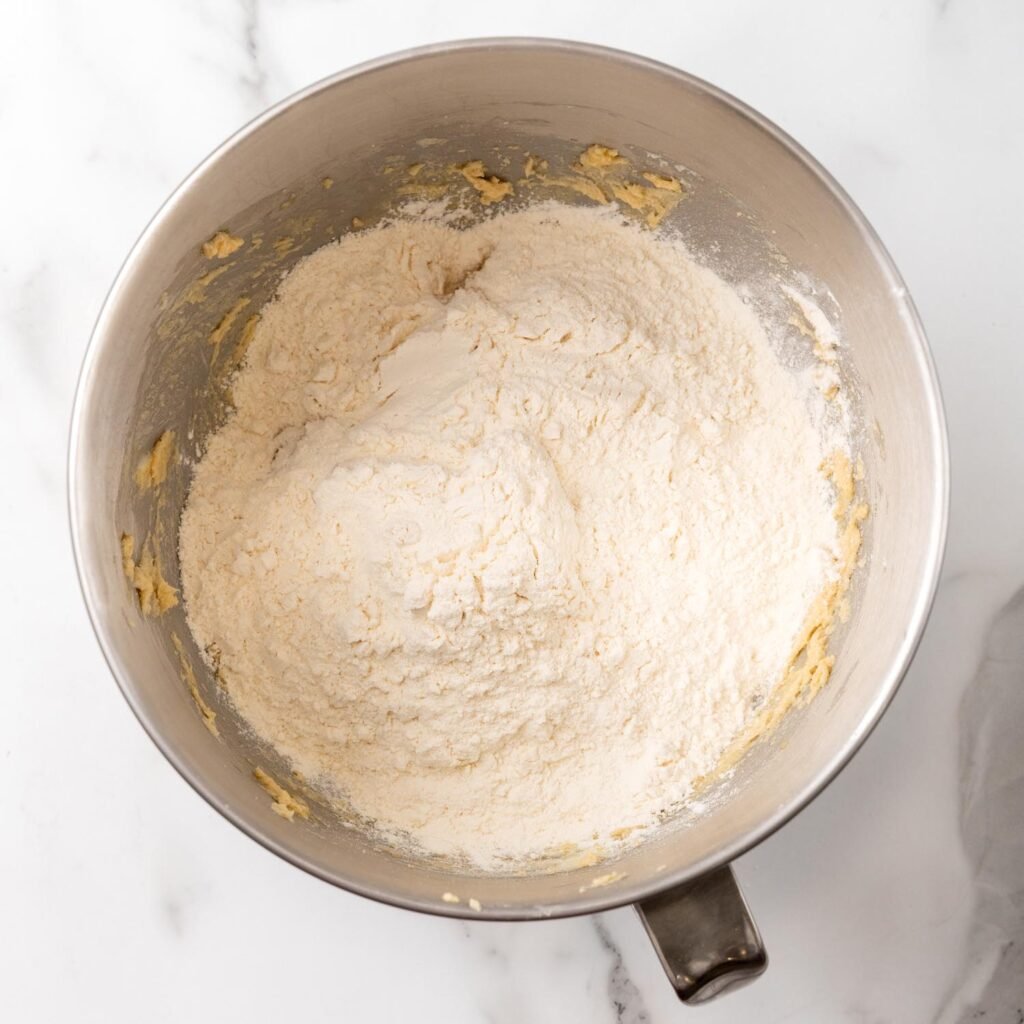
  • Add the flour mixture to the butter mixture and stir until no streaks of flour remain.
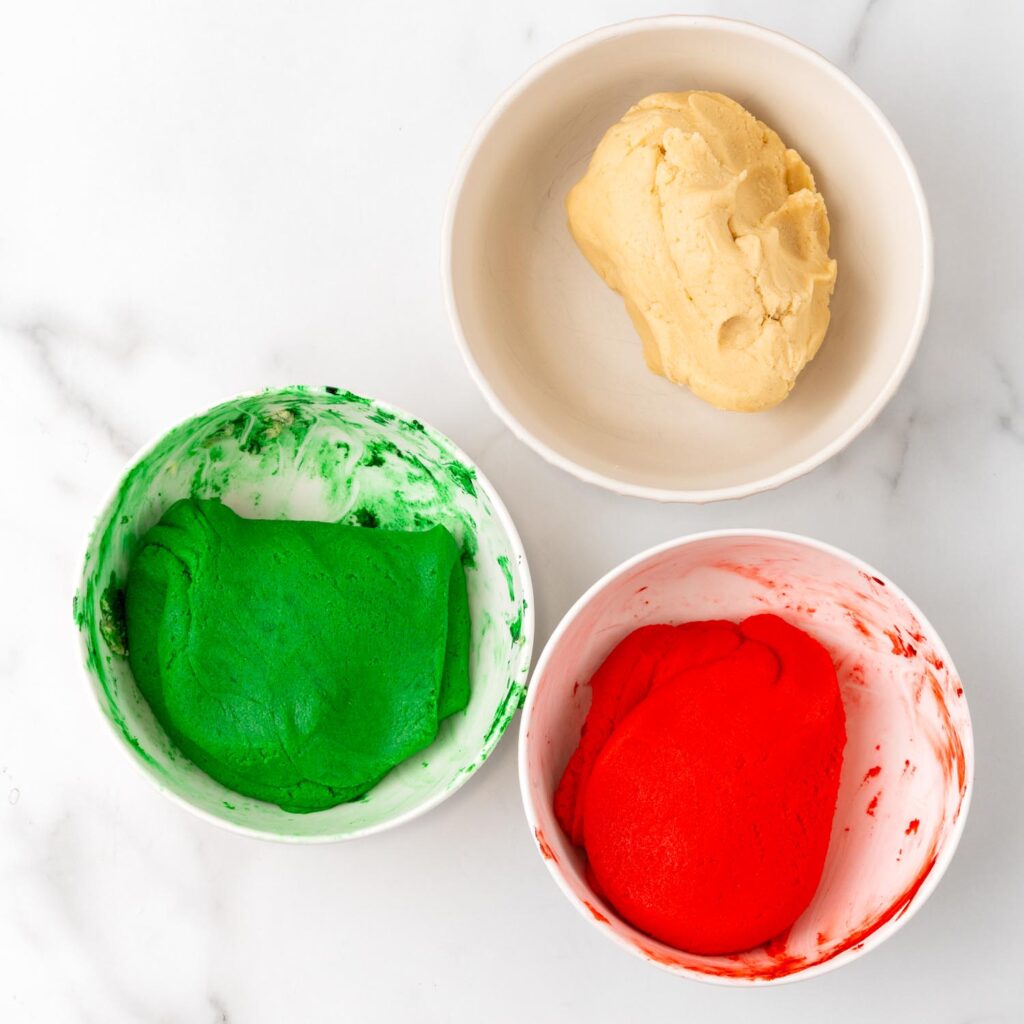
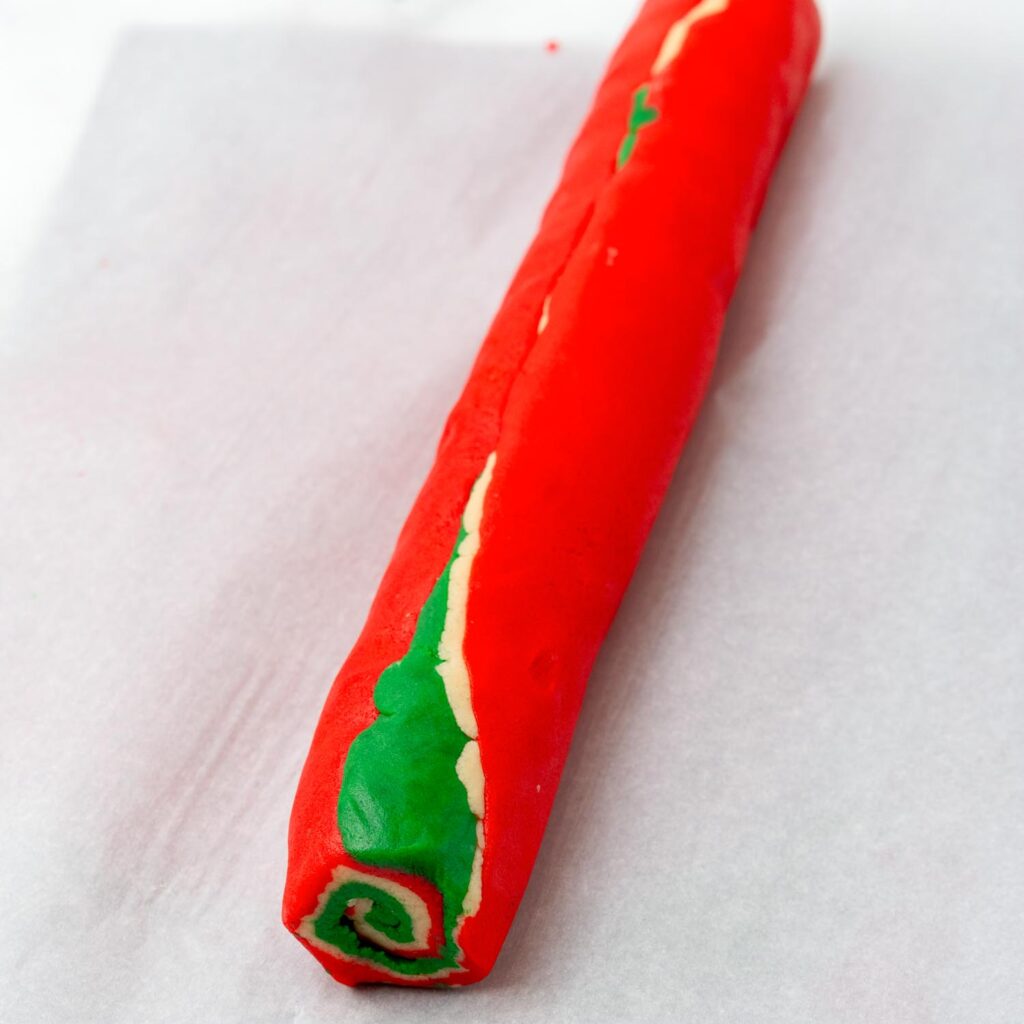
  • Divide the dough into 3 equal portions, add red coloring to one, green to another, and leave the final portion white. Mix until uniformly colored.
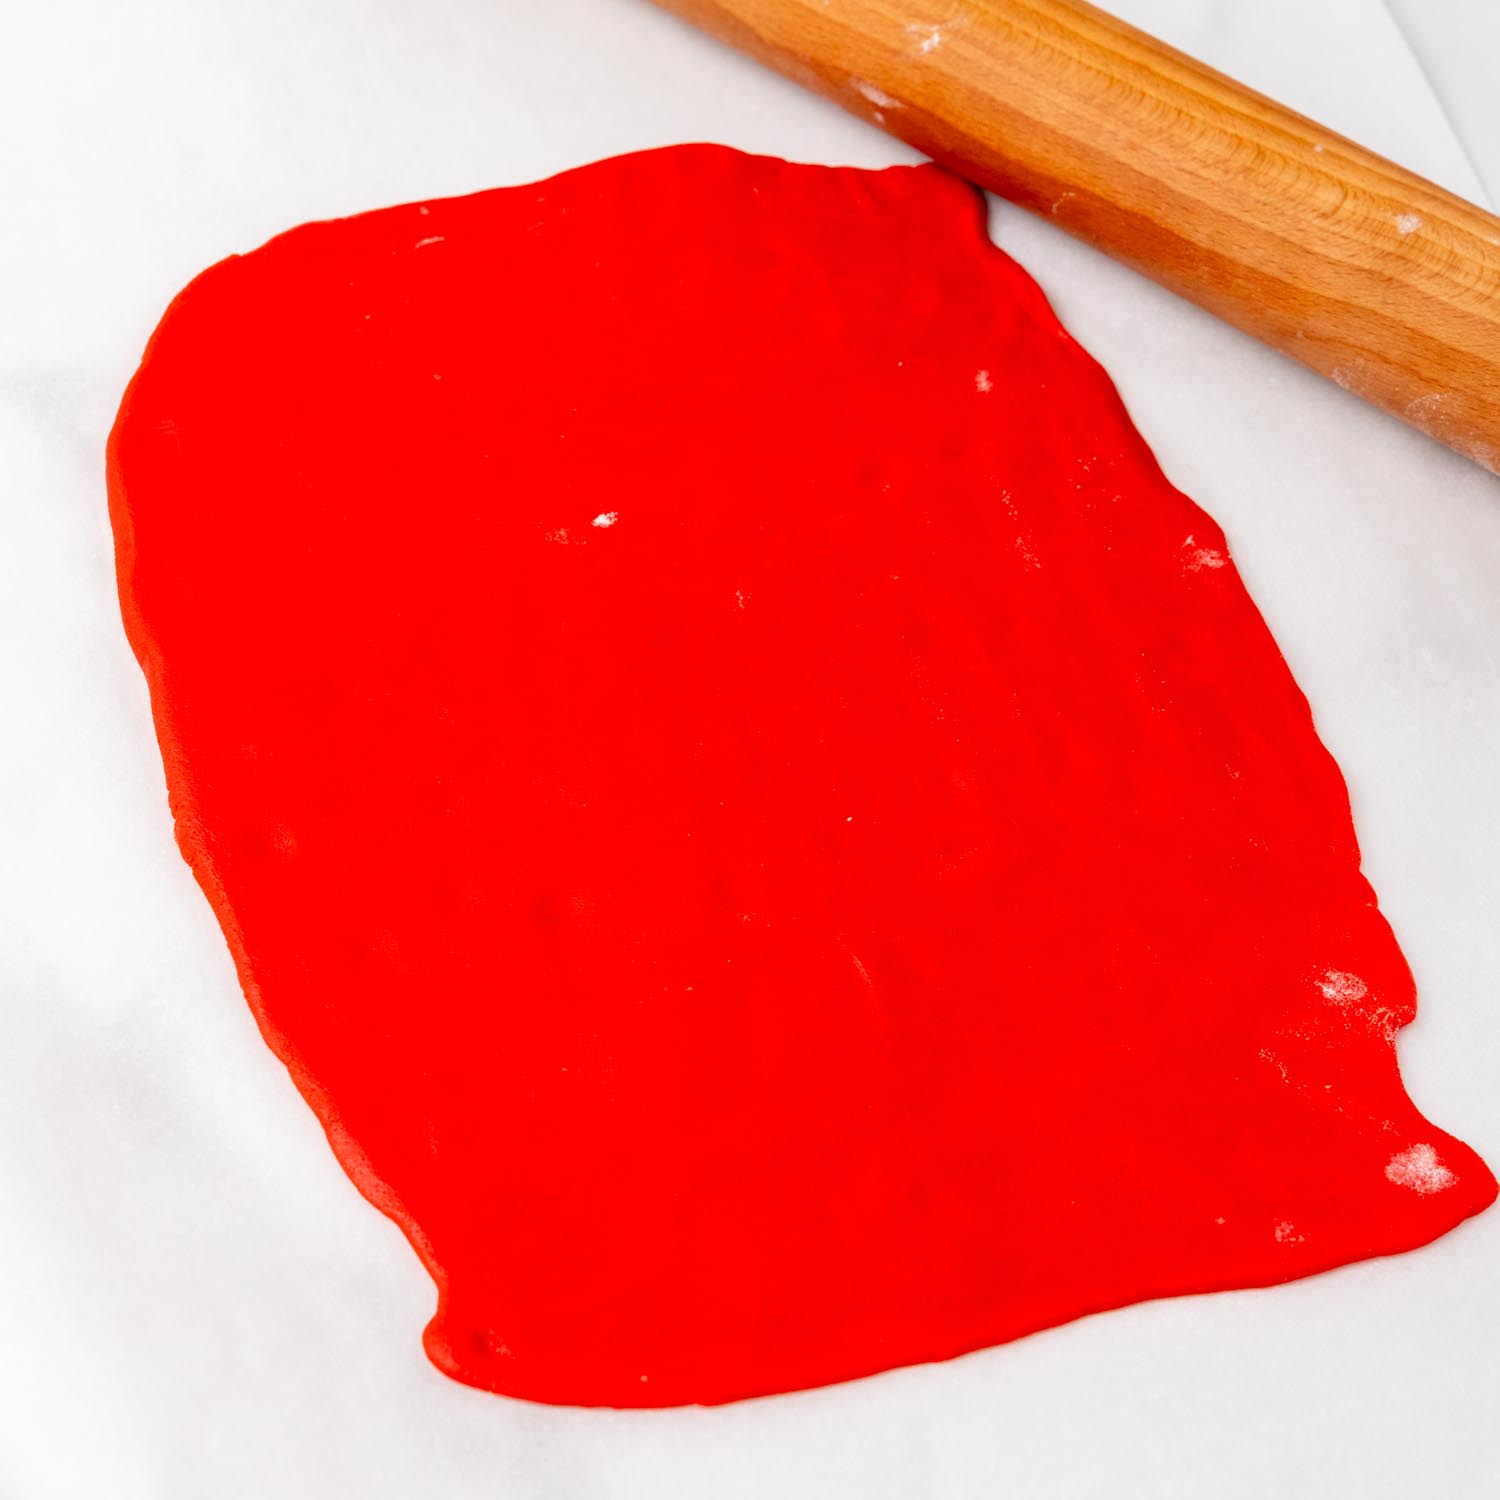
  • Roll each color of dough on a lightly floured surface into a roughly 12×8 inch (30×20 cm) rectangle. Layer the dough with the green, then white, then red.
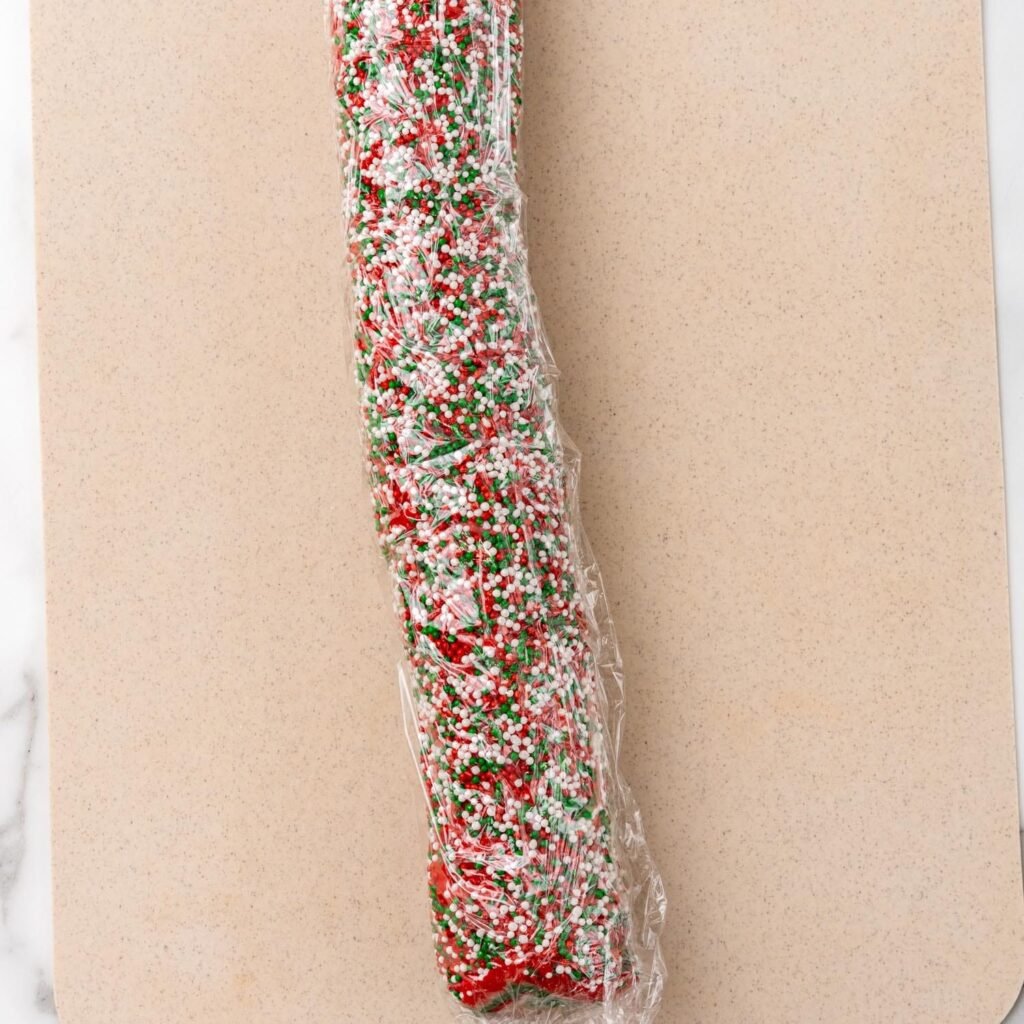
  • Starting for the long end, tightly roll the dough until you have a log. Roll the log in the sprinkles and wrap with plastic wrap. The log will likely lengthen slightly as you roll it. Place into the fridge to chill for at least 3 hours.
  • Preheat the oven to 350°F (180°C) or 160°C if using a fan oven, and line three baking sheets with parchment paper, and set aside.
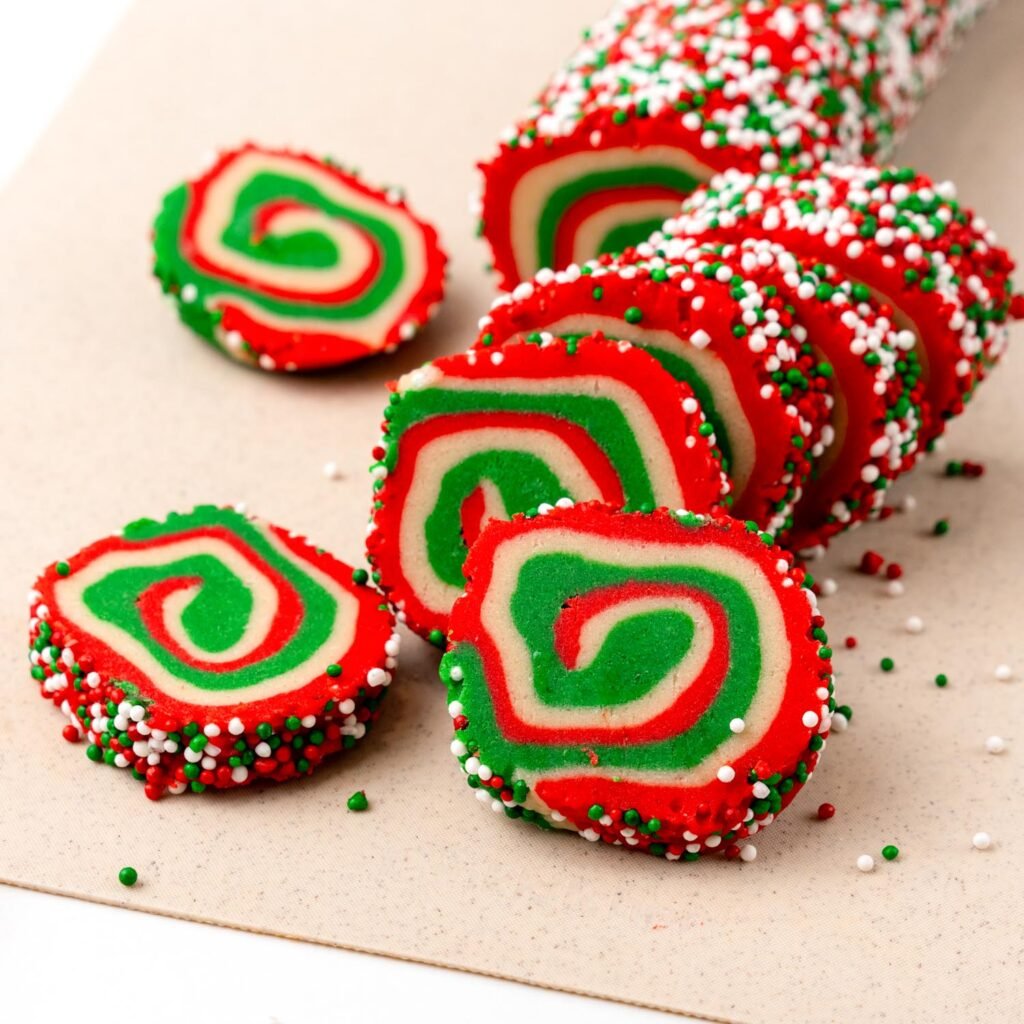
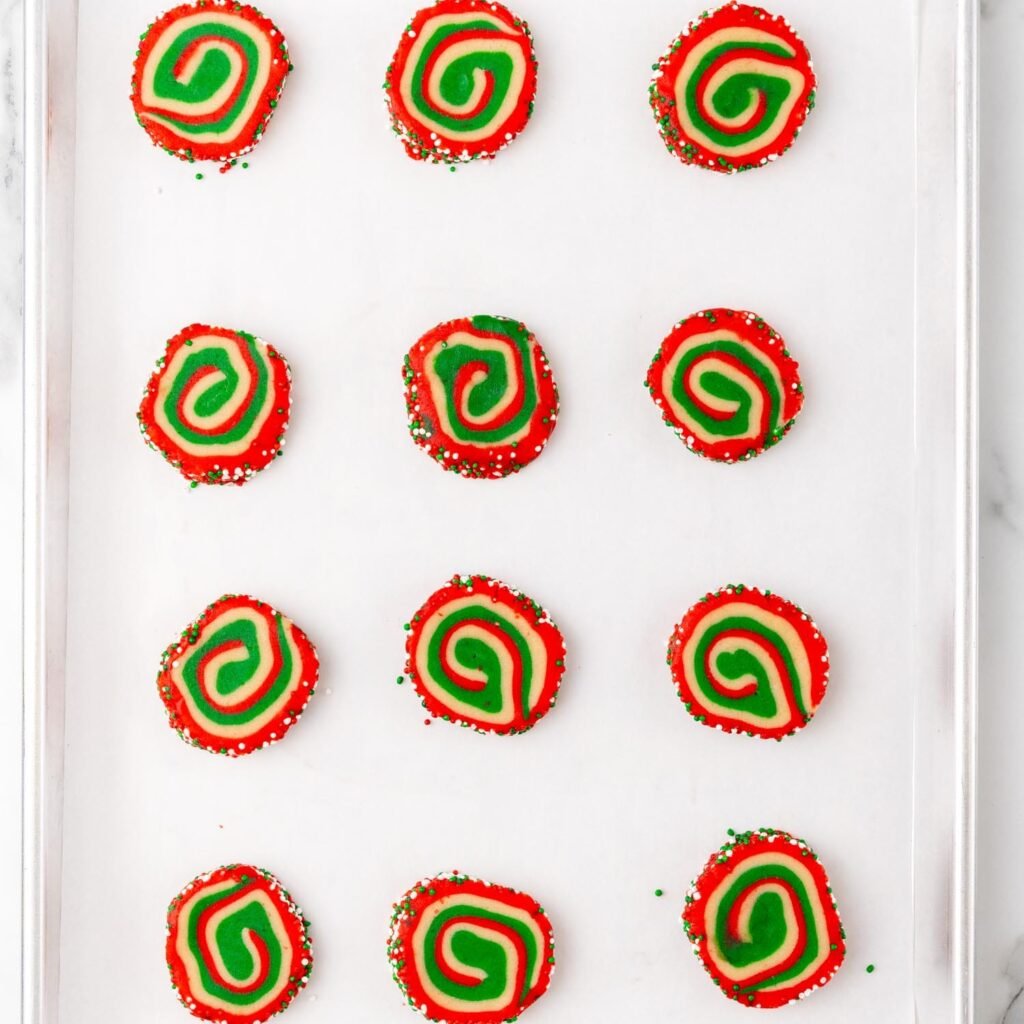
  • Slice the cookies into ¼ inch slices, and place cut side down on the prepared baking sheet. Bake for 8-10 minutes, or until slightly puffed and lightly golden.
  • Cool for 5 minutes before transferring to a wire rack to cool completely.

Notes:

  • I normally rotate my cookies halfway through baking so they will cook evenly. 
  • This recipe makes about 3-4 dozen cookies, and will depend on how tightly you roll them.
  • The secret to these cookies is keeping the dough chilled so when you slice into them, the colors stay firm. I had dough from the trimming, and it was a really pretty swirl of mixed colors, so I baked those too.

Nutrition Information

Serving: 1cookie, Calories: 91kcal, Carbohydrates: 12g, Protein: 1g, Fat: 4g, Saturated Fat: 3g, Cholesterol: 16mg, Sodium: 37mg, Potassium: 15mg, Fiber: 1g, Sugar: 6g, Vitamin A: 129IU, Calcium: 6mg, Iron: 1mg

This website provides approximate nutrition information for convenience and as a courtesy only. Nutrition data is gathered primarily from the USDA Food Composition Database, whenever available, or otherwise other online calculators.

© Little Sunny Kitchen

Did You Make This?I love to see what you made! Tag me @LittleSunnyKitchen and hashtag #LittleSunnyKitchen
Pin Recipe Tag on Insta Leave Review

You may also like...

  • Spiced Rum Slice And Bake Cookies
  • Italian Wedding Cookies
  • chocolate Snowman cupcakes made with marshmallow faces sitting on a wooden cutting board.
    Snowman Cupcakes
  • Chocolate Peppermint Cookies
closeup of one pot cheeseburger pasta in a skillet, stirred with a wooden spoon.
Previous Post
Cheeseburger Pasta
Carrot Souffle served on a white plate, with a fork on the side and a cinnamon stick
Next Post
Carrot Souffle

Reader Interactions

Leave a Review! Cancel reply

Have a question or just want to say how much you loved the recipe? Leave a rating below, save for later on Pinterest, and share on Facebook. Your email address will not be published. Required fields are marked *

Rate this recipe!


  1. Emelle says

    Posted on 12/19/24 at 03:51

    Shouldn’t the instructions for doubling the recipe say divide colored dough twice and make two logs?

    Reply
    • Little Sunny Kitchen says

      Posted on 12/20/24 at 23:21

      You are correct! Unfortunately the system used to do those calculations doesn’t allow for changing numbers in the actual instructions, only the ingredients. I’m glad you figured it out.

      Reply
  2. Lisa says

    Posted on 12/6/24 at 20:48

    Had a hard time rolling out the dough and rolling it up. The dough was very crumbly and kept coming apart.

    Reply
    • Little Sunny Kitchen says

      Posted on 12/7/24 at 20:43

      It’s possible that your dough had a bit too much flour in it. Be sure to measure by scooping the flour loosely into the measuring cup and then leveling it off.

      Reply
  3. Gloria says

    Posted on 12/4/23 at 13:27

    Can I just freeze the whole log and bake them closer to the holiday ?

    Reply
  4. Lauren says

    Posted on 12/18/21 at 17:49

    you don’t give a temperature for baking?

    Reply
    • Diana says

      Posted on 12/19/21 at 23:14

      It’s 350°F/180°C. Enjoy!

      Reply
  5. Tina says

    Posted on 11/15/21 at 05:15

    5 stars
    So festive and simple. I will be trying these this Christmas, thank you!

    Reply

Primary Sidebar

Diana, author of Little Sunny Kitchen.
Welcome

Meet Diana

Welcome to Little Sunny Kitchen! I'm Diana and I’m here to teach you how to make easy meals that are quick, family-friendly, and delicious!

Read More
Follow on Pinterest for more ideas!
Free ebook!

Download My Free Dinner eBook!


Get my copy!

Free eBook

Download My Free Dinner eBook!

Popular Recipes

Marry Me Chicken

Creamy Garlic Shrimp Pasta

Garlic Butter Chicken Tenders

Air Fryer Chicken Breast

Rasta Pasta Recipe

Shredded Chicken Tacos

Reader Favorites

a light green plate of spaghetti and meat sauce with hidden vegetables.

Meat Sauce with Hidden Vegetables

top down view of cheesy beef enchiladas in a casserole pan.

Ground Beef Enchiladas

Oven Baked Chicken and Rice

three mahi mahi tacos on a wooden board.

Mahi Mahi Fish Tacos

Cheesy Chicken Fajita Casserole

two white bowls of lasagna soup with a dollop of ricotta cheese and other cheeses, garnished with fresh herbs.

Lasagna Soup

Instant Pot Air Fryer Crockpot Easy Dinners Salads Grilling
Opens in a new window Opens an external site Opens an external site in a new window

As Featured On:

Dinner tonight
Free ebook!

Get My Free Dinner eBook!

Join us and receive new recipes every week! Receive our FREE eBook with quick and easy dinner recipes that are family-friendly and delicious.

Back to Top

explore

Recipe Index

Videos

Cooking Guides

Follow Along on Social:

Join My Free Cookie Facebook Group
Back to Top

About

Contact

Privacy Policy

Accessibility

© 2025 Little Sunny Kitchen
|
Site Credits Designed by Melissa Rose Design Developed by Once Coupled

Rate This Recipe

Your vote:


A rating is required
A name is required
An email is required