
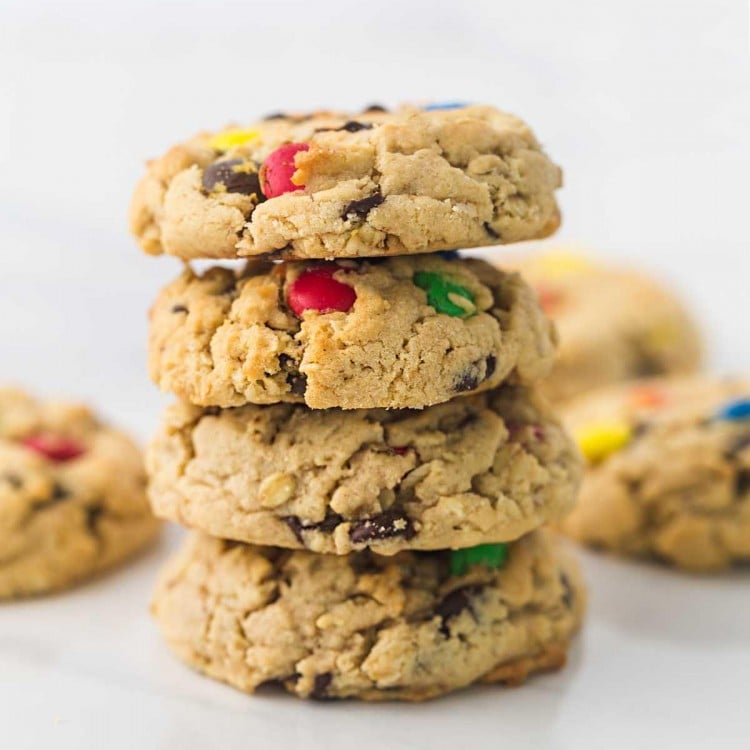
Soft, chocolatey, and chewy peanut buttery monster cookies. A family classic that we have been enjoying for decades. Try my recipe for these easy, soft, and thick cookies, and you will fall in love with them!

The Best EVER Monster Cookie Recipe
Monster cookies have been around for quite a while now, so they’re nothing new, but whoever came up with the idea of chocolate, peanut butter, and oat cookies is a genius! I can’t think of a better combination.
I’m sharing my recipe with you that I perfected several years ago, and have baked hundreds if not thousands of cookies ever since! They’re perfect for any day with a glass of cold milk, but also great to give as a gift, for Christmas, and any occasion really!
These Chocolate Chip Pudding Cookies are also super soft and easy to make!
The Ingredients
Here’s what you’ll need to bake the perfect monster cookies!
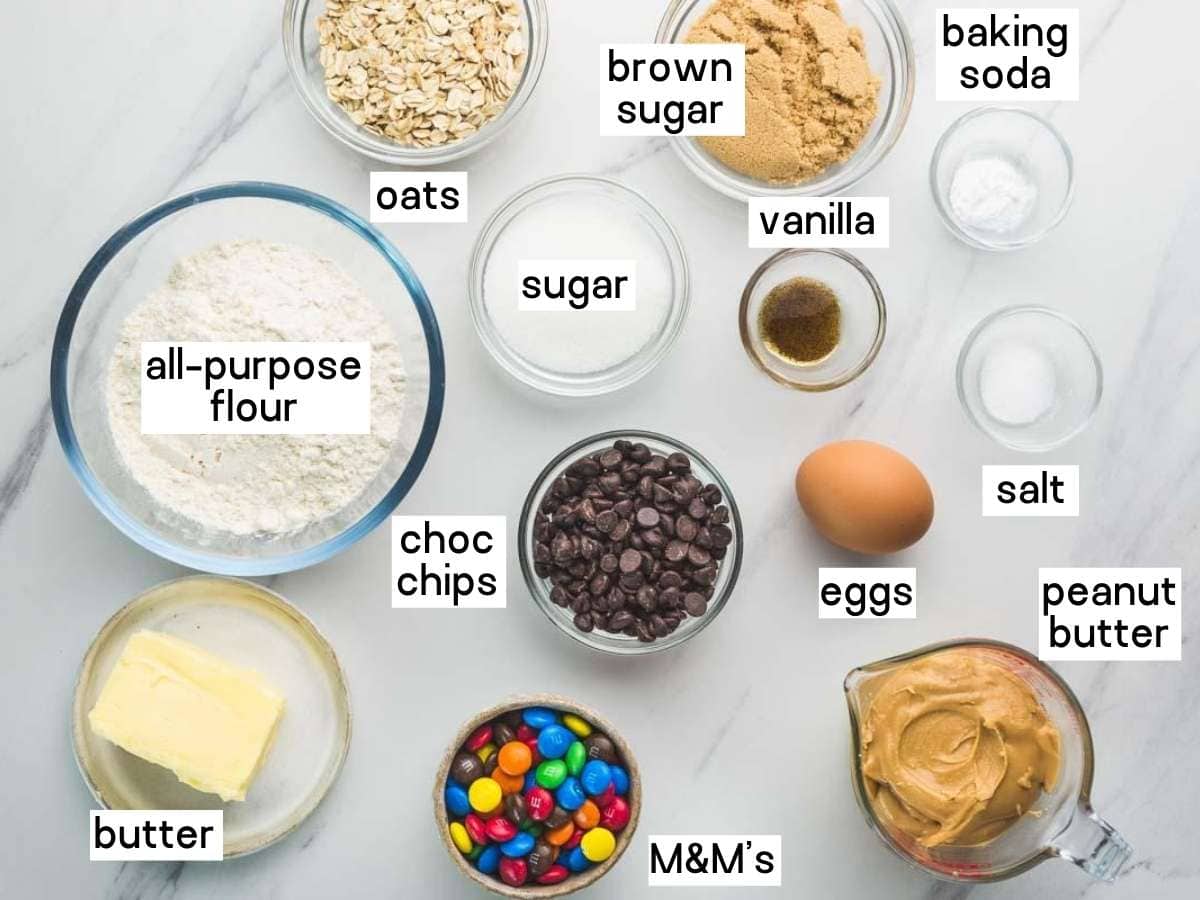
Complete list of ingredients and amounts can be found in the recipe card below.
- Chocolate coated candy or M&M’s – I recommend using mini M&Ms so you get more of them in each bite, but regular M&Ms work in this recipe too. If you only have larger M&Ms, such as peanut M&Ms or peanut butter M&Ms, I recommend chopping them into smaller pieces.
- Oats – You can either use quick or rolled oats, you will get different textures though as quick oats disappear more in the dough, and to be honest I like using either type of oats in these cookies. So use whichever you have on hand.
- Peanut butter – when it comes to cookies and peanut butter, I always recommend using creamy peanut butter as it works best.
- Butter and eggs – use unsalted butter, and make sure that it’s softened to room temperature. The egg must also be at room temperature for perfectly soft and chewy monster cookies.
How to Make Monster Cookies
It’s a very simple recipe, and no dough chilling is required! That’s the best part about making these cookies. The dough is thick and sturdy enough to bake right away, and that’s why I love this recipe so much. You can literally bake a batch in under half an hour, from start to finish.
It’s a good moment when you pull them out of the oven, but the hardest part? Is waiting for the cookies to cool!
These monster cookies spread as they bake, so I like to use my cookie scoop to create cookie dough balls that are even in size, and spread them apart on a cookie sheet.
This recipe is not “monster” in size, it yields 16 regular-size cookies (what you see in my pictures) or 32 small ones. Feel free to double or triple the recipe though.
To make them even more fun or if you’re baking for Halloween, decorate with edible eyes as we did in this Halloween monster cookie recipe. You can also make Hocus Pocus Cookies!
Freezing Cookies
You can bake the cookies and freeze to enjoy them later. After baking, allow the cookies to cool completely. Then place them in a single layer on parchment layer, and freeze in Ziploc bags. Don’t forget to write the name and date on the freezer bag, as they’re best when consumed within 2 months.

Success Tips
- For a nut-free alternative, substitute the peanut butter with sunflower butter (Sun butter).
- Use an electric beater to cream the butter with the sugar. This is the hand mixer that I have and always recommend so if you want to invest in one, make sure to check it out. Mine is red!
- The butter MUST be softened to room temperature, and the egg must be at room temperature as well. Remember that butter at room temperature is imperative in the creaming butter with sugar step.
- Variations: Feel free to add butterscotch morsels, white chocolate chips, or peanut butter chips to the cookie dough.
- Use a cookie scoop to create the cookie balls, it’s easier and your cookies will be the same size.
- Storing: The cookies can be kept at room temperature in a sealed container for up to 5 days, in the fridge for up to 7 days, or in the freezer for up to 2 months.

For more fun cookie recipes, check out my chocolate peppermint cookies, and my Middle Eastern 3 ingredient Ghraybeh cookies.
Did you make this? Be sure to leave a review below and tag me on Facebook, Instagram, or Pinterest!
Monster Cookies
Ingredients
- ½ cup unsalted butter at room temperature
- ½ cup light brown sugar lightly packed
- ¼ cup granulated sugar
- 1 large egg at room temperature
- ⅔ cup creamy peanut butter (not natural-style)
- 1 teaspoon pure vanilla extract
- 1 and ¼ all-purpose flour
- ½ teaspoon baking soda
- ½ cup old-fashioned whole rolled oats
- ½ cup M&Ms
- ½ cup semi-sweet chocolate chips optional
Instructions
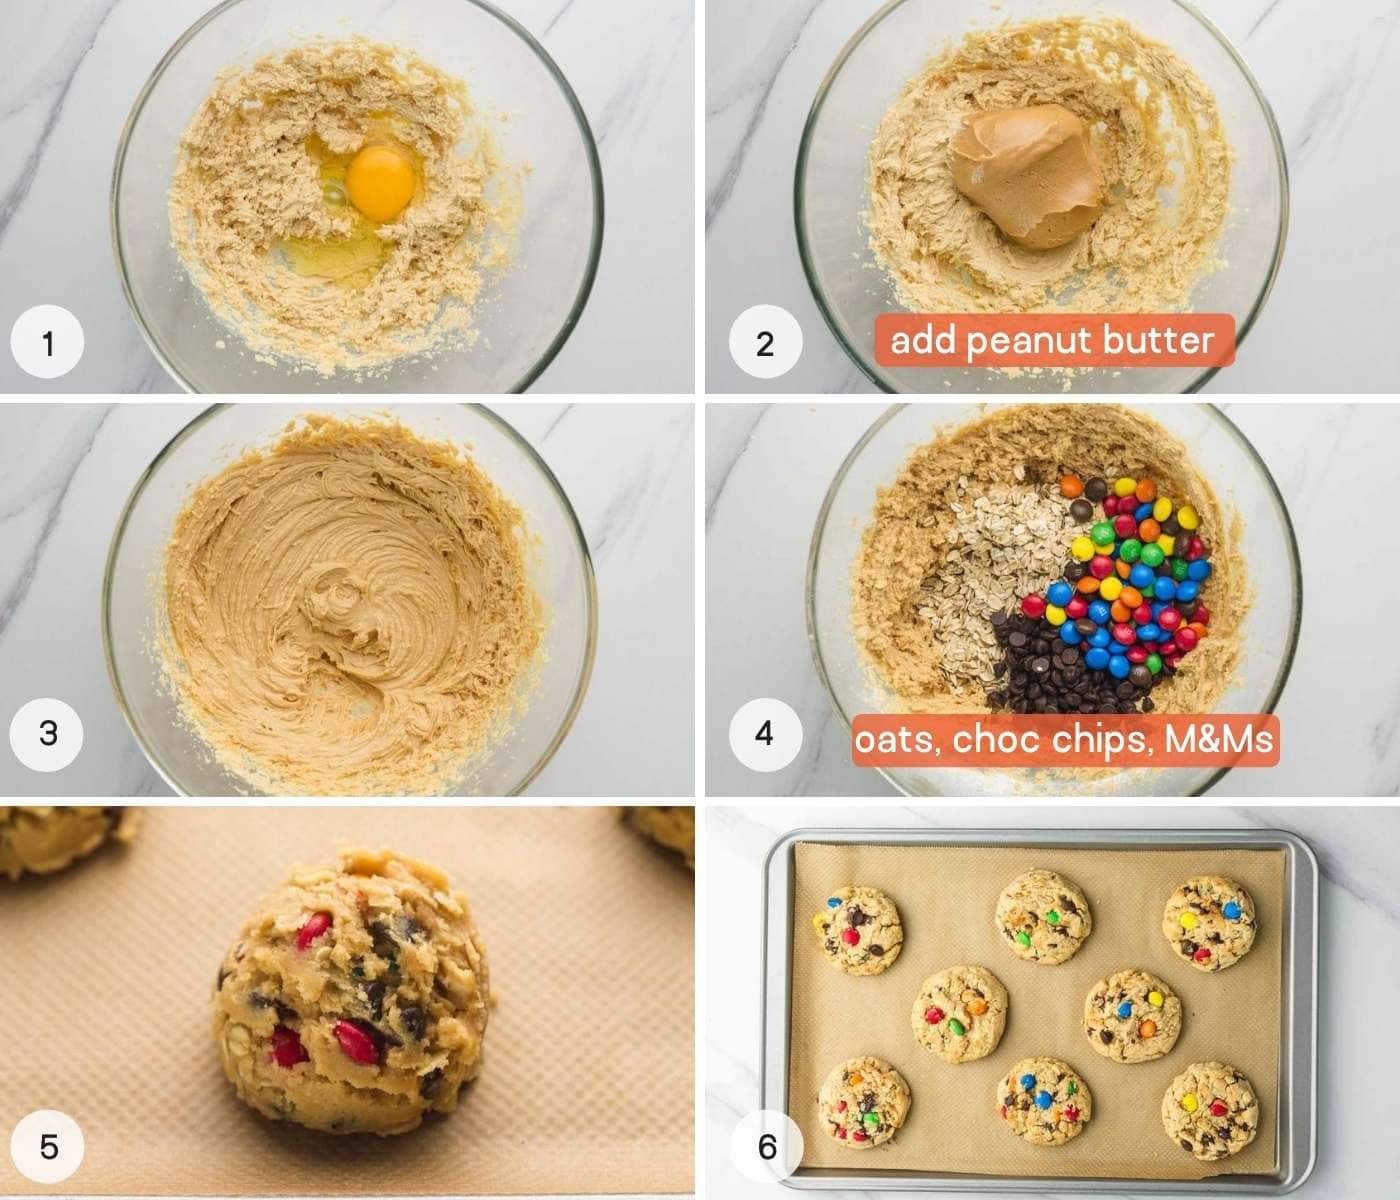
- Using a hand mixer or a stand mixer fitted with a paddle attachment, cream the sugars with the butter on medium speed (it will take around 2 minutes). Then at high speed, mix in the egg, the peanut butter, and the vanilla extract (about 2 minutes). Set aside.
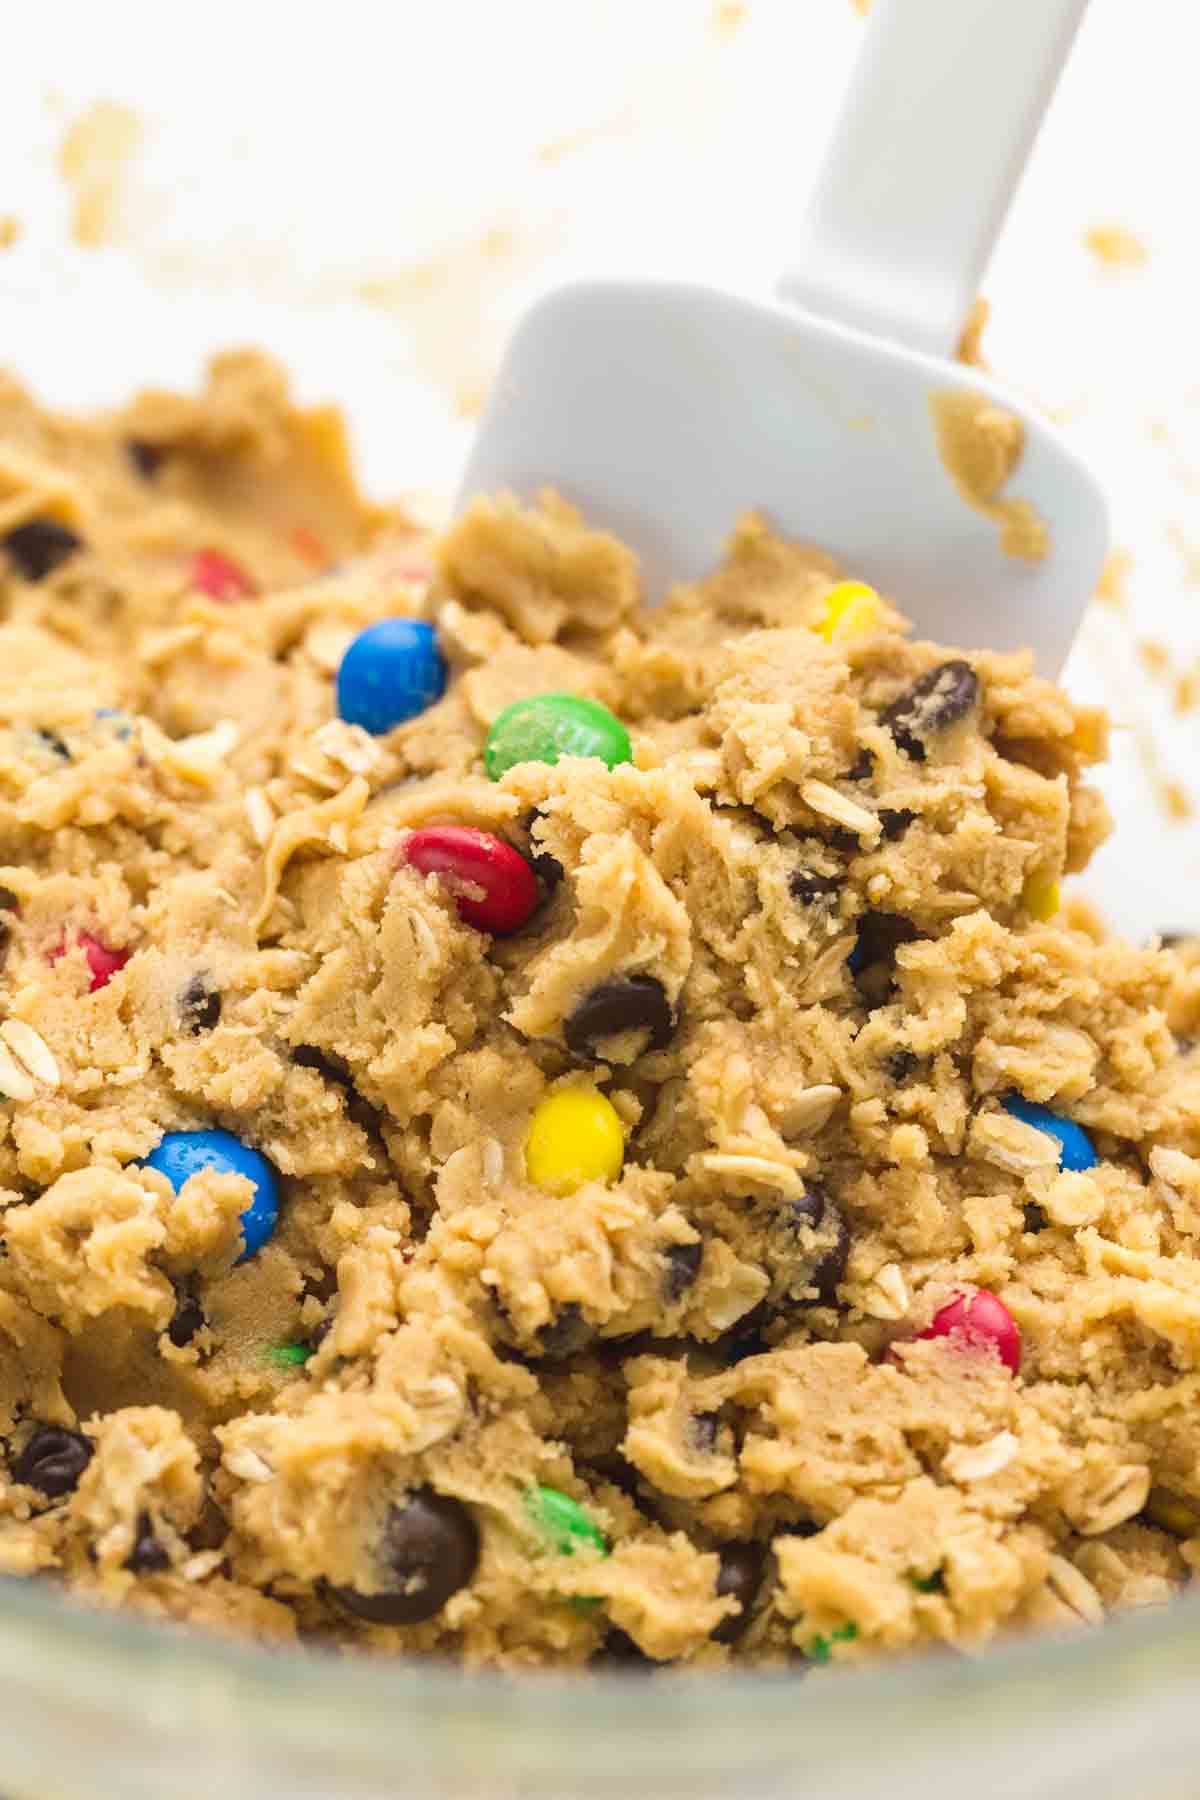
- Add the flour and the baking soda, and mix on low speed until just combined. Fold in the oats, the M&M's, and chocolate chips.
- Preheat oven to 400°F (200°C) and line two large baking sheets with parchment paper or silicone baking mats. Set aside.
- Using a medium cookie scoop, scoop out the batter and place on baking sheets. Keep about 2 inches between the cookies as they will spread.
- Bake for 8-10 minutes. The cookies will look soft and slightly under-baked. Remove them from the oven and allow them to cool down for 5 minutes.
- Transfer to a wire rack to completely cool down.
Notes:
- This recipe makes 32 small cookies, or 16 regular cookies.
- I recommend using mini M&Ms so you get more of them in each bite, but regular M&Ms work in this recipe too. If you only have larger M&Ms, such as peanut M&Ms or peanut butter M&Ms, I recommend chopping them into smaller pieces.
- Use an electric beater to cream the butter with the sugar.
- The butter MUST be softened to room temperature, and the egg must be at room temperature as well. Remember that butter at room temperature is imperative in the creaming butter with sugar step.
- Feel free to add butterscotch morsels, white chocolate chips, or peanut butter chips to the cookie dough.
- Peanut butter can be substituted with Sun Butter (sunflower butter) for a nut-free alternative.
- Use a cookie scoop to create the cookie balls, it’s easier and your cookies will be the same size.
- The cookies can be kept in a sealed container at room temperature for up to 5 days, in the fridge for up to 7 days, or in the freezer for up to 2 months.
Nutrition Information
This website provides approximate nutrition information for convenience and as a courtesy only. Nutrition data is gathered primarily from the USDA Food Composition Database, whenever available, or otherwise other online calculators.
© Little Sunny Kitchen
This recipe first appeared on Little Sunny Kitchen on January 12, 2014. It was updated with new images and more information on August 20th, 2020. The recipe remained the same.


Leave a Review!