
Golden, light, and perfectly crispy Indian onion bhajis made from scratch! A great gluten-free and vegan snack or appetizer that you can easily make in just 20 minutes.

What is Bhaji?
A bhaji is an Indian crispy fritter. Different vegetables are chopped small, then tossed in a batter with fragrant spices, chili, and cilantro, then deep fried until golden brown and crispy.
The batter is light, flavorful, and usually made with gram (chickpea) flour.
There are many variations of these crunchy fritters in India, the most popular ones are: onion bhaji (kanda bhaji), vegetable pakoda, potato bhaji, and bread pakoda. In India, they’re sold by street food vendors, and are very popular at celebrations and festivals. In the UK, they’re enjoyed at Anglo-Indian restaurants as an appetizer with other Indian snacks, dips, and chutneys.
My onion bhaji recipe is vegan (no eggs!), moderately spicy, and very versatile. It’s just the way I make it for my family, and I often add other vegetables to it such as grated carrot.

How to Make Onion Bhajis Without Eggs
Many onion bhaji recipes call for eggs that work as a binder in the batter, however, my version here is totally vegan, and honestly, it tastes much better (no eggy flavor here!).
I use gram flour, which is ground chickpea flour. If you haven’t cooked with gram flour, you totally should! It’s quite powdery and has a pale yellow color, the flavor is earthy but don’t try and taste it before you cook with it as it doesn’t taste good when it’s raw. It’s a great binder and an egg replacement, so I always use it for fritters.
Gram flour is great for savory dishes, but can be used in sweet recipes as well and is often used by vegans. The great thing about it is that it’s gluten-free, and you can find it at Indian shops or large supermarkets in the Indian foods section.
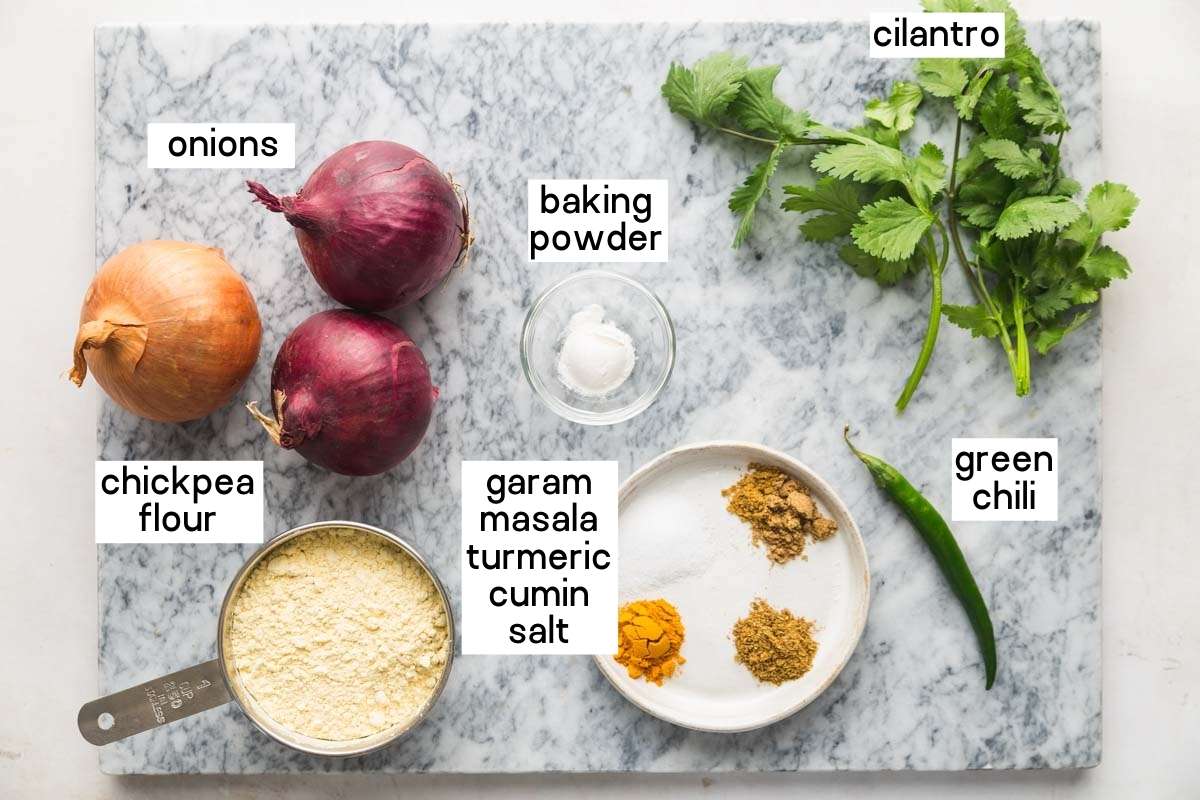
The Ingredients
- Onions – Red onion is usually used for these fritters for their sweet flavor, but I usually use any onion that I have available and often mix yellow with red.
- Gram flour – chickpea flour, often labeled as “besan flour”.
- Baking powder – to make the batter light and help the bhajis crisp up.
- Garam Masala – make this amazing spice mix at home, I have the recipe for you. Or you can buy it online.
- Turmeric, cumin, salt, fresh cilantro leaves, and green chili (or chili powder).
The Directions
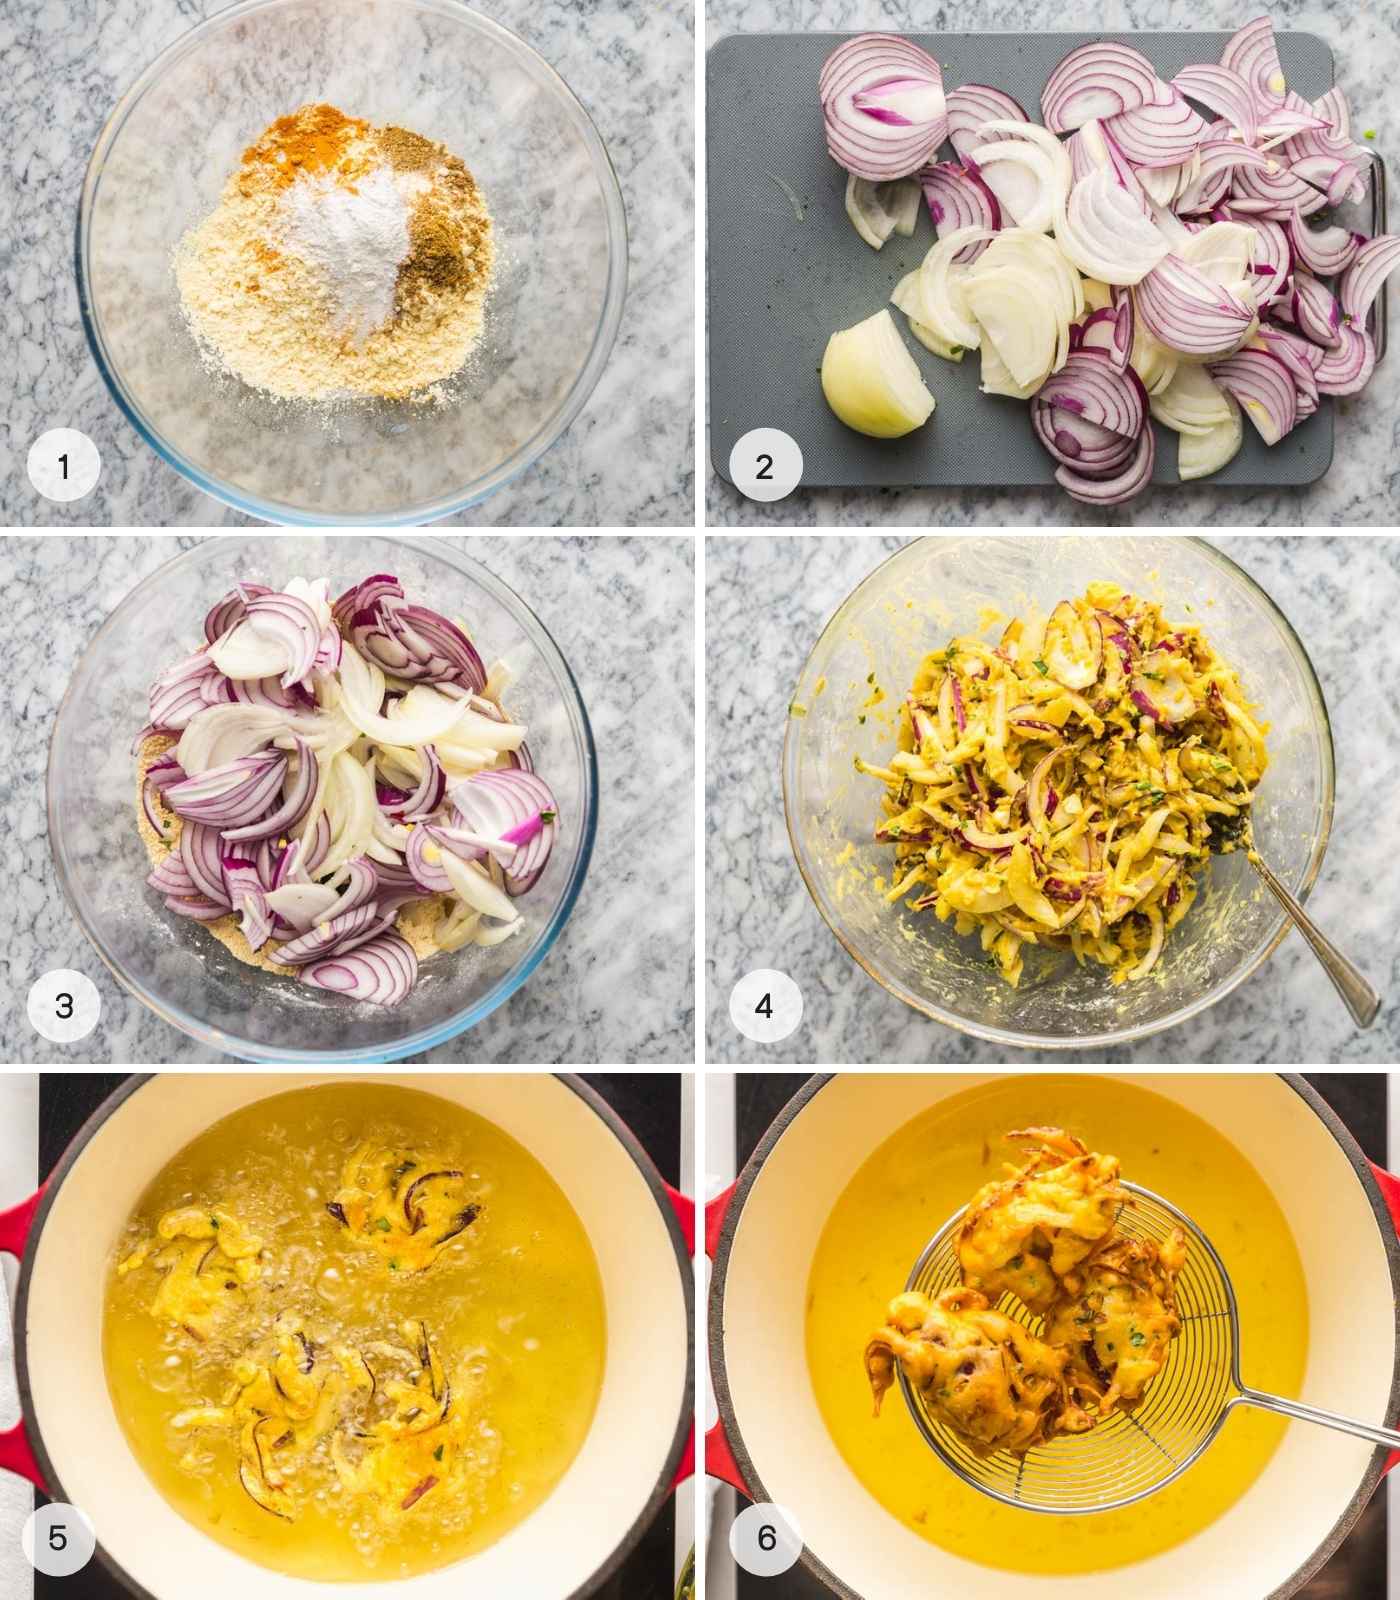
- Make the batter, mix all of the dry ingredients in a mixing bowl with water to create a batter with a consistency similar to heavy cream (double cream in the UK).
- Slice the onions into thin slices and separate them just a little.
- Add the onions to the batter.
- Stir the onions with the batter so that it coats the onion slices well.
- Heat canola or vegetable/corn oil to 355°F (180C°), then using 2 spoons of your hands start dropping clusters of onions in the batter (about 3-4 at a time), and fry for 3-4 minutes or until golden brown and crispy.
- Using a spider or slotted spoon, remove the bhajis from the oil, and place on a plate lined with paper towels. Enjoy hot on their own, or serve with a yogurt mint raita.
Top Tips
- Substitute green chili with chili powder, or cayenne pepper if needed. Or omit if you don’t like spicy food.
- The gram flour can be substituted with all-purpose flour.
- You can either use ground cumin or cumin seeds, both work.
- Substitute one onion with thinly grated potato or carrot for extra flavor. I do it all the time, and it works great!
- Use fresh oil for the best flavor.
- Make sure that the oil temperature is right, otherwise, you might get soggy or not-so-crispy bhajis. I always use my instant-read kitchen thermometer to check the temperature when deep-frying, or a clip-on thermometer attached to the frying pan/pot.
- This recipe is medium-spicy, when served with yogurt-cucumber-mint raita, it cools off the heat and works really nicely. The combination creates a flavor explosion!
- If you have leftovers, you can reheat them in the oven or Air Fryer at 390°F (200°C) for 15-20 minutes. But keep in mind, the bhajis won’t be as crispy as when they were first fried.

More Easy Indian Recipes To Try
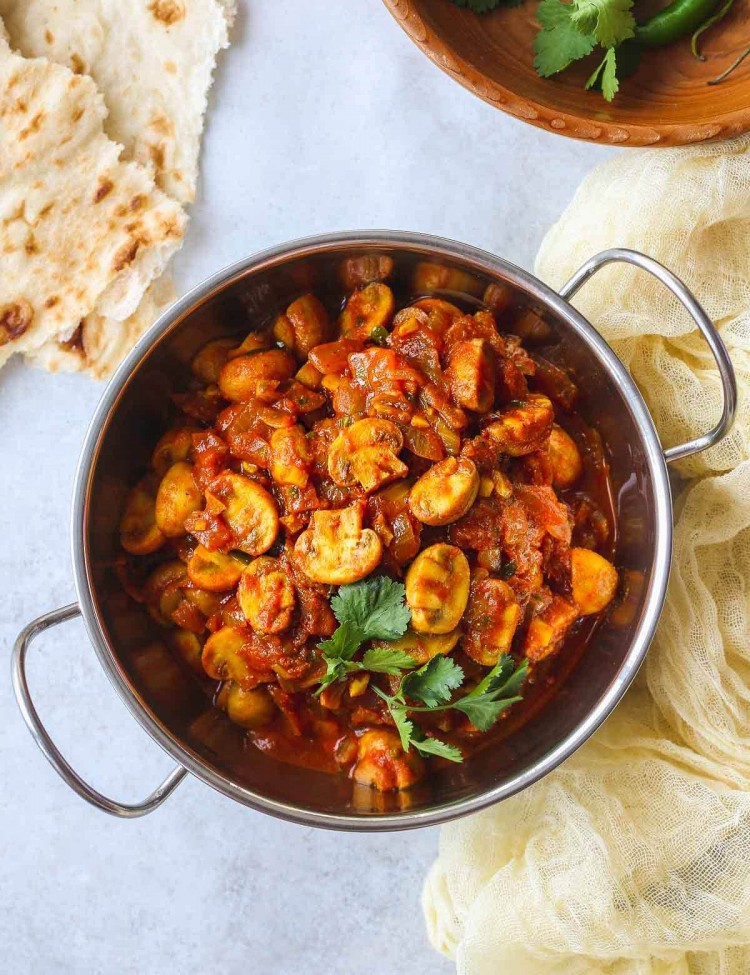
- Mushroom bhaji – another simple and delicious Indian starter or side, and it’s not deep-fried so can be nicely served with this onion bhaji.
- Jeera rice – cumin rice, a great side to serve with Indian curries.
- Butter chicken – chicken curry cooked in a cream fragrant tomato sauce. An Indian classic, I also have an Instant Pot butter chicken recipe and a vegan cauliflower ‘chicken’ butter version for you.
- Kidney bean curry (Rajma) – a simple and delicious vegan curry.
- And for dessert, enjoy this rich mango lassi!
Did you make this? Be sure to leave a review below and tag me on Facebook, Instagram, or Pinterest!

Onion Bhaji
Equipment
- Kitchen thermometer
Ingredients
- ¾ cup (100g) gram flour chickpea flour
- ½ teaspoon baking powder
- ½ teaspoon ground turmeric
- 1 teaspoon ground cumin
- ¾ teaspoon garam masala
- ½ teaspoon chili powder
- 1 teaspoon table salt
- 6 tablespoons water or more
- 2 onions thinly sliced – I use a mix of red and yellow
- 2 tablespoons cilantro chopped – optional
- 2 cups corn, canola, or sunflower oil for frying
Instructions
- Make the batter, mix all of the dry ingredients in a mixing bowl with water to create a batter with a consistency similar to heavy cream (double cream in the UK). You might need to add more water than written in the ingredient list above.
- Slice the onions into thin slices and separate them just a little.
- Add the onions to the batter.
- Stir the onions with the batter so that it coats the onion slices well.
- Heat canola or vegetable/corn oil to 355°F (180C°), then using 2 spoons of your hands start dropping clusters of onions in the batter (about 3-4 at a time), and fry for 3-4 minutes or until golden brown and crispy.
- Using a spider or slotted spoon, remove the bhajis from the oil, and place on a plate lined with paper towels. Enjoy hot on their own, or serve with a yogurt mint raita.
Notes:
- Substitute green chili with chili powder, or cayenne pepper if needed. Or omit if you don’t like spicy food.
- The gram flour can be substituted with all-purpose flour.
- You can either use ground cumin or cumin seeds, both work.
- Add thinly grated potato or carrot for extra flavor.
- Use fresh oil for the best flavor.
- Make sure that the oil temperature is right, otherwise, you might get soggy or not-so-crispy bhajis. I always use my kitchen thermometer to check the temperature when deep frying.
- This recipe is medium-spicy, when served with yogurt-cucumber-mint raita, it cools off the heat and works really nicely. The combination creates a flavor explosion!
- If you have leftovers, you can reheat them in the oven or Air Fryer at 390°F (200°C) for 15-20 minutes. But keep in mind, the bhajis won’t be as crispy as when they were first fried.
Nutrition Information
This website provides approximate nutrition information for convenience and as a courtesy only. Nutrition data is gathered primarily from the USDA Food Composition Database, whenever available, or otherwise other online calculators.
© Little Sunny Kitchen


Erika says
Made this with my girlfriend for a dinner party–I maybe chose onions that were too large, so we made extra batter. They came out amazing!!!!
Little Sunny Kitchen says
There’s nothing wrong with making a little more! I’m so glad they came out amazing!
Ace says
WOW! these were better than takeout and easy too. Saving this recipe.