
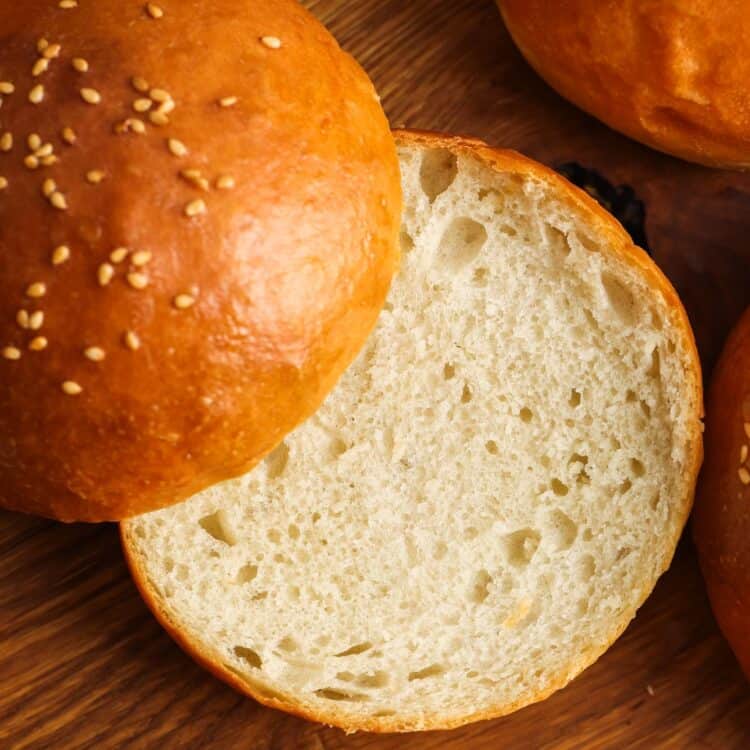
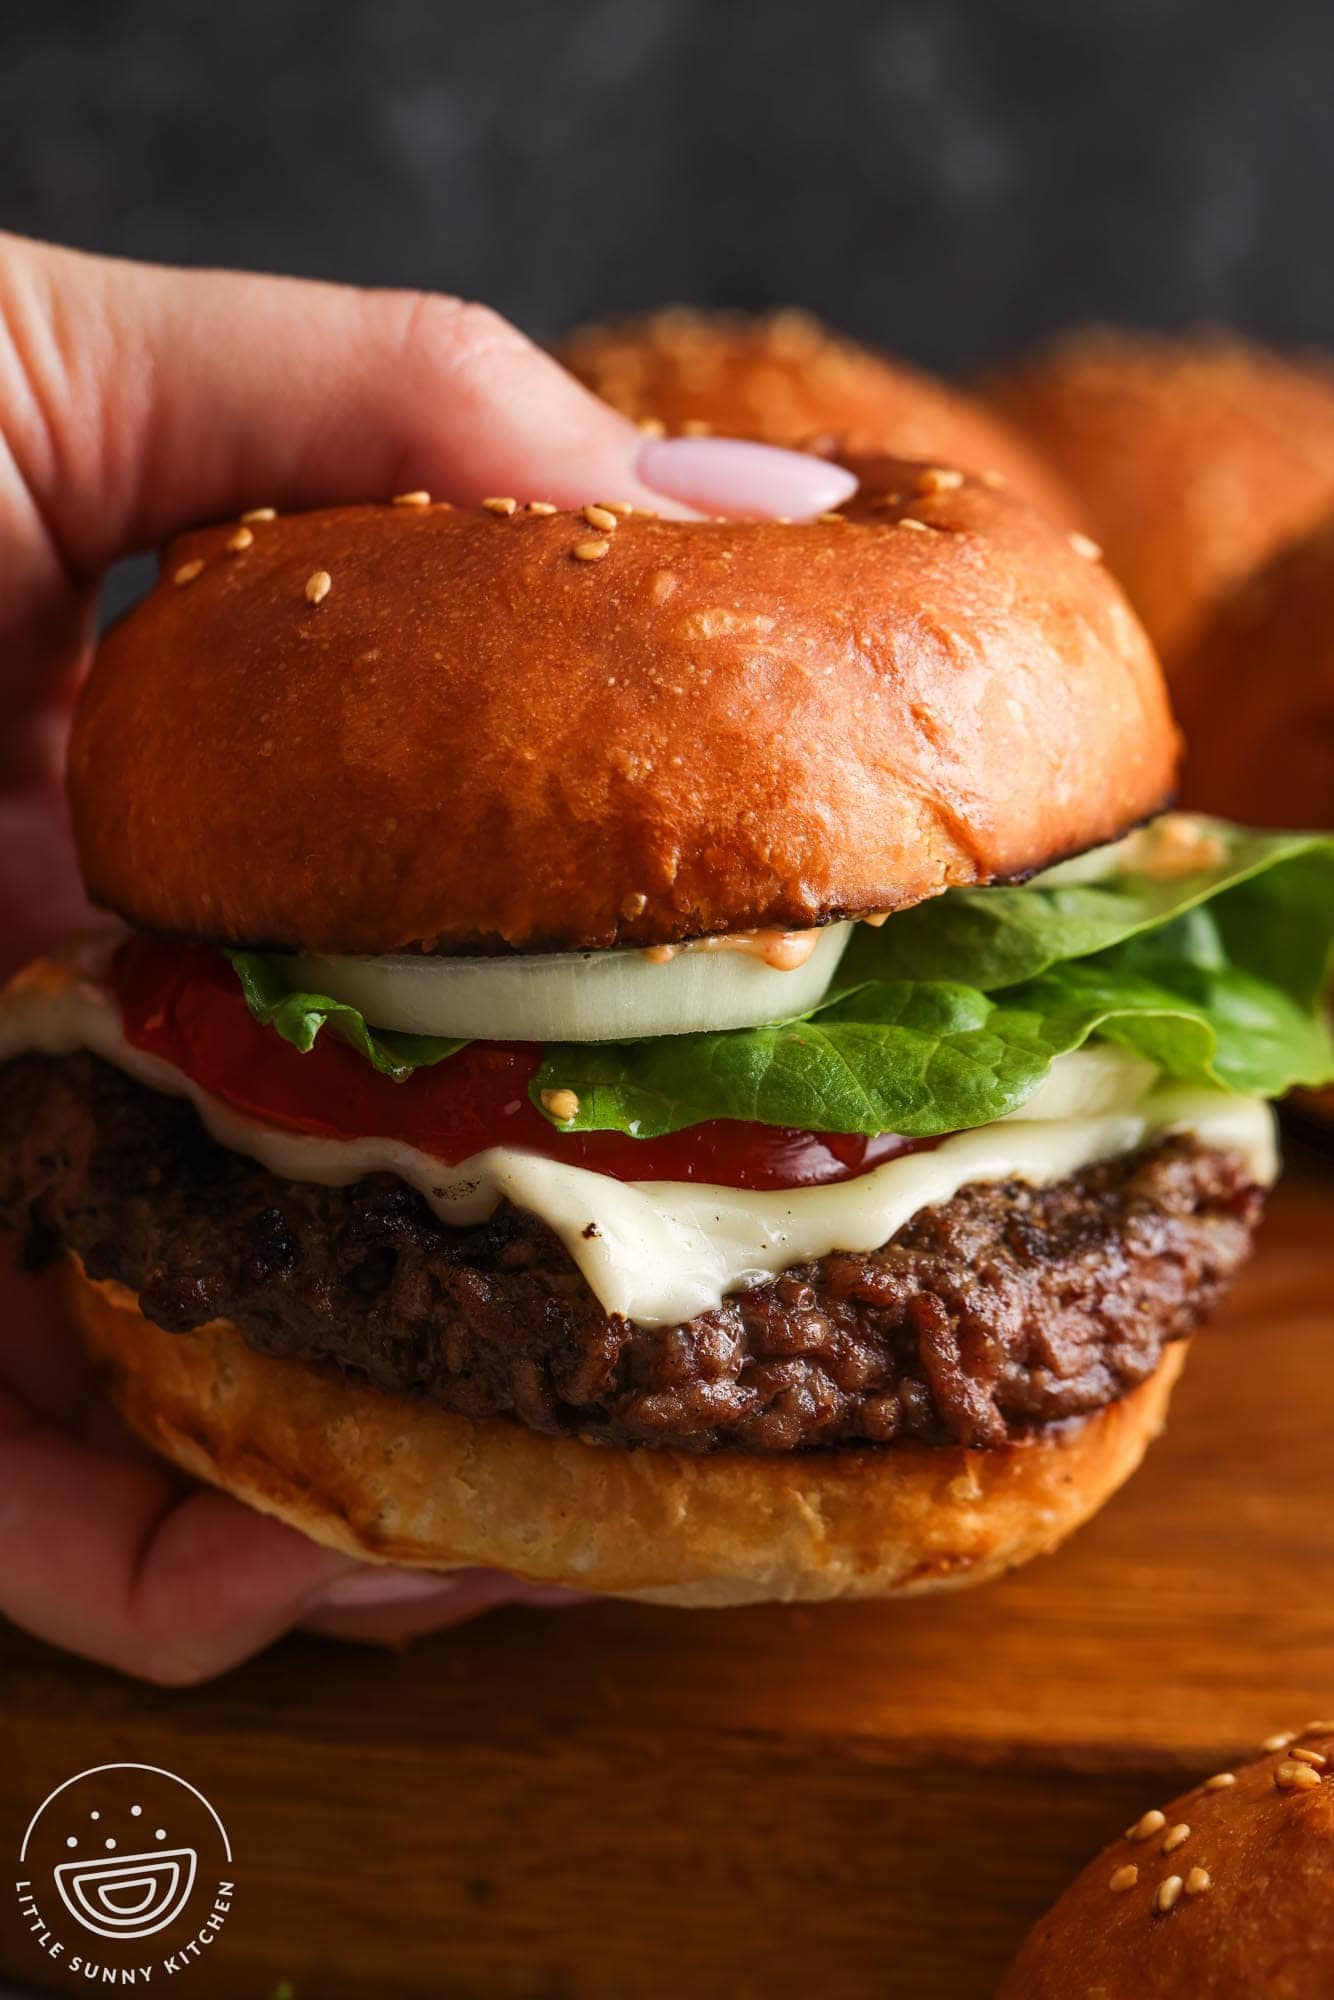
These soft, pillowy, homemade hamburger buns have a subtle richness and a lightly sweet flavor. This recipe makes 8 light, tender, and golden bakery-style buns.
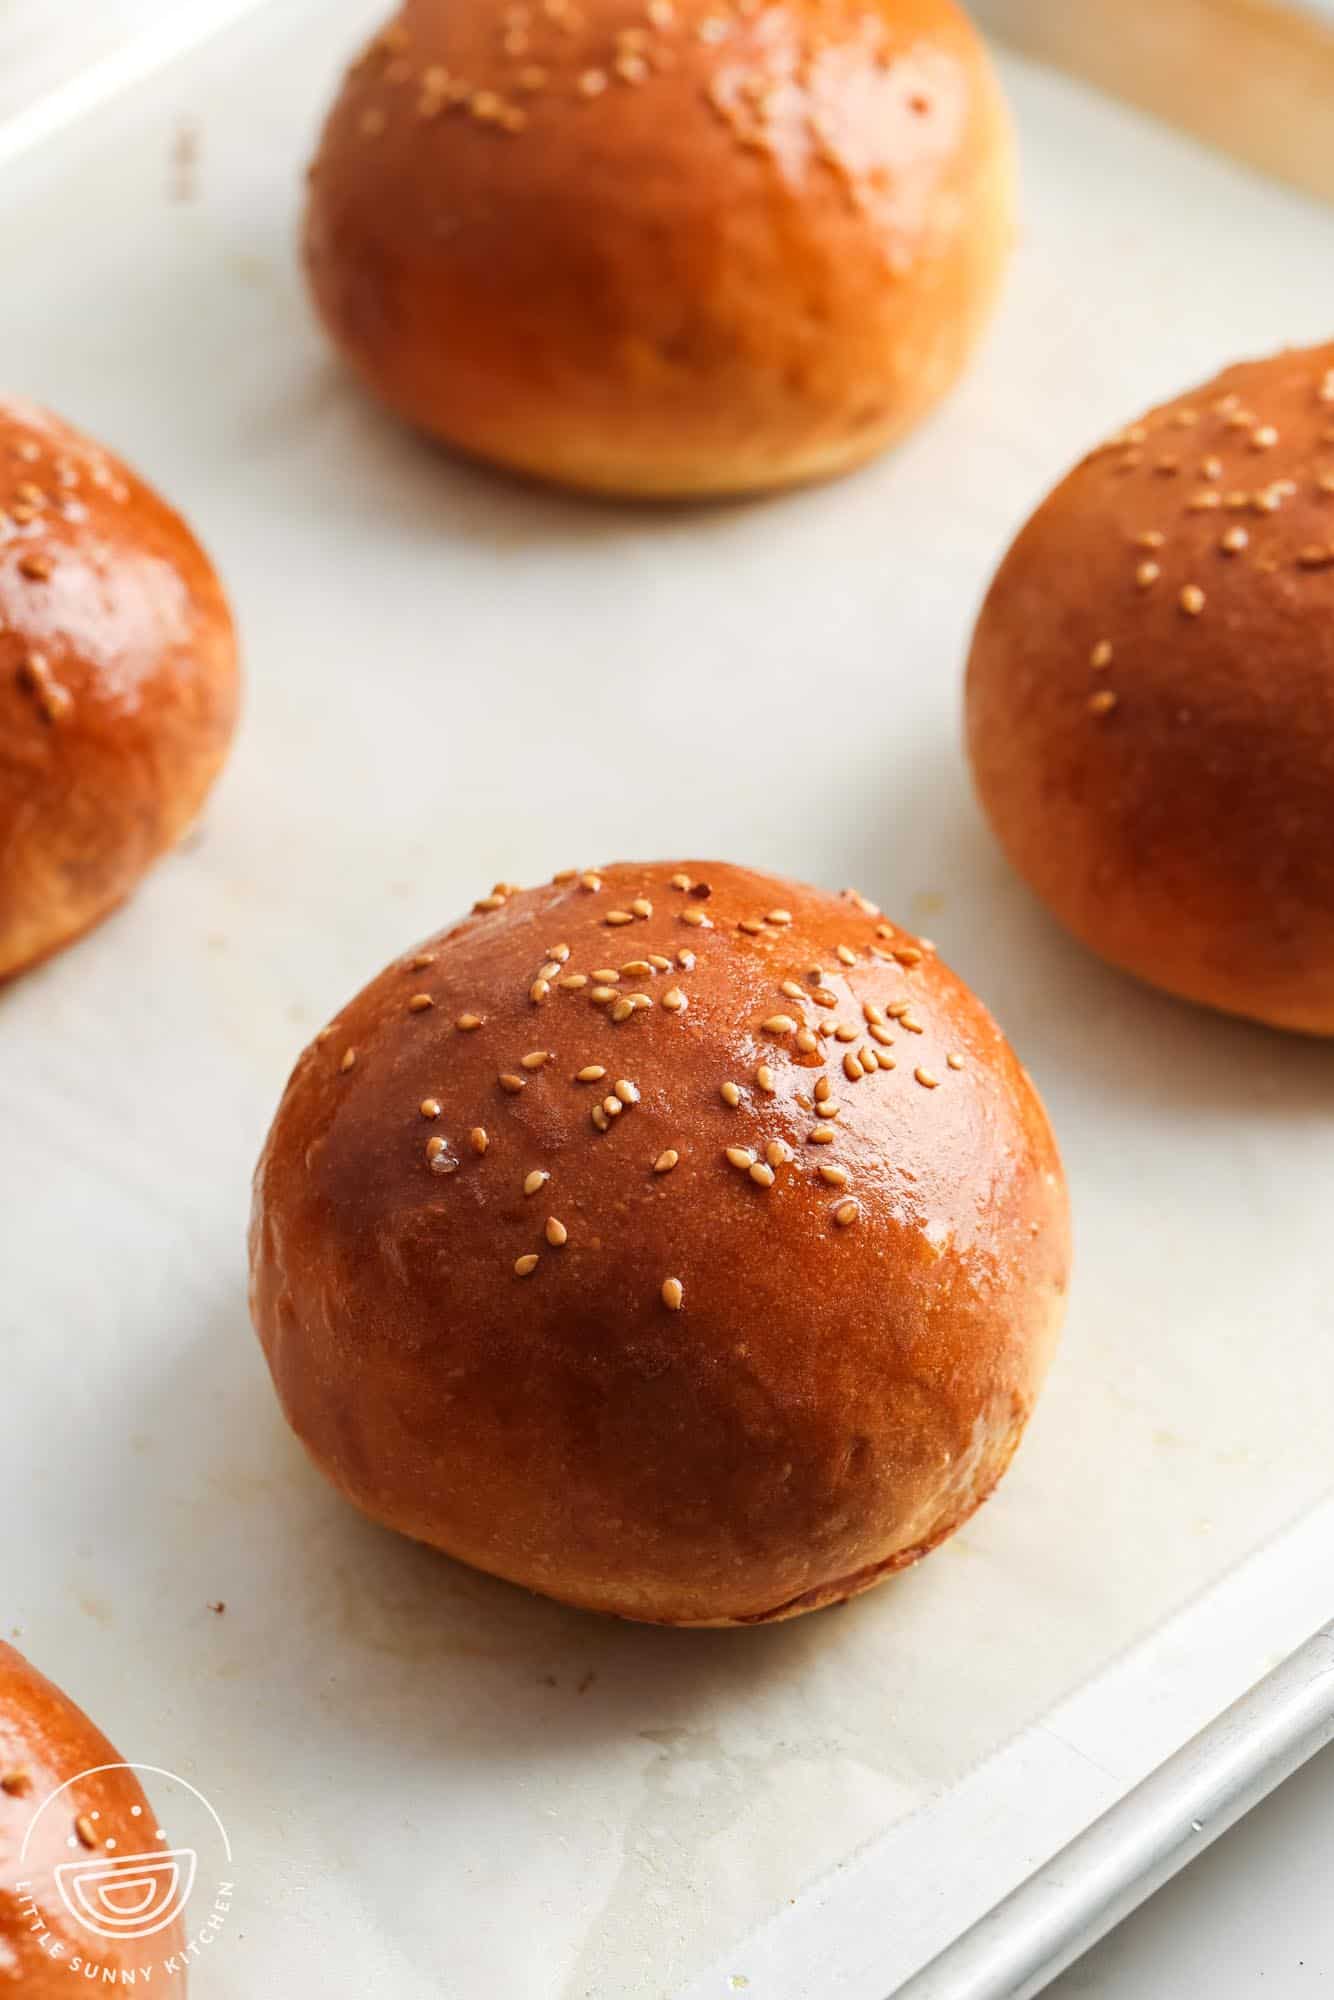

Hamburger Buns, From Scratch!
I created and perfected this burger bun recipe because I just really wanted the perfect bun. You know, soft and fluffy on the inside with a beautiful golden crust. It needed to have that wonderful light texture but be sturdy enough to hold even the beefiest of burgers.
And of course, my homemade hamburger buns it needed to be easy to bake with common ingredients and they needed to taste amazing.
It took a few tweaks to get it just right, but I’m really happy with how this recipe turned out. Soft, flavorful, and perfect for your favorite sandwich or burger.
Ingredient Notes
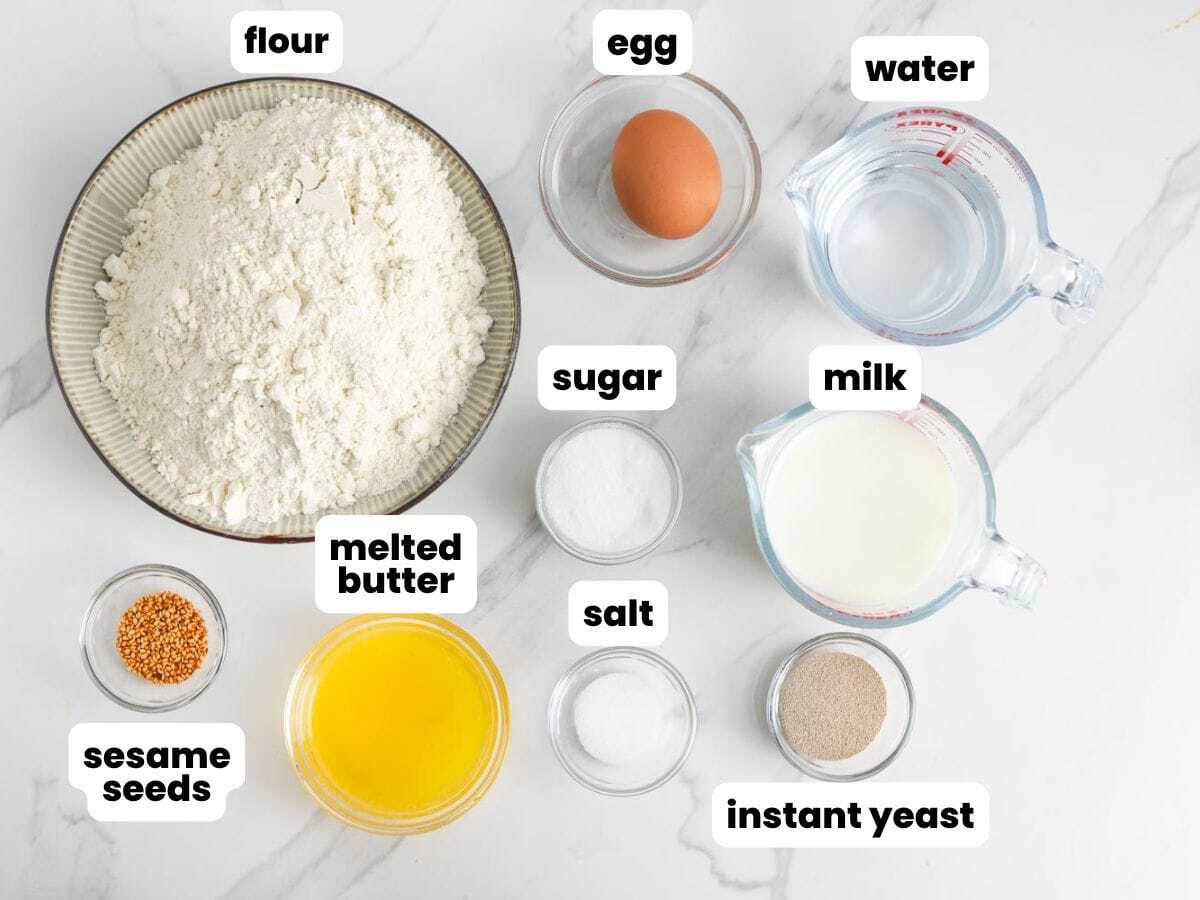
Complete list of ingredients and amounts can be found in the recipe card below.
- All-Purpose Flour: While using bread flour would give these buns more chew and structure, I found that regular all-purpose flour works really well here. For a sturdier bun, especially for saucy or heavy burgers, you can use a 50:50 mix of bread flour and all-purpose.
- Egg: Egg adds richness and helps with browning. An egg wash over the dough before it bakes will help to hold the sesame seeds on too.
- Butter: Melted unsalted butter gives the buns a super soft and tender crumb. Brushing the buns with butter after they’re baked will help to add more flavor and keep the top crust soft.
- Yeast: I developed this recipe using instant yeast. It uses a bit more than one standard 7 gram packet, so it might be easier to buy the yeast in a jar instead.
- Milk and Water hydrate this high-hydration dough. Make sure both are warmed slightly to around 110°F (45°C) to activate the yeast.
- Sugar: Sugar adds a touch of sweetness and also helps with browning. You might notice that my recipe uses less sugar than others. This is because I didn’t want the buns to taste like a brioche. If you want a sweeter dough, add up to 2 more tablespoons of sugar or honey.
More Homemade Bread Recipes!
All Breads →


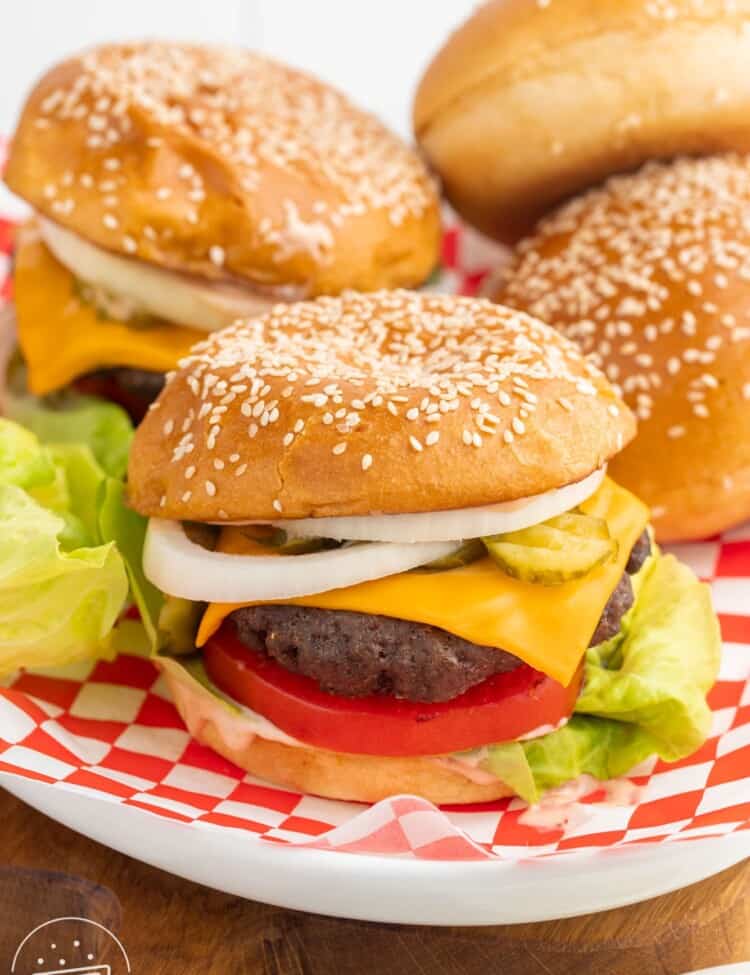
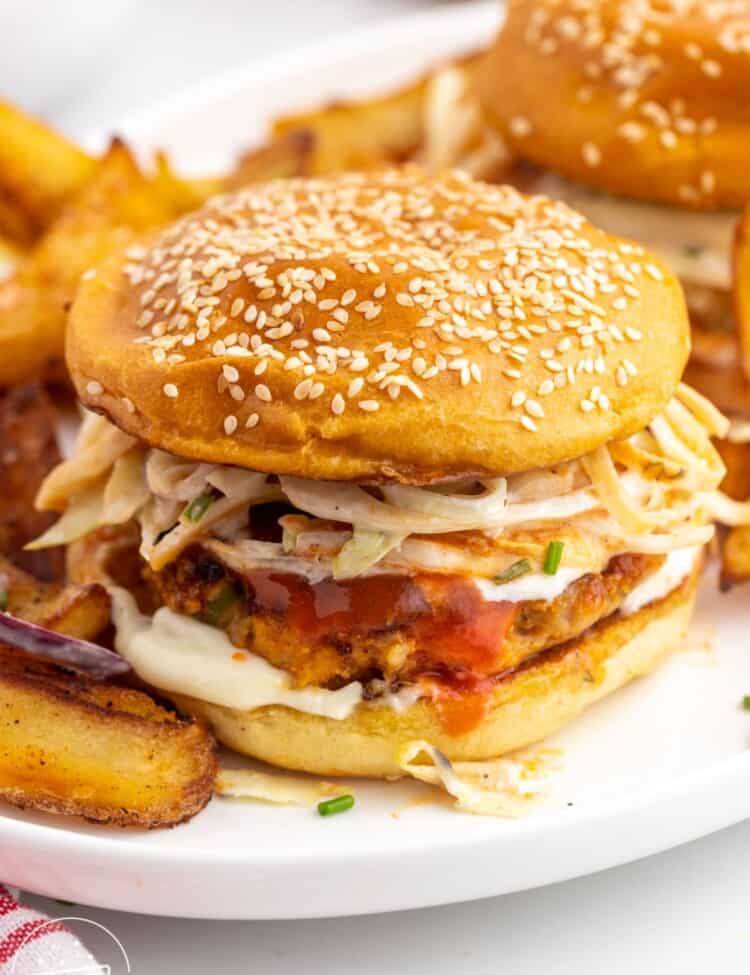
Try these homemade hamburger buns with classic beef burgers, turkey burgers, Greek chicken burgers, or my Nashville-style hot chicken sandwiches!
Recipe Tips
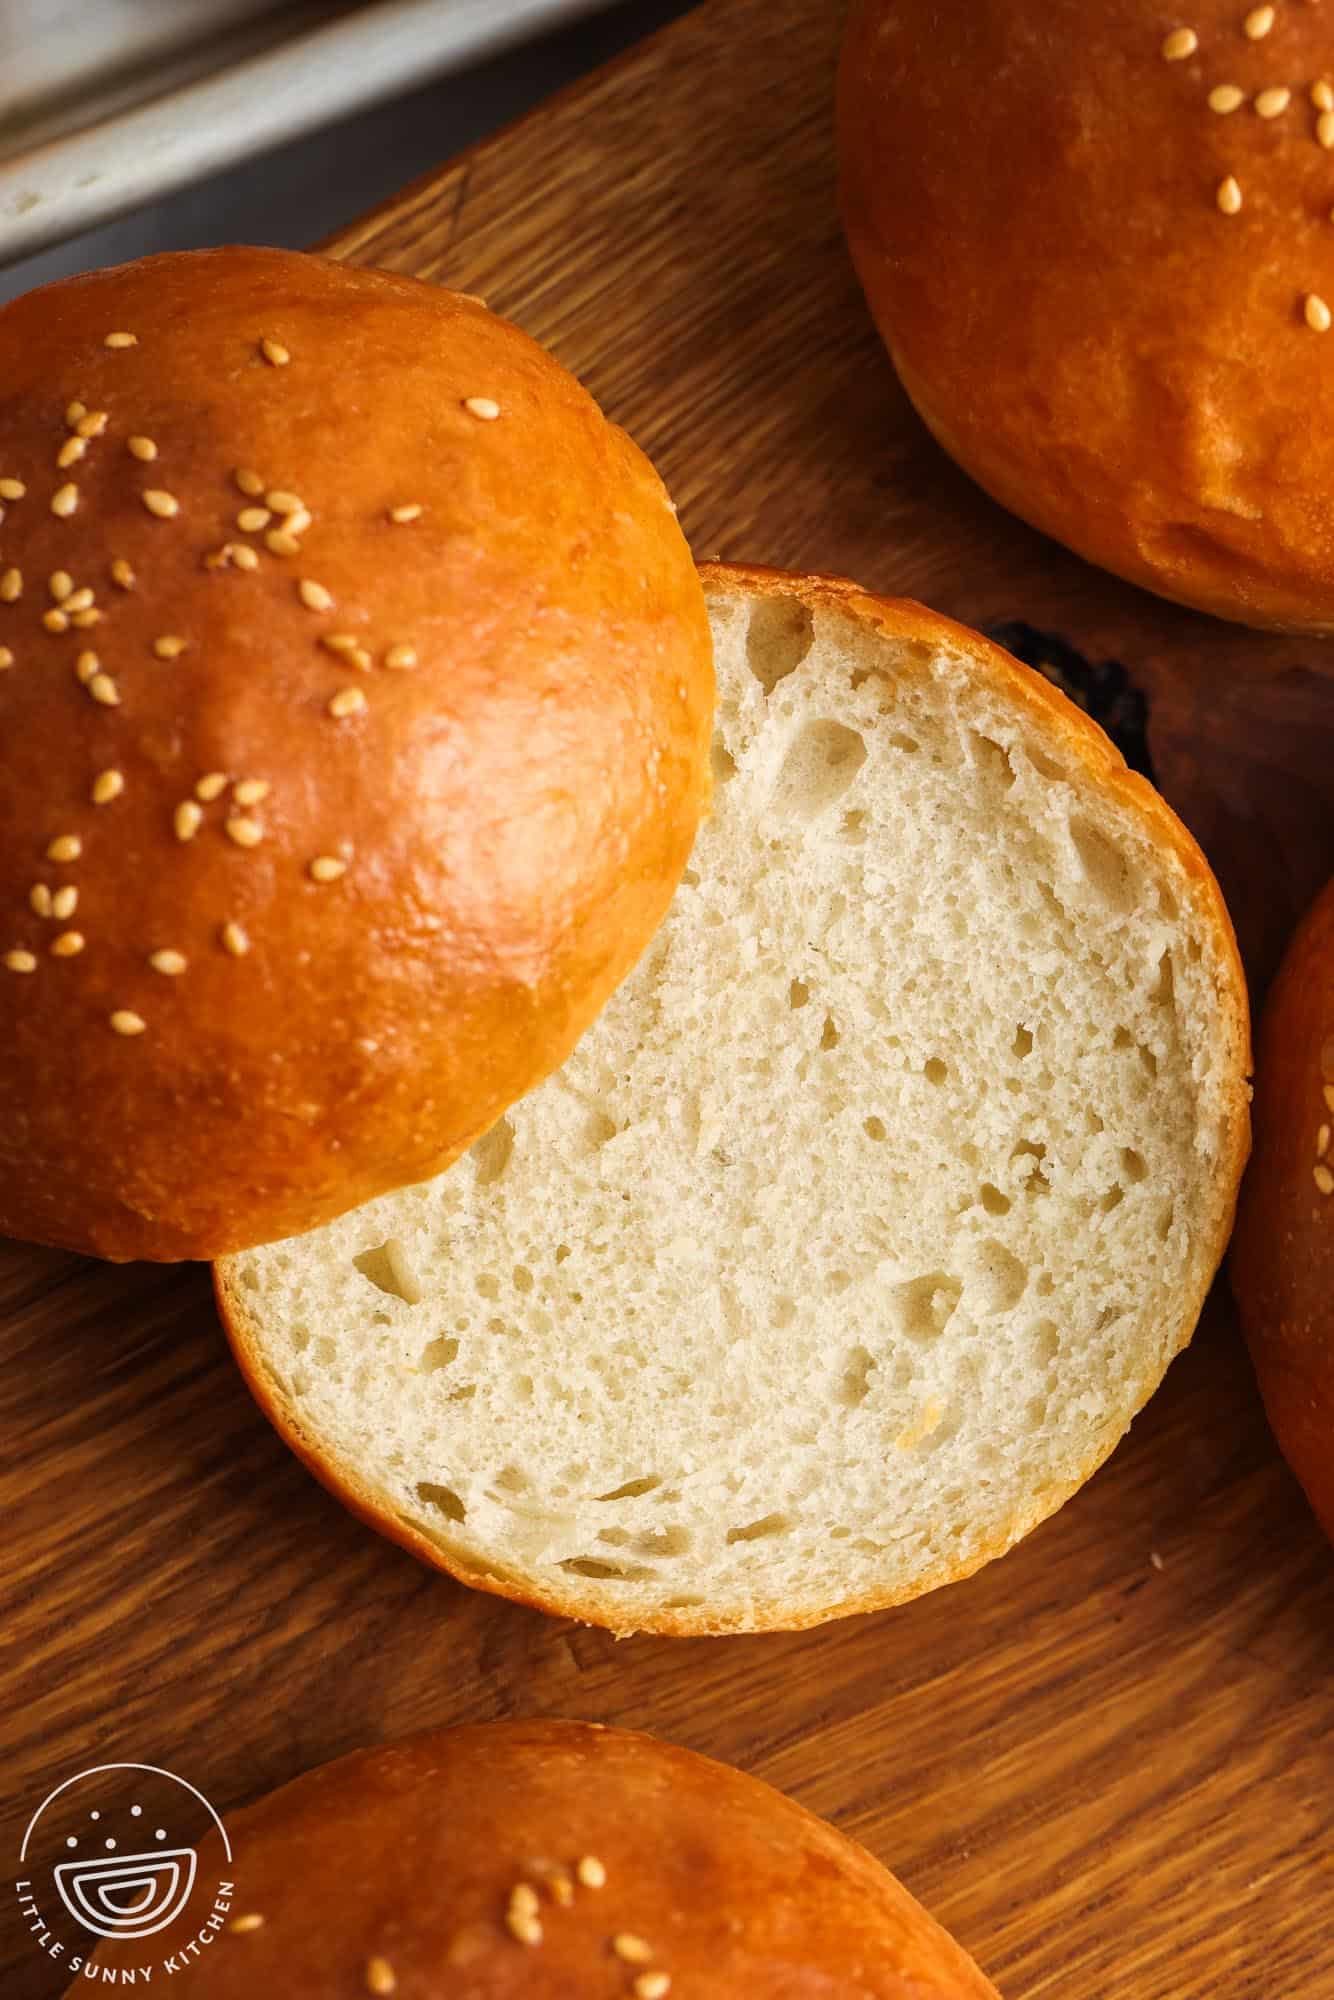
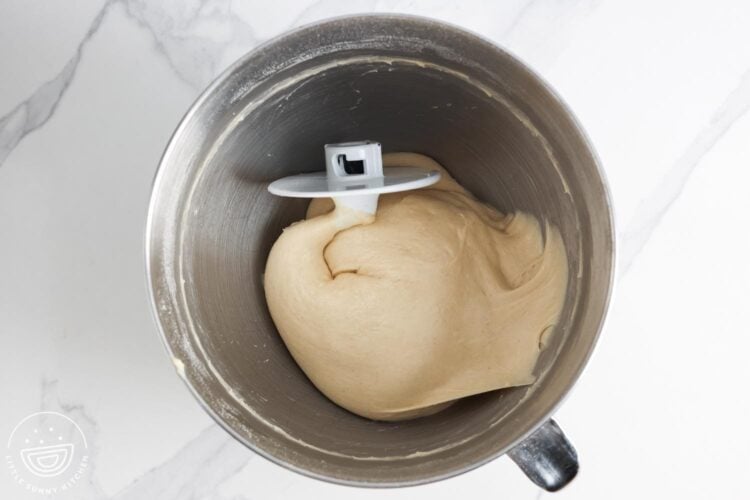
- Working with High Hydration Dough: This 69% hydration bread dough might seem sticky to you at first. This is normal, and the stickiness should mostly resolve after kneading. I knead the dough for 10 minutes using my stand mixer. By hand, it will take longer. If after this kneading the dough still seems too sticky, let it rest for 15 minutes and knead again.
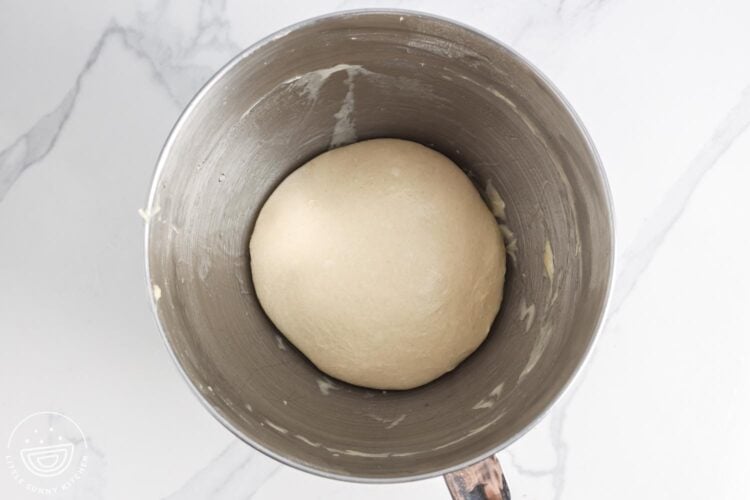
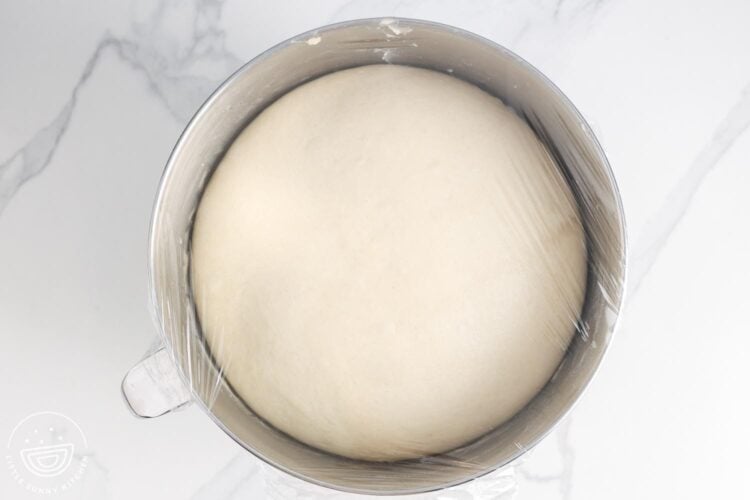
- Adjustments: Bread doughs will act differently in different temperatures and humidity levels. You are aiming for a dough that is soft and a bit tacky, but not wet. You may need to add more flour to get it just right. Environmental factors can also impact the rise times.
- Make Ahead: Shaped buns can be refrigerated overnight and allowed to rise slowly. Bake them fresh the next day. For extra assurance that the buns will rise enough in a cold environment, you can add an additional teaspoon of yeast.

I almost wish I didn’t try this recipe because it was so easy and delicious. Grocery store buns just aren’t going to work for me anymore 🤤
Nisha
Did you make this? Be sure to leave a review below and tag me on Facebook, Instagram, or Pinterest!
Hamburger Buns
Equipment
- Stand mixer or large mixing bowl
- Kitchen scale (optional, for even shaping)
Ingredients
For the dough:
- 3 ½ cups (420 g) all-purpose flour
- ¾ cup (180 ml) warm water
- ¼ cup (60 ml) warm whole milk
- 1 large egg at room temperature
- 3 tablespoons (42 g) unsalted butter very soft or melted
- 2 tablespoons (25 g) granulated sugar
- 1 ¼ teaspoons (7 g) table salt
- 3 teaspoons (9 g) instant yeast
For the topping:
- 1 large egg + 1 tablespoon water whisked (for egg wash)
- Sesame seeds or other toppings optional, toasted or untoasted
- 1 tablespoon melted butter optional, for brushing after baking
Instructions
- In a large bowl or stand mixer, combine the warm water, warm milk, sugar, and yeast. Let sit for 5 minutes until slightly foamy.
- Add the egg, butter, flour, and salt. Mix to form a dough.

- Knead for 10 minutes until smooth and elastic.
- Cover and let rise in a warm place until doubled in size, about 1 to 1 ½ hours.
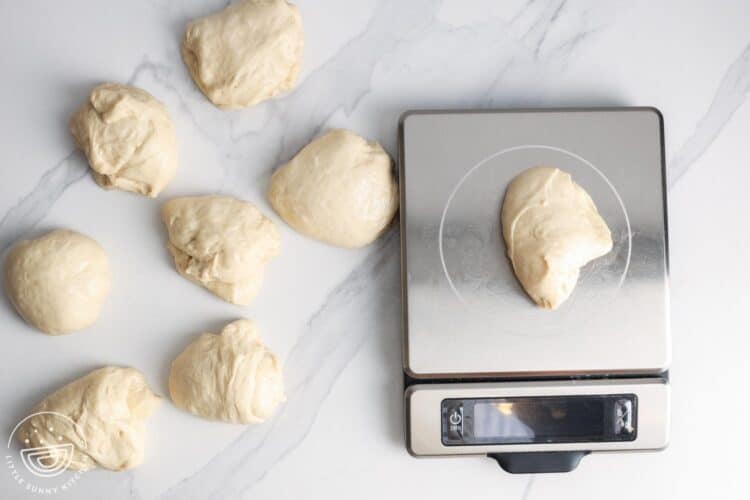
- Divide the dough into 8 equal portions (about 95-105 g each).
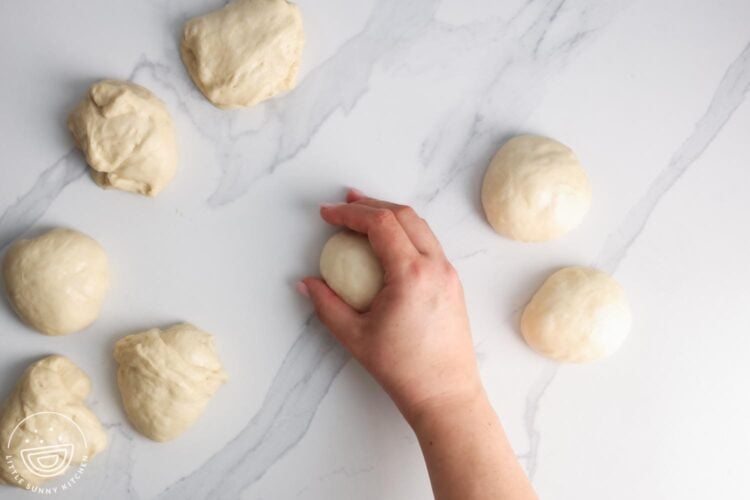
- Shape each portion of dough into a tight ball.
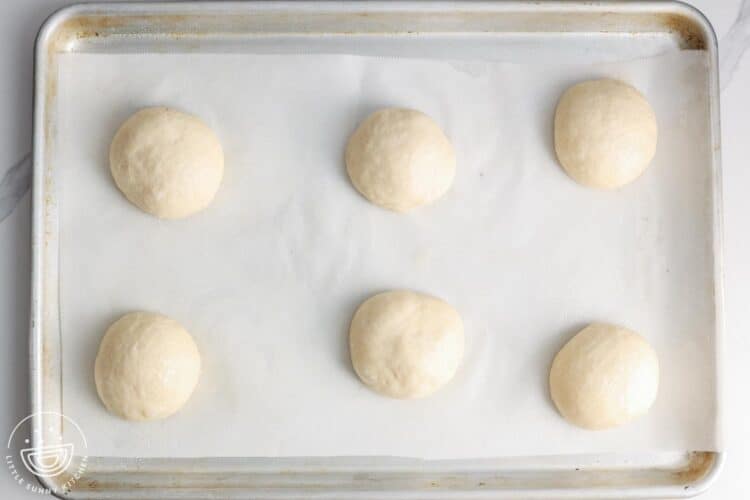
- Place the buns on a parchment-lined baking sheet, spaced apart. Gently flatten each bun slightly with your palm.
- Cover loosely and let rise again for about 15 minutes, until noticeably puffy.
- Preheat oven to 375°F (190°C).
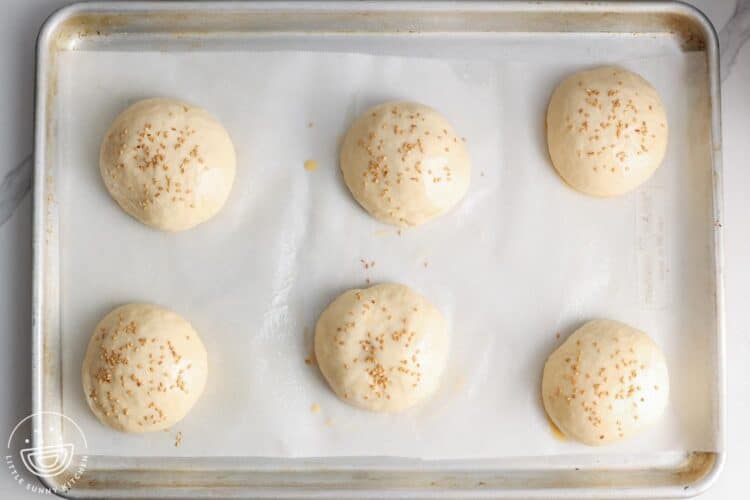
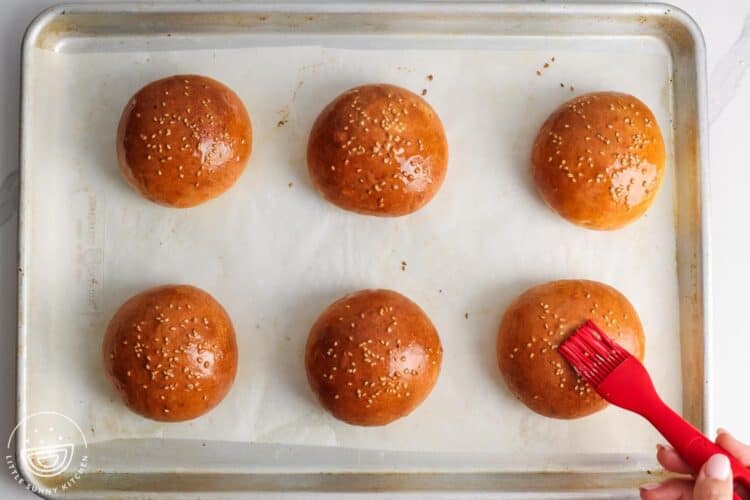
- Brush the tops with egg wash.
- Is using, sprinkle each bun with sesame seeds.
- Bake for 15-18 minutes, or until the buns are golden and the internal temperature reaches 190°F (88°C).
- Remove from the oven and optionally brush with melted butter while warm for a softer crust.

Notes:
- active dry yeast can be used in place of instant yeast. Use 3.75 tablespoons (10.6g) active dry yeast, and plan for slightly longer rising times.
- If your dough is too sticky after kneading in the mixer for 10 minutes, let it rest for 15 minutes and then lightly knead again.
- You are aiming for a dough that is soft and a bit tacky, but not wet. You may need to add more flour to get it just right. Environmental factors like temperature and humidity can also impact the rise times.
- Use a kitchen scale to get perfectly equal pieces of dough.
- Instead of sesame seeds, try poppy seeds or everything bagel seasoning.
- Make Ahead: Shaped buns can be refrigerated overnight and allowed to rise slowly. Bake them fresh the next day. For extra assurance that the buns will rise enough in a cold environment, you can add an additional teaspoon of yeast.
- Storage: These buns are best when they’re fresh, but if needed, store them in an airtight container at room temperature.
Nutrition Information
This website provides approximate nutrition information for convenience and as a courtesy only. Nutrition data is gathered primarily from the USDA Food Composition Database, whenever available, or otherwise other online calculators.
© Little Sunny Kitchen


Janet says
HI, I am allergic to sesame, which seems to be in every bread on the market. I also am sensitive to the glyphosate in wheat. I purchase my flour from Europe. Do you think this flour will work in your recipe?
Thank you.
Little Sunny Kitchen says
Hi Janet, I think that you won’t know until you’ve tried it. I live in Europe, so I buy my flour here as well, and it works wonderfully.
Roseann caswell says
I would like more recipes I think I will like this one
Diana says
Thanks, Roseann! I have lots of similar recipes you might enjoy like my easy dinner rolls and no-knead bread. I think you’ll love those too!
Nisha says
I almost wish I didn’t try this recipe because it was so easy and delicious. Grocery store buns just aren’t going to work for me anymore 🤤
Little Sunny Kitchen says
Thank you for trying my recipe, Nisha! I’m so happy to hear that you loved the buns!