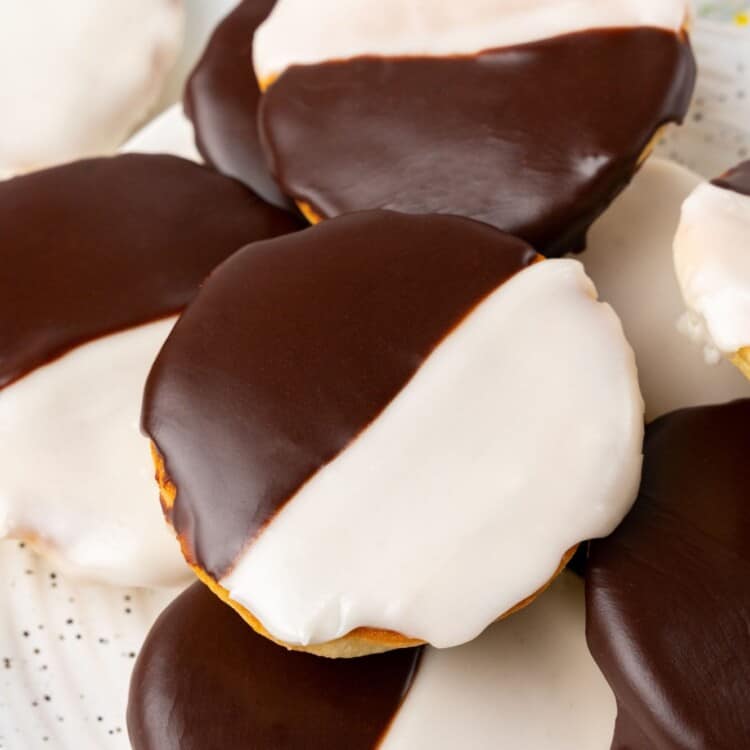
Soft, delicate Half Moon cookies topped with half vanilla and half chocolate icing are an iconic New York City treat! Enjoy the best of both flavors all in one delicious and fun-to-make cookie recipe.

I truly can’t look at a Half Moon Cookie without thinking about that classic Seinfeld episode!
He says that the key to eating a black and white cookie is that you want to get some black and some white in each bite! Nothing mixes better than vanilla and chocolate.
And while Jerry and Elaine agree that the half-moon cookie could be the solution to all the world’s problems, all I know is that these black and white cookies (sometimes called harlequins) are super fun to make and eat.
You’ll find these iconic cake-like cookies in kosher bakeries in New York City and elsewhere, but if you don’t have that option nearby, making your own is the next best thing.
Be sure to check out all of our cookie recipes! Some of our reader favorites are Pudding Chocolate Chip Cookies, Copycat Swig Sugar Cookies, and Chocolate Crinkle Cookies.
Why You’ll Love This Recipe
- A Classic Recipe – This cookie recipe will make soft, pillowy cookies that are almost like little cakes, with two delicious glazes that are exactly like you’ll remember.
- Step-by-Step Instructions – The full recipe below includes step-by-step instructions and images to help you along.
- Everyone Loves Half Moon Cookies! – I think it’s because there’s no need to choose if you want chocolate or vanilla – both are included in each bite.
Key Ingredients in Half Moon Cookies
Here’s what you need to make this cookie recipe:
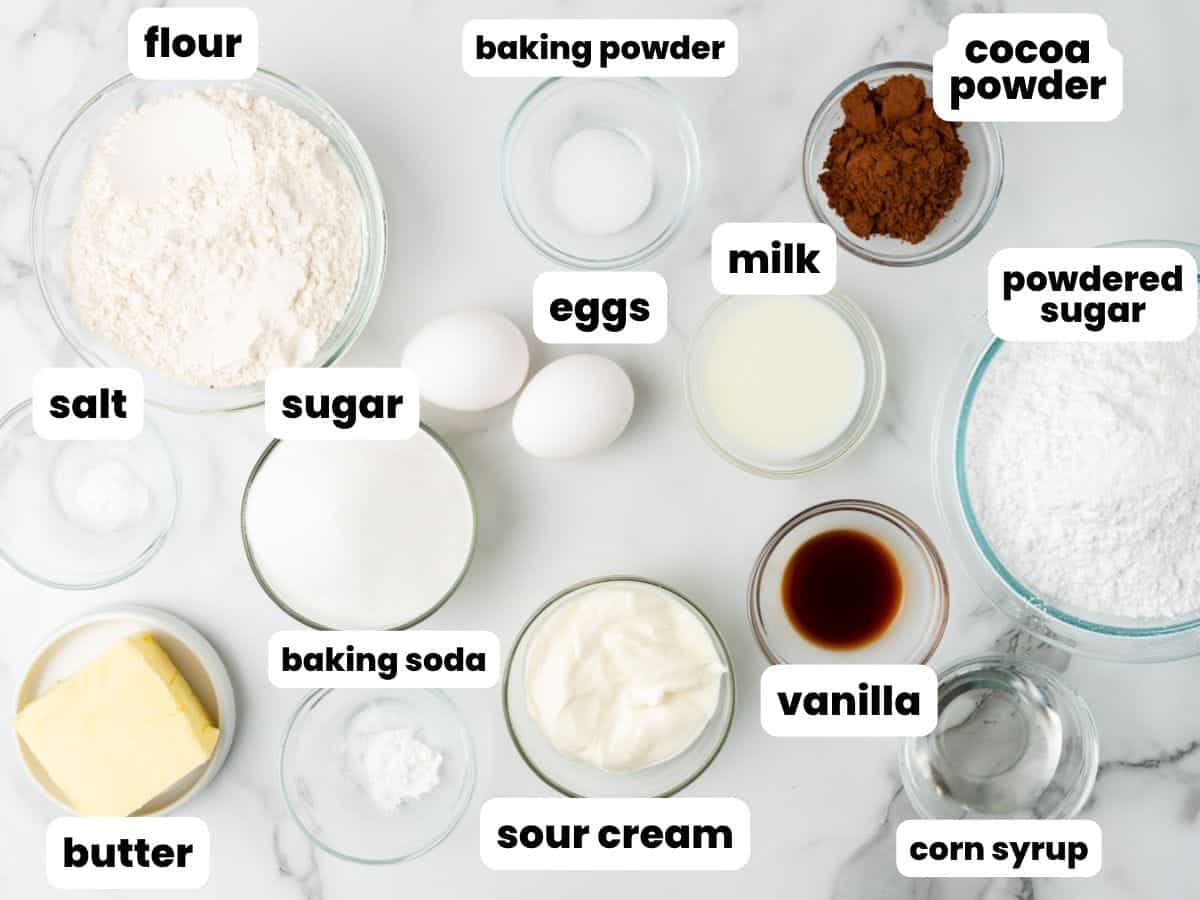
- Baking Powder and Baking Soda: These are key to giving the cookie dough lots of lift, making our cookies like mini cakes.
- Sour Cream: full-fat sour cream makes the cookie dough soft.
- Corn Syrup: This ingredient allows us to make a cookie glaze that dries semi-hard and stays shiny.
- Vanilla Extract: Use a good quality pure vanilla extract to flavor the cookies and the icing. A bit of cocoa powder turns half of that icing into a rich chocolate glaze.
Complete list of ingredients and amounts can be found in the recipe card below.
How To Make Half Moon Cookies
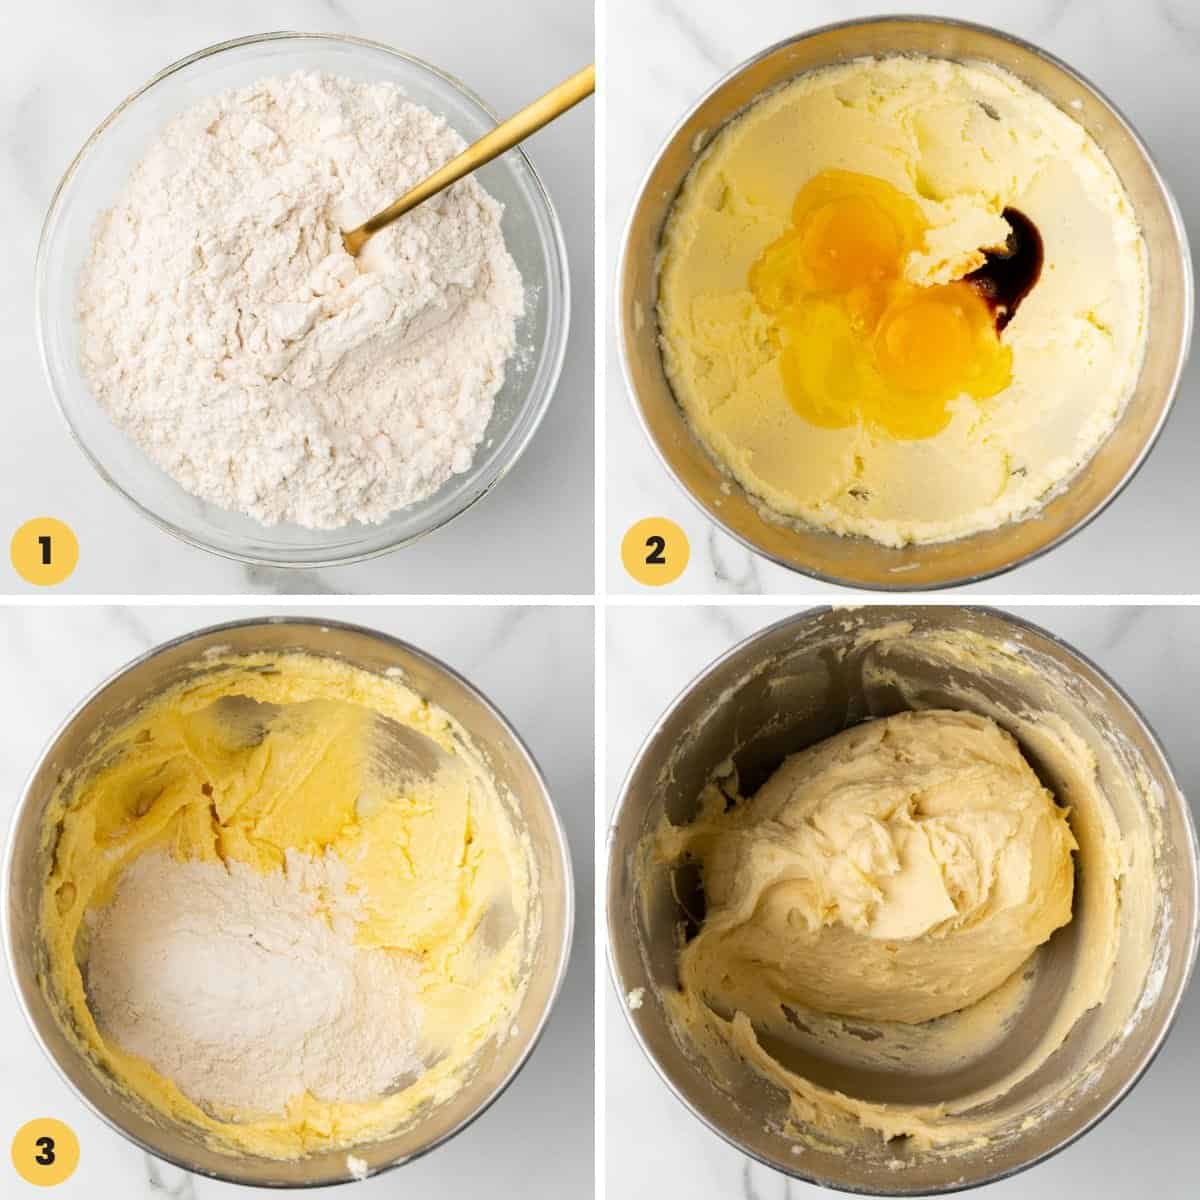
We’ll start by baking up a batch of big, soft, fluffy cookies, then cover them in the classic white and black icing. Before you begin, preheat the oven to 350°F/180°C, and line 2 cookie sheets with parchment paper.
- Mix the Dry Ingredients: In a bowl, combine flour with baking powder, baking soda, and salt. Whisk to combine and set aside.
- Mix the Wet Ingredients: In a separate bowl, beat the butter and sugar until smooth and creamy. Then add the eggs and vanilla and beat again until well combined.
- Combine: Add the dry ingredients in batches, alternating with sour cream. Beat until combined, scraping the sides of the bowl as needed. The cookie dough will be thick.
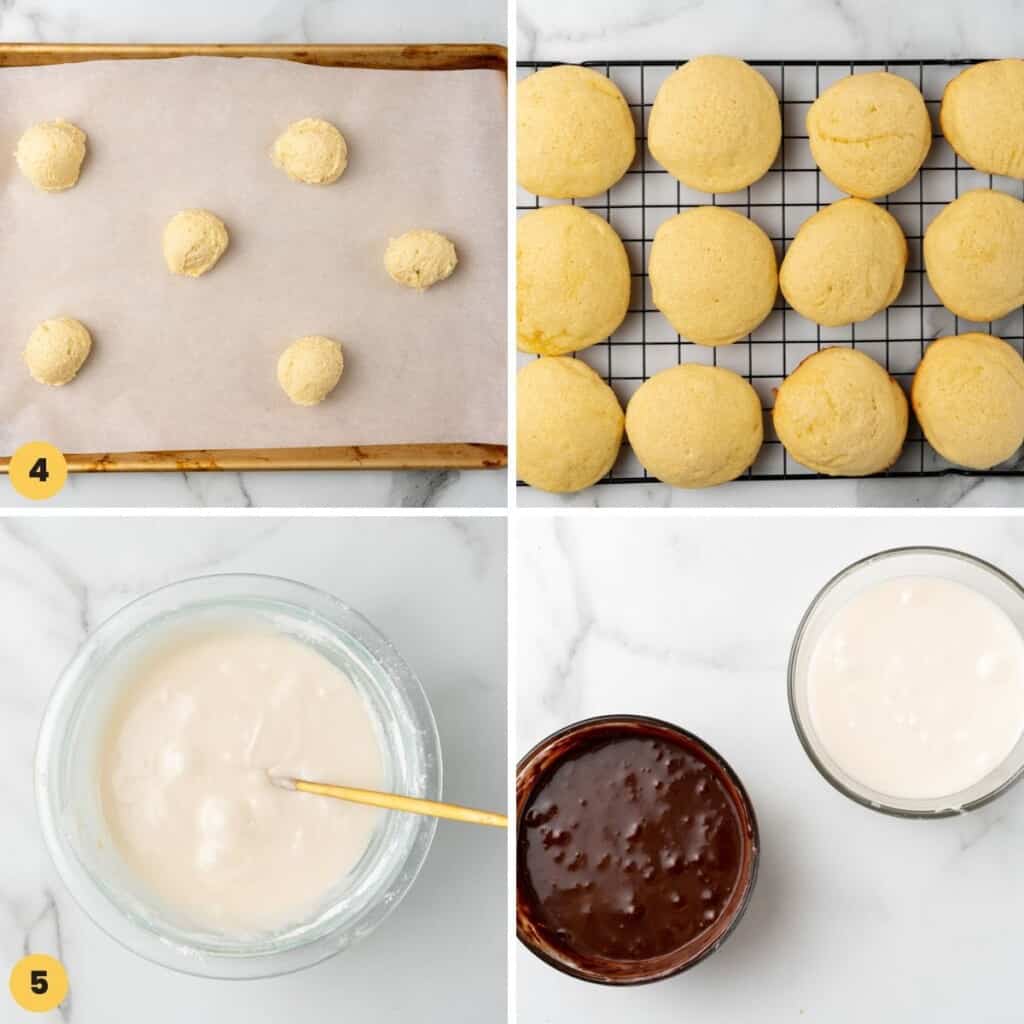
- Bake: Drop the dough using a ¼ cup measuring cup or cookie scoop onto the prepared cookie sheets about 4 inches apart. These cookies will spread! Bake for 15-17 minutes, or until the center of the cookies feels springy to the touch. Allow the cookies to cool on the cookie sheets for 5 minutes, then transfer to a wire rack to cool completely.
- Make the Icing: In a bowl combine the powdered sugar with milk, corn syrup, vanilla, and salt. Whisk until combined, adding more milk if needed until you reach a spreadable consistency. Evenly split the icing into two bowls. Add cocoa powder and 1 tablespoon of milk to one of them.

- Add the black and white icing: Using a small offset spatula, ice the FLAT side of each cookie with a thin layer of white icing, covering only half of the cookie. Chill in the fridge for 15 minutes to set. Ice the other half of each cookie with chocolate icing, and then allow to set completely.
Tip!
Add icing to the bottoms of these cookies rather than the top. The flat surface is easier to use, and this is the classic way to do it!
Recipe Tips
- Use Room Temperature Ingredients: Let the eggs, butter, and sour cream sit out at room temperature before making the cookie dough. This helps them all to incorporate smoothly and evenly.
- Be sure that your baking powder and baking soda are fresh so that they do their jobs perfectly.
- Allow the cookies to cool completely before icing them. Otherwise, the icing will slide off or melt!
- The icing should be thick but easily spreadable, similar to Nutella, or just a bit thicker. If needed, add more milk or powdered sugar to adjust the consistency to get it perfect.
- The flat bottom of these cookies becomes the top once they’re iced. It won’t work quite as well to try to ice the domed side of the cookies.
- Use a small offset spatula to spread the icing on black and white cookies. It will allow you more control and help you to get a clean line down the center.
- Chill the cookies after adding the white icing for about 15 minutes. Then add the chocolate icing. This way the colors won’t mix together at all.

Storing Tips
These soft cookies are best if enjoyed within 24 hours, as they’ll dry out a bit with time. If stored in an airtight container they can be kept for a maximum of 3 days.
You can freeze the baked but unglazed cookies for up to 3 months. Allow them to thaw completely before frosting.
Recipe FAQs
Some versions of black and white cookies include a subtle hint of lemon. I’ve chosen to leave it out here, in favor of a warm vanilla flavor, but you can include up to ½ teaspoon of lemon extract if you’d like.
Of course! Feel free to double this cookie recipe or even triple it to make as many half-moon cookies as you need.
In this recipe, the best substitutions for sour cream would be buttermilk or full-fat plain yogurt.
Half Moon Cookies are the classic black and white cookie favorite that you know and love! Get this recipe and make them at home.
Did you make this? Be sure to leave a review below and tag me on Facebook, Instagram, or Pinterest!
Half Moon Cookies
Equipment
- Cookie Sheets
- cookie scoop
Ingredients
Ingredients
- 2 cups (240 grams) all purpose flour
- ½ teaspoon baking powder
- ¼ teaspoon baking soda
- ¼ teaspoon salt
- 1 ½ sticks (170 grams) unsalted butter softened to room temperature
- 1 cup (200 grams) granulated sugar
- 2 large eggs at room temperature
- 1 teaspoon pure vanilla extract
- ½ cup full-fat sour cream at room temperature
For the Icing:
- 1 pound (450 grams) powdered sugar measured and then sifted
- 3 tablespoons whole milk divided
- 2 tablespoons corn syrup
- 1 teaspoon pure vanilla extract
- ¼ teaspoon salt
- 3 tablespoons cocoa powder
Instructions
- Preheat the oven to 350°F/180°C, and line 2 cookie sheets with parchment paper.
- In a large bowl, combine flour with baking powder, baking soda, and salt. Set aside.
- In a separate bowl, using a hand or a stand mixer fitted with a paddle attachment beat the butter with sugar until smooth and creamy (2-3 minutes).
- Add the eggs and vanilla, and beat again until well combined.
- Add the dry ingredients in batches alternating with sour cream, beat until combined scraping the sides of the bowl as needed. The cookie dough will be thick.
- Using a ¼ cup measuring cup or cookie scoop, drop cookies onto the prepared cookie sheet about 4 inches apart. Bake in the preheated oven for 15-17 minutes, or until the center of the cookie feels springy to the touch.
- Allow to cool on the cookie sheet for 5 minutes, then transfer to a wire rack to cool completely.
- To make the icing, in a bowl combine the powdered sugar with 2 tablespoons of milk, corn syrup, vanilla, and salt. Whisk until combined, and add more water if needed until you reach a spreadable consistency.
- Transfer half of the cookie icing to a separate bowl, and add the cocoa powder plus 1 tablespoon of milk. Whisk and add more milk/water to reach the desired consistency.
- Using a small offset spatula, ice the FLAT side of the cookie with a thin layer of icing (only half of the cookie), and chill in the fridge for 15 minutes. You want the icing to be set so it does not bleed into the chocolate icing once applied.
- Ice the other half of each cookie with chocolate icing, and allow it to set completely.
Notes:
- Use Room Temperature Ingredients: Let the eggs, butter, and sour cream sit out at room temperature before making the cookie dough. This helps them all to incorporate smoothly and evenly.
- Be sure that your baking powder and baking soda are fresh so that they do their jobs perfectly.
- Allow the cookies to cool completely before icing them. Otherwise, the icing will slide off or melt!
- The icing should be thick but easily spreadable, similar to Nutella, or just a bit thicker. If needed, add more milk or powdered sugar to adjust the consistency to get it perfect.
- The flat bottom of these cookies becomes the top once they’re iced. It won’t work quite as well to try to ice the domed side of the cookies.
- Use a small offset spatula to spread the icing on black and white cookies. It will allow you more control and help you to get a clean line down the center.
- Chill the cookies after adding the white icing for about 15 minutes. Then add the chocolate icing. This way the colors won’t mix together at all.
- Enjoy these cookies the same day you bake them, or store in an airtight container for up to 3 days.
Nutrition Information
This website provides approximate nutrition information for convenience and as a courtesy only. Nutrition data is gathered primarily from the USDA Food Composition Database, whenever available, or otherwise other online calculators.
© Little Sunny Kitchen




Valerie says
I love these cookies and thanks to you i won first place on a cookie competition!
these are the best cookies ever!!!
Little Sunny Kitchen says
That’s amazing! Congratulations!
Jennifer says
My kids loved these cookies! They were so easy to make and are just so fun! 🙂 Will definitely be making these again and again.
Little Sunny Kitchen says
That’s so wonderful to hear, Jennifer! Thank you for the kind review.
Sharina says
These half moon cookies were fun to make. I made them with the kids and we enjoyed making them. They turned out so adorable and delicious. We’ll surely make these again, thanks Diana!
Little Sunny Kitchen says
You’re welcome, Sharina! I’m so glad that you and your kids loved these cookies!
Tara G says
All time favorite cookie! We call them black and whites 🙂 First time making them and so happy I did!
Little Sunny Kitchen says
Thank you, Tara! I’m so happy you loved this recipe!